Samsung DVD-R135 Instruction Manual
Hide thumbs
Also See for DVD-R135:
- Instruction manual (372 pages) ,
- Instruction manual (94 pages) ,
- Instruction manual (98 pages)
Table of Contents
Advertisement
Available languages
Available languages
Quick Links
Download this manual
See also:
Instruction Manual
Advertisement
Chapters
Table of Contents

Related Manuals for Samsung DVD-R135


Summary of Contents for Samsung DVD-R135
- Page 1 Instruction Manual DVD-R135 www.samsung.com English Türkçe AK68-01094N-00...
-
Page 2: Warning
MPORTANT NOTE Warning The mains lead on this equipment is supplied with a moulded plug incorporating a fuse. The value of the fuse is indicated on the pin face of the plug. If it requires replacing, a fuse approved to BS1362 of the same rating must be used. -
Page 3: Precaution
Exterior interference such as lightning and static ● Precaution electricity can affect normal operation of this DVD Recorder. If this occurs, turn the DVD Recorder off and on again with the STANDBY/ON button, or disconnect and then reconnect the AC power cord to the AC power outlet. -
Page 4: Disc Storage
ISO9660 or JOLIET format can be played back This DVD Recorder can play back DVD-R discs ● Only MP3 files with the ".mp3", ".MP3" extension can recorded and finalised with a Samsung DVD video ● recorder. It may not be able to play some DVD-R be used. - Page 5 If you want to record the disc in VR Mode and then ● Do not use the following discs! record in V Mode, be sure to execute Format. Be careful when executing Format because all the LD, CD-G, CD-I, Video-CD, CD-ROM and DVD-ROM ●...
-
Page 6: Table Of Contents
Case 2 : Connecting to an S-Video output jack.....19 Contents Case 3 : Component Video output jacks......20 Other type of connecting the Audio output cable ..20 Case 1 : Connecting to your TV........20 Case 2 : Connecting to a stereo amplifier with AV output jacks .............21 Getting Started Getting Started... - Page 7 If you forgot your password..........38 Selecting the Audio language..........56 About the Rating Level ............38 Changing the Camera Angle...........57 About the Change Password ..........39 Zooming-In................57 Using Bookmarks.............58 Using Markers ..............59 Recording Recording Playing an Audio CD/MP3 ........60 Playing an Audio CD (CD-DA)/MP3 .......60 Before Recording.............40 Playing a Picture ............64 Recordable discs..............40...
-
Page 8: General Features
High quality progressive scan General Features Progressive scanning provides high resolution and flicker free video. The 10-bit 54-MHz DAC and 2D Y/C Separating Circuitry provides the highest image playback and recording quality. (See pages 20, 35) The DVD Recorder allows you to record and play high quality digital video on DVD-RW/DVD-R discs. -
Page 9: Before Reading The User's Manual
All rights reserved; No part or whole of this user’s reinitializing. It should be noted that manual may be reproduced or copied without the prior the disc's data will be lost when written permission of Samsung Electronics Co. changing formats. English -... - Page 10 Step 3 Step 6 Recording Finalising & Playing on other DVD components There are two different recording methods, Direct To play your DVD on other DVD components, Recording and Timer Recording. Timer recording is finalising may be necessary. First, finish all editing and classified as a Date : Once, Daily, MO-SA, MO-FR, recording operations, then finalise the disc.
-
Page 11: Unpacking
Unpacking Accessories Setting the Remote Control Check for the supplied accessories below. You can control certain functions of another manufacturer’s TV with this remote control. Control function buttons involve: STANDBY/ON, PROG , VOL +/-, Direct Number buttons, TV MUTE, INPUT SEL. button. Video/Audio Cable RF Cable for TV HDMI Cable... - Page 12 TELEAVA Controllable TV Codes TELEFUNKEN 67, 73, 75, 76 BRAND BUTTON THOMSON 72, 73, 75 SAMSUNG 01, 02, 03, 04, 05, 06, 07, 08, 09 THOMSON ASIA 80, 81 AIWA TOSHIBA 47, 48, 49, 50, 51, 52 ANAM 10, 11, 12, 13, 14, 15, 16, 17, 18 WEGA BANG &...
-
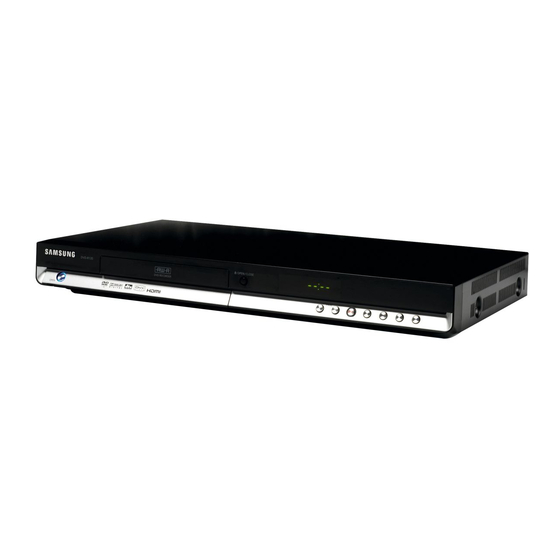
Page 13: Description
Description Front Panel 1. STANDBY/ON 7. DISPLAY Turns the DVD Recorder on and off. Displays the playing status, title/chapter/time, etc. 2. AV3 IN 8. PROG ( Connect external equipment. Select TV preset Channels. Same as PROG button on the remote control. 3. -
Page 14: Rear Panel
Rear Panel 8. AUDIO OUT In from aerial connector Connects to the audio input of external equipment Out to TV connector using audio cables. 3. AV2(EXT) INPUT SCART Connector 9. VIDEO OUT 4. AV1(TV) OUTPUT SCART Connector Connects the input of external equipment using a Video cable. -
Page 15: Tour Of The Remote Control
13. ANYKEY Button Tour of the Remote Control Use this to view the status of the disc that is being played. 14. REC Button Use to make a recording on DVD-RW/-R discs. 15. REC MODE Button This will display the recording status.(XP/SP/LP/EP) 16. -
Page 16: Connecting & Setting Up
Quick Overview Connecting A Quick Overview presented in this guide will give you enough information to start using the DVD Recorder. & Setting Up Connecting the DVD Recoder This section involves various methods of connecting the DVD Recorder to other external †... -
Page 17: Connecting The Dvd Recorder
Connecting the DVD Additional connections Recorder You can connect your DVD Recorder to the television You can connect your DVD Recorder to a satellite or using the SCART cable if the appropriate input is digital tuner. available on the television. 1. -
Page 18: Antenna + Dvd Recorder + External Decoder Box + Tv
Antenna + DVD Recorder + Other type of connecting external decoder box + TV the Video output cable There are several ways to output video signal not using If you connect external decoder box to DVD recorder, scart cables. Select one of the following video you can record scrambled channels (CANAL+or connecting that best suits you below. -
Page 19: Output Jack
Case 1 : Connecting to a Video Case 2 : Connecting to an (Composite) output jack S-Video output jack 1. Connect a video(yellow) cable between the VIDEO 1. Connect an S-Video cable (not included) between the (yellow) OUT jack on DVD Recorder and VIDEO S-VIDEO OUT jack on DVD Recorder and S-VIDEO (yellow) INPUT jack on your TV (or AV amplifier). -
Page 20: Case 3 : Component Video Output Jacks
Case 3 : Component Video Other type of connecting output jacks the Audio output cable 1. Connect Component video cables(not supplied) between the COMPONENT OUT(Y,P ) jacks on DVD Recorder and COMPONENT IN(Y,P ) jacks on your TV. 2. Connect audio cables (white and red) between the There are several ways to output audio signal not using AUDIO OUT jacks on the DVD Recorder and AUDIO scart cables. -
Page 21: Output Jacks
Case 2 : Connecting to a stereo Case 3: Connecting to an AV amplifier with AV output jacks amplifier with a digital output jack If your stereo amplifier only has AUDIO INPUT jacks(L and R), use the AUDIO OUT jacks. If your AV amplifier has a Dolby Digital, MPEG2 or DTS decoder and a digital input jack, use this connection. -
Page 22: Connecting Hdmi/Dvi To A Tv
DVD Recorder to the DVI IN jack of your TV. Why does Samsung use HDMI? Analog TVs require an analog video/audio • Using the audio cables, connect the AUDIO (red and signal. -
Page 23: Connecting To Av3 In, Dv Input Jack
Case 2 : Connecting a Connecting to AV3 IN, DV Camcorder to the DV IN jack input jack If your digital camcorder has a DV output jack, connect it to the DV input jack of your DVD Recorder. This allows you to connect your DVD Recorder to other external devices and view or record their outputs. -
Page 24: System Setup
On-Screen Menu Navigation System Setup The on-screen menus allow you to enable or disable various functions on your DVD Recorder. Use the following buttons to open and navigate through the on-screen menus. DVD-Recorder Programme DVD-Recorder Title List No Disc DVD-RW(VR) Programme Title List Scheduled Record List... -
Page 25: Plug & Auto Setup
• Refer to following abbreviation table when selecting “Country”. Plug & Auto Setup A(Austria) NL(Netherlands) S(Sweden) PL(Poland) B(Belgium) I(Italy) CH(Swiss) CZ (Czech) DK(Denmark) N(Norway) TR(Turkey) Others FIN(Finland) P(Portugal) GR(Greece) D(Deutschland) E(Spain) HU(Hungary) Your DVD Recorder will automatically set itself up when •... -
Page 26: Setting The Clock
Press the …† buttons to select On for the Setting the Clock Auto Clock. DVD-Recorder Clock Set No Disc Programme Setup Date Time Auto Clock This menu is used to set the current time. 2006 You need to set the time to use timer recording. MOVE RETURN EXIT... -
Page 27: Presetting Channels With The Auto Setup Function
Press the …† buttons to select Auto Presetting Channels with Setup, then press the OK or √ button. The Country Seletion screen is displayed. the Auto Setup function DVD-Recorder Install No Disc Country Selection Programm Auto Setup √ √ Manual Setup √... -
Page 28: Presetting Channels With The Manual Setup Function
Press the …† buttons to select Manual Presetting Channels with Setup, then press the OK or √ button. the Manual Setup function Manual Setup Name Decoder Edit ---- ---- √ √ ---- ---- √ √ ---- ---- √ √ You can add preset channel that Auto Channel Search ---- ---- √... -
Page 29: Setting Up The Language Options
Press the …† buttons to select the desired Setting up the Language language option, then press the OK or √ button. Options Audio : For the speaker sound. ● Subtitle : For the disc subtitles. ● Disc Menu : For the disc menu contained on the ●... -
Page 30: Ep Mode Time Setting
Press the …† buttons to select EP Mode EP Mode Time Setting Time, then press the OK or √ button. DVD-Recorder System No Disc Programme EP Mode Time : 6 Hours 6 Hours √ √ 8 Hours Setup Chapter Creator √... -
Page 31: Automatic Chapter Creation
Press the …† buttons to select On or Off, Automatic Chapter then press the OK or √ button. • Off: Select this option when you do not want Creation (Automatic Chapter Creation). • On: Select this option when you want (Automatic Chapter Creation). -
Page 32: Quick Recording Setting
Press the …† buttons to select On, then Quick Recording Setting press the OK or √ button. If this function is set to on, both the DVD Recorder and the TV will power on at the same time, which enables you to immediiatedly record a desired channel. -
Page 33: Audio Options
Dynamic Compression Press the …† buttons to select the desired audio option, then press the OK or √ This is only active when a Dolby Digital signal is button. detected. 1. Off : You can enjoy the movie with the standard DVD-Recorder Audio No Disc... -
Page 34: Setting Up Video Output Options
Press the …† buttons to select Video Setting up Video Output Output, then press the OK or √ button. Options DVD-Recorder Video No Disc Programme TV Aspect : 16:9 Wide √ √ Setup 3D Noise Reduction: Off √ √ Component Video Output : RGB √... -
Page 35: Setting Up The Progressive Scan
Setting up the Progressive Canceling the Progressive scan scan If the TV supports Progressive Scan, press the P.SCAN button on the front of the DVD Recorder to With the DVD Recorder in Stop mode, enjoy. press the P.SCAN button on the front of the DVD Recorder. -
Page 36: Setting Up The Display(Video) Options
Press the RETURN or œ button to return Setting up the ■ to the previous menu. Press the MENU NOTE Display(Video) Options button to exit the menu. This function allows you to setup the TV screen settings. Display(Video) Options This function depends on disc type. It may not work for With the DVD Recorder in Stop mode/No some disc types. -
Page 37: Output Selection
HDMI/DVI Resolution DivX(R) Registration This setting is used when the DVD Recorder is connected by HDMI or DVI with Display devices (TV, projector, etc). DVD-Recorder Video No Disc Programme TV Aspect : 16:9 Wide √ √ Please use the Registration code to register this DVD Setup 3D Noise Reduction : Off √... -
Page 38: If You Forgot Your Password
Press the …† buttons to select Parental If you forgot your password Control, then press the OK or √ button. The ‘Create the password’ message will be displayed. Remove the disc. DVD-Recorder Parental Control No Disc Programme Setup Create the password Press and hold down the PROG ( buttons on the front panel of the DVD Recorder simultaneously for more than 5 seconds... -
Page 39: About The Change Password
About the Change Password Press the …† buttons to select Change Password. DVD-Recorder Parental Control No Disc Programme Password : On √ √ Setup Rating Level : Level 1 Kids √ √ Change Password √ √ MOVE RETURN EXIT Press the OK or √ button. The ‘Enter the password’... -
Page 40: Before Recording
This section shows various DVD recording This DVD Recorder can record on the following discs. methods. DVD-RW DVD-R DVD-RWs are rewritable. ● DVD-Rs are non-rewritable ● Compatibility between Samsung and Other Company’s Recorder Disc Types Recording Recording Finalising Additional Recording in format Device Samsung Recorder... -
Page 41: Recording Formats
Recording Formats Recording Times Mode Characteristic Data Rates Since available functions differ depending on the disc Select when the type, select a disc that best fits your preferences; Approx. 1 hour video quality is When you insert an unused disc, the following message (high quality mode) about 8 Mbps appears... -
Page 42: About Info Button
About INFO Button Recording the current TV programme you are watching Before you start The INFO function allows you to view the current status and progress of playback and recording. Depending on Check that the disc has enough available space for the the disc type and status, the displayed screen may be recording. - Page 43 Press the REC MODE button repeatedly, To stop recording (or press the REC MODE button, then Press the STOP button to stop a recording in progress. press the …† button) to select the When using DVD-RW/DVD-R discs, the message ● recording speed(quality).
-
Page 44: Recording From External Equipment You Are
Press the REC button. Recording from external equipment you are watching To pause recording Press the PLAY/PAUSE( ) button to pause a recording in progress. Press the PLAY/PAUSE( ) button again to resume ● recording. PROG Before you start You can switch channels by pressing the ●... -
Page 45: Making A One Touch Recording (Otr)
Press the OPEN/CLOSE button to close You can not change the recording mode and ■ the disc tray. input source while recording. NOTE Wait until “LOAD” disappears from the front panel Recording will stop automatically if there is ■ display. no free space left for recording. -
Page 46: Making A Timer Recording
To view the current status of the disc and progress Making a Timer Recording of recording : Press the INFO button, and information about the disc will appear. DVD-RW(VR) Disc Info Disc Name Total Title Total Playlist Recordable Time 02:12 SP Before you start Protection Not Protected... -
Page 47: Flexible Recording (For Timer Recording Only)
• Source : The video input source (“AV1”, “AV2”, Press the OK button. “AV3”) or the broadcasting channel you want to make a timer If the timer settings overlap The programmes are recorded in order of priority. recording from. If timer recording is set for the first programme •... -
Page 48: Editing The Scheduled Record List
Press the …† buttons to select Edit, then Editing the Scheduled press the OK or √ button. The Timer Record Input item is displayed. ● Record List Edit the items you want to modify. See the “Making a Timer Recording” section for more information on Timer Recording Input items. -
Page 49: Recording The Standard Timer List
Press the …† buttons to select the number Recording the Standard of the timer recording you want to delete, then press the OK or √ button. Timer List The Edit and Delete items are displayed. ● Scheduled Record List DVD-Recorder Current Time 12:27 DVD-RW(VR) When the start time in the Scheduled record list... -
Page 50: Playback
Before Playing Playback Read the following information before playing a disc. Region code (DVD-Video only) This section introduces basic functions of playback and playback by disc type. Both the DVD recorder and the discs are coded by region. These regional codes must match in order for the disc to play. -
Page 51: Playing A Disc
Place a disc gently into the tray with the Playback and/or recording may not work ■ disc’s label facing up. for some types of discs, or when specific NOTE operations, such as angle change and aspect ratio adjustment, are being performed. -
Page 52: Using The Disc Menu & Title Menu
Using the Disc Menu & Title Menu Using the Search Functions Some discs contain a dedicated menu system that allow you to select special functions for the title, such as chapters, audio tracks, subtitles, film previews, information on characters, etc. For DVD-VIDEO discs Press the DISC MENU button to enter the disc menu of the disc. -
Page 53: Slow Motion Play
About ANYKEY Skipping Chapters or Tracks During playback, you can search quickly ● through a chapter or track. During playback, press the SKIP ( button on the remote control. If you press the SKIP ( ) button, ● it moves to the beginning of the chapter or track or marker(DVD-RW(VR mode)). -
Page 54: Using The Repeat Function
If you want to move to a desired time to Using the Repeat Function ● help you find a scene. Press the ANYKEY button during playback. DVD-VIDEO Title 1/28 Chapter 00:00:01 Time Subtitle D 5.1CH Audio Repeat Angle Zoom MOVE CHANGE Playing Repeatedly(Repeat Playback) Press the …†... - Page 55 Playing a Certain section Repeatedly(A-B Repeat Playback) Using the ANYKEY button Using the ANYKEY button Press the ANYKEY button during playback. Using the ANYKEY button Using the ANYKEY button DVD-VIDEO Title 1/28 Chapter Press the ANYKEY button during 00:00:01 Time Subtitle playback.
-
Page 56: Selecting The Subtitle
Selecting the Subtitle Selecting the Audio language Subtitle languages may not work depending on the disc Audio languages may not work depending on the disc type. This is only available during playback. type. This is only available during playback. Using the SUBTITLE button Using the AUDIO button Using the SUBTITLE button... -
Page 57: Changing The Camera Angle
Changing the Camera Angle Zooming-In When a DVD-VIDEO contains multiple angles of a particular scene, you can select the Angle function. This is only available during playback. Press the ANYKEY button during playback If the disc contains multiple angles, the ANGLE mark or pause. -
Page 58: Using Bookmarks
Using Bookmarks Playing back a bookmark This feature lets you bookmark sections of a DVD-VIDEO or DVD-R/-RW(V mode), so you can quickly find them. Press the MARKER button during playback. (V mode) Press the œ √ buttons to select a Press the MARKER button during bookmarked scene. -
Page 59: Using Markers
Using Markers Playing back a Marker (VR mode) Press the MARKER button during playback. Press the MARKER button during playback. Press the œ √ buttons to select a bookmarked scene. -- -- -- -- -- -- -- -- -- Marker N : 0 -- -- -- -- -- -- -- -- Marker... -
Page 60: Playing An Audio Cd/Mp3
Buttons on the Remote Control used for Audio CD(CD-DA) playback Playing an Audio CD/MP3 Playing an Audio CD (CD-DA)/MP3 Each disc has a variety of menu functions available. Playing an Audio CD(CD-DA) Insert an audio CD (CD-DA) into the disc tray. - Page 61 Playing an MP3 Disc MP3 Screen Elements Music List Insert an MP3 Disc into the disc tray. SONG01 01/13 Title ROOT SONG01 SONG02 DVD-Recorder Disc Navigation √ √ 0:00:15 SONG03 SONG01 SONG04 4.0MB Disc DivX √ √ Navigation SONG05 01/26/2006 Photo √...
- Page 62 Buttons on the Remote Control used for MP3 playback Playing Repeatedly(Repeat Playback) Using the REPEA Using the REPEA T button T button Press the REPEAT button during playback. The Track repeat mode icon ( ) appears and the selected track is played repeatedly. Music List TRACK 1 01/15...
- Page 63 Play Option Mode Using the Using the ANYKEY ANYKEY button button The Play Option can be used with an audio CD or MP3 in Stop mode. Press the ANYKEY button during playback. The PLAY MODE window appears. Press the ANYKEY button in Stop mode. Music List TRACK 1 01/15...
-
Page 64: Playing A Picture
To Programme Tracks Playing a Picture You can register a maximum of 30 tracks in the playlist. Press the ANYKEY button in Stop mode. The PLAY MODE window appears. Insert a JPEG into the disc tray. Music List TRACK 1 01/15 Title Length... -
Page 65: Playing A Mpeg4
-1 If you press the PLAY button, the Slide Playing a MPEG4 Show Speed screen will appear. Press the œ √ buttons to set the slide show speed, then press the OK button. DVD-RW(VR) MPEG4 File is used to contain the audio and video data. -
Page 66: Playing The Title List
MPEG4 Function Description Playing the Title List Function Description Skip During playback, press the SKIP ( ) button, it moves forward or backward 5 minutes. During playback, press the SEARCH ( Search button and press again to search at a faster speed. (Fast 1, Fast 2, Fast 3) In pause or step mode, press the SEARCH ( Slow Motion... - Page 67 Press the …† buttons to select Title List, Press the INFO button once again. Then you can check the information about the title under playback. then press the OK or √ button twice. The Title List screen is displayed. DVD-RW(VR) Playing Info Name APR/21/200612:00 PR1...
- Page 68 Title List Screen Elements DVD-RW(VR) DVD-RW(VR) Title List Title List APR/21/2006 APR/21/2006 Title Length Edit Title Length Edit 01 APR/19/2006 12:00 00:00:21 01 APR/19/2006 12:00 00:00:21 √ √ √ √ 02 APR/19/2006 12:30 00:00:03 02 APR/19/2006 12:30 00:00:03 √ √ √...
-
Page 69: Editing
Editing This section introduces basic functions of DVD editing and explains both edit functions for the recording on a disc and edit functions for the entire disc. Title List ● A title is a section of recorded video and audio. Title List shows a list to help you select a title. -
Page 70: Basic Editing (Title List)
Press the …† œ √ buttons to select the Basic Editing (Title List) desired characters, then press the OK button. DVD-Recorder Rename DVD-RW(VR) Sports(A1) Renaming(Labeling) a Title Follow these instructions to rename a title list entry, i.e., Save to edit the title of a recorded programme. Back Space Space Delete... -
Page 71: Locking(Protecting) A Title
Locking(Protecting) a Title Press the œ √ buttons to select On, then press the OK button. The key icon on the Follow these instructions to lock an entry to protect it information window for the selected entry from accidental deletion. changes to the locked status. -
Page 72: Deleting A Section Of A Title
Press the …† buttons to select Delete, Deleting a Section of a Title then press the OK or √ button. Follow these instructions to delete a section of a Title List entry. DVD-RW(VR) Title List Sports (A1) Title Length Edit (VR mode) Drama 00:00:21... - Page 73 Press the OK button at the starting point. Press the OK button at the Delete. The message “Do you want to delete? The image and starting point time are displayed in the (Deleted part will not be restored.)” is displayed. section deletion starting point window.
-
Page 74: Advanced Editing (Playlist)
Press the OK button at the end point. Advanced Editing (Playlist) DVD-Recorder Make Scene DVD-RW(VR) Scene No. 001 Start Title List : 1/6 00:00:10 00:10:00 Creating a Playlist 00:10:00 » » Start Make Return Follow these instructions to create a new playlist entry MOVE RETURN EXIT... -
Page 75: Playing Entries In The Playlist
Playing Entries in the Playlist Press the …† buttons to select Play, then press the OK button. Follow these instructions to play the playlist entries. √ √ Play (VR mode) With the DVD Recorder in Stop mode, press the PLAY LIST button. The Edit Playlist screen is displayed. -
Page 76: Renaming A Playlist Entry
Enter the desired characters using the Renaming a Playlist Entry …† œ √ buttons. Follow these instructions to rename a playlist entry, i.e. to edit the title of a playlist entry. DVD-Recorder Rename DVD-RW(VR) Dolphin (VR mode) With the DVD Recorder in Stop mode, Save press the PLAY LIST button. -
Page 77: Editing A Scene For The Playlist
Editing a Scene for the Playlist Playing a Selected Scene Follow these instructions to edit scenes for a playlist. Press the …† œ √ buttons to select the scene you want to play, then press the OK (VR mode) button. The playlist entry to be played is selected. - Page 78 Press the OK button at the end point of the Modifying a Scene (Replacing a Scene) scene. To setup, follow steps 1 to 3 in page 77. DVD-Recorder Modify Scene DVD-RW(VR) Press the …† œ √ buttons to select the Scene No.
- Page 79 Moving a Scene (Changing the Position of a Scene) You cannot move the selected scene to the ■ position of the next scene, because the NOTE selected scene should be inserted before that position, which requires no action. To setup, follow steps 1 to 3 in page 77. Depending on the kind of disc, the displayed ■...
-
Page 80: Copying A Playlist Entry To The Playlist
Press the OK button at the end point of the Copying a Playlist Entry to the scene. Playlist DVD-Recorder Add Scene DVD-RW(VR) Scene No. 004 Start Using the PLA LIST button Using the PLA LIST button Title List : 4/6 00:00:15 00:00:35 00:00:35... -
Page 81: Deleting A Playlist Entry From The Playlist
Press the …† buttons to select Delete, You can create up to 999 scenes on one ■ then press the OK button. disc. In some cases, this may be different NOTE from the actual numbers. Press the MENU button after the ■... -
Page 82: Disc Manager
Enter the desired characters using the Disc Manager …† œ √ buttons. DVD-Recorder Rename DVD-RW(VR) Disc Editing the Disc Name Follow these instructions to give a name to a disc. Save Back Space Space Delete Clear MOVE RETURN EXIT This function is the same as the Rename ●... -
Page 83: Disc Protection
Disc Protection Formatting a Disc Disc Protection allows you to protect your discs from Use these instructions to format a disc. being formatted or deleted due to unintended The disc protect should also be cleared. operations. With the DVD Recorder in Stop mode, With the DVD Recorder in Stop mode, press the MENU button. -
Page 84: Delete All Title Lists
Press the œ √ buttons to select desired Press the …† buttons to select Disc Manager, then press the OK or √ button. mode, then press the OK button. You will be prompted again with the message ● “All data will be deleted. Do you want to DVD-Recorder Disc Manager continue?”. -
Page 85: Finalising A Disc
You will be prompted with the message “Do you want Finalising a disc to finalise disc?”. After you record titles onto a DVD-RW/DVD-R disc with your DVD recorder, it needs to be finalised before it can be played back on external devices. DVD-Recorder Disc Manager DVD-RW(VR) -
Page 86: Unfinalising A Disc (V/Vr Mode)
Unfinalising a disc (V/VR mode) Press the œ √ buttons to select Yes, then press the OK button. The disc is unfinalised. A DVD-RW can be finalised or unfinalised ■ With the DVD Recorder in Stop mode, in Video mode. press the MENU button. -
Page 87: Additional Information
Troubleshooting Additional If your DVD Recorder malfunctions, go through the checkpoints below before contacting a Samsung autho- Information rised service centre. Power The input is displayed for a while when the power is turned on. The DVD recorder requires some time... - Page 88 Playback The angle operation does not work while playing a DVD disc. Cannot play the disc. The angle operation is available only Checkpoint 1 when the disc contains images Check whether the disc is inserted Checkpoint 1 captured from different angles. correctly with the label facing up.
-
Page 89: Timer Recording
Video Timer Recording The disc revolves, but no image or bad quality Timer lamp flickers. images are displayed. Check there is enough space in the Checkpoint 1 Be sure that the Video Setting is Checkpoint 1 disc for recording. properly set. (See pages 34-37) Check whether the current disc is Checkpoint 2 Check whether there is damage to or... -
Page 90: Remote Control Unit
Read the table of contents and then Checkpoint 1 find and read the section describing your problem, follow the instructions given. Checkpoint 2 Turn your DVD recorder off and on. Checkpoint 3 If the problem still persists, contact a nearby Samsung service centre. - English... -
Page 91: Specifications
Specifications Power requirements AC 220-240V, 50Hz Power consumption 21 Watts Weight 2,6 kg General Dimensions 430mm(W) x 240mm(D) x 49mm(H) Operating temp. +5°C to +35°C Other conditions Keep level when operating. Less than 75% operating humidity Composite Video : 1,0 V p-p at 75Ω load, sync negative Video Max.Audio Input Level : 2Vrms Audio... - Page 92 Contact SAMSUNG WORLD WIDE If you have any questions or comments relating to Samsung products, please contact the SAMSUNG customer care centre. ¤ Region Country Customer Care Centre Web Site CANADA 1-800-SAMSUNG (7267864) www.samsung.com/ca North America MEXICO 01-800-SAMSUNG (7267864) www.samsung.com/mx U.S.A...
- Page 93 Correct Disposal of This Product (Waste Electrical & Electronic Equipment) (Applicable in the European Union and other European countries with separate collection systems) This marking shown on the product or its literature, indicates that it should not be disposed with other household wastes at the end of its working life.
- Page 94 Kullanım Kılavuzu DVD-R135 DVD-R120/R121 www.samsung.com English Türkçe AK68-01094N-00...
-
Page 95: Uyarı
ÖNEMLİ NOT Uyarı Bu cihazın güç kablosu, içinde bir sigorta bulunan kalıp döküm fişe sahiptir. Sigorta değeri, fişin dişli yüzeyinde belirtilmiştir. Değiştirilmesi gerekirse, aynı değerdeki BS1262 için onaylanmış bir sigorta kullanılabilir. Sigorta kapağı çıkartılabiliyorsa, fişi kapak çıkartılmış halde asla kullanmayın. Yedek bir sigorta kapağının kullanılması ELEKTRİK ÇARPMASI RİSKİNİ... -
Page 96: Önlem
Yıldırım ve statik elektrik gibi harici girişimler, DVD Önlem Kaydedicinin normal çalışmasını etkileyebilir. Bu mey- dana gelirse DVD kaydediciyi kapatın ve STANDBY/ON düğmesiyle tekrar açın, ya da AC güç kablosunu AC güç kaynağından çıkarıp tekrar takın. DVD Kaydedici normal olarak çalışacaktır. Kullandıktan sonra diski çıkarın ve DVD Kaydediciyi kapatın. -
Page 97: Disklerin Saklanması
Kaydın durumuna göre bazı durumlarda oynatma müm- VBR(Değişken Bit Oranları) ile kaydedilen MP3 kün olmayabilir. dosyaları için, 32 Kbps’den 320 Kbps’e kadar, ses kes- Bu DVD Kaydedici, bir Samsung DVD video kaydedi- ilebilir. ciyle kaydedilen ve sonlandırılan DVD-R disklerini Oynatılabilen bit oranı aralığı 56Kbps’den 320Kbps’e oynatabilir. - Page 98 isterseniz, Format işlemini gerçekleştirdiğinizden emin Aşağıdaki diskleri kullanmayın! olun. Format işlemini uygularken dikkatli olun, kayıtlı tüm ver- iler kaybolabilir. LD, CD-G, CD-I, Video-CD, CD-ROM ve DVD-ROM Boş bir DVD-RW diski ilk başlatıldığında, VR Modunda diskleri bu DVD Kaydedicide kullanılmamalıdır. başlatılır. [Not] Oynatılabilen disk tipleri: CD/CD-R/CD-RW/MP3/JPEG/ DVD-RW (VR modu)
- Page 99 Durum 2 : AV çıkış jakıyla stereo amplifikatöre İçindekiler bağlama ............21 Durum 3 : Dijital çıkış jakıyla AV amplifikatöre bağlama ............21 Başlarken HDMI/DVI’nın Televizyona Bağlanması ....22 Durum 1 : HDMI Jakıyla televizyona bağlantı ....22 Uyarı ................2 Durum 2 : DVI Jakıyla televizyona bağlamak ....22 Önlem ................3 AV3 IN, DV giriş...
- Page 100 Şifre Değiştirme Hakkında ..........39 Kamera Açısının Değiştirilmesi........57 Yakınlaştırma ..............57 Yer İmlerinin Kullanılması ..........58 Kayıt İşaretlerin Kullanılması ............59 Kayda Başlamadan Önce ......... 40 Bir Ses CD’si/MP3 Çalma ........60 Kayıt yapılabilen diskler..........40 Bir Ses CD’si (CD-DA)/MP3 Çalma......60 Kayıt Biçimleri .............41 Resim Gösterme .............64 Kayıt Modu ..............41 MPEG4 oynatma............65 Kaydedilemeyen video ..........41...
-
Page 101: Genel Özellikler
Yüksek kalitede sürekli tarama Genel Özellikler Sürekli tarama, yüksek çözünürlükte ve titremesiz video sağlar. 10-bit’lik 54-MHz DAC ve 2D Y/C Ayırma Devreleri en yüksek görüntü oynatma ve kayıt kalitesini sunar. (Bkz. sayfa 20, 35) DVD Kaydedici, DVD-RW/DVD-R disklerine yüksek kaliteli dijital video kaydetmenizi ve oynatmanızı... -
Page 102: Kullanım Kılavuzunu Okumadan Önce
Telif hakkı Format değiştirilirken diskteki verilerin kaybolacağını unutmayın. © 2006 Samsung Electronics Co. Tüm hakları saklıdır. Bu kullanım kılavuzunun hiçbir bölümü ya da tamamı, Samsung Electronics Co.nun önceden yazılı izni olmadan çoğaltılamaz ve kopyala- namaz. Türkçe -... - Page 103 3. Adım Kayıt 6. Adım Adım Sonlandırma ve diğer DVD cihazlarında oynatma İki farklı kayıt yöntemi vardır, Doğrudan Kayıt ve DVD’nizi diğer DVD cihazlarında oynatabilmek için, Zamanlayıcı ile Kayıt. Zamanlayıcı ile kayıt Tarihe sonlandırma gerekebilir. Önce tüm düzenleme ve göre sınıflandırılır : Once, Daily, MO-SA, MO-FR, W- kayıt işlemlerini bitirin sonra diski sonlandırın.
-
Page 104: Ambalajın Açılması
Ambalajın açılması Uzaktan Kumandanın Aksesuarlar Ayarlanması Aşağıdaki aksesuarların birlikte verildiğini kontrol edin. Başka marka televizyonların bazı işlevlerini bu uzaktan kumanda ile yönetebilirsiniz. Kumanda işlev düğmeleri şunlardır: STANDBY/ON, PROG / , VOL +/-, Doğrudan Rakam düğmeleri, TV MUTE, INPUT SEL. düğmesi. Video/Ses Kablosu TV için RF Kablosu HDMI Kablosu... - Page 105 TELEAVA Kumanda Edilebilen Televizyonların Kodları TELEFUNKEN 67, 73, 75, 76 MARKA DÜĞME THOMSON 72, 73, 75 SAMSUNG 01, 02, 03, 04, 05, 06, 07, 08, 09 THOMSON ASIA 80, 81 AIWA TOSHIBA 47, 48, 49, 50, 51, 52 ANAM 10, 11, 12, 13, 14, 15, 16, 17, 18 WEGA BANG &...
-
Page 106: Tanım
Tanım Ön Panel 1. STANDBY/ON 7. DISPLAY DVD Kaydediciyi açar ve kapatır. Oynatma durumunu, bölüm/alt bölüm/saat, vs. gösterir. 2. AV3 IN Harici cihazları bağlayabilirsiniz. 8. PROG ( Önceden ayarlı televizyon kanallarını seçer. 3. DV IN Uzaktan kumandadaki PROG düğmesiyle aynıdır. DV jakıyla harici dijital cihazların bağlanmasını... -
Page 107: Arka Panel
Arka Panel 8. AUDIO OUT Anten bağlantısı girişi Ses kablolarıyla harici cihazın ses girişine bağlanır. TV bağlantısı çıkışı 9. VIDEO OUT 3. AV2(EXT) GİRİŞ SCART Bağlantısı Harici cihazın girişine Video kablosu ile bağlanır. 4. AV1(TV) ÇIKIŞ SCART Bağlantısı 10. S-VIDEO OUT 5. -
Page 108: Uzaktan Kumandanın Tanıtılması
Uzaktan Kumandanın Tanıtılması 12. TITLE LIST/DISC MENU Düğmesi View Recording list/Disc menüsüne girmek için bu düğmeyi kullanın. 13. ANYKEY Düğmesi Oynatılan diskin durumunu görüntülemek için bunu kullanın. 14. REC Düğmesi DVD-RW/-R disklerine kayıt yapmak için kullanın. 15. REC MODE Düğmesi Bu, kayıt durumunu görüntüler.(XP/SP/LP/EP) 16. -
Page 109: Bağlama Ve Kurulum
Genel Bakış Bağlama ve Bu kılavuzda yer alan Genel Bakış bölümü size, DVD Kaydediciyi kullanmaya başlamanıza yetecek Kurulum bilgiyi verecektir. DVD Kaydedicinin Bağlanması Bu bölüm, DVD Kaydediciyi başka harici ciha- zlara bağlamanın çeşitli yöntemlerini ve gereken başlangıç ayar modlarını içerir. İlave bağlantılar Anten + DVD Kaydedici + harici dekoder + TV... -
Page 110: Dvd Kaydedicinin Bağlanması
DVD Kaydedicinin İlave bağlantılar Bağlanması Televizyonunuzda uygun giriş varsa, DVD Kaydedicinizi DVD Kaydedicinizi bir uydu alıcısına veya dijital kanal televizyonunuza SCART kablosuyla bağlayabilirsiniz. seçiciye bağlayabilirsiniz. 1. RF kablosunu gösterildiği şekilde bağlayın. 2. SCART kablosunun bir ucunu, DVD Kaydedicinin arkasında yer alan AV1 soketine bağlayın. 3. -
Page 111: Anten + Dvd Kaydedici + Harici Dekoder + Tv
Anten + DVD Kaydedici + Video çıkış kablosunu harici dekoder + TV bağlamanın farklı yolları Scart kablosu kullanmadan video sinyallerini DVD kaydediciye harici dekoder bağlarsanız, DVD aktarmanın birkaç farklı yolu vardır. Aşağıdaki video Kaydedicinizdeki dahili TV kanal seçici sayesinde bağlama yöntemlerinden size en uygun olanını seçin. şifreli kanallardan kayıt yapabilirsiniz (CANAL+ ya da Premiere yayınları). -
Page 112: Durum 1 : Video (Kompozit) Çıkış Jakına Bağlama
Durum 1 : Video (Kompozit) Durum 2 : S-Video çıkış jakına çıkış jakına bağlama bağlama 1. Video (sarı) kablosunu, DVD Kaydedicideki VIDEO 1. S-Video kablosunu (dahil değildir), DVD Kaydedicideki (sarı) OUT jakıyla, televizyonunuzdaki (veya AV S-VIDEO OUT jakıyla, televizyonunuzdaki (veya amplifikatörünüzdeki) VIDEO (sarı) INPUT jakına AV amplifikatörünüzdeki) S-VIDEO INPUT jakına bağlayın. -
Page 113: Durum 3 : Ek Cihaz Video Çıkış Jaklarına Bağlama
Durum 3 : Ek cihaz Video çıkış Ses çıkış kablosunu jaklarına bağlama bağlamanın farklı yolları 1. Ek cihaz video kablosunu (dahil değildir) DVD Kaydedicinizdeki COMPONENT OUT (Y,P jaklarıyla televizyonunuzdaki COMPONENT IN (Y,P ) jaklarına takın. 2. Ses kablolarını (beyaz ve kırmızı), DVD Scart kabloları... -
Page 114: Bağlama
Durum 2: AV çıkış jaklarıyla Durum 3: Dijital çıkış jakıyla AV stereo amplifikatöre bağlama amplifikatöre bağlama Stereo amplifikatörünüzün sadece AUDIO INPUT AV amplifikatörünüzde Dolby Digital, MPEG2 jakları (L ve R) varsa, AUDIO OUT jaklarını kullanın. veya DTS dekoderi ve dijital bir giriş jakı varsa, bu bağlantıyı... -
Page 115: Hdmi/Dvi'nın Televizyona Bağlanması
Dijital İçerik Koruma) desteklemiyorsa ekranda karlı bir görüntü olur. arkasındaki HDMI OUT (Çıkış) jakını televizyonunuzun DVI IN (Giriş) jakına bağlayın. Samsung neden HDMI kullanıyor? Analog televizyonlar analog video/ses • Ses kablolarını kullanarak, DVD Kaydedici cihazının sinyali gerektirir. Ancak, DVD oynatırken arkasındaki AUDIO (kırmızı... -
Page 116: Av3 In, Dv Giriş Jakına Bağlama
Durum 2 : DV IN jakına bir AV3 IN, DV giriş jakına Video Kameranın bağlanması bağlama Dijital video kameranızın bir DV çıkış jakı varsa, bunu DVD Kaydedicinizin DV giriş jakına bağlayın. Bu, DVD Kaydedicinizi diğer harici cihazlara bağlamanızı ve çıkışlarını görüntülemenizi veya kaydetmenizi sağlar. -
Page 117: Sistem Ayarları
Ekran Menüsünde Gezinti Sistem Ayarları Ekran menüleri, DVD Kaydedicinizdeki birçok işlevi etkinleştirmenizi veya devre dışı bırakmanızı sağlar. Ekran menülerini açmak ve menülerde gezinmek için aşağıdaki düğmeleri kullanın. DVD-Recorder DVD-Recorder Programme Title List No Disc DVD-RW(VR) Programme Title List Scheduled Record List Title List ►... -
Page 118: Plug & Auto Setup
• “Country” öğesini seçerken aşağıdaki kısaltma tablosuna Fişe Takma ve Otomatik bakın. Ayar A (Avusturya) NL (Hollanda) S (İsveç) PL (Polonya) B (Belçika) I (İtalya) CH (İsviçre) CZ (Çek Cumhuriyeti) DK (Danimarka) N (Norveç) TR (Türkiye) Diğer FIN (Finlandiya) P (Portekiz) GR (Yunanistan) D (Almanya) E (İspanya) -
Page 119: Saatin Ayarlanması
Auto Clock ayarında On öğesini seçmek için Saatin Ayarlanması ▲▼ düğmelerine basın. DVD-Recorder Clock Set No Disc Programme Setup Date Time Auto Clock Bu menü, güncel zamanı ayarlamak için kullanılır. 2006 Zamanlayıcı ile kayıt işlevini kullanabilmek için saati ayarlamanız gerekir. MOVE RETURN EXIT... -
Page 120: Auto Setup Işleviyle Kanalların Önceden
Auto Setup öğesini seçmek için ▲▼ Auto Setup işleviyle düğmelerine, ardından OK veya ► düğmesine basın. Kanalların önceden Country Selection ekranı görüntülenir. ayarlanması DVD-Recorder Install No Disc Country Selection Auto Setup Bu özellik, DVD Kaydedici kanal seçiciyi, Antenna In ► Manual Setup ►... -
Page 121: Ayaranması
Manual Setup öğesini seçmek için ▲▼ Elle Ayar fonksiyonuyla düğmelerine, ardından OK veya ► düğmesine basın. Kanalların önceden ayarlanması Manual Setup Name Decoder Edit ---- ---- ► ---- ---- ► Otomatik Kanal Arama’nın atladığı önceden ayarlanmış ---- ---- ► ---- ---- ►... -
Page 122: Dil Seçeneklerinin Ayarlanması
İstediğiniz dili seçmek için ▲▼ Dil Seçeneklerinin düğmelerine, ardından OK veya ► düğmesine basın. Ayarlanması Audio : Hoparlör sesi için. • Subtitle : Disk altyazıları için. • Disc Menu : Diskte bulunan disk menüsü için. • • On-Screen Menu : DVD Kaydedicinizin ekranı için. -
Page 123: Ep Mode Time Setting
EP Mode Time öğesini seçmek için EP Modu Zaman Ayarı ▲▼ düğmelerine, ardından OK veya ► düğmesine basın. DVD-Recorder System No Disc Programme EP Mode Time : 6 Hours 6 Hours ► 8 Hours Setup Chapter Creator ► REC MODE düğmesine peş peşe basarak dört kayıt Quick Recording : Off ►... -
Page 124: Automatic Chapter Creation
On veya Off öğesini seçmek için ▲▼ Otomatik Alt Bölüm düğmelerine, ardından OK veya ► düğmesine basın. Oluşturma • Off : Bu seçeneği, Otomatik Bölüm Yaratılmasını istemediğinizde seçin. • On : Bu seçeneği, Otomatik Bölüm Yaratılmasını istediğinizde seçin. Bir DVD Video ‘Bölüm’ ve ‘Alt Bölümler’den oluşur. Bir program kaydettiğinizde, bu bir Bölümdür. -
Page 125: Quick Recording Setting
On öğesini seçmek için ▲▼ düğmelerine, Hızlı Kayıt Ayarı ardından OK veya ► düğmesine basın. Bu işlev devredeyken, DVD Kaydedici ve televizyon aynı anda açılır ve istediğiniz kanaldan anında kayıt yapabilmeniz sağlanır. DVD Kaydedici, Stop modunda/No Disc Ses Seçeneklerinin modundayken MENU düğmesine basın. Ayarlanması... -
Page 126: Ses Seçenekleri
İstediğiniz sesi seçmek için ▲▼ düğmelerine, ardından OK veya ► düğmesine basın. 1. Off : DTS sinyali göndermez. AV alıcınızın veya AV amplifikatörünüzün DTS dekoderi yoksa bunu seçin. DVD-Recorder Audio 2. On : DTS parçası çaldığınızda, dijital çıkış üzerinden DTS No Disc Bitstream gönderir. -
Page 127: Video Çıkış Seçeneklerinin Ayarlanması
Video Output öğesini seçmek için ▲▼ Video Çıkış Seçeneklerinin düğmelerine, ardından OK veya ► düğmesine basın. Ayarlanması DVD-Recorder Video No Disc Programme TV Aspect : 16:9 Wide ► Setup 3D Noise Reduction : Off ► Component Video Output : Component RGB veya Komponent Video bağlantılarıyla yüksek ►... -
Page 128: Canceling The Progressive Scan
Progressive scan Progressive scan özelliğinin ayarlanması özelliğinin iptali Televizyonunuz Progressive Scan özellliğini destekliyorsa, daha yüksek video kalitesinin keyfini çıkarmak için DVD DVD Kaydedici Stop modundayken, DVD Kaydedicinin önündeki P.SCAN düğmesine basın. Kaydedicinin önündeki P.SCAN düğmesine basın. “Press [Yes] to confirm Interlace scan mode. DVD Kaydedici Stop modundayken, DVD Otherwise press [No]”... -
Page 129: Görüntü (Video) Seçeneklerinin Ayarlanması
Görüntü (Video) Önceki menüye dönmek için RETURN ya da oe ◄ düğmesine basın. Menüden Seçeneklerinin Ayarlanması çıkmak için MENU düğmesine basın. Bu işlev TV ekranı ayarlarını yapmanızı sağlar. Görüntü (Video) Seçenekleri Bu işlev, diskin tipine bağlıdır. Bazı disk tiplerinde DVD Kaydedici, Stop /No Disc çalışmayabilir. -
Page 130: Divx(R) Registration
HDMI/DVI Çözünürlüğü DivX(R) Kayıt Bu ayar, DVD Kaydedici Görüntüleme cihazlarına (televizyon, projektör, vs.) HDMI veya DVI ile bağlandığında kullanılır. DVD-Recorder Video No Disc Programme TV Aspect : 16:9 Wide Bu DVD Kaydediciyi, DivX(R) Video On Demand ► 3D Noise Reduction : Off Setup ►... -
Page 131: Şifrenizi Unuttuysanız
Parental Control öğesini seçmek için ▲▼ Şifrenizi unuttuysanız düğmelerine, ardından OK veya ► düğmesine basın. ‘Create the password’ mesajı görüntülenecektir. Diski çıkartın. DVD-Recorder Parental Control No Disc Programme Setup Create the password DVD Kaydedicinizin ön panelindeki PROG ) düğmelerini aynı anda, DVD Kaydedicinizde disk olmadan, 5 saniye NUMBER RETURN... -
Page 132: Şifre Değiştirme Hakkında
Şifre Değiştirme Hakkında Change Password öğesini seçmek için ▲▼ düğmelerine basın. DVD-Recorder Parental Control No Disc Programme Password : On ► Rating Level : Level 1 Kids Setup ► Change Password ► MOVE RETURN EXIT OK ya da ► düğmesine basın. ‘Enter the password’... -
Page 133: Kayda Başlamadan Önce
Bu bölümde çeşitli DVD kayıt yöntemleri Bu DVD Kaydedici aşağıdaki disk tiplerine kayıt gösterilmektedir. yapabilmektedir. DVD-RW DVD-R DVD-RW’lere tekrar kayıt yapılabilir. DVD-R’lere tekrar kayıt yapılamaz. Samsung ve Diğer Kayıt Cihazı Markalarının Uyumluluğu Disk Tipleri Kayıt biçimi Kayıt Cihazı Sonlandırma Samsung Kaydedicide İlave Kayıt sonlandırılmış... -
Page 134: Kayıt Biçimleri
Kayıt Biçimleri Kayıt Süreleri Veri Özellik Oranları Mevcut fonksiyonlar disk türüne bağlı olarak değiştiği için tercihinize en uygun diski seçin. Daha önce kullanılmamış Yaklaşık 1 saat Video kalitesi önemli yeni bir disk taktığınızda aşağıdaki mesajlar çıkar (yüksek kalite yaklaşık 8 Mbps olduğu zaman seçin. -
Page 135: Info Düğmesi Hakkında
INFO Düğmesi Hakkında Seyretmekte olduğunuz TV programının kaydedilmesi Başlamadan önce INFO işlevi, oynatma ve kaydın geçerli durumunu ve Diskte kayıt için yeterli alan olup olmadığını kontrol ilerleyişini görmenizi sağlar. Disk tipine ve durumuna edin. Kayıt modunu ayarlayın. bağlı olarak görüntülenen ekran farklı olabilir. OPEN/CLOSE düğmesine basın ve disk tepsisine kaydedilebilir bir disk yerleştirin. - Page 136 Kaydetme hızını (kalitesini) seçmek için Kaydı durdurmak için REC MODE düğmesine üst üste basın Devam eden bir kaydı durdurmak için STOP düğmesine (veya REC MODE düğmesine, sonra da basın. ▲▼ düğmesine basın). DVD-RW/DVD-R disklerini kullanırken ‘Updating the disc information. Please wait for a moment.’ mesajı görünür.
-
Page 137: Seyretmekte Olduğunuz Harici Cihazlardan
REC düğmesine basın. Seyretmekte olduğunuz harici cihazlardan kayıt yapılması Kaydı duraklatmak için Devam eden bir kaydı duraklatmak için PLAY/PAUSE ( düğmesine basın. Kayda kaldığı yerden devam etmek için PLAY/ PAUSE ( ) düğmesine tekrar basın. Kayıt işlemine ara verilmişken PROG ( Başlamadan önce düğmelerine basarak kanalları... -
Page 138: Tek Tuşla Kayıt Yapma (Otr)
Disk tepsisini kapatmak için OPEN/CLOSE Kayıt yaparken kayıt modunu ve giriş düğmesine basın. kaynağını değiştiremezsiniz. Ön panel ekranında “LOAD” mesajı kaybolana kadar Kayıt için yeterli alan yoksa kayıt oto- bekleyin. matik olarak durur. Kullanılmamış bir DVD-RW kullanılıyorsa, önce diski Bir diske en fazla 99 bölüm kaydedile- başlatıp başlatmayacağınız sorulur. -
Page 139: Zamanlayıcı Ile Kayıt Yapma
Diskin geçerli durumunu ve kaydın ilerleyişini Zamanlayıcı ile Kayıt görmek için : INFO düğmesine basın, diskle ilgili bilgiler görünecektir. Yapma DVD-RW(VR) Disc Info Disc Name Total Title Total Playlist Recordable Time 02:12 SP Başlamadan önce Protection Not Protected Screen PR 1 DUAL L JAN 01 2006 SUN 12:00... -
Page 140: Esnek Kayıt
OK düğmesine basın. • Source : Bir zamanlayıcı ile kayıt yapmak istediğiniz video giriş kaynağı (“AV1”, “AV2”, “AV3”) veya yayın yapan kanal. Zamanlayıcı ayarları çakışıyorsa • Day : Zamanlayıcı ile Kayıt, bir ay boyunca kayıt Programlar öncelik sırasına göre kaydedilir. zamanının ayarlanabilmesini sağlar.Kayıt Zamanlayıcı... -
Page 141: Programlanan Kayıt Listesinin Düzenlenmesi
Edit öğesini seçmek için ▲▼ düğmelerine, Programlanan Kayıt sonra da OK veya ► düğmesine basın. Zamanlayıcı ile Kayıt Girişi öğesi görünür. Listesinin Düzenlenmesi Değiştirmek istediğiniz öğeleri düzenleyin. Zamanlayıcı ile Kayıt Girişi öğeleri hakkında daha fazla bilgi için “Zamanlayıcı Kayıt Yapma” bölü- müne bakın. -
Page 142: Standart Zamanlayıcı Listesinin Kaydı
Silmek istediğiniz zamanlayıcı ile kayıt Standart Zamanlayıcı numarasını seçmek için ▲▼ düğmelerine, sonra da OK veya ► düğmesine basın. Listesinin Kaydı Edit ve Delete öğeleri görünür. DVD-Recorder Scheduled Record List DVD-RW(VR) Current Time 12:27 Scheduled Record List öğesindeki başlama zamanına, No. -
Page 143: Oynatma
Oynatmadan Önce Oynatma Bir disk oynatmadan önce aşağıdaki bilgileri okuyun. Bölge Kodu (Sadece DVD-Video) Bu bölümde oynatmanın ve disk tipine göre DVD kaydedicisi ve diskler bölgeye göre oynatmanın temel işlevleri tanıtılmaktadır. kodlanmıştır. Diskin oynatılabilmesi için bu bölge kodlarının eşleşmesi gerekir. Kodlar eşleşmezse disk oynatılamaz. -
Page 144: Bir Diskin Oynatılması
Açı değiştirme veya en-boy oranı OPEN/CLOSE düğmesine basın. ayarlaması gibi belli işlemler gerçekleştirilirken bazı disk tiplerinde oynatma ve/veya kaydetme yapılamaz. Diskler hakkında ayrıntılı bilgi, kutunun Diski, etiketi yukarı gelecek şekilde disk üzerinde yazılıdır. Lütfen gerektiğinde bu tepsisine dikkatle yerleştirin. bilgilere bakın. Diskin kirlenmemesini veya çizilmemesini sağlayın. -
Page 145: Disk Menüsünün Ve Bölüm Menüsünün Kullanılması
Disk Menüsünün ve Bölüm Arama İşlevlerinin Kullanılması Menüsünün Kullanılması Bazı disklerde, alt bölümler, ses parçaları, altyazılar film ön izlemeleri, karakterler hakkında bilgiler, vb. gibi özel bölümlerden seçim yapmanızı sağlayan atanmış bir menü sistemi bulunmaktadır. DVD-VIDEO diskleri için Diskin disk menüsüne girmek için DISC Bir Alt Bölüm veya Parça içinde Arama MENU düğmesine basın. -
Page 146: Yavaş Çekim Oynatma
ANYKEY Hakkında Alt Bölüm veya Parçaların Atlanması Oynatma sırasında bir alt bölüm veya parça içinde hızlı arama yapabilirsiniz. Oynatma sırasında, uzaktan kumanda üzerindeki SKIP ( ) düğmesine basın. SKIP ( ) düğmesine basarsanız, alt bölüm, parça veya işaretin başına gider (DVD-RW ANYKEY işlevi, arzu ettiğiniz bir sahneyi bölüm, alt (VR modu)). -
Page 147: Tekrar İşlevinin Kullanılması
Tekrar İşlevinin Kullanılması Bir sahneyi bulmak için istediğiniz bir zaman dilimine gitmek istiyorsanız. Oynatma sırasında ANYKEY düğmesine basın. DVD-VIDEO Title 1/28 Chapter Time 00:00:01 Subtitle Audio D 5.1CH Repeat Angle Zoom MOVE CHANGE Üst Üste Oynatma (Oynatmayı Tekrarlama) Time öğesini seçmek için ▲▼ düğmelerine basın. - Page 148 Belli bir kısmı Üst Üste Oynatma (A-B Oynatmayı Tekrarlama) ANYKEY düğmesinin kullanılması Oynatma sırasında ANYKEY düğmesine basın. DVD-VIDEO ANYKEY düğmesinin kullanımı Title Chapter 1/28 Time 00:00:01 Subtitle Audio D 5.1CH Oynatma sırasında ANYKEY düğmesine Repeat Angle basın. Zoom MOVE CHANGE DVD-VIDEO Title Chapter...
-
Page 149: Altyazının Seçilmesi
Altyazının Seçilmesi Ses dilinin seçilmesi Altyazı dilleri, disk tipine bağlı olarak çalışmayabilir. Ses dilleri, disk tipine bağlı olarak çalışmayabilir. Bu Bu işlev, sadece oynatma sırasında kullanılabilir. işlev, sadece oynatma sırasında kullanılabilir. AUDIO düğmesinin kullanılması SUBTITLE düğmesinin kullanılması Oynatma sırasında AUDIO düğmesine basın. -
Page 150: Kamera Açısının Değiştirilmesi
Kamera Açısının Değiştirilmesi Yakınlaştırma Bir DVD VIDEO’da belli bir sahnenin birden fazla açısı bulunuyorsa açı işlevini seçebilirsiniz. Bu işlev, sadece oynatma sırasında kullanılabilir. Diskte birden fazla açı bulunuyorsa ekranda ANGLE Oynatma veya duraklatma sırasında işareti görünür. ANYKEY düğmesine basın. DVD-VIDEO Oynatma sırasında ANYKEY düğmesine Title 1/28... -
Page 151: Yer İmlerinin Kullanılması
Yer İmlerinin Kullanılması Yer iminin oynatılması Bu özellik bir DVD-VIDEO veya DVD-R/-RW’nin (V modu) bölümlerini imlemenizi, böylece onları kolayca bulmanızı sağlar. Oynatma sırasında MARKER düğmesine basın. (V modu) Yer imli bir sahne seçmek için◄ ► Oynatma sırasında MARKER düğmesine düğmelerine basın. basın. -
Page 152: İşaretlerin Kullanılması
İşaretlerin Kullanılması Bir Marker öğesinin oynatılması (VR modu) Oynatma sırasında MARKER düğmesine basın. Oynatma sırasında MARKER düğmesine basın. Yer imli bir sahne seçmek için ◄ ► -- -- -- -- -- -- -- -- -- Marker N : 0 düğmelerine basın. -- -- -- -- -- -- -- -- Marker N : 2... -
Page 153: Bir Ses Cd'si/Mp3 Çalma
Ses CD’si (CD-DA) çalmak için kullanılan Uzaktan Kumanda düğmeleri Bir Ses CD’si/MP3 Çalma Bir Ses CD’si (CD-DA)/MP3 Çalma Her diskin çeşitli menü işlevleri bulunmaktadır. Bir Ses CD’si (CD-DA) Çalma Disk tepsisine bir ses CD’si (CD-DA) yerleştirin. Ses CD’si menüsü görünür ve parçalar (şarkılar) oto- matik olarak çalar. - Page 154 MP3 Diski Çalma MP3 Ekran Öğeleri Music List SONG01 01/13 Title Disk tepsisine bir MP3 Diski yerleştirin. ROOT SONG01 SONG02 0:00:15 ► DVD-Recorder Disc Navigation SONG03 SONG01 SONG04 4.0MB SONG05 Disc 01/26/2006 DivX ► Navigation SONG06 Photo ► Programme Music ►...
- Page 155 MP3 oynatmada kullanılan Uzaktan Kumanda düğmeleri Üst Üste Çalma (Çalmayı Tekrarlama) REPEAT düğmesinin kullanılması Çalma sırasında REPEAT düğmesine basın. Track repeat modu simgesi ( ) görünür ve seçilen parça üst üste çalar. Music List TRACK 1 01/15 Title Length TRACK 1 0:03:50 TRACK 2 0:04:00...
- Page 156 Play Option Modu ANYKEY düğmesinin kullanımı Play Option Modu, Stop modundaki ses CD’si veya MP3 ile kullanılabilir. Oynatma sırasında ANYKEY düğmesine basın. PLAY MODE penceresi görünür. Stop modunda ANYKEY düğmesine basın. Music List PLAY MODE penceresi görünür. 01/15 TRACK 1 Title Length TRACK 1...
-
Page 157: Resim Gösterme
Parçaların Programlanması Resim Gösterme Oynatma listesine en fazla 30 parça kaydedebilirsiniz. Stop modunda ANYKEY düğmesine basın. PLAY MODE penceresi görünür. Disk tepsisine bir JPEG diski yerleştirin. Music List TRACK 1 01/15 Title Length DVD-Recorder Disc Navigation TRACK 1 0:03:50 PLAY MODE TRACK 2 0:04:00 Repeat : Off... -
Page 158: Mpeg4 Oynatma
-1 PLAY düğmesine basarsanız Slide Show MPEG4 oynatma Speed ekranı görünür. Slayt gösterisi hızını ayarlamak için ◄ ► düğmesine, sonra da OK düğmesine basın. DVD-RW(VR) MPEG4 dosyasında ses ve görüntü verileri bulunur. Slide Show Speed Aşağıdaki uzantılara sahip MPEG4 dosyaları oynatılabilir. Slow Normal Fast... -
Page 159: Bölüm Listesinin Görüntülenmesi
MPEG4 İşlev Tanımı Bölüm Listesinin İşlev Tanım Görüntülenmesi Oynatma sırasında SKIP( veya ) düğmesine Atla basın, görüntü 5 dakika ileri veya geri gider. veya Oynatma sırasında SEARCH ( veya düğmesine basın, daha hızlı arama için tekrar basın. veya (Fast 1, Fast 2, Fast 3) Title List öğesinden bir sahne oynatmak için aşağıdaki Yavaş... - Page 160 Title List öğesini seçmek için ▲▼ INFO düğmesine bir kez daha basın. Daha sonra, düğmelerine, sonra da OK veya ► oynatılan bölümle ilgili bilgileri kontrol edebilirsiniz. düğmesine iki defa basın. Title List ekranı görünür. DVD-RW(VR) Playing Info Name APR/21/200612:00 PR1 DVD-RW(VR) Title List Title...
- Page 161 Title List Ekran Öğeleri DVD-RW(VR) Title List Title List DVD-RW(VR) APR/21/2006 APR/21/2006 Title Length Edit Title Length Edit 01 APR/19/2006 12:00 00:00:21 01 APR/19/2006 12:00 00:00:21 ► ► 02 APR/19/2006 12:30 00:00:03 02 APR/19/2006 12:30 00:00:03 ► ► Play Play 03 APR/20/2006 12:00 00:00:15 03 APR/20/2006 12:00 00:00:15 ►...
-
Page 162: Düzenleme
Düzenleme Bu bölümde DVD düzenlemesinin temel işlevleri tanıtılmakta ve diske kayıt yapmanın düzen- leme işlevleriyle bütün diskin düzenleme işlevleri açıklanmaktadır. Title List Bölüm, kaydedilmiş bir video ve ses bölümüdür. Title List, bir bölüm seçmenize yardımcı olacak bir liste gösterir. Bölüm listesinde, kaydedilen videoyla ilgili aktarımdaki bilgiler bulunduğundan, bir bölüm silindiğinde o bölüm yeniden oynatılamaz. -
Page 163: Temel Düzenleme (Bölüm Listesi)
Arzu edilen karakterleri seçmek için Temel Düzenleme ▲▼◄ ► düğmelerine, sonra da OK düğmesine basın. (Bölüm Listesi) DVD-Recorder Rename DVD-RW(VR) Sports(A1) Bir Bölümün Yeniden Adlandırılması (Etiketlenmesi) Save Back Space Space Clear Delete Bir bölüm listesi girişini yeniden adlandırmak, yani MOVE RETURN EXIT kayıtlı... -
Page 164: Bir Bölümü Kilitleme (Koruma)
Bir Bölümü Kilitleme (Koruma) On öğesini seçmek için ◄► düğmelerine, sonra da OK düğmesine basın. Seçilen Bir girişi kazayla silinmekten korumak için kilitlerken girişin bilgi ekranındaki anahtar simgesi kilitli aşağıdaki talimatları uygulayın. duruma getirir. DVD-RW(VR) Title List Sports (A1) Title Length Edit TITLE LIST düğmesinin kullanılması... -
Page 165: Bölümün Bir Parçasını Silme
Bölümün Bir Parçasını Silme Delete öğesini seçmek için ▲▼ düğmelerine, sonra da OK düğmesine Bir Title List öğesi girişinin bir bölümünü silmek için şu basın. talimatları uygulayın. DVD-RW(VR) Title List Sports (A1) Title Length Edit (VR modu) Drama 00:00:21 ► Music 00:00:03 ►... - Page 166 Başlangıç noktasında OK düğmesine Delete öğesindeki OK düğmesine basın. basın. “Do you want to delete? (Deleted part will not be restored.)” mesajı görünür. Görüntü ve başlama noktası zamanı, bölüm silme başlangıç noktası penceresinde görünür. DVD-RW(VR) Edit Title List DVD-RW(VR) Edit Title List Title List No.
-
Page 167: Gelişmiş Düzenleme (Oynatma Listesi)
Bitiş noktasında OK düğmesine basın. Gelişmiş Düzenleme (Oynatma listesi) DVD-Recorder Make Scene DVD-RW(VR) Scene No. 001 Start Title List : 1/6 00:00:10 00:10:00 Oynatma Listesi Oluşturma 00:10:00 Start Make Return Kayıtlı bir bölümden yeni bir oynatma listesi oluşturmak MOVE RETURN EXIT için şu talimatları... -
Page 168: Oynatma Listesindeki Girişlerin Oynatılması
Oynatma Listesindeki Girişlerin Play öğesini seçmek için düğmelerine, ▲▼ sonra da OK düğmesine basın. Oynatılması Oynatma listesi girişlerini oynatmak için şu talimatları ► Play uygulayın. (VR modu) DVD Kaydedici Stop modundayken PLAY LIST düğmesine basın. Edit Playlist ekranı görünür. Diskin geçerli durumunu ve oynatmanın ilerleyişini görmek için : INFO düğmesine basın, diskle ilgili DVD-RW(VR) Edit Playlist... -
Page 169: Oynatma Listesindeki Bir Girişe Yeni İsim Verilmesi
Oynatma Listesindeki bir Girişe ▲▼◄ ► düğmelerini kullanarak arzu edi- len karakterleri seçin. Yeni İsim Verilmesi Oynatma listesindeki bir girişi yeniden adlandırmak, DVD-Recorder Rename yani oynatma listesindeki bir girişi düzenlemek için şu DVD-RW(VR) talimatları uygulayın. Dolphin (VR modu) Save Back Space Space Delete Clear... -
Page 170: Oynatma Listesindeki Bir Sahnenin Düzenlenmesi
Oynatma listesindeki bir Seçilen bir Sahnenin Oynatılması Sahnenin Düzenlenmesi Bir oynatma listesi için sahne düzenlerken şu talimatları Oynatmak istediğiniz sahneyi seçmek uygulayın. için ▲▼◄ ► düğmelerine, sonra da OK düğmesine basın. (VR modu) Oynatılacak oynatma listesi girişi seçilir. DVD Kaydedici Stop modundayken PLAY DVD-Recorder Edit Scene LIST düğmesine basın. - Page 171 Sahnenin bitiş noktasında OK düğmesine Bir Sahneyi Değiştirme (Başka bir Sahneyle) basın. DVD-Recorder Modify Scene Ayarlamak için sayfa 77’deki 1-3 adımlarını uygulayın. DVD-RW(VR) Scene No. 002 Start Değiştirmek istediğiniz sahneyi seçmek Title List : 5/6 için ▲▼◄ ► düğmelerine, sonra da OK 00:00:25 00:00:30 00:00:30...
- Page 172 Sahnenin Taşınması (Sahne Konumunun Değiştirilmesi) Seçilen sahneyi bir sonraki sahnenin konu- muna taşıyamazsınız, çünkü seçilen sahne o konumun önüne yerleştirilmelidir, bu da Ayarlamak için sayfa 77’deki 1-3 adımlarını uygulayın. herhangi bir eylem gerektirmez. Disk türüne bağlı olarak gösterilen ekranın küçük bir farkı olabilir. Taşımak (konumunu değiştirmek) istediğiniz sahneyi seçmek için ▲▼◄...
-
Page 173: Bir Girişin Oynatma Listesine Kopyalanması
Sahnenin bitiş noktasında OK düğmesine Bir Girişin Oynatma Listesine basın. Kopyalanması DVD-Recorder Add Scene DVD-RW(VR) PLAY LIST düğmesinin kullanılması Scene No. 004 Start Title List : 4/6 00:00:15 00:00:35 DVD Kaydedici Stop modundayken PLAY 00:00:35 LIST düğmesine basın. Start Cancel Edit Playlist ekranı... -
Page 174: Oynatma Listesinden Bir Oynatma Listesi Girişinin
Delete öğesini seçmek için ▲▼ Bir diskte en fazla 999 sahne düğmelerine, sonra da OK düğmesine oluşturabilirsiniz. Bazı durumlarda bu basın. rakam, gerçek rakamlardan farklı olabilir. İşlem bittiğinde MENU düğmesine basın. Edit Playlist ekranı kaybolur. DVD-RW(VR) Edit Playlist Dolphin Title Length Edit Science 00:00:17... -
Page 175: Disk Yöneticisi
▲▼◄ ► düğmelerini kullanarak arzu edi- Disk Yöneticisi len karakterleri seçin. DVD-Recorder Rename DVD-RW(VR) Disc Disk Adının Düzenlenmesi Save Diske ad vermek için şu talimatları uygulayın. Back Space Space Delete Clear MOVE RETURN EXIT Bu işlev bölüm listesini yeniden adlandırmadaki Rename işleviyle aynıdır. -
Page 176: Disk Koruma
Disk Koruma Disk Biçimlendirme Disk Koruma ile disklerinizi yanlışlıkla biçimlendir- Disk biçimlendirmek için şu talimatları uygulayın. ilmeden veya silinmekten koruyabilirsiniz. Disk koruma da temizlenmelidir. DVD Kaydedici Stop modundayken MENU DVD Kaydedici Stop modundayken MENU düğmesine basın. düğmesine basın. DVD-Recorder Title List DVD-Recorder Title List DVD-RW(VR) -
Page 177: Tüm Bölüm Listelerinin Silinmesi
Arzu edilen modu seçmek için ◄ ► Disc Manager öğesini seçmek için düğmelerine, sonra da OK düğmesine ▲▼ düğmelerine, sonra da OK veya ► basın. düğmesine basın. “All data will be deleted. Do you want to con- tinue?” mesajıyla yeniden uyarılırsınız. DVD-Recorder Disc Manager DVD-RW(VR) -
Page 178: Diskin Sonlandırılması
Diskin Sonlandırılması “Do you want to finalise disc?” mesajıyla uyarılırsınız. DVD Kaydedicinizle bir DVD-RW/DVD-R disk üzerine bölümleri kaydettikten sonra, diskin harici cihazlarda oynatılmadan önce sonlandırılması gerekmektedir. DVD-Recorder Disc Manager DVD-RW(VR) Title List Disc Name : ► Playlist Disc Protection : Not Protected ►... -
Page 179: Disk Sonlandırmanın Geri Alınması (V/Vr Modu)
Disk Sonlandırmanın geri Yes öğesini seçmek için ◄ ► düğmelerine ve OK düğmesine basın. alınması (V/VR Modu) Diskte sonlandırılma kaldırılır. Bir DVD-RW diski Video modunda DVD Kaydedici Stop modundayken MENU sonlandırılabilir veya sonlandırılması düğmesine basın. kaldırılabilir. DVD-Recorder Title List Sonlandırma Sonlandırmayı... -
Page 180: Ek Bilgiler
Sorun Giderme Ek Bilgiler DVD Kaydediciniz arızalanırsa bir Samsung yetkili servis merkeziyle temas kurmadan önce denetim noktalarını gözden geçirin. Güç Güç açıkken giriş bir süre görünür. DVD Kaydediciyi başlatmak için bir Denetim noktası 1 süre beklemeniz gerekmektedir, giriş açıldıktan sonra yaklaşık 10 saniye boyunca görünür. - Page 181 Oynatma Açı işlemi bir DVD diski oynatırken gerçekleşmez. Diski oynatamıyor. Açı işlemi yalnızca diskte farklı Denetim noktası 1 açılardan çekilmiş görüntüler Diskin etiketi yukarı gelecek bulunduğunda mevcuttur. Denetim noktası 1 şekilde doğru olarak yerleştirilip yerleştirilmediğini kontrol edin. DVD diskinin bölge kodunu kontrol Denetim noktası...
- Page 182 Video Zamanlayıcı ile Kayıt Disk dönüyor ama görüntü yok veya düşük kalitede Zamanlayıcı lambası yanıp sönüyor. görüntüler görünüyor. Diskte kayıt için yeterince alan olup Denetim noktası 1 Video Ayarlarının düzgün Denetim noktası 1 olmadığını kontrol edin. ayarlandığından emin olun. (Bkz. sayfa 34-37) Geçerli diskin kaydedilebilir olup Denetim noktası...
- Page 183 İçindekiler kısmını okuyun ve soru- Denetim noktası 1 nunuzu tanımlayan bölümü bulun ve okuyun, daha sonra da verilen talimatları uygulayın. DVD Kaydedicinizi kapatıp açın. Denetim noktası 2 Sorun devam ederse yakındaki bir Denetim noktası 3 Samsung servis merkeziyle temas kurun. - Türkçe...
-
Page 184: Teknik Özellikler
Teknik Özellikler Güç gereksinimleri AC 220-240V, 50Hz Güç sarfiyatı 21 Watt Ağırlık 2,6 kg Genel Boyutlar 430mm(W) x 240mm(D) x 49mm(H) Çalışma sıcaklığı +5°C ile +35°C arası Diğer koşullar Çalıştırırken seviyeyi koruyun. %75’ten az çalışma nem oranı Kompozit Video : 75 Ω yüklü 1.0 V p-p, eşitleme negatif Video Maksimum Ses Giriş... - Page 185 Contact SAMSUNG WORLD WIDE If you have any questions or comments relating to Samsung products, please contact the SAMSUNG customer care centre. Region Country Customer Care Centre Web Site CANADA 1-800-SAMSUNG (7267864) www.samsung.com/ca North America MEXICO 01-800-SAMSUNG (7267864) www.samsung.com/mx U.S.A 1-800-SAMSUNG (7267864) www.samsung.com...
- Page 186 Bu Ürünün Doğru Şekilde Atılması (Elektrik& Elektronik Cihaz Atığı) (Avrupa Birliği ve ayrı toplama gerektiren Avrupa ülkelerinde uygulanır) Ürünün, kutusunun ya da garantisinin üzerinde görünen bu sembol, bu ürünün genel belediye çöplüklerine atılmaması gerektiğini gösterir. Kontrolsüz çöp atımı sonucunda oluşabilecek çevre ve insan sağlığına yönelik olası...