Table of Contents
Advertisement
Advertisement
Table of Contents
Troubleshooting

Related Manuals for Technicolor MediaAccess TG788VN


Summary of Contents for Technicolor MediaAccess TG788VN
- Page 1 SETUP AND USER GUIDE MediaAccess TG788vn v2...
- Page 2 SETUP AND USER GUIDE MediaAccess TG788vn v2...
- Page 3 Distribution and copying of this document, use and communication of its contents is not permitted without written authorization from Technicolor. The content of this document is furnished for informational use only, may be subject to change without notice, and should not be construed as a commitment by Technicolor.
-
Page 4: Table Of Contents
CONTENTS 1 Getting Started ......................3 1.1 Features at a Glance ..........................4 1.2 Components ...............................5 1.2.1 Power ....................................6 1.2.2 Local Network Connection............................7 1.2.3 Broadband Connection ..............................8 1.2.4 Voice Connection ................................9 1.2.5 Buttons................................... 10 1.2.6 Status LEDs ................................... 11 1.3 Preparing for the Installation........................14 2 Guided Installation....................15 3 Manual Installation....................19... - Page 5 CONTENTS 6.4 Viewing Call Logs ........................... 58 7 Saving Energy ......................59 7.1 Code of Conduct............................ 60 7.2 ECO Manager............................61 7.3 Manually Switching Off Services to Reduce Power ................62 8 Sharing Content...................... 63 8.1 The Network File Server ........................65 8.2 The UPnP AV Media Server .........................
-
Page 6: About This Setup And User Guide
The note symbol indicates that the text provides additional information about a topic. Terminology Generally, the MediaAccess TG788vn v2 will be referred to as MediaAccess Gateway in this Setup and User Guide. Typographical Conventions Following typographical convention is used throughout this manual: This sample text indicates a hyperlink to a Web site. -
Page 7: Getting Started
1 GETTING STARTED 1 Getting Started Introduction This chapter gives you a brief overview of the main features and components of the MediaAccess Gateway. After this chapter we will start with the installation. Do not connect any cables to the MediaAccess Gateway until instructed to do so. DMS-CTC-20120510-0000 v1.0... -
Page 8: Features At A Glance
For more information see “6 Telephony” on page 47 ECO label Technicolor’s ECO label guarantees you that the MediaAccess Gateway is able to reduce its power consumption to an absolute minimum. For more information, see “7 Saving Energy” on page... -
Page 9: Components
1 GETTING STARTED 1.2 Components Overview This section provides an overview of the different components of the MediaAccess Gateway: Topic Page 1.2.1 Power 1.2.2 Local Network Connection 1.2.3 Broadband Connection 1.2.4 Voice Connection 1.2.5 Buttons 1.2.6 Status LEDs DMS-CTC-20120510-0000 v1.0... -
Page 10: Power
1 GETTING STARTED 1.2.1 Power Overview Power inlet The power inlet allows you to connect the power supply. Only use the power supply delivered with your MediaAccess Gateway. Power switch The power switch allows you to power on/off your MediaAccess Gateway. DMS-CTC-20120510-0000 v1.0... -
Page 11: Local Network Connection
1 GETTING STARTED 1.2.2 Local Network Connection Overview Wireless Access Point The built-in WiFi-certified wireless access point provides wireless access to your WiFi-certified wireless clients. For more information, see “5 The MediaAccess Gateway Wireless Access Point” on page Ethernet switch The Ethernet switch allows you to connect an Ethernet device (for example, a computer) to your local network. -
Page 12: Broadband Connection
1 GETTING STARTED 1.2.3 Broadband Connection Overview DSL port This port can be used to connect your MediaAccess Gateway to your service provider’s DSL network. For more information, see “3.1 Connecting the MediaAccess Gateway to your Service Provider’s Network” on page DMS-CTC-20120510-0000 v1.0... -
Page 13: Voice Connection
1 GETTING STARTED 1.2.4 Voice Connection Overview Phone Port The Phone ( ) port allows you to connect a traditional phone to your MediaAccess Gateway. This way you will be able to make phone calls over the Internet and save on communication costs, especially for long-distance calls. For more information, see “6.1 Setting Up Your Telephone Network”... -
Page 14: Buttons
1 GETTING STARTED 1.2.5 Buttons Overview Reset WPS button The WPS ( ) button allows you to add new wireless clients to your network in a swift and easy way, without the need to enter any of your wireless settings manually. For more information, see “5.1 Connecting Your Wireless Client via WPS”... -
Page 15: Status Leds
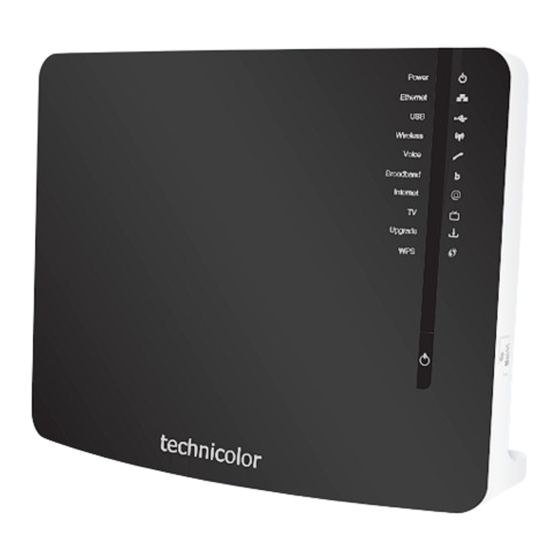
1 GETTING STARTED 1.2.6 Status LEDs Introduction On the front panel of your MediaAccess Gateway, you can find a number of status LEDs, indicating the state of the device. Power Ethernet Wireless Voice Broadband Internet Upgrade Power LED Colour State Description Green Solid on... - Page 16 1 GETTING STARTED USB LED Colour State Description Green Solid on Device(s) connected to the MediaAccess Gateway’s USB port No device connected to the MediaAccess Gateway’s USB port Wireless LED Colour State Description Green Solid on No wireless activity, WPA2-PSK or WPA-PSK encryption Blinking Wireless activity, WPA2-PSK or WPA-PSK encryption Orange...
- Page 17 1 GETTING STARTED TV LED Colour State Description Green Solid on Set-Top Box (STB) connected to the MediaAccess Gateway Blinking Unknown STB connected to the MediaAccess Gateway No STB connected to the MediaAccess Gateway Phone LED Colour State Description Green Solid on Registered at your VoIP provider, no activity.
-
Page 18: Preparing For The Installation
1 GETTING STARTED 1.3 Preparing for the Installation DSL service requirements Make sure that: Your service provider activated the DSL service on your telephone line by your service provider. You have the installation information (for example, user name, password, service profile,...) provided by your service ... -
Page 19: Guided Installation
2 GUIDED INSTALLATION 2 Guided Installation Introduction In the guided installation, the Setup wizard on the Setup CD will assist you with the installation of your MediaAccess Gateway. If you do not want to use the Setup CD or if the Setup CD is not included in your package, follow the installation procedure described in “3 Manual Installation”... - Page 20 2 GUIDED INSTALLATION 5 At the end of the installation, the following screen appears: Select Go to the Technicolor Gateway web interface if you want to go to the MediaAccess Gateway GUI after closing the wizard. On the MediaAccess Gateway GUI, you can configure all services of your MediaAccess Gateway.
- Page 21 2 GUIDED INSTALLATION In case of problems If you encounter problems during this installation please refer to “11.1 Setup Troubleshooting” on page 104. Backup your configuration Once you successfully installed your MediaAccess Gateway, it is recommend to backup your configuration. This will allows you to return to this configuration when needed (for example, after misconfiguration).
-
Page 22: Manual Installation
3 MANUAL INSTALLATION 3 Manual Installation Installation This chapter will help you to manually install your MediaAccess Gateway. Setting up your network Proceed as follows: 1 Connect your MediaAccess Gateway to your service provider’s network. For more information, see “3.1 Connecting the MediaAccess Gateway to your Service Provider’s Network” on page 2 Power on the MediaAccess Gateway. -
Page 23: Connecting The Mediaaccess Gateway To Your Service Provider's Network
The procedure to be followed depends on the fact if this filter has been integrated into your MediaAccess Gateway or not. Check the label of your MediaAccess Gateway. If the product name contains: “wIF” (for example MediaAccess TG788vn v2 wIF) then your MediaAccess Gateway has an integrated filter. No external ... - Page 24 3 MANUAL INSTALLATION Scenario 1: A MediaAccess Gateway with integrated filter Proceed as follows: 1 Take the DSL cable. This is the gray cable that is included in your box. 2 Plug one end of the cable in the grey DSL port on the back of your MediaAccess Gateway. 3 Plug the other end of the cable: In the DSL/Modem output of your splitter/filter.
-
Page 25: Powering On The Mediaaccess Gateway
3 MANUAL INSTALLATION 3.2 Powering on the MediaAccess Gateway Procedure Proceed as follows: 1 Connect the power cord to the power port of the MediaAccess Gateway. 2 Plug the other end of the power cord into an electrical outlet. 3 Press the power button to turn on the MediaAccess Gateway. 4 Wait at least two minutes to allow the MediaAccess Gateway to complete the start up phase. -
Page 26: Connecting Your Network Devices To The Mediaaccess Gateway
3 MANUAL INSTALLATION 3.3 Connecting Your Network Devices to the MediaAccess Gateway Choose your connection method To connect your device via: A wireless connection, continue with “3.3.1 Setting up a Wireless Connection” on page A wired connection, continue with “3.3.2 Setting up a Wired Connection”... -
Page 27: Setting Up A Wireless Connection
3 MANUAL INSTALLATION 3.3.1 Setting up a Wireless Connection The MediaAccess Gateway access point Your MediaAccess Gateway is equipped with a wireless access point that supports the following standards: IEEE 802.11n IEEE 802.11g IEEE 802.11b Requirements Your network device must be equipped with a WiFi-certified wireless client. Connection speed When setting up your wireless network, keep in mind that the following factors may have a negative impact on your wireless connection speed:... -
Page 28: Setting Up A Wired Connection
3 MANUAL INSTALLATION 3.3.2 Setting up a Wired Connection Requirements Both your network device (for example, a computer, a gaming console,...) and MediaAccess Gateway must have a free Ethernet port. Your network device must be configured to obtain an IP address automatically. This is the default setting. ... -
Page 29: Configure The Mediaaccess Gateway
2 The MediaAccess Gateway informs you that you have not yet configured your MediaAccess Gateway. If this window does not appear, browse to http://dsldevice.lan or to the IP address of your MediaAccess Gateway (by default: 192.168.1.254) and click Technicolor Gateway on the menu on the left-hand side. 3 Click Setup my Technicolor Gateway. -
Page 30: Setting Up The 3G Fall-Back Wan Connection
3 MANUAL INSTALLATION 3.5 Setting Up the 3G Fall-Back WAN Connection Introduction Many SOHO (Small Offices, Home Offices) and SME (Small/Medium Enterprises) businesses choose DSL as their access technology for a Wide Area Network (WAN) connection because this is typically cheaper than using leased lines. A dropout of a DSL line can however have expensive consequences due to inaccessibility of the Internet and E-mail. -
Page 31: Managing Your Mobile Connection With The Mediaaccess Gateway Gui
3 MANUAL INSTALLATION 3.5.1 Managing your Mobile Connection with the MediaAccess Gateway GUI Introduction You can view and manage the parameters of your mobile connection via the MediaAccess Gateway GUI. Procedure To manage your mobile USB connection via the MediaAccess Gateway GUI: 1 Browse to the MediaAccess Gateway GUI. -
Page 32: Inserting A Mobile Usb Adapter
3 MANUAL INSTALLATION 3.5.2 Inserting a Mobile USB Adapter Procedure Once the mobile connection is configured you can proceed as follows to insert the mobile USB adapter: 1 Power off the MediaAccess Gateway. If you do not power off the MediaAccess Gateway first, the mobile USB adapter will not be detected. 2 Insert your SIM card into the mobile USB adapter. -
Page 33: Configuration Tools
4 CONFIGURATION TOOLS 4 Configuration Tools Configuration Tools You can use the following tools to configure your MediaAccess Gateway: The MediaAccess Gateway Setup CD allows you to configure your MediaAccess Gateway and helps you to connect your computers to the MediaAccess Gateway. For more information, see “2 Guided Installation”... -
Page 34: Mediaaccess Gateway Gui
4 CONFIGURATION TOOLS 4.1 MediaAccess Gateway GUI Introduction The MediaAccess Gateway Graphical User Interface (GUI) allows you to configure your MediaAccess Gateway using your web browser. Requirements JavaScript must be enabled on your browser (this is the default setting). For more information, consult the help of your web browser. -
Page 35: Access
4 CONFIGURATION TOOLS 4.1.1 Access Accessing the MediaAccess Gateway GUI Proceed as follows: 1 Open your web browser. 2 Browse to http://dsldevice.lan or to the IP address of your MediaAccess Gateway (by default: 192.168.1.254). 3 If you have protected your MediaAccess Gateway with a user name and password, the MediaAccess Gateway will prompt you to enter these. -
Page 36: Components
Menu The menu consists of the following menu items: Home: Allows you to go back to the MediaAccess Gateway home page. Technicolor Gateway: Provides basic information on the MediaAccess Gateway. Broadband Connection: Allows you to view/configure your broadband connections. -
Page 37: Language Bar
4 CONFIGURATION TOOLS Login section In the login section you can see the current user name. By clicking the user name, you can: Change your password. Switch to another user. Language bar If more than one GUI language is available, a language bar is showed. This language bar allows you to change the language of the MediaAccess Gateway GUI. -
Page 38: Protecting Access To The Mediaaccess Gateway
4 CONFIGURATION TOOLS 4.1.3 Protecting Access to the MediaAccess Gateway Introduction To prevent that every user on your local network can access the MediaAccess Gateway, the MediaAccess Gateway is secured with a user name and password. Default user name The default user name is Administrator. Default password The default password is either blank or the ACCESS KEY printed on the label of your MediaAccess Gateway. -
Page 39: Backing Up/Restoring Your Configuration
For more information, see “Accessing the MediaAccess Gateway GUI” on page 2 On the Technicolor Gateway menu, click Configuration. 3 In the Pick a task list, click Save or Restore Configuration. 4 Under Backup current configuration, click Backup Configuration Now. -
Page 40: Access From The Internet
4 CONFIGURATION TOOLS 4.3 Access From the Internet Modes To access your MediaAccess Gateway from the Internet, you can choose between two modes: Permanent Mode (Remote Access): The remote session ends when you disable remote assistance or after restarting your MediaAccess Gateway. Temporary Mode (Remote Assistance): ... -
Page 41: The Mediaaccess Gateway Wireless Access Point
5 THE MEDIAACCESS GATEWAY WIRELESS ACCESS POINT 5 The MediaAccess Gateway Wireless Access Point Introduction This section will help you set up your wireless network. What you need to set up a wireless network To set up a wireless network, you need the following components: Wireless Access Point (already integrated into your MediaAccess Gateway) ... -
Page 42: Connecting Your Wireless Client Via Wps
5 THE MEDIAACCESS GATEWAY WIRELESS ACCESS POINT 5.1 Connecting Your Wireless Client via WPS Wi-Fi Protected Setup (WPS) allows you to add new wireless clients to your local network in a swift and easy way, without the need to enter any of your wireless settings (network name, wireless key, encryption type). Requirements Your wireless client must support WPS. -
Page 43: Troubleshooting
5 THE MEDIAACCESS GATEWAY WIRELESS ACCESS POINT Blinking red This indicates that the MediaAccess Gateway could not find your wireless client. Use the same procedure to try again (you do not need to wait until the LED turns off). Procedure for PIN code entry Proceed as follows: 1 Check the label on your MediaAccess Gateway and write down the following information:... -
Page 44: Connecting Your Wireless Client Without Wps
5 THE MEDIAACCESS GATEWAY WIRELESS ACCESS POINT 5.2 Connecting Your Wireless Client without WPS Before you start Before you can connect a wireless client (for example, a computer) to your wireless network you need to know the wireless settings that are currently used by the MediaAccess Gateway, i.e.: The Network Name (SSID) ... -
Page 45: Connecting Your Wireless Client Via Qr Code
5 THE MEDIAACCESS GATEWAY WIRELESS ACCESS POINT 5.3 Connecting Your Wireless Client via QR Code Introduction The MediaAccess Gateway allows you to generate a Quick Response (QR) code that contains all wireless settings that are needed to connect. You are then able to connect to the wireless network by scanning the generated code. Target devices This connection method is typically used for tablet computers and smartphones. -
Page 46: Securing Your Wireless Connection
5 THE MEDIAACCESS GATEWAY WIRELESS ACCESS POINT 5.4 Securing Your Wireless Connection Introduction You can protect the wireless communication between the wireless clients and your MediaAccess Gateway with a wireless key. This means that: Only clients which use the correct Network Name (SSID) and wireless key can connect to your network. ... - Page 47 5 THE MEDIAACCESS GATEWAY WIRELESS ACCESS POINT 4 In the Security Mode list, select one of the following modes: WPA-PSK WPA2-PSK WPA-PSK + WPA2-PSK For more information, see “Encryption types” on page 5 In the WPA-PSK Encryption Key box, type a the key of your choice. The key must be in one of the following formats: ...
-
Page 48: Telephony
Install VoIP software on your computer and make your phone calls via your computer. The Technicolor solution With the MediaAccess Gateway you can make both VoIP and traditional telephone calls using a traditional analogue phone. If your MediaAccess Gateway is not powered, the traditional telephone network (if connected) will automatically selected. -
Page 49: Setting Up Your Telephone Network
6 TELEPHONY 6.1 Setting Up Your Telephone Network Procedure To set up your telephone network, follow these steps: 1 Connect your traditional phone(s), DECT base station or fax to the green Phone port(s) on the back panel of your MediaAccess Gateway. 2 Configure the VoIP service on your MediaAccess Gateway. -
Page 50: Configuring The Mediaaccess Gateway Voip Service
6 TELEPHONY 6.1.1 Configuring the MediaAccess Gateway VoIP Service Introduction If your VoIP service has not been configured yet, follow the instructions in this section. How can I check if the VoIP service has already been configured? If the Phone LED is: Solid or blinking green then the VoIP service is configured correctly. - Page 51 6 TELEPHONY Password: The password of your VoIP account. Displayname: The name that you want people to see on the display of their phone when you are calling. Your VoIP provider may not support this feature. Abbreviated number: ...
-
Page 52: Address Book
6 TELEPHONY 6.2 Address Book Introduction The Address Book page allows you to: Store your contacts on the MediaAccess Gateway GUI. Initiate a call or send a message by clicking the phone number or e-mail address in the contact details. ... - Page 53 6 TELEPHONY Making a phone call from the address book Proceed as follows: 1 Browse to the Address Book page. 2 Click on the phone number of your contact. 3 The following page appears: 4 Pick up the phone. 5 The MediaAccess Gateway is now initiating the call. Your contact’s phone is now ringing. 6 At the end of the conversation, click Done to go to the Last Calls page.
-
Page 54: Telephony Services
6 TELEPHONY 6.3 Telephony Services Introduction Telephony services add extra functionality to your phone. For example: putting a call on hold, transferring calls,... Requirements Before you can use a service, must both be: 1 Supported by your service provider. 2 Activated on your MediaAccess Gateway. Checking if a telephone service is activated/supported To check which services are supported or activated, proceed as follows: 1 Browse to the MediaAccess Gateway GUI. - Page 55 6 TELEPHONY 6.3.1 Activating a Telephony Service on your MediaAccess Gateway How can I (de)activate a service on my MediaAccess Gateway? You can (de)activate services in two ways: Via the MediaAccess Gateway GUI. Via (de)activation codes on your phone. ...
-
Page 56: Common Telephony Services
6 TELEPHONY 6.3.2 Common Telephony Services Introduction This section provides an overview of the functions that will be available if you activate one of the following services: Call Hold service Call Waiting service Conference Call (3 Party) service ... - Page 57 6 TELEPHONY Call Waiting service If the Call Waiting service is activated, you can use the following functions: To... Press... Illustration Terminate an active call and switch to an incoming call R, 1 You press R, 1 active active incoming Reject an incoming call R, 0 You press...
-
Page 58: Call Transfer
6 TELEPHONY Call Transfer If the Call Transfer service is activated, you can use the following functions: To... Press... Illustration Transfer a call R, 4 active You press active R, 4 on hold DMS-CTC-20120510-0000 v1.0... -
Page 59: Viewing Call Logs
6 TELEPHONY 6.4 Viewing Call Logs Introduction The Call Logs page on the MediaAccess Gateway GUI lists: Successful incoming calls. Missed incoming calls. Successful outgoing calls. Failed outgoing calls. Viewing the telephony statistics Proceed as follows: 1 Browse to the MediaAccess Gateway GUI. -
Page 60: Saving Energy
7 SAVING ENERGY 7 Saving Energy Code of Conduct To prove its commitment to protect the environment, Technicolor has signed the Code of Conduct, a global agreement to reduce the power consumption of broadband access devices. For more information, see “7.1 Code of Conduct”... - Page 61 7 SAVING ENERGY 7.1 Code of Conduct Power states Code of Conduct provides rules for the power consumption in: Full power state: This is the normal operation mode of the device, where all functionality is enabled. Low power state: ...
-
Page 62: Eco Manager
7 SAVING ENERGY 7.2 ECO Manager Introduction The MediaAccess Gateway constantly monitors the user activity and uses this information to optimise the power consumption: For example: The MediaAccess Gateway reduces the clock frequency of the central processor when there is no or low user activity. ... -
Page 63: Manually Switching Off Services To Reduce Power
7 SAVING ENERGY 7.3 Manually Switching Off Services to Reduce Power ECO button If you are not using the wireless access point of your MediaAccess Gateway, you might consider to disable the wireless access point permanently. This allows you to further reduce the power consumption. To turn the wireless interface: Off, press the ECO ( ) button until the Wireless LED is off. -
Page 64: Sharing Content
8 SHARING CONTENT 8 Sharing Content Introduction The MediaAccess Gateway allows you to share the content stored on your USB storage device with other users on your network or even access this shared content from the Internet. Features The MediaAccess Gateway supports USB 2.0 ... - Page 65 8 SHARING CONTENT Configuration All servers are enabled by default. The only thing that you need to do is to plug your USB memory stick or external hard disk in (one of) the USB port(s) of your MediaAccess Gateway. By using a USB hub, you can connect up to five USB mass storage devices to the MediaAccess Gateway. Do not remove your USB storage device without stopping it first, otherwise data might be lost! For more information, see “8.5 Safely Removing your USB Storage Device”...
-
Page 66: The Network File Server
1 Open Windows Explorer. 2 In the address bar, type two backslashes followed by the name that you entered in the Server Name box (default: \\Technicolor). If you did not provide a server name, type \\192.168.1.253. If you made changes to the DHCP settings, the IP address may diff. For more information, see “Getting the IP... - Page 67 2 The Connect To Server window appears. In the Server Address box, type smb://<server name>, where <server name> is the Server Name you assigned to your USB storage device (default: smb://Technicolor). If you did not provide a server name, type smb://192.168.1.253.
- Page 68 8 SHARING CONTENT 3 The following window appears: Select Guest and click Connect. 4 If prompted, select the partition that you want to open and click OK: 5 Your USB storage device is now mounted and is displayed on your desktop. DMS-CTC-20120510-0000 v1.0...
-
Page 69: The Upnp Av Media Server
8 SHARING CONTENT 8.2 The UPnP AV Media Server Introduction Your MediaAccess Gateway has a built-in DLNA-certified UPnP AV media server. This section describes how to use and configure this media server. UPnP AV UPnP AV (AV stands for Audio and Video) is a protocol especially designed to share media files on your local network. DLNA-certified The Digital Living Network Alliance (DLNA) is an organisation that imposes requirements to ensure the interoperatability of your media devices and standardize the communication between them. -
Page 70: Configuring The Upnp Av Media Server
8 SHARING CONTENT 8.2.1 Configuring the UPnP AV Media Server Introduction The Network File Server is enabled by default and ready to use. Enabling/disabling the UPnP AV Media Server Proceed as follows: 1 Browse to the MediaAccess Gateway GUI. For more information, see “Accessing the MediaAccess Gateway GUI”... -
Page 71: Using The Upnp Av Media Server
On your UPnP AV renderer, the MediaAccess Gateway’s UPnP AV media server will be listed as Technicolor TGXXX. Below you can find a screenshot taken on a smartphone with a UPnP AV client. - Page 72 8 SHARING CONTENT 4 Windows Media Player starts up. Your MediaAccess Gateway’s UPnP AV Media Server is listed on the left. This entry allows you to browse to your media files. DMS-CTC-20120510-0000 v1.0...
-
Page 73: The Ftp Server
8 SHARING CONTENT 8.3 The FTP Server Introduction The MediaAccess Gateway allows you to access your shared content by FTP. This can be useful if you want to be able to access your shared content from the Internet. Via FTP you can download and upload all types of files both from your local network and the Internet. Setting up the FTP server Proceed as follows: Protect your account with a... -
Page 74: Additional Configuration
8 SHARING CONTENT Result The Shared folder and its subfolders are now accessible using FTP. The other folders are not accessible via FTP. If you are connected to the Internet, the link to the FTP server is displayed under FTP Server: On the MediaAccess Gateway network, you can also access the FTP server using its local address (192.168.1.253). -
Page 75: Managing Your Shared Content
8 SHARING CONTENT 8.4 Managing your Shared Content Managed Partition If you select your drive or partition as managed partition, users only have access to the following folders: Media Shared All other folders will be hidden from the user. These hidden folders are still on the USB storage device, but you can not access them. - Page 76 8 SHARING CONTENT 4 Under List of connected disks, click the radio button next to the partition you want to configure as Managed Partition. 5 Click Apply. Result The MediaAccess Gateway creates following folders: Media: Use this folder to share your media files with others users on your network. You can store your media files in following subfolders: ...
-
Page 77: Safely Removing Your Usb Storage Device
8 SHARING CONTENT 8.5 Safely Removing your USB Storage Device Introduction If you just unplug your USB storage device from the MediaAccess Gateway you may loose your data. To avoid this you must first stop your USB storage device. Stopping your USB storage device Proceed as follows 1 Browse to the MediaAccess Gateway... -
Page 78: Network Services
9 NETWORK SERVICES 9 Network Services In this chapter In this chapter we will take a closer look at following features: Topic Page 9.1 UPnP 9.2 Assigning a service (HTTP, FTP,...) to a Computer 9.3 Dynamic DNS “9.4 Network Time Server” on page 88 Feature availability Depending on the configuration offered by your service provider, some features may not be available on your MediaAccess Gateway. -
Page 79: Upnp
9 NETWORK SERVICES 9.1 UPnP Introduction UPnP is designed to automate the installation and configuration of a (small) network as much as possible. This means that UPnP-capable devices can join and leave a network without any effort of a network administrator. Supported Operating Systems The following operating systems support UPnP: Windows 7... -
Page 80: Accessing Your Mediaaccess Gateway Via Upnp
If you computer runs Windows 7/Vista: 1 On the Windows Start menu, click Network. 2 The Network window appears: 3 Right-click your MediaAccess Gateway (displayed as Technicolor TGXXX) and click View device web page. 4 The MediaAccess Gateway GUI appears. -
Page 81: Managing Your Internet Connection Via Upnp
If you computer runs Windows 7/Vista: 1 On the Windows Start menu, click Network. 2 The Network window appears: 3 Right-click your MediaAccess Gateway (displayed as Technicolor TGXXX). 4 If you are currently: Connected to the Internet, click Disable to disconnect from the Internet. -
Page 82: Configuring Upnp On The Mediaaccess Gateway
9 NETWORK SERVICES 3 The Network Connections window appears; 4 If you right-click the Internet Connection icon, you can connect/disconnect your connection to the Internet. Disabling this feature To prevent that users can connect/disconnect you can enable Extended Security. This feature is enabled by default. For more information, see “9.1.3 Configuring UPnP on the MediaAccess Gateway”... - Page 83 9 NETWORK SERVICES 9.1.3 Configuring UPnP on the MediaAccess Gateway Introduction On the MediaAccess Gateway GUI you can: Enable/Disable UPnP. Enable/Disable Extended Security. Enable/Disable UPnP Proceed as follows: 1 Browse to the MediaAccess Gateway GUI. For more information, see “Accessing the MediaAccess Gateway GUI”...
-
Page 84: Installing Upnp On Windows Xp
9 NETWORK SERVICES 9.1.4 Installing UPnP on Windows XP Adding UPnP If you are running Microsoft Windows XP, it is recommended to add the UPnP component to your system. Proceed as follows: 1 In the Start menu, click (Settings >) Control Panel. 2 The Control Panel window appears. - Page 85 9 NETWORK SERVICES 2 Select (Settings >) Control Panel > Add or Remove Programs. 3 In the Add or Remove Programs window, click Add/Remove Windows Components. 4 The Windows Components Wizard appears: Select Networking Services in the Components list and click Details. 5 The Networking Services window appears: Select Internet Gateway Device Discovery and Control Client and click OK.
-
Page 86: Assigning A Service (Http, Ftp
9 NETWORK SERVICES 9.2 Assigning a service (HTTP, FTP,...) to a Computer Introduction The MediaAccess Gateway allows you to use one Internet connection for multiple computers. This means that all your computers share one public IP address, as if only one computer were connected to the outside world. Issue When the MediaAccess Gateway receives an incoming message, the MediaAccess Gateway has to decide to which computer it has to send this message. - Page 87 9 NETWORK SERVICES Assign a game or application to a local networking device If you assign a game or application to a local networking device, you will basically tell the MediaAccess Gateway that if it receives requests for a specific game or application, it has to forward these messages to a specific computer. Proceed as follows to do so: 1 Browse to the MediaAccess Gateway GUI.
-
Page 88: Dynamic Dns
9 NETWORK SERVICES 9.3 Dynamic DNS Introduction The Dynamic DNS service allows you to assign a dynamic DNS host name (for example mywebpage.dyndns.org) to a broadband connection even if it is using a dynamic IP address. As soon as the device gets a new IP address, the dynamic DNS server updates its entry to the new IP address. -
Page 89: Network Time Server
Proceed as follows: 1 Browse to the MediaAccess Gateway GUI. For more information, see “Accessing the MediaAccess Gateway GUI” on page 2 On the Technicolor Gateway menu, click Configuration. 3 The System Configuration page appears. On the Navigation bar, click Configure. - Page 90 9 NETWORK SERVICES Time Zone: Select your time zone from this list. Summer Time: Select Summer Time if you want the clock to follow daylight saving time. In the Time Server box, type the address of the time server of your choice (for example: pool.ntp.org). You can ...
-
Page 91: Internet Security
10 INTERNET SECURITY 10 Internet Security Overview The MediaAccess Gateway offers various options to secure your network and network connection: Topic Page 10.1 Parental Control 10.2 Firewall 10.3 Access Control 10.4 Wireless Time Control DMS-CTC-20120510-0000 v1.0... -
Page 92: Parental Control
10 INTERNET SECURITY 10.1 Parental Control Introduction The MediaAccess Gateway allows you to deny access to specific web sites. Access Denied page When a user tries to access a page that is being blocked, the following page is displayed: Address-based filtering With address-based filtering (or URL-filtering) you can block web sites based on their address (for example www.porn.com). - Page 93 10 INTERNET SECURITY Option 1: content-based filter (combined with the address-based filter) If you want to use the content-based filtering: 1 Browse to the MediaAccess Gateway GUI. For more information, see “Accessing the MediaAccess Gateway GUI” on page 2 On the Toolbox menu, click Parental Control. 3 On the Navigation bar, click Configure.
-
Page 94: Configuring Content-Based Filtering
10 INTERNET SECURITY 10.1.1 Configuring Content-based Filtering Requirements Content-based filtering must be activated on your MediaAccess Gateway. For more information, see “Activating content-based filtering” on page Accessing the configuration page Proceed as follows: 1 Browse to the MediaAccess Gateway GUI. For more information, see “Accessing the MediaAccess Gateway GUI”... -
Page 95: Adding Rules For Address-Based Filtering
10 INTERNET SECURITY 10.1.2 Adding Rules for Address-Based Filtering Introduction Address-based filtering has a higher priority than content-based filtering. This means that when you are blocking a specific category, you can still access a specific site if you allow it in the address-based filter. Example If you block content from the Finance / Investment category and allow access to netbanking.mybank.com, netbanking.mybank.com will still be accessible. - Page 96 10 INTERNET SECURITY 5 Click Redirect in the Action list. 6 Type the URL of the Web site you want to redirect to (for example “mycompany.com/internetpolicy.htm”) in the Redirect box. 7 Click Add. Redirect all web sites Proceed as follows: 1 Browse to the MediaAccess Gateway GUI.
-
Page 97: Firewall
10 INTERNET SECURITY 10.2 Firewall Introduction The MediaAccess Gateway comes with an integrated firewall that helps you protect your network from attacks from the Internet. This firewall has a number of predefined levels to allow you to adjusted the firewall to your needs. The Firewall is disabled by default. - Page 98 10 INTERNET SECURITY The Source Interface and IP Address (range). Use Any as IP address in case all traffic for the interface should be parsed. Or you can type a User-defined IP address (range). The Destination Interface and IP Address (range) ...
-
Page 99: Access Control
10 INTERNET SECURITY 10.3 Access Control Introduction Access Control allows you to create access schedules for Internet access. By default, all devices have constant access to the Internet. Access Control allows you to create exceptions on this rule by adding an access schedule for devices. You can define two schedules for each device: One schedule for weekdays (Monday until Friday) ... -
Page 100: Access Control
10 INTERNET SECURITY 5 The Device Access Editor page appears. Select the hours for which you want to allow Internet access. For example, if you select 06 this means that access is allowed from 6:00 until 6:59. 6 Click Apply. 7 The schedule is now active. -
Page 101: Wireless Time Control
For more information, see “9.4 Network Time Server” on page Procedure 1 Browse to the Technicolor GUI. For more information, see “4.1 MediaAccess Gateway GUI” on page 2 On the Home Network, click Access Control. 3 The Access Control page appears. In the Pick a task list, click Wireless Time Control. -
Page 102: Support
Introduction This chapter suggests solutions for issues that you may encounter while installing, configuring or using your MediaAccess Gateway. If the suggestions do not resolve the problem, look at the support pages on www.technicolor.com or contact your service provider. Topics... -
Page 103: Setup Troubleshooting
11 SUPPORT 11.1 Setup Troubleshooting Introduction If you have trouble to install your MediaAccess Gateway with the Setup CD, try the suggested solutions in this section. The Setup CD does not start automatically If your computer runs: Microsoft Windows 7 and Vista: ... -
Page 104: General Mediaaccess Gateway Troubleshooting
11 SUPPORT 11.2 General MediaAccess Gateway Troubleshooting None of the LEDs light up (MediaAccess Gateway does not work) Make sure that: The MediaAccess Gateway is plugged into a power socket outlet. You are using the correct power supply for your MediaAccess Gateway device. ... -
Page 105: Wired Connection Troubleshooting
11 SUPPORT 11.3 Wired Connection Troubleshooting Ethernet LED does not light up Make sure that: The Ethernet cable is securely connected to the Ethernet port on your MediaAccess Gateway and your computer. You are using the correct cable type for your Ethernet equipment, that is at least UTP CAT5 with RJ-45 connectors. ... -
Page 106: Wireless Connection Troubleshooting
11 SUPPORT 11.4 Wireless Connection Troubleshooting No Wireless Connectivity Try the following: Make sure that the wireless client adapter is enabled (message like “radio on”). Make sure that the wireless client is configured for the correct wireless settings (Network Name, security settings). ... -
Page 107: Voice Over Ip Troubleshooting
11 SUPPORT 11.5 Voice over IP Troubleshooting Introduction If you cannot make or receive any phone calls via your MediaAccess Gateway, try the suggestions in the following sections. Calling over VoIP If you have problems calling via VoIP, check whether: Your phone is correctly connected to the MediaAccess Gateway. -
Page 108: Content Sharing Troubleshooting
11 SUPPORT 11.6 Content Sharing Troubleshooting Getting the IP address of your USB storage device The MediaAccess Gateway always uses the highest available address in your DHCP pool. When using the default settings this will be 192.168.1.253. You can always check the IP address as follows: 1 Browse to the MediaAccess Gateway GUI. -
Page 109: Reset To Factory Defaults
“Accessing the MediaAccess Gateway GUI” on page 2 On the Technicolor Gateway menu, click Configuration. 3 In the Pick a task list, click Reset my Technicolor Gateway. 4 The MediaAccess Gateway restores the initial configuration and restarts. 5 The MediaAccess Gateway returns to the MediaAccess Gateway home page (unless the IP address of your computer is not in the same subnet as the default IP address of the MediaAccess Gateway, being 192.168.1.254). - Page 110 11 SUPPORT 3 The MediaAccess Gateway restarts. Your system administrator may have disabled the physical reset button of the MediaAccess Gateway. In this case, a hardware reset to defaults is not possible. DMS-CTC-20120510-0000 v1.0...
- Page 111 TECHNICOLOR DELIVERY TECHNOLOGIES BELGIUM NV Prins Boudewijnlaan 47 2650 Edegem Belgium Copyright 2012 Technicolor. All rights reserved. www.technicolor.com All tradenames referenced are service marks, trademarks, or registered trademarks of their respective companies. Specifications subject to change without notice. DMS-CTC-20120510-0000 v1.0...
- Page 112 Safety Instructions and Regulatory Notices Read this document prior to installation! Consignes de Sécurité et Informations Réglementaires Lisez ce document avant d’effectuer l’installation! Sicherheitshinweise und Zulassungsbestimmungen Liest dieses Dokument vor Installation! Instrucciones de Seguridad e Información Sobre Regulaciones Lea este documento antes de proceder a la instalación! Instruções de Segurança e Informações Sobre Normas Leia este documento antes de iniciar a instalaçio! Precauzioni di Sicurezza e Informazioni Sulla Normativa...
-
Page 113: Safety Instructions And Regulatory Notices
relating to the equipment. Such acts not expressly approved by Technicolor will result in the loss of product warranty and may invalidate the user's authority to operate this equipment in accordance with FCC Rules. Technicolor disclaims all responsibility in the event of use that does not comply with the present instructions. - Page 114 Environmental information WEEE directive This symbol means that your inoperative electronic appliance must be collected separately and not mixed with the household waste. T he European Union has implemented a specific collection and recycling system for which producers are responsible. This appliance has been designed and manufactured with high quality materials and components that can be recycled and reused.
- Page 115 Water and moisture Do not use this product near water, for example near a bathtub, washbowl, kitchen sink, laundry tub, in a wet basement or near a swimming pool. Transition of the product from a cold environment to a hot one may cause condensation on some of its internal parts.
- Page 116 Telephone cable CAUTION To reduce the risk of fire, use only No 26 AWG wire size or larger telecommunication line cord. Connect the telecommunication line cord only in the PSTN, FXO, DSL, ADSL, SHDSL, VDSL or Line port of the product.
-
Page 117: Regulatory Information
(e.g. airports), you are encouraged to ask for authorization to use this device prior to turning on the equipment. Technicolor is not responsible for any radio or television interference caused by unauthorized modification of the device, or the substitution or attachment of connecting cables and equipment other than specified by Technicolor. The correction of interference caused by such unauthorized modification, substitution or attachment will be the responsibility of the user. - Page 118 North-America - Canada Notification of Canadian Radio Frequency Interference Statement This Class B digital apparatus complies with Canadian ICES-003. NOTICE: This product meets the applicable Industry Canada technical specifications. NOTICE: The ringer Equivalence Number (REN) for this terminal equipment is 0.1. The REN is an indication of the maximum number of devices allowed to be connected to a telephone interface.
- Page 119 This equipment complies with Part 68 of the FCC Rules. The customer information required for Telephone Terminal Equipment ("TTE") approved for connection to the Public Switched Telephone Network ("PSTN"), pursuant to 47 CFR §68.218(b)(1) can be found at www.technicolor.com. RF-Exposure Statement...
-
Page 120: Consignes De Sécurité Et Informations Réglementaires
de performance) quelle que soit la source d'information. Ces actes, réalisés sans l'accord explicite de Technicolor, entraînent la perte de la garantie du produit et enlèvent à l'utilisateur le droit d'employer l'équipement. Technicolor rejette toute responsabilité en cas d'utilisation de l'équipement non conforme aux présentes instructions. - Page 121 Environnement Directive DEEE (WEEE) Ce symbole signifie que votre appareil électronique hors d'usage doit être collecté séparément et non jeté avec les déchets ménagers. Dans ce but, l'Union Européenne a institué un système de collecte et de recyclage spécifique dont les producteurs ont la responsabilité. Cet appareil a été...
- Page 122 Nettoyage Débranchez l'appareil de la prise murale et de l'ordinateur avant de le nettoyer. N'utilisez pas de détergents liquides ou d'aérosols. Nettoyez-le avec un chiffon humide. Eau et humidité N'utilisez pas ce produit à proximité d'une arrivée d'eau, par exemple près d'une baignoire, d'un lavabo, d'un évier, d'une machine à...
- Page 123 ISDN Avertissement ! Pour le Canada : N'utilisez pas le port ISDN et n'essayez jamais de connecter ce port au réseau. L'appareil doit être connecté à un port USB identifié qui réponde aux besoins d'une source à puissance limitée. Câble téléphonique ATTENTION Pour réduire les risques d'incendie, utilisez uniquement des conducteurs de télécommunications 26 AWG ou de section supérieure.
- Page 124 Technicolor n’est pas responsable des interférences avec les postes de radio ou de télévision susceptibles de survenir à la suite d’une modification non autorisée de l’appareil ou du remplacement ou de la connexion de câbles et d’équipements non agréés par Technicolor.
- Page 125 Vous pouvez trouver la déclaration de conformité sur le site www.technicolor.com. Dans le cas où ce produit est équipé d'un récepteur sans fil IEEE802.11b/IEEE802.11g/IEEE802.11n: son usage est limité à l'intérieur d’un bâtiment. il est conforme aux restrictions et limites telles que définies par la recommandation (1999/519/CE) du conseil ...
-
Page 126: Sicherheitshinweise Und Zulassungsbestimmungen
Vorschriften von Wi-Fi®-Alliance Wi-Fi® CERTIFIED™ (zertifiziert) wurden. Richtlinien Sofern nicht ausdrücklich und eindeutig in schriftlicher Form von Technicolor erlaubt, ist es nicht gestattet: das Gerät zu demontieren, seinen Inhalt auseinanderzunehmen, die Betriebsweise oder Funktionalität nachzubauen, nachzuempfinden oder auf eine andere Weise zu analysieren, oder zu versuchen, den Quellcode (oder die zu Grunde liegenden Ideen, Algorithmen, Strukturen oder Organisationen) vom Gerät,... - Page 127 Umweltschutzinformationen WEEE-Richtlinie Dieses Symbol bedeutet, dass Ihr nicht mehr betriebsfähiges Elektrogerät separat gesammelt wird und nicht mit dem Hausmüll entsorgt werden darf. Die Europäische Union hat diesbezüglich ein Sammel- und Recyclingsystem entworfen, in dem die Hersteller auch zu Entsorgern werden. Dieses Gerät wurde mit hochwertigen Materialen und Komponenten gebaut, die recycelt und wiederverwertet werden können.
- Page 128 Wasser und Feuchtigkeit Verwenden Sie das Gerät nicht in der Nähe von Wasser, wie beispielsweise einer Badewanne, Wasserschüssel, Spüle, einer Waschmaschine, in einem feuchten Keller oder in der Nähe eines Schwimmbeckens. Beim Transport von einer kalten in eine sehr warme Umgebung kann sich im Inneren des Geräts Kondenswasser bilden. Lassen Sie das Gerät von selbst trocknen, ehe Sie es einschalten.
- Page 129 Telefonkabel ACHTUNG: Um das Brandrisiko zu minimieren, sollten Sie nur Kabel des Typs 26 AWG oder noch leistungsfähigere Telefonkabel verwenden. Schließen Sie das Telefonkabel nur an die Steckbuchsen PSTN, FXO, DSL, ADSL, SHDSL, VDSL, oder Line, des Geräts an. Stecken Sie das Telefonkabel niemals in andere Anschlüsse am Gerät ein. Befolgen Sie die Anweisungen zum anschließen des Produktes in der gleichen Reihenfolge wie angegeben im Installationshandbuch.
- Page 130 Technicolor ist nicht verantwortlich für Radio- oder Fernsehinterferenzen aufgrund nicht autorisierter Veränderung des Gerätes oder des Austauschs oder Anbringens von Anschlusskabeln und Zubehör, die nicht von Technicolor spezifiziert wurden. Die Korrektur einer durch eine solche nicht autorisierte Veränderung, Austausch oder Anbringung ausgelöste Interferenz unterliegt der Verantwortung des Benutzers.
- Page 131 Verordnung (EG) Nr. 1275/2008 der Kommission vom 17. Dezember 2008 zur Durchführung der Richtlinie 2005/ 32/EG des Europäischen Parlaments und des Rates im Hinblick auf die Festlegung von Ökodesign-Anforderungen an den Stromverbrauch elektrischer und elektronischer Haushalts- und Bürogeräte im Bereitschafts- und im Aus- Zustand.
-
Page 132: Instrucciones De Seguridad E Información Sobre Regulaciones
(ni las ideas, algoritmos, estructura u organización subyacentes) del equipo, o de alguna otra información proporcionada por Technicolor, excepto en los términos en que esta restricción sea aplicada por las leyes competentes;... - Page 133 Technicolor renuncia a todo tipo de responsabilidad en caso de utilización que no se ajuste a lo expuesto en estas instrucciones. Información medioambiental Directiva RAEE (WEEE) Este símbolo indica que el aparato eléctrico fuera de uso se debe desechar de forma independiente y nunca junto a los residuos domésticos.
- Page 134 Limpieza Desconecte éste producto del ordenador antes de limpiar. No emplee limpiadores líquidos o en aerosol. Utilice un paño húmedo para la limpieza. Agua y humedad No utilice este producto cerca del agua, por ejemplo, cerca de una bañera, lavabo, fregadero de cocina, lavadero, en un suelo húmedo o cerca de una piscina.
- Page 135 Cable del teléfono PRECAUCIÓN: Para reducir el riesgo de incendio, utilice únicamente un cable de línea de comunicaciones de tamaño nº 26 AWG o mayor. Conecte el cable de línea de comunicaciones únicamente en el receptáculo PSTN, FXO, DSL, ADSL, SHDSL, VDSL, o Líne del producto.
- Page 136 (por ejemplo, aeropuertos), le instamos a que pida autorización para utilizar este dispositivo antes de activar el equipo. Technicolor no se responsabiliza de ninguna interferencia de radio o televisión ocasionada por la modificación no autorizada del dispositivo, ni por la sustitución o conexión de cables de conexión o equipo distintos de los especificados por Technicolor.
- Page 137 Reglamento (CE) n o 278/2009 de la Comisión, de 6 de abril de 2009 , por el que se desarrolla la Directiva 2005/ 32/CE del Parlamento Europeo y del Consejo en lo concerniente a los requisitos de diseño ecológico aplicables a la eficiencia media en activo de las fuentes de alimentación externas y a su consumo de energía eléctrica durante el funcionamiento en vacío.
-
Page 138: Instruções De Segurança E Informações Sobre Normas
qualquer fonte relacionada ao equipamento. Tais atos não autorizados expressamente pela Technicolor resultarão na perda da garantia do produto e na proibição do uso deste equipamento por parte do usuário. A Technicolor estará isenta de toda responsabilidade, no caso de uso incompatível com as instruções atuais. - Page 139 Informações ambientais Directriz REEE (WEEE) Este símbolo significa que, em caso do seu equipamento ficar inutilizado, deverá ser colectado em separado do lixo doméstico. A união Europeia implementou um sistema específico de colecta e reciclagem, pelo o qual os fabricantes são responsáveis. Este equipamento foi desenhado e manufacturado com materiais e componentes de alta qualidade que poderão ser reciclados e usados.
- Page 140 Água e umidade Não use este produto perto de água, por exemplo, perto de uma banheira, pias, tanque, em uma área molhada ou perto de uma piscina. A transição do produto de um ambiente frio para um ambiente quente pode gerar condensação em algumas de suas partes internas.
- Page 141 Cabo telefônico CUIDADO Para reduzir o risco de incêndio, use somente o tamanho de fio Nº 26 AWG ou cabo maior de linha de telecomunicação. Ligue o cabo da linha de telecomunicação somente no receptáculo PSTN, FXO, DSL, ADSL, SHDSL, VDSL, ou Line do produto.
- Page 142 (em aeroportos, por exemplo), procure pedir autorização de uso deste dispositivo para ligar o equipamento. Technicolor não se responsabiliza por qualquer interferência de rádio ou televisão causada por modificações não autorizadas feitas ao dispositivo, nem pela substituição ou pela inserção dos cabos do equipamento de maneira diferente da especificada pelo Technicolor.
- Page 143 Regulamento (CE) n. o 1275/2008 da Comissão, de 17 de Dezembro de 2008 , que dá execução à Directiva 2005/ 32/CE do Parlamento Europeu e do Conselho no que respeita aos requisitos de concepção ecológica para o consumo de energia do equipamento eléctrico e electrónico doméstico e de escritório nos estados de vigília e de desactivação.
-
Page 144: Precauzioni Di Sicurezza E Informazioni Sulla Normativa
"Wi-Fi® CERTIFIED™", definita dalla Wi-Fi® Alliance. Direttiva Salvo espressamente e precedentemente approvato da Technicolor per iscritto e nei limiti previsti dalle locali normative vigenti in materia, è vietato: disassemblare, decompilare, decodificare, analizzare o altrimenti esaminare l'apparecchiatura, il suo contenuto, ... - Page 145 Informazioni sulla protezione ambientale Direttiva RAEE (WEEE) Questo simbolo significa che il vostro apparecchio elettronico fuori uso non deve essere gettato con i normali rifiuti casalinghi, ma smaltito separatamente. A questo scopo, l'Unione Europea ha istituito un sistema di raccolta e riciclaggio specifici la cui responsabilità è affidata ai produttori. Questo apparecchio è...
- Page 146 Acqua e umidità Non utilizzare il prodotto in prossimità di acqua, ad esempio vicino a una vasca, un lavandino, un lavello, in uno scantinato umido o vicino a una piscina. Il passaggio del prodotto da un ambiente freddo a uno caldo potrebbe causare la formazione di condensa su alcuni componenti interni.
- Page 147 Seguire la procedura relativa alla connessione dei cavi al prodotto nella stessa sequenza indicata dal guida d'installazione. Ripartitore centrale / filtri distribuiti (se disponibili) Se sulla stessa linea è richiesto il servizio telefonico, per garantire prestazioni DSL ottimali è necessario installare un ripartitore centrale oppure uno o più...
- Page 148 Technicolor. L'eliminazione delle interferenze causate da tali modifiche, sostituzioni o collegamenti non autorizzati sarà di responsabilità dell'utente. Technicolor e i relativi rivenditori o distributori autorizzati non potranno essere ritenuti responsabili per danni o violazioni di norme di legge causati dalla mancata osservanza di queste indicazioni.
-
Page 149: Säkerhetsföreskrifter Och -Information
Dylika åtgärder, som inte uttryckligen godkänts av Technicolor, kommer att innebära förverkande av produktgaranti samt användarens rätt att använda utrustningen. Technicolor frånskriver sig allt ansvar i händelse av användning på ett sätt som inte överensstämmer med aktuella föreskrifter. - Page 150 Miljöinformation WEEE-direktiv Denna symbol anger att din obrukbara elektroniska apparat ska kasseras separat och inte kastas i hushållsavfallet. Därför har Europeiska Unionen inrättat ett särskilt i uppsamlingssystem för vilket tillverkarna är ansvariga. Denna apparat har utformats och tillverkats av material och komponenter av hög kvalitet som kan återvinnas och komma till användning på...
- Page 151 Vatten och fukt Använd inte produkten i närheten av vatten, såsom vid badkar, handfat, diskbänk, tvättho, fuktig källare eller simbassäng. Förflyttning av produkten från en kall miljö till en varm kan orsaka kondens på vissa invändiga delar. Låt produkten självtorka innan den startas igen. Gränssnittsklassificering De externa gränssnitten på...
- Page 152 Central linjedelare/fördelningsfilter (om sådant behövs) Om telefonen ska användas på samma linje, krävs installation av en centraldelare eller ett distributionsfilter för maximala DSL-prestanda. Installationen måste utföras av kvalificerad servicepersonal, beroende på vilken typ av DSL-konfigurering och delare/ filter som används. Kontakta ditt telebolag eller din DSL-leverantör för vidare instruktioner. Åtkomst Strömadaptern fungerar som frånkopplingsenhet.
- Page 153 (t.ex. flygplatser) uppmanas du att fråga om lov innan du slår på utrustningen. Technicolor är inte ansvarig för radio- eller televisionsstörning som orsakas av obehörig ändring av enheten, eller av att du bytt ut eller kopplat in anslutningskablar och utrustning, annat än vad som specificerats av Technicolor. Korrigering av störningen som orsakats av obehörig ändring, obehörigt utbyte eller tillägg är användarens ansvar.
-
Page 154: Veiligheidsvoorschriften En Regelgevingsinformatie
Deze handelingen die niet uitdrukkelijk zijn goedgekeurd door Technicolor leiden tot verlies van de garantie en kunnen het recht van de gebruiker om deze apparatuur te gebruiken ongeldig maken. - Page 155 Informatie inzake milieuzorg AEEA-richtlijn (WEEE) Dit symbool betekent dat het product, eens afgedankt, gescheiden moet worden ingezameld en NIET samen met het huishoudelijk afval mag worden verwerkt. De Europese Unie heeft hiervoor een inzamel- en recyclagesysteem opgelegd waarvoor de verantwoordelijkheid bij de fabrikant ligt. Dit product is ontwikkeld en vervaardigd met gebruik van hoogwaardige materialen en componenten die kunnen worden gerecycleerd en herbruikt.
- Page 156 Water en vocht Gebruik dit product niet in de buurt van water, bijvoorbeeld een bad, wastafel, aanrecht, wasbak, in een natte kelder of bij een zwembad. Als u het product van een koude naar een warme omgeving verplaatst, kan condensatie worden gevormd op bepaalde interne onderdelen.
- Page 157 Centrale splitter / distributiefilter(s) (indien van toepassing) Als u uw telefoon via dezelfde lijn wilt gebruiken, moet voor optimale DSL-prestaties een centrale splitter of distributiefilter(s) worden geïnstalleerd. Afhankelijk van de DSL-configuratie en het type splitter of filter moet de installatie door een erkende onderhoudstechnicus worden uitgevoerd.
- Page 158 Technicolor. Het is de verantwoordelijkheid van de gebruiker om zorg te dragen voor het opheffen van de storing die wordt veroorzaakt door dergelijk ongeautoriseerde aanpassingen, vervangingen of aansluitingen.
- Page 159 *DSL3681883B* DSL3681883B THOMSON TELECOM BELGIUM NV Prins Boudewijnlaan 47 Copyright 2011 Technicolor. All rights reserved. 2650 Edegem All tradenames referenced are service marks, trademarks, Belgium or registered trademarks of their respective companies. Specifications subject to change without notice. www.technicolor.com E-DOC-SAF-20100729-0000 v3.0.