Table of Contents
Advertisement
Quick Links
Advertisement
Table of Contents
Troubleshooting

Related Manuals for Oki 56801


Summary of Contents for Oki 56801
-
Page 2: Table Of Contents
Changing Answering Mode ......25 Fax Machine Identification ......25 TSI/CSI...25... - Page 3 Canceling ITU Bulletin Polling Transmission ... 50 Printing Bulletin Messages ... 50 Polling Reception (Dialing Another Fax Machine to Request Documents) ... 51 Dual Access ........51 While Sending Faxes...
- Page 4 Reading Print Counters ... 73 Shipping the Fax Machine ......73 Problem Checklist ....... . 74 I-Fax.
- Page 5 I-Fax Network Set Up......83 Identifying Current Settings on Fax Machine ... 83 Print the Configuration Report ...
- Page 6 Warranty, Regulatory, and Safety Information ..102 Limited Warranty: U.S. & Canada ... 102 Service and Support: U.S. & Canada... 103 Oki Data Service Providers: U.S. & Canada ... 103 Oki Data Contact Locations: U.S. & Canada ... 103 United States ... 103 Canada ...
-
Page 7: Notes And Disclaimer
Directives 89/336/EEC and 73/23/EEC on the approximation of the laws of the member states relating to electromagnetic compatibility and low voltage. © 2003 Oki Data Americas. All rights reserved. Energy Star is a trademark of the United States Environmental Protection Agency. -
Page 8: Safety
• Disconnect the fax machine before you clean it. DO NOT use liquid or aerosol cleaners to clean the fax machine. • Place your fax machine on a firm, solid surface. If you place the fax machine on something unsteady, it may fall and become damaged or injure someone. -
Page 9: Operation & Maintenance
• Do not connect your fax machine to a power source that is used by other equipment producing electrical noise (i.e., air conditioners, etc.). • Leave electronic adjustments to authorized service personnel. • The LINE port connects your fax machine to a standard telephone line. -
Page 10: Toner Cartridge & Image Drum Handling
• Always hold the image drum unit by the ends - never by the middle. Never touch the green drum inside the image drum unit. • To avoid damage to the image drum unit, always use OKI toner cartridges. • Exercise care when removing the toner cartridge. Do not let it touch your clothing or porous materials. -
Page 11: Introduction
• Your fax machine can also make up to 99 sorted copies of an original document using standard weight (75 g/m paper. -
Page 12: Safety Instructions
Safety Instructions This machine has been carefully designed to provide years of safe, reliable performance. As with all electrical equipment, however, there are a few basic precautions that should be taken to avoid personal injury or damaging the machine: • Read this guide carefully and save it for future reference. •... -
Page 13: Product Options
Second Paper Cassette The second paper cassette option adds an additional 500 pages of paper capacity to your fax machine. When the main paper cassette runs out of paper, your fax machine automatically switches to the second paper cassette to continue printing received faxes or copies. -
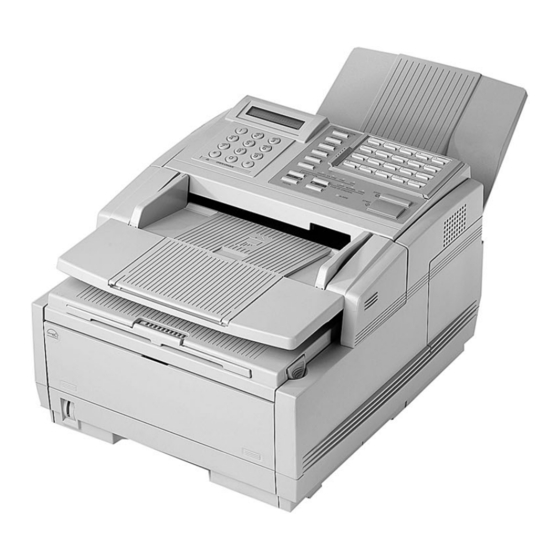
Page 14: Component Identification
: Covers the copy stacker and holds : Flips out to support longer : Holds copies or received faxes. : The panel on the front of the fax machine : Slide this tray out to help : Holds up to 250 sheets of paper. - Page 15 : Terminals for connecting an external handset, external telephone, or answering machine to the fax machine. LINE Terminal : Terminal for connecting the fax machine to a telephone line. Expansion Slot Cover : Open this cover for access to expansion slots for Network interface board and memory...
-
Page 16: Control Panel & Indicators
: If your fax machine is set to pulse dialing, this key allows you to switch the dialing operation of your fax machine from pulse to tone dialing during your current call. - Page 17 (not available in some countries). You will hear the dialing tone through the speaker of your fax machine. : This key sets the answering mode (auto Auto Rec Key...
-
Page 18: One-Touch Dialing
“P” symbol. • Plus Key (One-Touch key 18) : Each fax number you enter or program into your fax machine can be up to 40 digits long. In the case that you need to dial a number which is... -
Page 19: One-Touch Keys For Selecting Functions & Programming
If memory reception mode is set on your fax machine, use this key to print faxes that have been received in memory. Also use this key to print any bulletin polling messages that have been stored in memory for transmission. -
Page 20: Signal Tones
: This key prints to print a cleaning page to clear accumulated toner from your fax machines image drum. Signal Tones Your fax machine emits a number of sounds to inform you of specific conditions. • : This is a short beep that occurs each time Key Select Tone that you press a key. -
Page 21: Installation
Where to install your fax machine – Install your fax machine in a dust-free location away from direct sunlight. – Allow several inches on each side of the fax machine to ensure adequate ventilation. – Make sure there are both power and telephone outlets nearby. -
Page 22: Setting Up
Setting Up Installing Document Stacker 1. Slip the document stacker indents over the tabs on the rear of the unit. You will feel them lock into place. Installing Toner Cartridge 1. Lift the document table into an upright position. 2. Press in the cover release buttons on the sides of the copy stacker until you hear a click. - Page 23 4. Carefully remove the protective sheet from the image drum unit. 5. Place the image drum unit back into your fax machine. To ensure that the image drum is positioned correctly, press down firmly on both of the locations on the image drum marked “PUSH.”...
- Page 24 carefully peel the white plastic tape from the bottom of the toner cartridge. WARNINGs Be careful when handling the toner cartridge. Do not let toner spill onto your clothing or other porous materials. If you experience any problems with toner, refer to the safety instructions at the beginning of this User’s Guide.
-
Page 25: Connecting Telephone Line
Place the handset in the cradle. 4. Feed the telephone cable from the back of the cradle through the cable run located on the back of the fax machine. -
Page 26: Connecting External Telephone Or Answering Machine
Note 2:You will need to have the TAD mode feature turned on for an answering machine to work with your fax machine. See “Setting Answering Mode” on page 23 in Installation. Connecting Power 1. -
Page 27: Paper
(down to 75% of the original length). For example, if a document created originally on legal-size paper is received, your fax machine reduces the received pages to fit on A4 or letter-size paper. Note: Your fax machine is set at the factory to use letter-size paper. - Page 28 2. Adjust the paper guides to the width of your paper. 3. If necessary, lift and adjust the vertical paper guide for the length of your paper. 4. If you are using legal size paper, pull out the extension at the back of the paper cassette.
-
Page 29: Setting Time & Date
You can answer from either an external handset or from an external telephone connected to your fax machine. If you pick up the handset and hear fax machine CNG tones (normally a short peep every three... -
Page 30: Telephone/Fax Auto Switch Mode [T/F]
At the same time, your fax machine monitors the incoming call to check if the call is a fax or voice call. If the incoming call is a fax call, your fax machine will receive the fax and no voice message will be recorded on your answering machine. -
Page 31: Changing Answering Mode
If you use the voice request function while you are trans- mitting to another fax machine and no one is there to answer, your fax machine will automatically send a cover letter with a call back message. - Page 32 4. Press the key. The display shows ID=<SENDER ID> 5. After the display clears, enter the full telephone number of your fax machine using the numeric keypad. 18/+ Note: Use the One-Touch key to enter a “+” character before the number, which is the generally recognized...
-
Page 33: Setting Forwarding Number
9/OP FUNCTION USER PROG. When the answering mode of your fax machine is set to Fax Forwarding [FWD], it will receive fax messages into memory and then automatically resend the faxes to the number which you enter here. 1. Press the Select Function key. -
Page 34: Connecting To A Pbx
PBX. After it dials the prefix digits, your fax machine will wait until it sees that the outside line is available before dialing the rest of the number. -
Page 35: Dial Directories
ENTER (SRCH, OT, A/D, #) LOCATION PROG. Your fax machine has 40 One-Touch keys for rapid dialing. You can store up to two fax numbers with 40 digits on each One- Touch key, a main number and an alternate number. The alternate number is used if the main number is busy or does not answer. -
Page 36: Function Key
To do this Enter Pause (i.e., to wait for Pause One-Touch key long distance or outside lines) Add a switch from pulse to */Tone key tone dialing for part of the call Enter Plus Plus One-Touch key Delete Delete One-Touch key Caps Caps One-Touch key Move the cursor to make... -
Page 37: Chain Dialing
3. Press the Start Programming Auto Dial Numbers Your fax machine has 150 Auto Dial numbers available for Space key until quick, three-digit selection and dialing. For each Auto Dial number, you can enter a fax number up to 40 digits long and a Location ID (name) up to 15 characters long. -
Page 38: Programming Groups
To do this Enter Pause (i.e., to wait for Pause One-Touch key long distance or outside lines) Enter Plus Plus One-Touch key Delete Delete One-Touch key Caps Caps One-Touch key Move the cursor to make YES and NO keys. corrections 6. - Page 39 Each group can contain up to a maximum of all of the One-Touch and Auto Dial locations available on your fax machine. 8/Location 6. When you are finished programming your group, press the key.
-
Page 40: Basic Operation
8.5" (216 mm) or longer than 14.02" (356 mm). Note: If you often have documents longer than 356 mm, your dealer may be able to adjust your fax machine to scan and transmit documents up to 59.06 " (1500 mm) in length. -
Page 41: Sending Faxes To Single Location
2. Neatly stack your documents, and then insert them face down into the document feeder. If necessary, readjust the document guides for a snug fit. 3. Your fax machine will grip the documents, and pull the bottom page into the machine. 4. If necessary, use the Transmit Resolution/YES the resolution of your document. -
Page 42: Search Key Dialing
Redialing If the line is busy or if there is no answer, your fax machine waits and then automatically redials the number. Also, if your fax machine is transmitting and a communication error occurs, it will automatically redial the number and try to send the fax again. -
Page 43: Stopping Transmissions
Your fax machine receives faxes automatically unless the fax machine has been set to the manual receive [TEL] mode. If your fax machine is set to the manual receive [TEL] mode, follow the instructions below. 1. When your telephone or fax machine rings, pick up the telephone handset. -
Page 44: No Paper Reception
No Toner Reception When your fax machine is running low on toner, it displays a message. Rather than risk TONER LOW, REPLACE TONER CART. printing an unreadable message, your fax machine can be set by the dealer to automatically receive faxes into memory. -
Page 45: Rejecting Unsolicited Fax Messages
The closed network option allows you to limit the locations with which your fax machine can communicate. Using this function, you can set your fax machine to refuse to receive any faxes from locations whose telephone numbers are not programmed into your One-Touch keys or Auto Dial numbers. -
Page 46: Making Copies
Refer to “Reports” on page 60 for more information. Making Copies Your fax machine can also be used to make copies. You can make up to 99 copies at one time. Your fax machine automatically makes all copies in FINE mode. STD, EX.FINE and PHOTO mode can be selected manually by pressing the 1. -
Page 47: Using Voice Request
If you are receiving a fax, you can answer a voice request after reception of each page. You will know if the person on the other fax machine has issued a voice request when you hear a warbling tone. If you do not respond in approximately six seconds, the voice request is automatically cancelled. -
Page 48: Answering Voice Request
A call back message is only sent if you have programmed a call back number into your fax machine. Refer to “Setting Fax Machine Identification” on page 25. Answering Voice Request 1. -
Page 49: Delayed Sending Of Faxes
numbers from the numeric keypad. Refer to the instructions below. To Do This Do This One-Touch key Press the One-Touch key. Lift the main One-Touch keypad to access One-Touch keys 21-40. Auto Dial number Press the Auto Dial key, and then enter the 3-digit Auto Dial number on the numeric keypad. -
Page 50: Sending Delayed Faxes
Limitations Number of locations Number of delayed faxes in your fax machine at any one time Fax machine can be used for other transmissions while a delayed fax is waiting to be sent? Sending Delayed Faxes 1. Load your documents. -
Page 51: Confidential Faxes
Ask the person who is receiving the fax to tell you their mailbox number, or ITU sub-address. A receiving fax machine stores the message in a confidential mailbox or ITU sub-address protected by a password and will not print any confidential faxes until the correct password is entered. -
Page 52: Receiving Confidential Faxes
When your fax machine receives a confidential message, it will store the message unprinted in the mailbox (in memory) until you enter a password. Your fax machine can have a maximum of 16 mailboxes. Your fax machine automatically prints a confidential RX report to indicate that a confidential fax has been received and is waiting to be printed. -
Page 53: Changing Password Or Closing Mailbox
FUNCTION PRINT OPERATION. Each time your fax machine receives a confidential fax, it auto- matically prints a confidential reception report telling you which mailbox number received the message. To print a confi- dential fax after your fax machine has received it, follow the instructions below. -
Page 54: Relay Broadcasting
Before programming your fax machine to initiate a relay broad- cast, you will need to obtain the following information from the operator of the fax machine you intend to use as a relay key sta- tion: Note: The designated recipient of the receipt report sent by the... -
Page 55: Polling (Sending Documents Requested By Another Fax)
However, sometimes it is more useful to be able to simply load your document into your fax machine and set it to wait for the another fax machine to call and collect the document. This is called setting your fax machine to be polled, or polling transmission. -
Page 56: Canceling Itu Bulletin Polling Transmission
After your fax machine has been polled and the document has been sent, your document remains in mailbox allowing the document to retrieved more than once. -
Page 57: Polling Reception (Dialing Another Fax Machine To Request Documents)
ITU subaddress on the fax machine you are polling and press Start key. The display changes to LOCATION 5. Select the location of the fax machine you are polling as CANCEL? follows: . Press the To Do This... -
Page 58: While Receiving Faxes
When the first transmission is complete, the next fax is automatically sent. • Continue to receive faxes while earlier messages are being printed if your fax machine has been set to memory reception mode. While Making Copies While your fax machine is making local copies, you can: •... -
Page 59: Customizing Features & Operations
User Function Settings User function settings allow you to customize the general operation of your fax machine. Refer to the list below to determine which settings you may need to change, then refer to “Changing User Function Settings” on page 57 to make the change. - Page 60 If the incoming call is a voice call, your fax machine will ring to tell you to pick up the handset. If you do not answer, your fax machine automatically switches back to facsimile mode to allow the calling party to send a fax.
- Page 61 : This function controls the telephone ringing sound your fax machine makes when a call comes in. When this function is set to off, your fax machine will not ring during incoming calls. When set to on, your fax machine only rings when set to manual receive mode or 11:RING RESPONSE is set to 5 to 20 seconds (except 1 ring).
-
Page 62: Broadcast Mode
22: NO TONER MEM RX : With this function turned on, your fax machine will automatically receive and store messages in its memory when it is low on toner. When turned off, messages will print even if toner is low or empty. Available settings are On and Off. -
Page 63: Changing User Function Settings
26: RESTRICT ACCESS : Select whether or not you want restricted access. Turning on this function renders your restricted ID registration active. Available settings are On and Off. 27: WIDTH REDUCTION : Turning this function on enables you to print received data at a slightly reduced width. 28: TONER SAVE : This function allows you to select whether to use toner saving during facsimile printing. -
Page 64: Dial Parameter Settings
The display changes to CALL FAX NUMBER NOW 7. Using a separate telephone line, immediately dial the number assigned to the fax machine (you must do this within 90 seconds). When your fax machine begins to ring, the display changes to AUTO DETECTING, RING PATTERN 8. -
Page 65: Changing Dial Parameter Settings
PBX to get an outside line. After it dials your dial prefix number, your fax machine pauses to wait for an outside line before dialing the rest of the telephone number. Available settings are On and Off. -
Page 66: Reports
The activity report provides a communication record of your fax machine. Information provided on this report includes: – The total amount of time your fax machine spent sending faxes and the total amount of time spent receiving faxes. – The date, time and duration (S, R-TIME) of each transmission or reception. -
Page 67: Active Memory Files Report
Note: The standard parameter settings are ECHO and RATE. Configuration Report The configuration report provides a list of the current operational settings of your fax machine that can be set by you. The information includes: – The current settings of all your fax machine’s user functions. -
Page 68: Protocol Dump
– The number of pages sent. – The result of the communication. – Service codes. – Depending on the settings of your fax machine, a portion of the page will be printed after the report (see 04:IMAGE IN MCF. on page 53). -
Page 69: Power Outage Report
To access this report, generate a Broadcast. See “Perform a Broadcast Operation” on page 42 for details. Power Outage Report If the electrical power to your fax machine has been interrupted and your fax machine had delayed transmissions or messages received into memory, your fax machine automatically prints a power outage report to alert you that fax messages have been lost. -
Page 70: Codes Used In Reports
PUNIT Indicates a problem with the printing unit. Contact your supplier. R_JAM A paper jam occurred in your fax machine while it was receiving a fax, and your fax machine was unable to receive the entire message in memory. S_JAM A document jam occurred in your fax machine. -
Page 71: Problem Solving
Problem Solving Clearing Document Jams When a document jam occurs, your fax machine beeps and an error message appears in the display. If the jammed document looks like it is positioned straight in your feeder, press the key to try to feed the document the rest of the way through the feeder. -
Page 72: Clearing Printer Paper Jams
Clearing Printer Paper Jams PAPER JAM If your fax machine displays paper cassette still contains paper, there may be one or more sheets of paper jammed in the machine. Clearing paper jams is as follows: Note: If you are experiencing many paper jams, it may be due to the type of paper you are using. - Page 73 by the ends. Never touch the surface of the green drum inside the image drum unit. 4. Lift the image drum unit out and set it aside. Keep it out of direct sunlight and DO NOT touch the green surface of the drum.
- Page 74 8. Slide the paper cassette all the way back into your fax machine. 9. Place the image drum unit back into your fax machine. To ensure that the image drum is positioned correctly, press down firmly on both of the locations on the image drum marked “PUSH”.
-
Page 75: Replacing Toner Cartridge
If the print density becomes low even before your fax machine displays TONER LOW REPLACE TONER CART lens surface of the LED array (see Step 8 ). - Page 76 image drum unit. Dispose of it in the plastic bag you received with your new toner cartridge. 4. Remove the new toner cartridge from its package and gently shake it from side to side to distribute the toner. Then carefully peel the white plastic tape from the bottom of the toner cartridge.
-
Page 77: Replacing Image Drum Unit
Contact your dealer to order one. If the faxes you receive are light or have vertical streaks in them and you are not out of toner, or if your fax machine displays a CHANGE DRUM message, your fax machine needs a new image drum unit. - Page 78 4. Take the new image drum unit out of its package and insert it into your fax machine. To ensure that the image drum is positioned correctly, press down firmly on both of the...
-
Page 79: Reading Print Counters
COUNTER DISPLAY The print counters of your fax machine count the number of pages your fax machine has printed or scanned in its lifetime. If you are experiencing a problem, a service person may ask you to check these counters. -
Page 80: Problem Checklist
If the call is a voice call, your fax machine will ring, but your telephone will remain silent. It is rec- ommended that you only use tel/fax answering mode if your telephone is located near the fax machine. - Page 81 Try sending a fax to another location to check your machine. . This alarm You sent a fax but the image the remote fax machine received was very poor small type, complex illustrations, photos, or was very light or very dark, try changing your Transmit Reso- lution and Type of Original settings (see “Loading...
- Page 82 Transmit Resolution and Type of Original settings. Ask the person to make a copy of the document on their fax machine to ensure that it is working properly. Then ask them to send the fax again. If you still have a problem, try making a copy of a document on your machine to make sure it is working properly.
- Page 83 Check also if their fax machine uses either standard polling transmission or ITU polling transmission. Your fax machine is connected to a PBX and you can . You must enter your access digit before not dial out the telephone number for each number that you dial or program into your machine.
-
Page 84: I-Fax
I-Fax I-Fax, despite its complicated nature, is an easy-to-use feature. The T.37 protocol allows your fax machine to send and receive email over your LAN connection, without ever needing to be hooked up to your computer. Note, if your email server uses authentication, see important information “Authentication -... -
Page 85: What Your I-Fax Machine Can Do
What Your I-Fax Machine Can Do I-Fax is a feature with many capabilities. This unit can: • send and receive faxes via a Public Switched Telephone Network (PSTN) • send and receive faxes via the Internet (over a LAN) • print via a Local Area Network (LAN) (Windows only) •... -
Page 86: Internet Fax Protocols
Internet Fax Protocols TCP/IP SMTP POP3 Internet Fax Transmission General Information To send an Internet Fax message, you need a mail server from which to send email. Please consult your network administrator about the settings listed below, which are required in order to make a connection to the mail server. -
Page 87: Pop Server Address / Name
The machine is ready to receive Internet Fax messages when these settings have been configured. To receive a fax message, the machine will access the server automatically at regular intervals according to the POP Interval Time setting. If there is mail, the machine will print it out automatically. This machine only receives TIFF files and text-format mail. -
Page 88: Header
The conversion to TIFF or PDF and file handling are part of the Internet Faxing process. Note: If the receiver is another OKI I-Fax device, the format must be TIFF as the OKI devices cannot receive PDF. Helpful Hints (I-Fax) -
Page 89: Status Of Server
Internet Faxing will be adversely affected. Backup/Archive (Email Scanning) You can use your fax machine to create digital versions of documents you only have in hardcopy form. 1. To do this, send the document as an Internet Fax to your email address. -
Page 90: I-Fax Nic Options
3. Using the numeric keypad, press . The display will show 5:CONFIGURATION 4. Press . The report will print. I-Fax NIC Options The following lists the available options for setting up and adjusting the Network Interface Card (NIC) functions. To access: SELECT 9/OP FUNCTION... -
Page 91: I-Fax Nic Settings
I-Fax NIC Settings The I-Fax NIC settings can be accessed using the following: SELECT 9/OP FUNCTION 8:I-FAX NIC OPTIONS YES ( ) NO( USER PROG. 1. Press Select Function to enter the menu. 2. Press to enter the programming menu and 9/USER PROG then press keypad I-FAX NIC OPTIONS... -
Page 92: Header Print
SP 0 ‘ & < > Header Print • Settings: TYPE 1, TYPE 2, or OFF • Default: TYPE 1 • OFF: Do not print header • TYPE1: Print SUBJECT/FROM/TO • TYPE2: Print all header information This setting is only valid when the TEXT Print setting is ON. Coding Mode •... -
Page 93: Send File Format
Send File Format • Settings: TIFF or PDF • Default: TIFF This determines whether the format sent is either PDF or TIFF. Note: Oki facsimile machines cannot receive PDF faxes. Send Notification • Settings: ON or OFF. • Default: ON... -
Page 94: Daily
Daily Daily sets the machine to check the mail server once a day. Thus, it is required that the time of day is set for this option. POP INTERVAL POP INTERVAL TIME [DAILY] YES ( ) NO( ) [TIME1] YES ( ) NO( ) POP INTERVAL TIME [__:__] PRG. -
Page 95: Subnetmask
• When 0.0.0.0 is set as the IP address, the DHCP function automatically starts. If a DHCP server is found, an IP address is obtained from the DHCP server. • From then on, an IP address is obtained from the DHCP server each time the power is turned OFF and ON;... -
Page 96: Pop User Id
1. Press the Number keys to insert either text or numbers. Press them repeatedly to enter the character desired. 2. To jump to the next field, use the key. 3. Press the Start key to enter your settings. Restrictions • If DNS has not been set, enter the IP address of the server. The address must include the “.”... -
Page 97: Dns P.srv Address
5. Press the Start key to enter your settings. Restrictions • Up to 16 characters may be entered. • POP USER ID and POP PASSWORD settings in the fax machine must match the POP3 user name already entered in the server. •... -
Page 98: Email Settings
resetting the Network Card to factory settings, all current set- tings are lost. 1. Press Select Function to enter the menu. 2. Press 9/USER PROG to enter the programming menu and then press keypad I-FAX NIC OPTIONS 3. Press to enter I-FAX NIC OPTIONS 4. -
Page 99: Program Group Email Addresses
START key to add or delete it. 5. Each group can contain up to a maximum of all of the One- Touch locations available on your fax machine. 6. When you are finished programming, press display will show 7. To program another group, return to Step 3. If you are... -
Page 100: I-Fax User Interaction
The email address you are sending to. 2: From The email address you would like to appear as the return address. The default is the fax machine’s own programmed email. 3: Subject Enter the subject of the email. If no subject is entered, then “Internet FAX Message from [Sender ID]”... -
Page 101: Email Using Ot Key
Email Using OT Key A document can be sent to an email address (or several email addresses) by pressing pre-programmed one-touch keys, but cannot be sent to recipients with telephone numbers registered on One-Touch keys. 1. Place a document in the machine. 2. -
Page 102: Receiving Email
Receiving Email This fax machine automatically connects to the server to receive mail according to the setting “POP Interval” on page 87. If there is mail on the server, reception will start automatically. If there is more than one mail message, it will receive all the messages and print them out automatically. -
Page 103: I-Fax Troubleshooting
I-Fax Troubleshooting If a communication error occurs, check the service code shown on the Activity Report. SMTP Communication The service code for a SMTP communication is prefixed with the letter E. Error Description 0000 Normal Shutdown 9080 Press stop key E058 Failed SMTP connection E074... -
Page 104: Transmission Troubleshooting
Transmission Troubleshooting Transmission fails; a communication error occurs. • Are the IP ADDRESS, SubNet Mask and Default Gateway settings correct? • Has the SMTP server been configured correctly? • If using DNS, is the DNS server address correct? • Check to make sure that the server is not down. •... -
Page 105: Authentication - Unable To Send Global E-Mails
If this is enabled on the mail server, it will pre- vent the machine from sending any global email, since the Oki T.37 card does not currently support this feature. -
Page 106: Specifications
exempt one IP address from requiring authentication. It can be found by doing a search of Microsoft's Knowledge Base at http://www.microsoft.com. Specifications Category Specifications Type/compatibility Desktop ITU-T G3 transceiver Applicable network PSTN, PBX, LAN, T.37 Transmission Speed Up to 33,600 BPS Automatic fall back Communications Half duplex... -
Page 107: Part Numbers
40755302 2 MB Memory Expansion Kit 40755312 4 MB Memory Expansion Kit 40755322 8 MB Memory Expansion Kit 70029401 2nd Paper Tray Kit (UST-550) 70031801 Handset For the latest product and technical support information, visit the Oki Data website: http://www.okidata.com... -
Page 108: Warranty, Regulatory, And Safety Information
This Limited Warranty extends to the original purchaser only and does not extend to consumable items. Oki Data will, for a period of ninety (90) days from the date of purchase, repair (or replace at its option) on site at the original purchaser’s facility and without charge any defective... -
Page 109: Service And Support: U.s. & Canada
Fax: 1-905-238-4421 Sales and Service Dealers: U.S. & Canada Consult the store location where you purchased your machine, or contact Oki Data for the location of the nearest Authorized Oki Data Service Dealer. Prices and minimum charges may vary. Proof of purchase is required for warranty work. Be sure to retain... -
Page 110: Telephone Support
Material Safety Data Sheet MSDS#58093701 Product Identification and Use OKIFAX 5680 Black Toner, P/N 52106701 For more information, contact Oki Data at 2000 Bishops Gate Blvd., Mount Laurel, NJ, 08054-4620. Emergency Information: Call 1-800-654-3282; US & Canada Only Hazardous Ingredients... - Page 111 CAS# 1333-86-4 OSHA TWA 3.5 mg/m3 ACGIH TLV 3.5 mg/m3 Polypropylene (less than 3% by weight) CAS# 9003-07-0 OSHA TWA 15 mg/m3 for total dust ACGIH TLV 10 mg/m3 for total dust Amorphous Fumed Silica (less than 1% by weight) CAS# 67762-90-7 OSHA PEL 15.0 mg/m3 for total dust ACGIH TLV 10.0 mg/m3 for total dust...
- Page 112 Reactivity Data Stability: Stable Conditions to Avoid: Not available Polymerization: Will not occur Hazardous Decomposition Products: Thermal decomposition may result in release of oxides of carbon and nitrogen. Incompatibility: Avoid exposure to strong oxidizers Toxicological Properties Routes of Entry: Inhalation, Ingestion, Eyes, Skin Effects of Acute Exposure: LD50: Not Available LC50: Not Available...
- Page 113 Hot water makes toner harder to remove. Preparation Date of MSDS Date: March 1, 2003 Prepared by: Oki Data Americas, Inc. Engineering Services Department 2000 Bishops Gate Blvd. Mt. Laurel, NJ 08054-4620 Tel: (856) 235-2600 FAX: (856) 222-5320 http://www.okidata.com...
-
Page 114: Safety Information
• ·Leave electronic adjustments to authorized service person- nel. • ·The LINE terminal connects your fax machine to a standard telephone line. To avoid damage to your telephone system or to the machine, do not plug your fax machine into anything other than a standard RJ-11C jack. -
Page 115: Regulatory Information
Regulatory Information ® Energy Star As an Energy Star Partner, Oki Data has determined that this product meets the Energy Star guidelines for energy efficiency. Year 2000 Compliance This product is Year 2000 Compliant. It contains information... -
Page 116: Federal Communications Commission
7. If trouble is experienced with this equipment, please contact the following for repair and/or warranty information: Oki Data Americas, Inc. 2020 Bishops Gate Blvd Mount Laurel, N.J. 08054 Telephone:(856) 235-2600 or... - Page 117 8. This equipment contains no user serviceable parts. Please contact Oki Data for service. 9. This equipment cannot be used on public coin service provided by the telephone company. Connection to Party Line Service is subject to state tariffs.
-
Page 118: Industry Canada (Ic)
A properly shielded interface cable must be used in order to ensure compliance of this equipment with FCC regulations. Changes or modifications not expressly approved by Oki Data may void your authority to operate this device. 230/240-Volt Models... -
Page 119: European Union Council Of The European Communities
This OKI apparatus complies with Class B limits for radio interference as specified in the Industry Canada Radio Interference Regulations. 230/240-Volt Models This OKI apparatus complies with the Class A limits for radio interference as specified in the Industry Canada Radio Interference Regulations. European Union Council of the... - Page 120 Mississauga, Ontario, Canada L4W 4M8 Tel: (800) 654-3282 FAX: (905) 238-4427 Oki Data de Mexico, S.A. de C.V., Mariano Escobedo No. 748 - 8 Piso, Col Anzures, e. p. 11590, Mexico, DF Tel: +52 55 5263-8780 FAX: +52 55 5263-8785 Oki Data do Brasil, Ltda.
- Page 121 Index Answering Mode Changing ...25 Setting ...23 Auto Dial Numbers ...31 Broadcast ...42 Canceling Messages Stored In Memory ...38 Chain Dialing ...31 Clearing Document Jams ...65 Clearing Printer Paper Jams ...66 Components ...7 Component Identification ...8 Control Panel & Indicators ...10 Copies, Making ...40 Current Settings, Viewing ...53 Dialing...
- Page 122 Receiving ...96 Sending ...94 Fax Machine Identification Call Back Number ...25 Sender ID ...25 Setting ...25 TSI/CSI ...25 Faxing Confidential Faxes ...45 Creating Confidential Mailbox ...46 Multiple Locations ...42 Sending Delayed Faxes ...44 Sending to Single Location ...35 Forwarding Number, Setting ...27 I-Fax Current Settings ...83...
- Page 123 Options ...7 Paper Loading Paper ...21 Types ...21 Part Numbers Consumables ...101 Options ...101 PBX, Connecting ...28 Polling (Sending Documents Requested by Another Fax) ...49 Power Failures & Memory ...39 Print Memory Reception ...38 Printing Reports ...63 Problem Checklist ...74 Programming Auto Dial ...31 Groups ...32...
- Page 124 Installing External Handset ...19 Installing Toner Cartridge ...16 Settings Current ...53 User Functions ...53 User Functions, Changing ...57 Shipping the Fax Machine ...73 Signal Tones ...14 Specifications ...100 Stopping Transmissions ...37 Time & Date, Setting ...23 Toner Cartridge Replacement ...69 Toner Part Number ...101...