Table of Contents
Advertisement
Quick Links
Advertisement
Table of Contents

Related Manuals for Oki OKIFAX 5300 Plus


Summary of Contents for Oki OKIFAX 5300 Plus
- Page 1 OKIFAX 5300 Plus/5600 Plus Handbook of5356fm.pm6 6/8/98, 5:19 PM...
- Page 2 Mount Laurel, NJ 08054-3405 pubs@okidata.com Visit the Okidata web site: http://www.okidata.com OKIDATA and OKIFAX are registered trademarks of Oki Electric Industry Company, Ltd.; marques déposées de Oki Electric Industry Company, Ltd. OKIDATA — marca registrada Oki Electric Industry Company, Ltd.
- Page 3 Federal Communications Commission Requirements for End Users This device has been granted a registration number by the Federal Communications Commission, under Part 68 rules and regulations for direct connection to the telephone lines. In order to comply with these FCC rules, the following instructions must be carefully read and applicable portions followed completely.
- Page 4 FCC Telephone Consumer Protection Act The Federal Communications Commission Telephone Consumer Protection Act of 1991 makes it unlawful for any person to use a computer or other electronic device to send any message via a telephone fax machine unless such message clearly contains in a margin at the top or bottom of each transmitted page or on the first page of the transmission, the date and time it is sent and an identification of the business or other entity, or other individual...
- Page 5 L’etiquette du Industrie Canada identifie le materiel homologue. Cette etiquette certifie que le materiel est conforme a certaines normes de protection, d’exploitation et de securite des reseaux de telecommunications. Le Ministere n’assure toutfois pas que le materiel fonctionnera a la satisfaction de l’utilisateur. Avant d’installer ce materiel, l’utilisateur doit s’assurer qu’ll est permis de le raccorder aux installations de l’entreprise locale de telecommunication.
- Page 6 Federal Communications Commission Radio Frequency Interference Statement This equipment has been tested and found to comply with the limits for a Class B digital device, pursuant to Part 15 of the FCC rules. These limits are designed to provide reasonable protection against harmful interference in a residential installation.
- Page 7 Safety Installation Hints Install your OKIFAX 5300 Plus/5600 Plus in a dust-free location away from direct sunlight. Do not plug your OKIFAX into a power source shared by equipment which produces electrical noise (i.e., air conditioners, etc.). Leave electronic adjustments to authorized service personnel.
- Page 8 When relocating your OKIFAX, always disconnect the telephone line before disconnecting the power cord, then reconnect the power cord first. This unit is not intended to be used in parallel with any other telephone devices. Toner Cartridge and Image Drum Unit Handling Leave unused toner cartridges and image drum units in their packages until needed.
-
Page 9: Table Of Contents
Direct Access This special section of the Table of Contents points you directly to the things you’re most likely to do with your OKIFAX 5300 Plus/5600 Plus. See the Table of Contents and Index for a complete listing of topics. How to Set or change the Answer mode ... - Page 10 Contents Introduction ... 1 Features ... 1 Product Options ... 2 Component Identification ... 4 What You Should Receive ... 4 Components ... 5 Control Panel ... 7 Control Panel Keys and Indicators ... 8 The One Touch Keypad ... 11 Using the One Touch Keys for Dialing ...
- Page 11 Document Size ... 35 Multiple Page Documents ... 35 Loading Documents ... 36 Sending a Fax to a Single Location ... 37 Search Key Dialing ... 37 Real-Time Dialing ... 38 Redialing ... 38 Confirming Results ... 38 Stopping a Transmission ... 38 Shortcut Fax Number Programming ...
- Page 12 Customizing OKIFAX 5300 Plus/5600 Plus ... 55 Customizing Features and Operations ... 55 Viewing Your Current Settings ... 55 User Function Settings ... 55 User Function Settings List ... 55 Setting Distinctive Ring ... 57 Changing Your User Function Settings ... 60 Dial Parameter Settings ...
- Page 13 Specifications ... 85 Index ... 87 Material Safety Data Sheet ... 93 of5356fm.pm6 6/8/98, 5:19 PM...
-
Page 14: Introduction
Introduction Thank you for purchasing this OKIFAX 5300 Plus or OKIFAX 5600 Plus fax machine. It uses advanced LED technology to transfer faxed and copied images to plain paper quickly and sharply. The optional PC interface allows it to function as a 600 dpi class printer for your computer as well. -
Page 15: Product Options
OKIFAX and whom your OKIFAX can send faxes to. A convenience copy feature that lets you make up to 99 sorted copies of an original document. OKIFAX 5300 Plus Features 15 One Touch keys. 64 Auto Dial numbers. 10 groups. - Page 16 Handset with cradle connects directly to your OKIFAX and works exactly like a telephone. Order Number 70031801. Second Paper Tray adds an additional capacity of 500 sheets. When the main tray runs out, your OKIFAX automatically switches to the second tray for uninter- rupted printing.
-
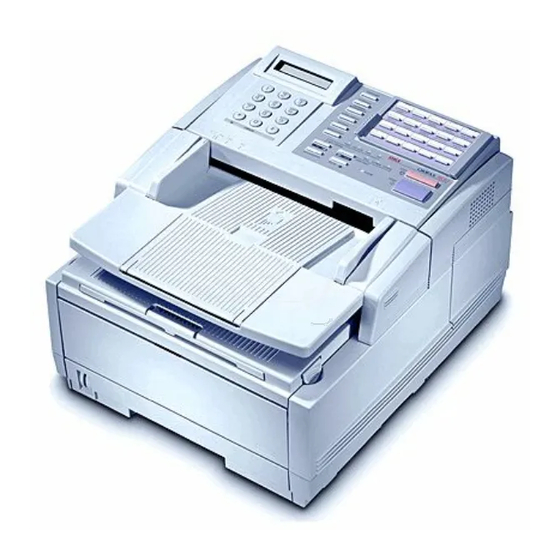
Page 17: Component Identification
Component Identification What You Should Receive Document Stacker Handbook & Quick Start Guide Component Identification Power Cord Telephone Cord Image Drum Unit OKIFAX 5300 Plus/5600 Plus (inside unit) Toner Cartridge... -
Page 18: Components
Components Document Stacker Holds your original documents after they are faxed or copied Display Panel Shows status of machine and faxes in progress. Numeric Keypad Use to enter phone numbers, auto dial numbers, or information programmed into the OKIFAX. Document Guides Adjust these guides to the page width of the documents that are to be copied or faxed. - Page 19 Components Back Cover Open this cover to expose expansion slot to install the optional memory expansion board and PC interface. LINE Jack Jack for connecting to an outside telephone line. TEL 1 Jack TEL 2 Jack Jacks for connecting to an optional handset, external phone, or answering machine.
-
Page 20: Control Panel
Control Panel Introduction... -
Page 21: Control Panel Keys And Indicators
Control Panel Keys and Indicators Display Panel: Refer to this display for instructions and information while your OKIFAX is performing operations or while you are entering information or changing settings. Copy key: After loading a document, press this key to make a copy. - Page 22 If you have an optional telephone handset or external telephone connected to your OKIFAX, you can also use this key to initiate or answer a request for voice communication during a fax communica- tion. Press this key while transmitting to signal the operator at the other fax machine that you want to talk to him or her at the end of your transmission or after reception of any page has been completed.
- Page 23 See page 32 for details. • On the OKIFAX 5300 Plus, the Plus key is One Touch key 13. • On the OKIFAX 5600 Plus, the Plus key is One Touch key 13 and 28.
-
Page 24: The One Touch Keypad
You can also use the Search key to find locations programmed into One Touch keys. One Touch Keys available: • The OKIFAX 5300 Plus has keys 1–15 available. • The OKIFAX 5600 Plus has keys 1– 15 available on the main One Touch panel, and keys 16–30 available beneath the main One Touch panel. - Page 25 memory to the document feeder when preparing to send a fax. Use this key to send a confidential 3/Confidential TX key: document to a mail box (a secure memory storage area) in the receiving fax machine. See page 46. 4/Relay Initiate TX key: Use this key to set up a relayed fax transmission.
-
Page 26: Signal Tones
Signal Tones Your OKIFAX makes a number of sounds to inform you of specific conditions. Key Select tone: This is a short beep that occurs each time you press a key. If you press a wrong or inappropriate key, Error tones: your OKIFAX emits three short beeps. -
Page 27: Installation
50°F (10°C) and 92°F (32°C). Installation Unpacking Before you begin, be sure that all the items listed below are included in your package. OKIFAX 5300 Plus/5600 Plus Toner cartridge (wrapped) Image drum cartridge (inside machine) Power cord Telephone line cord... -
Page 28: Setting Up Your Okifax 5300/5600
Setting Up Your OKIFAX 5300 Plus/5600 Plus Install the Document Stacker Slip the document stacker indents over the tabs on the rear of the unit so that they click into place. Remove the Protective Sheet Lift up the document table. -
Page 29: Install The Toner Cartridge
Replace the image drum cartridge. Install the Toner Cartridge Remove the sponge and discard. Warning: Be c areful when handling the toner cartridge. Do not let toner spill on your clothing or other porous materials. If you experience any problems with toner, see the Safety chapter at the beginning of this handbook. -
Page 30: Connect To The Telephone Line
Close the copy stacker—push down until you hear both sides click into place. Close the document table. Connect to the Telephone Line Insert one end of the telephone cord into the LINE jack in the back of the machine, and the other end into your wall telephone jack. - Page 31 Using the supplied screw, connect the handset cradle to its base. Position the handset cradle on the left side of the OKIFAX. Installation Plug one end of the handset cord into the handset and the other end into the jack on the front of the cradle. Place the handset in the cradle.
-
Page 32: Connecting An External Telephone Or Answering Machine
Insert the end of the cord into the TEL 1 or TEL 2 jack on the back of the OKIFAX. Tel 1, Tel 2 Note: The two TEL jacks are provided to allow you to connect both an external handset and an answering machine. -
Page 33: Answer Mode
Time: 2:35 PM 14:35 [FAX] Loading Paper Your OKIFAX 5300 Plus/5600 Plus can hold up to 250 sheets of standard-weight (20 lb.) paper. For best results, use paper specially made for laser printers or photocopiers. It can use letter, legal, and A4 size paper. -
Page 34: Date
If you are using legal-size paper, pull out the extension at the back of the paper tray. Remove the paper from its wrapper (up to 250 sheets). Note the “print side” notice printed on the label. Fan the paper. Load the paper into the paper tray, print side down. Note: Be sure the paper is under the tabs on the sides of the tray. -
Page 35: Setting The Answering Mode
Setting the Answering Mode The answering mode determines how your OKIFAX handles incoming fax and voice calls. The standby display shows the current answering mode. Answering Mode Options The answering mode you choose depends on how you use your OKIFAX and what telephone equip- ment is connected to it. -
Page 36: Changing The Answering Mode
Memory Receive mode [MEM]: When set to this mode, your OKIFAX stores received faxes in memory and does not print them out immediately. See page 40 for details Fax Forwarding mode [FWD]—OKIFAX 5600 Plus only: this mode, your OKIFAX receives all fax messages into memory, and then automatically resends them to the forwarding number you have programmed into the machine. - Page 37 To program your Fax ID: Press the Select Function key. Press the 9/User Program One Touch key. The display shows 1:FUNC. PROGRAMMING. On the numeric keypad, press 4. The display shows 4:SYSTEM DATA PRG. Press the Yes key. The display shows NO=<TSI/ CSI>, ID=<SENDER ID>.
-
Page 38: Setting The Language
Setting the Language Your OKIFAX comes with two languages in- stalled—English and Spanish, French or Portu- guese, depending on where you bought your unit—which appear on the display and in re- ports. Follow the instructions below to switch languages. Press the Select Function key. Press the 9/User Program One Touch key. -
Page 39: Connecting To A Pbx
Press the Start key to save your entry. Press the Select Function key to finish. Connecting to a PBX A PBX (Private Branch Exchange) is a private tele- phone system used to route internal calls. If you have to dial a prefix (access digit) to get an outside line, then your line is connected to a PBX. -
Page 40: Make Copies
Copying Making Copies You can use your OKIFAX as a stand-alone copier to make up to 99 copies of a document at one time. The default resolution for copies is FINE; you can also use the Yes key to change to a finer resolution before you press the Copy key. -
Page 41: Paper Size
Using the Manual Paper Feeder Your OKIFAX’s manual paper feeder allows you to make copies on a different type of paper than what you normally keep in the paper tray. To make copies using the manual paper feeder, follow the instructions below. - Page 42 Insert a sheet of paper face up. Adjust the guides again to ensure that the paper is straight. Press the Copy key (see the instructions above). If you are making more than one copy, or copying a multipage document, insert additional sheets when the previous sheet is all the way through the machine.
-
Page 43: Faxing: Dial Directories
You can also enter a 16-char- acter Location ID (name) for each One Touch key. The OKIFAX 5300 Plus has 15 locations available on keys 1–15. The OKIFAX 5600 Plus has 30 locations available. -
Page 44: One Touch Parameters
To Do This Enter numbers Numeric keypad (press once) Enter spaces 14/Space One Touch key Enter hyphens (-) Hyphen key Enter pauses (i.e., to wait for 15/Pause One Touch key long distance or outside lines) Add a switch from pulse */Tone key to tone dialing for part of the call... -
Page 45: Chain Dialing
Using the numeric keypad, enter 23. The display shows 23:ONE TOUCH PARAM YES [OT] NO[ ]. Press the One Touch key for the location whose settings you want to change. The display shows ECHO PROTECTION, [OFF]. Press the No key to switch Echo Protection on. Press the Yes key to confirm your selection. -
Page 46: Programming Groups
Auto Dial number you want to program. The numbers available for programming depend on the model you own. Model Auto Dial Numbers Available OKIFAX 5300 Plus 01–64 OKIFAX 5600 Plus 01–99 The display briefly shows NO=<FAX NO.>, ID=<LOCATION ID> (or a previously programmed fax number and location). - Page 47 You can program up to ten groups into your OKIFAX 5300 Plus, and up to 20 groups into your OKIFAX 5600 Plus. The OKIFAX 5300 Plus can have up to 79 locations per group. The OKIFAX 5600 Plus can have up to 129 locations per group.
-
Page 48: Faxing: Basic Operations
Faxing: Basic Operations This chapter explains how to load documents for faxing, how to send and receive faxes, how to use the closed network and voice request features, and how your OKIFAX handles power interruptions. Preparing Documents for Faxing Use the information in this section to make sure your documents scan and fax easily and clearly. -
Page 49: Loading Documents
When loading multiple-page documents, do not load paper thinner than 0.003" (0.08 mm) or thicker than 0.005" (0.13 mm). For single-page documents, do not load paper thinner than 0.002" (0.06 mm) or thicker than 0.006" (0.15 mm). Loading Documents To prevent paper jams and problems during operation, stack your documents neatly, aligning their edges, before loading. -
Page 50: Sending A Fax To A Single Location
If necessary, use the No key to adjust the level of contrast in your document. For most documents, the default NORMAL setting works best. Document Type Contrast to Use Documents with normal contrast NORMAL Documents which are too light LIGHT Documents which are too dark DARK Your documents are now ready for faxing or copying. -
Page 51: Messages On The Display
When selecting locations, press the Search key. The display will show ENTER 1'ST CHAR. Repeatedly press the Search key to look through the entire list of locations in alphabetical order, or locate the letter you want on the numeric keypad, and press that key repeatedly to look through Location IDs beginning with that letter. -
Page 52: Receiving Faxes Manually
Use the following procedure: Load the document. Enter the fax number using the numerical keypad. Press the Copy key. The display shows ONE TOUCH NO.[01]. The number in brackets is the next unpro- grammed One Touch key number. If all the One Touch keys are programmed, the display shows AUTO DIAL NO.[01], with the number of the next unprogrammed Auto Dial number. -
Page 53: Receiving Faxes In Memory
After you receive the fax, a long beep tells you that the transmission was successful. Receiving Faxes in Memory Note: This section does not apply when the OKIFAX is in PC Fax mode. In that case, all faxes are automatically stored on the computer's hard drive, regardless of the conditions explained below. -
Page 54: Power Failures And Memory
Press the Select Function key. Press the 9/User Program One Touch key. The display shows 1:FUNC. PROGRAMMING. Press the Yes key. The display shows FUNCTION NO. [ ]. Using the numeric keypad, enter 08. The display shows 08:CLOSED NETWORK, and the current setting of this function. -
Page 55: To Initiate A Voice Request
Notes: You need to have either the optional handset or an ex- ternal telephone attached to the OKIFAX in order to use the voice request function. You can use the voice request function only when you are using the document feeder to send a fax directly to a single location. -
Page 56: Faxing: Advanced Operations
Note: The OKIFAX 5300 Plus sends from the feeder by default. The OKIFAX 5600 Plus sends from memory by default. To change the default setting, see “Mem./Feeder SW.”, page Sending a Delayed Fax from the Document Feeder Load your documents. -
Page 57: Sending A Delayed Fax From Memory
Using the numeric keypad, enter the time you wish the transmission to begin, in 24-hour format—8:00 is 08:00; 8:00 Press the Yes (OKIFAX 5300 Plus) or BROADCAST/MEMORY TX (OKIFAX 5600 Plus). OKIFAX 5600 Plus: Press the Yes OKIFAX 5300 Plus: Press the No shows BROADCAST/MEMORY TX. -
Page 58: Canceling A Delayed Transmission
10 manually entered numbers. key and go back The OKIFAX 5300 Plus can send a fax to as many as 89 locations. key to delete The OKIFAX 5600 Plus can send a fax to as many as 139 locations. -
Page 59: Sending A Confidential Fax
Sending a Confidential Fax Fax machines are often placed in public places where everyone can look through the received faxes. If you are communicating with another Oki fax-ca- Faxing: Advanced Operations pable unit, you can use the confidential fax fea- ture. -
Page 60: Receiving Confidential Faxes
Creating a Confidentail Mailbox The number of confidential mailboxes you can set up depends on your OKIFAX model: The OKIFAX 5300 Plus can have 8 confidential mailboxes. The OKIFAX 5600 Plus can have 16 confidential mailboxes. -
Page 61: Changing Your Password Or Closing A Mailbox
Refer to the table below. Model Mailbox Numbers OKIFAX 5300 Plus 1–8; enter as 1 digit OKIFAX 5600 Plus 01–16; enter as 2 digits The display asks you to confirm the box number. -
Page 62: Printing A Confidential Message
Two different Oki fax-capable units are involved in transmitting a relay broadcast: the relay initiating station and the relay key station, or hub. Note: At this writing, the OKIFAX 2600 is the only Oki fax machine that can function as a relay key station. Relay Initiating Station... -
Page 63: Relay Key Station
Relay Key Station The relay key station is the Oki fax-capable unit which receives the original fax message and then auto- matically relays or broadcasts the message to other re- mote fax machines. -
Page 64: Polling
where XX is the last list number you entered. - If the list number is correct, go to step 5. - If you want to fax to a different list, press the No key. Then use the numeric keypad to enter the number of the list you want to use. -
Page 65: Polling Documents From Other Fax Machines
confirmation report prints, the display reads SELECT LOCATION. Press Stop to remove documents. Polling Documents from Other Fax Machines With no documents loaded, press the Select Function key. Press the 5/Polling One Touch key. The display shows NO.=<MAIL BOX NO.>. Press the Start key. -
Page 66: Loading A Document
Note: Note: Note: Note: If [CONF] or [POLL] appears, then the box number is Note: already in use as a confidential or bulletin poll mailbox. Press the Yes § key to continue. Using the numeric keypad, enter the 4-digit password you want to use with your mailbox. -
Page 67: What You Can Do While Making Copies
received, the faxes you have loaded will automatically be sent. Continue to receive faxes while earlier received messages are printing, if your OKIFAX is set to receive faxes into memory. What You Can Do While Making Copies While your OKIFAX is making copies, you can: Continue to receive faxes while copies are printing, if your OKIFAX is set to receive faxes into memory. -
Page 68: Customizing Okifax 5300 Plus/5600 Plus
Customizing OKIFAX 5300 Plus/ 5600 Plus Customizing Fax Features and Operations Many of your OKIFAX 5300 Plus/5600 Plus’s fea- tures and functions have settings which can be changed to customize its operation. The user func- tions control a broad range of features, such as when certain reports print, and how the OKIFAX responds to incoming calls. - Page 69 02 MCF(MULTI-LOC.): This function automatically prints a Message Confirmation Report after each multiple- location transmission. The report provides informa- tion about the transmission—see page 60 for details. Available settings are ON(default) and OFF. 03 ERR REPORT(MCF): This function automatically prints a Message Confirmation Report each time an error occurs during a transmission or polling transmission operation.
-
Page 70: Setting Distinctive Ring
TEL/FAX, or TAD–will override Distinctive Ring. This feature may not work properly if you have a telephone other than a genuine Oki optional handset connected to your OKIFAX. Setting Distinctive Ring To set up your OKIFAX to recognize another ring pattern: 1 Press the Select Function key. - Page 71 13, LEGAL 14, and OTHER. Customizing Using the OTHER setting: When using the OKIFAX as a PC printer, you can load A5 and B5 size paper into the paper tray. However, reports and standard size faxes (letter, legal, or A4) will not print com- pletely on these paper sizes.
- Page 72 (Portuguese), depending on where you purchased your OKIFAX. 16 INCOMING RING: This function controls the telephone ringing sound your OKIFAX makes when a call comes in. When set to off, it does not ring during incoming calls. The available settings are: ON (default): Only rings when set to Manual Receive [TEL] mode or when the RING RESPONSE function is set to 5, 10, or 20 seconds.
-
Page 73: Changing Your User Function Settings
that case, incoming faxes are saved directly to the PC’s disk without being printed. If the PC is turned off or not functioning, the OKIFAX acts as a stand- alone fax machine and prints incoming faxes when this PC/FAX SWITCH function is set to ON (default). If this function is set to OFF, the OKIFAX will not accept incoming faxes when the PC is turned off or not functioning. -
Page 74: Changing Your Dial Parameter Settings
DIAL TONE DETECT: This function allows your OKIFAX to wait for and detect a dial tone before pro- ceeding with dialing. Available settings are ON and OFF. Default: OFF. BUSY TONE DETECT: This function allows your OKIFAX to detect a busy tone when sending a fax. Available settings are ON and OFF. -
Page 75: Service Function Settings
Service Function Settings In many cases, service function settings greatly change the way your OKIFAX operates. To change any of these settings, contact your Authorized OKIFAX Dealer. Service Function Settings List LONG DOC. SCAN: Normally OKIFAX does not scan documents longer than 14 inches (360 mm). When this function is on, your OKIFAX can scan and transmit documents of any length for up to one hour. -
Page 76: Fax Reports
Fax Reports Understanding Reports Your OKIFAX 5300 Plus/5600 Plus provides a variety of useful reports which help you under- stand its current settings, programming and op- erations. Message Confirmation Report (MCF) This report provides information about your last single-location fax transmission or polling transmis- sion. -
Page 77: Broadcast Entry Report
Broadcast Entry Report Each time you program a multiple-location transmis- sion (broadcast), your OKIFAX gives you the option of printing this report to confirm your entries. Infor- mation in this report includes: The Location ID of the One Touch keys and Auto Dial codes you have selected. -
Page 78: Broadcast Confirmation Report (Mcf)
(“Calling”) and the total amount of time spent receiving faxes (“Called”). The date, time and duration (S, R-TIME) of each transmission or reception. The name or telephone number of the fax machine you were communicating with (DISTANT STATION ID). If you were sending a fax, the telephone number or the Location ID is printed. -
Page 79: Power Outage Report
The Sender ID (ID=), TSI/CSI (TEL NO.), and call back number currently programmed into your OKIFAX. Current dial parameter settings. Power Outage Report Certain information stored in your OKIFAX is lost if power is interrupted under these circumstances: If there is no optional memory expansion board installed. -
Page 80: Document Jams
Problem Solving Clearing a Document Jam When a document jams while being faxed or scanned, your OKIFAX beeps, the red Alarm indica- tor lights, and DOCUMENT JAM appears in the dis- play. If the jammed document looks as if it is posi- tioned straight in your feeder, press the Stop key to try to feed the document the rest of the way through the feeder. - Page 81 Notes: If you experience paper jams often, the type of paper you are using may be the problem. For best results, select paper developed specifically for photocopying or laser printing. Be sure to fan the paper before loading it into your paper tray.
- Page 82 Pull out any paper you see jammed inside the machine. Pull out the paper tray. If any paper in the tray is damaged, remove and replace it. Push the paper down until it is under the plastic tabs. Make sure the paper stop in the tray is properly adjusted: not too loose, not too tight.
-
Page 83: Printing A Cleaning Page
10 Close the copy stacker and push down until you hear a click. Be sure both sides are latched. 11 Close the document table. Note: If you cannot remove jammed paper using the procedure above and most of the jammed sheet has emerged from the machine, use the following method. - Page 84 If your OKIFAX displays “TONER LOW” or “REPLACE TONER CART.,” replace the toner cartridge with a new one soon. If print density is high enough, you can continue to to use the toner cartridge without replacing it until print quality becomes unacceptable. Keep in mind that if you don’t replace the cartridge soon, there is a risk that a fax will be unreadable when it prints using an empty cartridge.
- Page 85 With the ridged side facing up and the lever on your right, insert the toner cartridge into the image drum unit. Slide the left end of the cartridge in first, then lower the right end into place. Once the toner cartridge is in place, push the lever all the way toward the back of the OKIFAX to secure it and release the toner.
-
Page 86: The "Change Drum Soon" Message
The “CHANGE DRUM SOON” Message The “CHANGE DRUM SOON” message is a warning that the image drum cartridge in your OKIFAX may be approaching the end of its usable life, which is approximately 20,000 pages, depending on the length and type of document you receive or copy. It appears when the drum has used up approximately 90% of its life, based on an internal calculation. - Page 87 Push in the cover release buttons on the side of the copy stacker until you hear a click. Lift the copy stacker. Remove the old image drum unit (with its toner cartridge), wrap it in the packaging materials from your new image drum unit, and discard it.
-
Page 88: Resetting The Drum Counter
Close the copy stacker and push down until you hear the copy stacker click into place. Besure that the cover latches on both sides. Close the document table. Follow the instructions in the next section to reset the drum counter. Resetting the Drum Counter Important: Reset the drum counter only when you have finished installing a new image drum. -
Page 89: Error Messages
The paper tray is out of paper. Add more paper. If there is paper in the tray, this message may indicate that paper has jammed while feeding into the printer. Check the paper path and remove any jammed paper– see “Clearing a Printing Paper Jam” at the beginning of this chapter (page 67). -
Page 90: Reading The Print Counters
COMMUN. ERROR There is a problem communicating with a remote fax machine. See page 78 for possible causes and solutions. PRINTER ALARM 2 [FAX] PLEASE CONFIRM PRINTER ALARM 4 [FAX] PLEASE CONFIRM Open and close the cover. -
Page 91: Problem Checklist
Problem Checklist Your OKIFAX is a complex machine with many features and functions. Many problems you experience may be due to improper programming. If you are experiencing a problem, read through the following list of problems and solutions before calling your Authorized OKIFAX Dealer for service. - Page 92 to enter a pause (using the Pause One Touch key) after the dial prefix or international dialing code to tell your machine to wait for a dial tone. • If you have frequent problems communicating with a particular remote fax machine, try programming the number into one of your One Touch keys and then changing the One Touch Parameters for that One Touch key (see page 31).
- Page 93 Your received documents are light or have vertical streaks on them and you are not out of toner. First, print a cleaning page— Press the Select Function key, then press the 10/Msg. Print from Memory key, then press the Yes that doesn’t help, Gently wipe the lens surface of the LED array with a soft pad moistened with rubbing alcohol, and then see if the machine works properly...
-
Page 94: Service And Support
Please be sure that you are calling from a tele- phone close to your OKIFAX, so you can describe your problem accurately. Our Customer Service Representatives are trained on all current Oki products. They can answer your questions regarding: Installation of your OKIFAX... -
Page 95: Purchasing Supplies And Options
PC Interface Kit, with interface board, bidirectional cable, and software: Order Number 58241701 LIMITED WARRANTY OKIDATA, division of Oki America, Inc. (OKIDATA) warrants this OKIFAX to be free from defect in material and work- manship and will remedy any such defect according to the terms of this Limited Warranty. - Page 96 To make request or claim for service under the parts-only portion of this Limited Warranty the original purchaser must return the OKIDATA product, shipping prepaid, in the original shipping container or equivalent, to OKIDATA or an authorized OKIFAX service center and assume the risk of loss or damage in transit.
- Page 97 Tel: 525-661-6860 Fax: 525-661-5861 ARGENTINA Megatech Tel: (541) 371-4123 Fax: (541) 371-4123 (tone needed) BRAZIL Oki Data do Brasil, Ltda Tel: (5511) 5589-1518 Fax: (5511) 5584-0267 CHILE Teknos Comunicaciones Tel: 56 (2) 555 5530 Fax: 56 (2) 550 2390 COLOMBIA...
-
Page 98: Specifications
Specifications Category Specifications Type/compatibility Desktop ITU-T G3 transceiver Modem speed OKIFAX 5300 Plus: 14.4/9.6/7.2/4.8/2.4 Kbps OKIFAX 5600 Plus: 33.6/28.8/14.4/9.6/7.2/4.8/2.4 Kbps Automatic fallback Transmission speed OKIFAX 5300 Plus: (ITU-T Test Chart #1) As fast as 6 seconds per page OKIFAX 5600 Plus:... - Page 99 Category Specifications Environmental Dimensions 13" x 16.5" x 9.6" W x D x H (33cm x 42 cm x 24.5 cm), excluding paper tray Weight 28.7 lb (13 kg) with image drum Power 120 VAC ± 10%, 50/60 Hz ± 2% or 220/240 VAC ±...
-
Page 100: Index
Index Symbols */Tone key 9 0/Unique key 9 1/Delayed TX key 11, 43 10/Message Print From Memory key 12 1'ST PAPER SIZE: 58 2'ND PAPER SIZE: 58 2/Broadcast Feeder TX key 11, 45 3/Confidential TX key 12 4/Relay Initiate TX key 12, 50 5/Polling key 12, 51 6/Report Print key 12, 64 7/Counter Display key 12, 77... - Page 101 Call Back Number 23 Chain dalling 32 CHANGE DRUM 73, 76 Cleaning page 70 Clock setting 21 Closed network 40, 56, 80 Codes communication 66 report 66 COMM ERROR 77 Communication codes 66 COMMUNICATION ERROR 77, 78 Components 4 Confidential fax 46 Confidential fax messages receiving 47 sending 46...
- Page 102 Documents loading 36 preparing 35 Drum counter resetting 12, 75 Echo Protection 31 ECM FUNCTION 59 End of Session tone 13 Error Tones 13 External Telephone connecting 19 sending 37-38 sending, confidential 46 sending, delayed 43, 80 sending, multiple locations 45 Fax Forwarding mode 23, 25 Fax Identification (Fax ID) 23-24 FAX mode 22...
- Page 103 Language setting 25, 58 LED array 72 LED Print Head 6 LINE jack 17 Location ID 30, 31, 32, 33 Location Program key 12 LONG DOC. SCAN 62 Manual Receive mode [TEL] 22 MDY/DMY 62 MEM./FEEDER SW. 59 Memory printing from 12 Memory reception 40 cancelling 40 Message Confirmation Report...
- Page 104 Polling reception 12 Polling transmission 12 Power cord 19 Power outage report 41, 66 Primary number 11 Print counters 77 PRINTER ALARM 2 77 PRINTER ALARM 4 77 Printing paper jam clearing 67-70 Private Branch Exchange (PBX) 26 Receiving Fax...
- Page 105 Service and Support 81 Service Function Settings 62 Signal Tones 13 Space key 10 Start 10 Start key 10 Stop 10 Stop key: 10 Supplies 82 T/F mode 22 T/F TIMER PROG. 57 TAD MODE 59 TAD mode 19, 22 TEL jack 19 TEL mode 22 TEL/FAX SW.
-
Page 106: Material Safety Data Sheet
MATERIAL SAFETY DATA SHEET MATERIAL SAFETY DATA SHEET MATERIAL SAFETY DATA SHEET MATERIAL SAFETY DATA SHEET MATERIAL SAFETY DATA SHEET OL "e" Series Toner MSDS # 58093101 For more information, contact Okidata at: 532 Fellowship Road Mount Laurel, NJ 08054 Emergency Information: 1-800-OKIDATA Emergency First Aid Procedures Emergency... - Page 107 Vapor Density (Air=1): Not applicable Evaporation Rate (Butyl Acetate=1): Not applicable Specific Gravity (H O=1): 1.15 Solubility in water: Negligible Appearance and odor: Black granules, no odor Fire and Explosion Hazard Data Flash Point (Method Used): Not applicable Flammable Limits Lower Explosive Limit: Not applicable Upper Explosive Limit: Not applicable Extinguishing Media: Water, CO...
- Page 108 Reactivity Data Stability: Stable Polymerization: Will not occur. Hazardous Decomposition Products: Thermal decom- position may result in release of oxides of carbon and nitrogen. Temperature: Do not expose to temperatures above 200°C (392°F). Incompatibility: Avoid exposure to strong oxidizers. Spill Cleanup and Disposal Spill Cleanup Small Spills 1.