Table of Contents
Advertisement
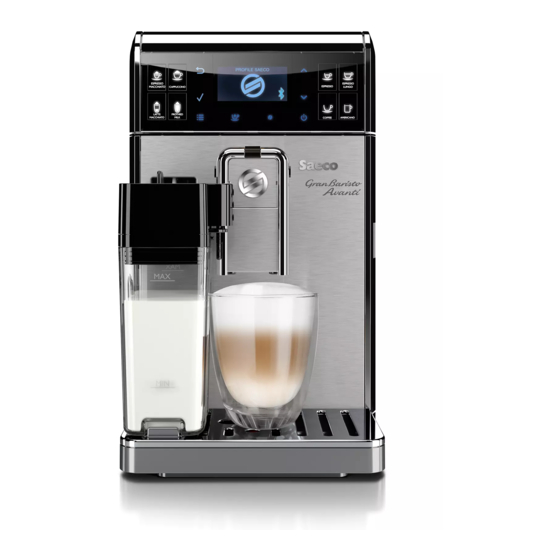
Coff ee Machine
Service
Service
Service
Service
TECHNICAL INFORMATION
Power supply and output:
Temperature monitoring:
Safety system:
Coff ee heat exchanger output: Stainless steel
for coff ee, hot water and steam dispensing
Dimensions: W x H x D in mm:
Stand-by power consumption
Weight:
Water tank capacity:
Coff ee bean hopper capacity:
Dreg drawer capacity:
Heating time:
Water circuit fi lling time:
Power consumption:
Automatic dosage:
Material
Housing
Beans container
Water tank
Dreg drawer
All parts of this document are the property of Saeco International Group.
All rights reserved. Th is document and all the information herein is provided without liability deriving from any errors or omissions. Furthermore, no part may be reproduced, used or
collected, except where express authorisation has been provided in writing or through a contractual agreement.
Published by Saeco International Group
Downloaded from
www.Manualslib.com
Service
Service
240 V~ 50 Hz 1900W - 230 V~ 50/60 Hz 1900 W 120 V~ 60 Hz 1300 W
(NTC) variable resistor sensor - transmits the value to the electronic card
2 thermostats at 190°C one shot
(230 V~) 1900 W - (120 V~) 1300 W - (100 V~) 1100 W
210 x 360 x 460 mm
< 0,5W
13 kg
1.7 l
270 g. of coff ee beans
20
Approx. 45 sec.
Approx. 15 sec Max. on fi rst fi lling cycle
During heating phase- approx. 5.6 A
Dose adjustment controlled by the electronic system
ABS/ABS+PMMA/METAL
ABS
SAN
ABS
Subject to modifi cation
manuals search engine
GranBaristo Avanti
Manual
Manual
GranBaristo
Rev. 02 July 2014
EN 4219 400 00022
2013-Sept.-02
Advertisement
Table of Contents

Related Manuals for Saeco GranBaristo Avanti


Summary of Contents for Saeco GranBaristo Avanti
- Page 1 Dreg drawer All parts of this document are the property of Saeco International Group. All rights reserved. Th is document and all the information herein is provided without liability deriving from any errors or omissions. Furthermore, no part may be reproduced, used or collected, except where express authorisation has been provided in writing or through a contractual agreement.
-
Page 2: Table Of Contents
7.12. Gearmotor and Microswtch present BrewUnit User instructions 7.13. CPU board and KYB interface and display 3.1.1. Customer menu in the GranBaristo Avanti 7.14 Bluetooth board in GranBaristo Avanti 3.1.2. Customer menu in the GranBaristo 7.15. Fitting and removing Oetiker clamps... -
Page 3: Introduction
CHAPTER 1 INTRODUCTION GRAN BARISTO Downloaded from www.Manualslib.com manuals search engine... -
Page 4: Documentation Required
As well as the standard equipment, the following is required: Qty. Description Notes Screwdriver Pliers for Oetiker clamps CC -A - Vdc tester Digital thermometer Scale limit > 150°C SSC (Saeco Service Center) Programmer (for programming and diagnostics mode) Material Description Notes Thermal paste Heating element > 200°C Descaler... -
Page 5: Service Policy
GRAN BARISTO 01 INTRODUCTION Service POLICY grid as used for coffee machine For IN WARRANTY repairs is mandatory to use the single components (not the assembly) avail- able in the exploded views of the coffee machines or of the specifi c components. If you fi nd the information “SEE THE EXPLODED VIEW E..”... -
Page 6: External Machine Parts
GRAN BARISTO 01 INTRODUCTION 1.6.1 External machine parts Coffee bean hopper locking/removal selector switch (depending on the model) Water tank + lid Removable coffee bean Control hopper lid (depending panel on the model) Removable Pre-ground coffee dispenser compartment Hot water spout Cup-warming dispensing spout... -
Page 7: Internal Machine Parts
1.6.2 Internal machine parts Grinding adjustment insert Coffee grinder Cover and Coffee grinder Piston assembly Flow-meter Pump Solenoid valve Bluetooth board in Granbaristo Avanti Power board IRDA (To program the machine) Page / 04 Downloaded from www.Manualslib.com manuals search engine... -
Page 8: Technical Specifications
CHAPTER 2 TECHNICAL SPECIFICATIONS GRAN BARISTO Downloaded from www.Manualslib.com manuals search engine... - Page 9 GRAN BARISTO 02 TECHNICAL SPECIFICATIONS 2.1. Technical specifi cations 240 V~ 50 Hz 1900W - 230 V~ 50/60 Hz 1900 W Power supply and output: 120 V~ 60 Hz 1300 W (NTC) variable resistor sensor - transmits the value to the Temperature monitoring: electronic card Safety system:...
- Page 10 GRAN BARISTO 02 TECHNICAL SPECIFICATIONS 2.2.1. Specifi cation for the measurement of the coffee products temperature. The temperature is infl uenced by the fl ow from the dispenser and stratifi cation of temperatures in the glass. In order to consider these phenomena and to introduce measures that allow compari- sons in controlled conditions, below guidelines must be followed: Conditions: a) Water temperature in tank: 23°C (+/-2°C).
- Page 11 GRAN BARISTO 02 TECHNICAL SPECIFICATIONS 2.2.2. Specifi cation for the measurement of the Milk products temperature. Milk evaluation To carry out the test, a partially skimmed UHT milk with a percentage of grease between 1.5- 1.8% at a refrigerator temperature Trefr. (between 4 to 10°C) must be used. The milk product must be checked on a beaker of 250 ml of capability and with an inner diameter of 70mm, brewing 100gr of product.
- Page 12 GRAN BARISTO 02 TECHNICAL SPECIFICATIONS How to measure the milk cream. The temperature (Trefr or Tamb) of the milk doesn’t affect as much the test result on measuring the milk cream; by convection is assumed to always use milk at refrigerator temperature Trefr. Manual systems (Pannarello) Pour 100cc.
-
Page 13: Machine Parameters And Performance
GRAN BARISTO 02 TECHNICAL SPECIFICATIONS 2.3. Machine parameters and performance Minimum Maximum Default Water Default Water PRODUCT Water Water Milk Length quantity (ITA) quantity (ENG) Aroma QUANTITY quantity quantity (sec) (ml) (ml) (ml) (ml) AmericanCoffee 3 = Regular Espresso 3 = Regular Cafe Creme 3 = Regular Coffee... -
Page 14: How To Check For Oil Leakage In Piston Assembly
GRAN BARISTO 02 TECHNICAL SPECIFICATIONS 2.4. How to Check for oil leakage in piston assembly. In case of return because the machine indicates no coffee one of the causes could be the loss of oil from the piston assembly. To check this, proceed as follows: To enter Test Mode When the display is turning ON, press the key- board buttons in the order described below:... -
Page 15: User Instructions
CHAPTER 3 USER INSTRUCTIONS GRAN BARISTO Downloaded from www.Manualslib.com manuals search engine... -
Page 16: Customer Menu In The Granbaristo Avanti
GRAN BARISTO 03 USER INSTRUCTIONS 3.1.1. Customer menu in the Gran Baristo Avanti “ESC” “UP” and ”DOWN “ button button “Espresso” “Cappuccino” button button “Espresso Macchiato” “Long Espresso ” button button LCD Display “Latte Macchiato” “American Coffee” button button “Hot Milk” “Coffee”... - Page 17 Before starting the connection procedure, make sure that the Bluetooth function on your mobile device is active. The GranBaristo Avanti Bluetooth function is enabled by default. If it is disabled, fol- low the instructions below to enable it again: PROFILE SAECO Press the “...
- Page 18 Warning: Use the Saeco Avanti app to control your Gran Baristo only when you can see the machine in or- der to avoid injury or damage! You cannot use the pre-ground coffee function when operating the machine via the app.
-
Page 19: Customer Menu In The Granbaristo
GRAN BARISTO 03 USER INSTRUCTIONS 3.1.2. Customer menu in the Gran Baristo. “UP” and ”DOWN “ “ESC” button “Espresso” “Cappuccino” button button button “Espresso Macchiato” “Cafè Crème” button LCD Display button “Latte Macchiato” “American Coffee” button button “Hot Milk” “Coffee” button button “Aroma”... -
Page 20: Operation, Cleaning And Maintenance
GRAN BARISTO 03 USER INSTRUCTIONS 3.2. Operation, cleaning and maintenance Operating the machine Fill water tank Fill the coffee bean hopper Switch on the appliance Press the button to start the appliance Heating When the heating phase begins, wait for it to fi nish Rinse Carry out a rinse cycle for the internal circuits Machine ready... -
Page 21: Operating Logic
CHAPTER 4 OPERATING LOGIC GRAN BARISTO Downloaded from www.Manualslib.com manuals search engine... -
Page 22: Water Circuit Granbaristo
GRAN BARISTO 04 OPERATING LOGIC 4.1.1. Water circuit Granbaristo Page / 06 Downloaded from www.Manualslib.com manuals search engine... -
Page 23: Milk Carafe
GRAN BARISTO 04 OPERATING LOGIC 4.1.2. Milk Carafe The steam passes through the pipe creating a sucking effect that pulls the milk upwards The milk is heated by the steam and taken towards the emulsion chamber where it is mixed with air and transformed into foam 1) Steam input... -
Page 24: Coffee Cycle
GRAN BARISTO 04 OPERATING LOGIC 4.2. Coffee cycle Main switch ON START STOP Time Coffee grinder Pulses (Dosage) Heating approx. 45 sec. Pump Pump operation (fl ow meter pulses) in accordance with the amount of product selected. Brewing unit gear motor Status Heating... -
Page 25: Single Microswitch
GRAN BARISTO 04 OPERATING LOGIC 4.3. Single microswitch The gear motor is powered by a direct current motor that engages with the smaller double toothed wheel using a worm screw. The unit is mounted on the axle of the large gear wheel and when a coffee is requested, it moves from the standby position to the dispensing posi- tion, and then back to the standby posi-... -
Page 26: Coffee Grinder
GRAN BARISTO 04 OPERATING LOGIC 4.5. Coffee grinder The coffee grinder is driven by a direct current motor (1) using a worm screw helicoidal wheel transmission (2). The worm screw (2) drives a plastic gear wheel (3), which turns the lower grinder (4) and the increment pin (5) 4.6. -
Page 27: Descaling Request
GRAN BARISTO 04 OPERATING LOGIC 4.7. Descaling request “Descaling” – message with water fi lter Flow meter pulses inserted (appliances with display only) The water hardness is set on the basis of the regional water hardness analysis (1, 2, 3, 4). Filter Filter off: If the function is turned off the electronics... -
Page 28: Troubleshooting
CHAPTER 5 TROUBLESHOOTING GRAN BARISTO Downloaded from www.Manualslib.com manuals search engine... -
Page 29: Test Mode In Granbaristo Avanti
GRAN BARISTO 05 TROUBLESHOOTING 5.1.1. Test Mode Gran Baristo Avanti To enter Test Mode When the display turns ON, press the keyboard buttons in the order described below: Description When the machine is in Factory Test Mode appears a windows divided in several sectors: CPU SW xx.yy.zz Debug msg... - Page 30 GRAN BARISTO 05 TROUBLESHOOTING Activation of loads In Test Mode all loads are initially disabled. To activate a load press the corresponding button on keyboard, to deactivate press again the same button. Other conditions for which a load may be switched off automatically without key presses are: ·...
- Page 31 GRAN BARISTO 05 TROUBLESHOOTING Keyboard KEYBOARD xx.yy.zz KEY 1 KEY 2 KEY 5 KEY 6 KEY 3 KEY 4 KEY 7 KEY 8 This page allow to test each button of keyboard (is shown its version) with the following corre- spondence: When is pressed a button the corresponding box becomes with background colored and the led of keyboard is turned ON, if it is pressed again becomes with black background and the led of key-...
- Page 32 GRAN BARISTO 05 TROUBLESHOOTING Info: mA: indicates the maximum current (in mA) absorbed by the brew unit in motion. The value must not exceed 300 mA Encoder Pulses Home-Work: indicate the number of encoder pulses from Home to Work posi- tion or vice versa.
- Page 33 GRAN BARISTO 05 TROUBLESHOOTING Grinder This page allow to test the functionality of grinder: Time during grinding GRINDER GTest A/AA Grinder Time for Zero crossing selected coffee 3500 DDoor Z-Cr FAIL strength The meaning of the sectors are the following: Command: A1: Selected Coffee Strength.
- Page 34 GRAN BARISTO 05 TROUBLESHOOTING Bluetooth This page allow to check the BT module Bluetooth module FW version Bluetooth MAC address Bluetooth Status (ON/OFF) BLUETOOTH xxxxxxxxxxxxx Vx.x Data exchange with remote CONN device in progress The meaning of the sectors are the following: Command: I/O: enable/disable Bluetooth module.
- Page 35 GRAN BARISTO 05 TROUBLESHOOTING Steam Out This page allow to execute the steam out process: STEAM OUT Start Boiler Temperature (°C) 93.3 Boiler The meaning of the sectors are the following: Command: Start: start the steamout process. At the end of process appears: Switch Off at the bottom of the display (so it’s possible to restart the machine with the default values) Info: Boiler: It’s enabled when the boiler is activated...
-
Page 36: Test Mode In Granbaristo
GRAN BARISTO 05 TROUBLESHOOTING 5.1.2. Test Mode Gran Baristo To enter Test Mode When the display turns ON, press the keyboard buttons in the order described below: Description When the machine is in Factory Test Mode appears a windows divided in several sectors: CPU SW xx.yy.zz Debug msg... - Page 37 GRAN BARISTO 05 TROUBLESHOOTING Activation of loads In Test Mode all loads are initially disabled. To activate a load press the corresponding button on keyboard, to deactivate press again the same button. Other conditions for which a load may be switched off automatically without key presses are: ·...
- Page 38 GRAN BARISTO 05 TROUBLESHOOTING Keyboard KEYBOARD xx.yy.zz KEY 1 KEY 2 KEY 5 KEY 6 KEY 3 KEY 4 KEY 7 KEY 8 This page allow to test each button of keyboard (is shown its version) with the following corre- spondence: When is pressed a button the corresponding box becomes with background colored and the led of keyboard is turned ON, if it is pressed again becomes with black background and the led of key-...
- Page 39 GRAN BARISTO 05 TROUBLESHOOTING Info: mA: indicates the maximum current (in mA) absorbed by the brew unit in motion. The value must not exceed 300 mA Encoder Pulses Home-Work: indicate the number of encoder pulses from Home to Work posi- tion or vice versa.
- Page 40 GRAN BARISTO 05 TROUBLESHOOTING Grinder This page allow to test the functionality of grinder: Time during grinding GRINDER GTest A/AA Grinder Time for Zero crossing selected coffee 3500 DDoor Z-Cr FAIL strength The meaning of the sectors are the following: Command: A1: Selected Coffee Strength.
- Page 41 GRAN BARISTO 05 TROUBLESHOOTING Press UP ( ): go to next page Steam Out This page allow to execute the steam out process: STEAM OUT Start Boiler Temperature (°C) 93.3 Boiler The meaning of the sectors are the following: Command: Start: start the steamout process.
- Page 42 GRAN BARISTO 05 TROUBLESHOOTING 5.1.3. Diagnostic Mode Gran Baristo/Gran Baristo Avanti To enter Diagnostic Mode When the display turns ON, press the keyboard buttons in the order described below: Menu Structure DIAGNOSTIC MODE 1. Product counters Espresso (default values 0) Caffè...
- Page 43 GRAN BARISTO 05 TROUBLESHOOTING Detailed description of the diagnosis menu 1. Product counters “Product counters” represents the total number of deliveries performed by the machine for each product from the production. 2. Error counters “Error counters” displays the total number of errors “out of service” (fail) occurred in the system (see “Errors log”), and allows you to reset the drive (see “Errors reset”).
- Page 44 GRAN BARISTO 05 TROUBLESHOOTING Coffee temp. sensor short circuit (E10): occurs when the temperature of the coffee boiler sensor is short-circuited. This error causes a total shutdown of the machine to start up. Coffee temp. sensor open circuit (E11): occurs when the temperature of the coffee boiler sensor is not detected.
- Page 45 GRAN BARISTO 05 TROUBLESHOOTING Number of execution: represents the number of cleaning cycles performed on the machine group. Liters since last clean: represents the total number of gallons of water consumed since the last cleaning cycle group. It is reset after the execution of a complete cleaning cycle group The submenu “Water fi...
- Page 46 GRAN BARISTO 05 TROUBLESHOOTING 5.2. Error codes ERROR ERROR DESCRIPTION DESCRIPTION CODES CODES Grinder blocked Brewing UNIT blocked work Brewing UNIT blocked home Water circuit interrupted DC valve short circuit Coffee temp. sensor short circuit Coffee temp. sensor open circuit Boiler coffee timeout Zero crossing error Boiler coffee overheating...
-
Page 47: Standard Checks
CHAPTER 6 STANDARD CHECKS GRAN BARISTO Downloaded from www.Manualslib.com manuals search engine... -
Page 48: Repair Schedule
Water tank lip seal Boiler pin O-ring Brewing unit ES/P Grease solvent / Grease Hoses, attachments and Oetiker clamps Coffee grinder Vacuum cleaner / brush Water circuit Saeco descaler Hot water/steam valve Page / 02 Downloaded from www.Manualslib.com manuals search engine... -
Page 49: Final Test
GRAN BARISTO 06 STANDARD CHECKS 6.3. Final test Support/ Test Procedure Standard Tolerance tool 2-3 Espressos for Measuring Espresso Same amount adjustment purposes scoop 2-3 Coffees for Measuring Coffee Same amount adjustment purposes scoop Noise Standard The cream should Amount of Blow into the cup until come together cream... -
Page 50: Disassembly
CHAPTER 7 DISASSEMBLY GRAN BARISTO Downloaded from www.Manualslib.com manuals search engine... -
Page 51: Outer Shell
GRAN BARISTO 07 DISASSEMBLY 7.1. Outer Shell Remove the water tank, coffee container and cover, drip tray, dreg drawer, brewing unit, hot water dispenser, Milk carafe. Lateral panels Unscrew the Remove the left, right Unscrew the Remove the cover. screw shown. and posterior panels screws shown. -
Page 52: Service Door
GRAN BARISTO 07 DISASSEMBLY Disconnect all electrical and water circuit Remove the reed sensor. connections and remove the top cover. 7.2. Service door Remove the high- Lift the pin with a screwdriver and remove it Unscrew the screws shown. lighted frame. through the top of the door. -
Page 53: Coffee Grinder
GRAN BARISTO 07 DISASSEMBLY Remove the dispenser, remove the insert and unhook the anchors. 7.3. Coffee grinder When reassembling the coffee grinder, make sure the spring is repositioned correctly (see photo). Remove the Raise the coffee grinder and remove the cover. -
Page 54: Coffee Grinder Adjustment
GRAN BARISTO 07 DISASSEMBLY 7.5. Coffee grinder adjustment The grinding adjustment can be set by the user (only with the coffee grinder in opera- tion) by pressing and turning (only by one click at a time) the insert inside the coffee bean hopper with the aid of the wrench sup- plied. -
Page 55: The Piston Assembly
GRAN BARISTO 07 DISASSEMBLY 7.7. The piston assembly. Loosen screws highlighted and dis- connect the silicone tube. Piston assembly Remove the assembly and disconnect the electrical / idraulics connections. 7.8. Pin boiler Loosen the screws highlighted and slide out the fork as illustrated. 7.9. -
Page 56: Pump
GRAN BARISTO 07 DISASSEMBLY 7.10. Pump Slip off the pump Remove the pump off the support. extension. Disconnect the electrical / idraulics connections. 7.11. Flow-meter Lift the fl ow meter out of the casing assembly and remove the electrical and water circuit connections. - Page 57 GRAN BARISTO 07 DISASSEMBLY Microswitch present brew unit. Lift the assembly and in the back there is the microswitch. Loosen the screws highlighted and remove the gearmotor assembly. Loosen the screws highlighted and remove the gearmotor cover. The following are located inside the compartment protected by the casing: - Electric motor (A) with gears (B) and (C) for trans- mission and timing of the dispenser.
-
Page 58: Cpu Board And Kyb Interface And Display
GRAN BARISTO 07 DISASSEMBLY 7.13. CPU board and KYB interface and display Lateral panels Remove the left, right Unscrew the Unscrew the Remove the cover. and posterior panels screws shown. screw shown. Top cover Remove the cover. Unscrew the screw shown. Unscrew the screws shown. -
Page 59: Bluetooth Board In Granbaristo Avanti
GRAN BARISTO 07 DISASSEMBLY 7.14. Bluetooth board in Granbaristo Avanti Unscrew the screw shown and Disconnect the electrical connections remove the cover. and remove the bluetooth board. 7.15. Fitting and removing Oetiker clamps 1) Boiler connection. 2) Other connections. Use a suitable pair of pliers to remove the Tighten the clamp as illustrated. -
Page 60: Notes
CHAPTER 8 NOTES GRAN BARISTO Downloaded from www.Manualslib.com manuals search engine... - Page 61 GRAN BARISTO 08 NOTES Page / 01 Downloaded from www.Manualslib.com manuals search engine...
-
Page 62: Water Circuit Diagram
CHAPTER 9 WATER CIRCUIT DIAGRAM GRAN BARISTO Downloaded from www.Manualslib.com manuals search engine... - Page 63 GRAN BARISTO 09 WATER CIRCUIT DIAGRAM Gran Baristo Page / 01 Downloaded from www.Manualslib.com manuals search engine...
-
Page 64: Electrical Diagram
CHAPTER 10 ELECTRICAL DIAGRAM GRAN BARISTO Downloaded from www.Manualslib.com manuals search engine... - Page 65 GRAN BARISTO 10 WIRING DIAGRAM Gran Baristo Avanti Page / 01 Downloaded from www.Manualslib.com manuals search engine...
- Page 66 GRAN BARISTO 10 WIRING DIAGRAM Gran Baristo Page / 01 Downloaded from www.Manualslib.com manuals search engine...