Table of Contents
Advertisement
Quick Links
IMPORTANT:
THESE INSTRUCTIONS ARE TO
REMAIN WITH THE HOMEOWNER
INSTALLATION
& OPERATING
INSTRUCTIONS
SAFETY NOTICE
If this stove is not properly installed, a
house fire may result. For your safety,
follow the installation instructions.
Contact local building or fire officials
about restrictions and installation,
inspection requirements in your area.
Visit www. pacificenergy.net for the most recent version of this manual
5055.600EU-A
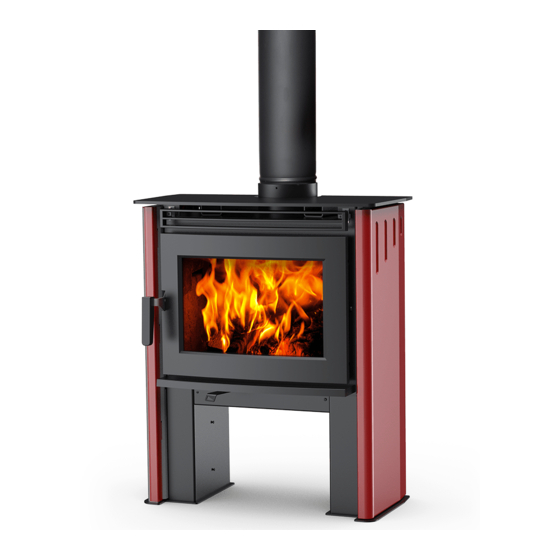
MODEL - NEO 1.2 EU
SERIES - A
NEO 1.2 EU-En
SERIAL #
120416-24
Advertisement
Table of Contents

Related Manuals for Pacific energy NEO 1.2 EU A SERIES


Summary of Contents for Pacific energy NEO 1.2 EU A SERIES
- Page 1 IMPORTANT: THESE INSTRUCTIONS ARE TO REMAIN WITH THE HOMEOWNER INSTALLATION & OPERATING SERIAL # INSTRUCTIONS SAFETY NOTICE If this stove is not properly installed, a house fire may result. For your safety, follow the installation instructions. MODEL - NEO 1.2 EU Contact local building or fire officials about restrictions and installation, inspection requirements in your area.
-
Page 2: Table Of Contents
PLEASE SAVE THESE INSTRUCTIONS This manual describes the installation and operation of the Pacific Energy, NEO 1.2 Freestanding wood heater. SAFETY NOTICE: If this stove is not properly installed, a house fire may result. For your safety, follow the instal- lation instructions. -
Page 3: Operator Instructions
Operator Instructions Operator Instructions Rating Label PACIFIC ENERGY FIREPLACE PRODUCTS LTD. 2975 ALLENBY RD., DUNCAN, BC, CANADA V9L 6V8 EN: 13240:2001 / A2:2005 NEO 1.2, ALDERLEA 1.2, NEOSTONE 1.2 Steel Freestanding room heater fired by Chauffe en acier indépendants uniquement Calentador de acero independiente de wood fuel only. -
Page 4: Safety
Operator Instructions Safety Chimney Smoke and Creosote Formation When wood is burned slowly, it produces tar and other organic vapours, which combine with expelled moisture to form creosote. The creosote vapours condense in the relatively cool chimney flue of a slow burning fire. As a result, creosote residue accumulates on the flue lining. -
Page 5: Avoiding A Chimney Fire
CAUTION: Hot while in operation. Keep children, clothing and furniture away. Contact may cause skin burns. Your PACIFIC ENERGY stove is designed for many years of trouble free operation. Over firing the appliance will shorten the life of the product. Failure to rectify an over firing condition can be hazardous and may void the manufacturer's warranty. -
Page 6: How To Test Your Wood
Operator Instructions How to Test Your Wood Add a large piece of wood to the stove when it has a large, hot bed of coals. It is dry if it is burning on more than one side within one minute. It is damp if it turns black and lights within three minutes. If it sizzles, hisses and blackens with- out igniting in five minutes it is soaked and should not be burnt Lighting a Fire WARNING: Never use chemicals or any other volatile liquid to start a fire. -
Page 7: Restarting From Hot Embers
Operator Instructions WARNING: Do not use grates or andirons to elevate the fuel. Burn directly on the fire bricks. Replace broken or missing bricks. Failure to do so may create a hazardous condition. Restarting from Hot Embers If there is insufficient burning material in the fire bed to light a new fuel charge, excessive smoke emission can occur. Refueling must be carried out onto a sufficient quantity of embers and ash that the new charge will ignite in a reasonable period. -
Page 8: Maintenance Checks
Operator Instructions Maintenance Checks Check the following parts for damage such as cracks, excessive corrosion, burned out sections and excessive warping: (See website for descriptions and more detail) Some warping of the baffle is normal (up to 65cm). Replace if the baffle has permanent warping greater than this or has signs of cracking or breakage. -
Page 9: Baffle Removal
Follow instructions included in the WODC.NEODGKIT obtainable from your nearest Pacific Energy Dealer. 5. DOOR GLASS - Do not slam loading door or otherwise impact glass. When closing door, make sure that no logs protrude to impact the glass. -
Page 10: Troubleshooting
Operator Instructions Troubleshooting Problem Cause Cure Glass is Dirty 1. Wood is wet - Use dry wood 2. Turning down air control - Do not turn down until or damper too soon a) there is a good bed of coals b) the wood is charred 3. -
Page 11: Warranty Information
3 Year Comprehensive • Pacific Energy will replace or repair any part found to be defective (parts and labor) for three years from the date of purchase. This coverage includes electrical components (blowers, speed controls and thermal switches). Conditions •... -
Page 12: Stove Dimensions
Installation Instructions Installation Instructions Stove Dimensions NE12.24 Dimensions 380mm 690mm 615mm 650mm Figure 1: NE12.24 Dimensions. NE12.32 Dimensions 688mm 420mm 89mm 807mm 841mm Figure 2: NE12.32 Dimensions. 120416-24_ NEO 1.2 5055.600EU-A... -
Page 13: Assembly
Installation Instructions Assembly Removing stove from crate 1. Carefully remove wood top and supports. 2. Remove plastic cover. 3. Using a 7/16"(12mm) wrench, remove lag bolts that secure hold down brackets to bottom pallet (Figure 3). 4. Slide the hold down brackets away from the stove. Lag bolts (2 on each side) Figure 3: NEO 1.2 pallet removal. - Page 14 Installation Instructions Panel Bracket Figure 4: Panel bracket.ai Figure 5: Slide panel in to place. Align panel with unit base Figure 7: Base of panel and alignment. Figure 6: Panel adjustments. 120416-24_ NEO 1.2 5055.600EU-A...
-
Page 15: Installation
Installation Instructions Installation Warning: Under no circumstances is this stove to be installed in a makeshift or "temporary" manner. It may be fired only after the following conditions have been met. • *DO NOT ATTEMPT TO CONNECT THIS Stove TO ANY AIR DISTRIBUTION DUCT. •... -
Page 16: Floor Protector
Installation Instructions Floor Protector The stove may be installed on a combustible floor provided noncombustible ember protection is used. This protection must extend as follows: UK: The Hearth Protection must be 12mm thick and protrude at least 305mm in front of the unit. See Figure 9, below. Minimum Width - 1.08m Minimum Overall Depth - 900m 200mm... -
Page 17: Combustion Air
Installation Instructions Combustion Air Intake or combustion air can be supplied to the stove in one of two ways. Consult your local building code or National Installation Code for Solid-Fuel-Burning Appliances and Equipment before proceeding. The unit must have adequate air for combustion provided in the room the unit is installed in. -
Page 18: Optional Blower
Installation Instructions Optional Blower The optional blower kit (WODC.BLOW) is equipped with a three prong power cord and may be installed at any time. Follow installation instructions supplied with the kit. Route power supply cord away from heater. Electrical rating: 115 volts A.C., 60Hz, .5 amps. Fan output rating: 125 CFM Blower Operation Proper blower speed matched with air control setting will ensure peak performance from your stove. - Page 19 Installation Instructions Fireclay Flue liner Concrete cap Ensure that the Masonry chimney meets all National Fire Protection Association and local building codes. Have the chimney cleaned and inspected by a professional to ensure Chimney there are no cracks, weak mortar or other signs of deterioration.
- Page 20 Installation Instructions Spark arrester rain cap Follow chimney manufacture specifcations for distance between vent termination heigth and chimney at roof line. Also consult local building Certi ed regulations. Chimney Storm collar Roof ashing as per Local Chimney Support and Federal codes The chimney may incorporate Minimum 7' (2.1m.)
-
Page 21: Neo 1.2 Firebrick Installation Instructions
Installation Instructions NEO 1.2 Firebrick Installation Instructions This package contains 6 full-size firebricks as well as 6 various cut-size bricks. With the heater in the upright position, install firebricks as follows: • Place 4 full-size firebricks "C" at the back of the heater first. •... -
Page 22: Replacement Parts - Neo 1.2
Titanium ..TI 9.... Optional Blower ......WODC.BLOW 10 ..Firebrick Set ........NE12.BRIC All parts may be ordered from your nearest Pacific Energy dealer. 11 ..Door Gasket ......WODC.NEODGKIT 12 ..Baffle Assembly ....... NE12.787520 Contact Pacific Energy for the location of the dealer nearest you. - Page 23 060416-24_NEO 1.2 EU-En 5055.600EU-A...
- Page 24 © 2016 Copyright Pacific Energy Fireplace Products LTD Reproduction, adaptation, or translation without prior written permission is prohibited, except as allowed under the copyright laws. PACIFIC ENERGY FIREPLACE PRODUCTS LTD. 2975 Allenby Rd., Duncan, B.C. V9L 6V8 For technical support, please contact your retailer.