Table of Contents
Advertisement
Available languages
Available languages
Quick Links
FH 21 IX/HA S
FH 21 /HA S
Italiano
Istruzioni per l'uso
FORNO
Sommario
Istruzioni per l'uso,1
Programmi,17
Manutenzione e cura,19
English
Operating Instructions
OVEN
Contents
Operating Instructions,1
Warnings,3
Assistance,8
Description of the appliance,10
Description of the appliance,12
Installation,21
Français
Mode d'emploi
FOUR
Sommaire
Mode d'emploi,1
Avertissements,4
Assistance,8
Description de l'appareil,10
Description de l'appareil,12
Installation,28
Programmes,31
Español
Manual de instrucciones
HORNO
Sumario
Manual de instrucciones,1
Advertencias,4
Asistencia,8
Descripción del aparato,10
Descripción del aparato,12
Instalación,35
Programas,38
Portuges
Instruções para a utilização
FORNO
Índice
Instruções para a utilização,1
Advertências,5
Assistência,9
Descrição do aparelho,10
Descrição do aparelho,12
Instalação,42
Programas,45
Advertisement
Table of Contents

Related Manuals for Hotpoint FH 21 IX/HA S


Summary of Contents for Hotpoint FH 21 IX/HA S
-
Page 1: Table Of Contents
FH 21 IX/HA S FH 21 /HA S Français Mode d’emploi FOUR Sommaire Mode d’emploi,1 Avertissements,4 Assistance,8 Description de l’appareil,10 Description de l’appareil,12 Installation,28 Mise en marche et utilisation,30 Le programmateur électronique*,30 Programmes,31 Précautions et conseils,33 Nettoyage et entretien,33 Italiano Español... - Page 2 Deutsch Română Bedienungsanleitung Instrucţiuni de folosire BACKOFEN CUPTOR Inhaltsverzeichnis Sumar Bedienungsanleitung,2 Instrucţiuni de folosire,2 Hinweise,5 Avertizări,7 Kundendienst,9 Asistenţă,9 Beschreibung Ihres Gerätes,11 Descrierea aparatului,11 Beschreibung Ihres Gerätes,13 Descrierea aparatului,13 Installation,49 Instalare,70 Inbetriebsetzung und Gebrauch,51 Pornire şi utilizare,72 Der elektronische Garzeitprogrammierer *,51 Programator de coacere electronic*,72 Programme,52 Programe,73...
-
Page 3: Avvertenze
Avvertenze Warnings ATTENZIONE: Questo apparecchio e le WARNING: The appliance and its sue parti accessibili diventano molto caldi accessible parts become hot during use. durante l’uso. Bisogna fare attenzione ed Care should be taken to avoid touching evitare di toccare gli elementi riscaldanti. heating elements. - Page 4 Avertissements Advertencias ATTENTION : Cet appareil ainsi que ATENCIÓN: Este aparato y sus partes ses parties accessibles deviennent très accesibles se vuelven muy calientes chauds pendant leur fonctionnement. durante el uso. Por lo tanto, es importante Il faut faire attention à ne pas toucher evitar tocar los elementos calentadores.
-
Page 5: Advertências
Advertências Hinweise ATENÇÃO: Este aparelho e as suas ZUR BEACHTUNG: Bei Gebrauch wird partes acessíveis aquecem muito durante dieses Gerät und alle zugänglichen a utilização. É preciso ter atenção e evitar Teile sehr heiß. Es ist darauf zu achten, tocar os elementos que aquecem. Manter dass die Heizelemente nicht berührt afastadas as crianças com menos de 8 werden. - Page 6 Belangrijk Предупреждения PAS OP: Dit apparaat en zijn bereikbare ВНИМАНИЕ: Данное изделие и его onderdelen worden tijdens gebruik zeer доступные комплектующие сильно heet. Zorg ervoor de verwarmende нагреваются в процессе эксплуатации. elementen niet aan te raken. Zorg ervoor Будьте осторожны и не касайтесь dat kinderen die kleiner dan 8 jaar oud zijn нагревательных...
-
Page 7: Avertizări
Avertizări ATENŢIE: Acest aparat şi părţile sale accesibile devin foarte calde în timpul folosirii. Trebuie să fiţi atenţi şi să nu atingeţi elementele de încălzire. Îndepărtaţi copiii sub 8 ani dacă nu sunt supravegheaţi continuu. Acest aparat poate fi utilizat de copiii de peste 8 ani şi de persoane cu capacităţi fizice, senzoriale sau mentale reduse sau fără... -
Page 8: Assistenza
Assistenza Assistance ! Non ricorrere mai a tecnici non autorizzati. ! Never use the services of an unauthorised technician. Comunicare: Please have the following information to hand: • Il tipo di anomalia; • The type of problem encountered. • Il modello della macchina (Mod.) •... -
Page 9: Assistência
Llame al 902.133.133 y nuestros técnicos intervendrán con rapidez y eficacia, devolviendo el electrodoméstico a sus condiciones óptimas de funcionamiento. En el SAT encontrará recambios, accesorios y productos Сервисное обслуживание específicos para la limpieza y mantenimiento de su electrodoméstico a precios competitivos. ! Никогда... -
Page 10: Descrizione Dell'apparecchio
Descrizione dell’apparecchio Descripción del aparato Vista d’insieme Vista en conjunto 1 POSIZIONE 1 1 POSICIÓN 1 2 POSIZIONE 2 2 POSICIÓN 2 3 POSIZIONE 3 3 POSICIÓN 3 4 POSIZIONE 4 4 POSICIÓN 4 5 POSIZIONE 5 5 POSICIÓN 5 6 GUIDE di scorrimento dei ripiani 6 GUÍAS de deslizamiento de las bandejas 7 Ripiano LECCARDA... -
Page 11: Beschreibung Ihres Gerätes
Beschreibung Ihres Gerätes Descrierea aparatului Geräteansicht Vedere de ansamblu 1 EINSCHUBHÖHE 1 1 POZITIA 1 2 EINSCHUBHÖHE 2 2 POZITIA 2 3 EINSCHUBHÖHE 3 3 POZITIA 3 4 EINSCHUBHÖHE 4 4 POZITIA 4 5 EINSCHUBHÖHE 5 5 POZITIA 5 6 GLEITFÜHRUNGEN für die Einschübe 6 GHIDAJE culisare rafturi 7 Einschub FETTPFANNE 7 Raft TAVĂ... -
Page 12: Descrizione Dell'apparecchio
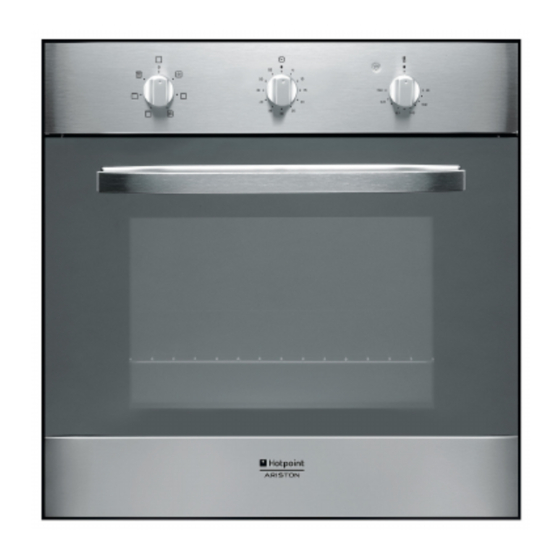
Descrizione dell’apparecchio Descripción del aparato Pannello di controllo Panel de control 1 Spia TERMOSTATO 1 Spia TERMOSTATO 2 Manopola TERMOSTATO 2 Piloto TERMOSTATO 3 Manopola TIMER * 3 Mando TEMPORIZADOR * 4 Manopola PROGRAMMI 4 Mando PROGRAMAS 5 Programmatore ELETTRONICO * 5 Programador ELECTRÓNICO * Presente solo in alcuni modelli. -
Page 13: Beschreibung Ihres Gerätes
Beschreibung Ihres Gerätes Descrierea aparatului Bedienfeld Panoul de control 1 Kontrollleuchte THERMOSTAT 1 Indicator TERMOSTAT 2 Drehknopf THERMOSTAT 2 Buton TERMOSTAT 3 Drehknopf KURZZEITWECKER * 3 Selector TIMER* 4 Drehknopf PROGRAMME 4 Buton PROGRAME 5 ELEKTRONISCHER * Pogrammierer 5 Programator ELECTRONIC * Nur bei einigen Modellen. -
Page 14: Installazione
Installazione ! È importante conservare questo libretto per poterlo consultare in ogni momento. In caso di vendita, di cessione o di trasloco, assicurarsi che resti insieme all’apparecchio per informare il nuovo proprietario sul funzionamento e sui relativi avvertimenti. ! Leggere attentamente le istruzioni: ci sono importanti informazioni sull’installazione, sull’uso e sulla sicurezza. - Page 15 Allacciamento del cavo di alimentazione alla rete TARGHETTA CARATTERISTICHE Montare sul cavo una spina normalizzata per il carico larghezza cm 43,5 indicato nella targhetta caratteristiche (vedi a fianco). Dimensioni* altezza cm 32,4 In caso di collegamento diretto alla rete è necessario interporre profondità...
-
Page 16: Avvio E Utilizzo
Avvio e utilizzo 3. Il timer è un contaminuti: a tempo scaduto emette un segnale acustico. ATTENZIONE! Il forno è ! Il timer non controlla l’accensione e lo spegnimento del forno. dotato di un sistema di arresto griglie che consente di estrarle senza che queste Il programmmatore di fuoriescano dal forno. -
Page 17: Programmi
Programmare la cottura Programma FORNO DOLCE Si accende l’elemento riscaldante inferiore. ! La programmazione è possibile solo dopo aver selezionato Questa funzione è indicata per la cottura di cibi delicati, in un programma di cottura. particolare i dolci che necessitano di lievitazione, in quanto viene facilitata dal calore proveniente dal basso. - Page 18 Tabella cottura Programmi Alimenti Peso Posizione Preriscaldamento Temperatura Durata (Kg) dei ripiani (minuti) consigliata cottura (minuti) Anatra 65-75 Arrosto di vitello o manzo 70-75 70-80 Arrosto di maiale Biscotti (di frolla) 15-20 Crostate 30-35 Lasagne 35-40 Tradizionale Agnello 50-60 Sgombro 30-35 Plum-cake 40-50...
-
Page 19: Precauzioni E Consigli
Precauzioni e consigli Smaltimento • Smaltimento del materiale di imballaggio: attenersi alle norme locali, così gli imballaggi potranno essere ! L’apparecchio è stato progettato e costruito in conformità riutilizzati. alle norme internazionali di sicurezza. • La direttiva Europea 2012/19/CE sui rifiuti di Queste avvertenze sono fornite per ragioni di sicurezza e apparecchiature elettriche ed elettroniche (RAEE), devono essere lette attentamente. - Page 20 Pulire la porta Pulire il vetro della porta con spugne e prodotti non abrasivi e asciugare con un panno morbido; non usare materiali ruvidi abrasivi o raschietti metallici affilati che possono graffiare la superficie e causare la frantumazione del vetro. Per una pulizia più...
-
Page 21: Installation
Installation ! Please keep this instruction booklet in a safe place for future reference. If the appliance is sold, given away or moved, please make sure the booklet is also passed on to the new owners so that they may benefit from the advice contained within it. - Page 22 Connecting the supply cable to the mains APPLIANCE SPECIFICATIONS Install a standardised plug corresponding to the load indicated on the data plate (see table). width 43.5 cm Dimensions* The appliance must be directly connected to the mains using height 32,4 cm an omnipolar switch with a minimum contact opening of 3 depth 45.0 cm mm installed between the appliance and the mains.
-
Page 23: Start-Up And Use
Start-up and use 3. The timer operates in minutes: when the selected time has elapsed, a buzzer will sound. WARNING! The oven is ! The timer does not turn the oven on or off. provided with a stop system to extract the racks and prevent them from coming The electronic programmer* out of the oven (1). -
Page 24: Cooking Modes
Programming the cooking duration TRADITIONAL OVEN mode 1. Press the button several times until the icon and Both the top and bottom heating elements will come on. the three digits on the DISPLAY begin to flash. With this traditional cooking mode, it is best to use one 2. -
Page 25: Cooking Advice Table
GRILL • Insert the rack in position 3 or 4. Place the food in the centre of the rack. • We recommend that you set the maximum power level. The top heating element is regulated by a thermostat and may not always be on. Cooking advice table Cooking Cooking... -
Page 26: Precautions And Tips
Precautions and tips Disposal • When disposing of packaging material: observe local legislation so that the packaging may be reused. ! This appliance has been designed and manufactured • The European Directive 2012/19/EC on Waste in compliance with international safety standards. The Electrical and Electronic Equipment (WEEE), requires following warnings are provided for safety reasons and that old household electrical appliances must not... -
Page 27: Cleaning The Oven Door
Cleaning the oven door Clean the glass part of the oven door using a sponge and a non-abrasive cleaning product, then dry thoroughly with a soft cloth. Do not use rough abrasive material or sharp metal scrapers as these could scratch the surface and cause the glass to crack. -
Page 28: Installation
Installation ! Conservez ce mode d’emploi pour pouvoir le consulter à tout moment. En cas de vente, de cession ou de déménagement, veillez à ce qu’il suive l’appareil pour informer le nouveau propriétaire sur son fonctionnement et lui fournir les conseils correspondants. ! Lisez attentivement les instructions : elles contiennent Centrage et fixation des conseils importants sur l’installation, l’utilisation et la... - Page 29 Branchement du câble d’alimentation au réseau électrique PLAQUE SIGNALETIQUE Montez sur le câble une prise normalisée adaptée à la largeur 43,5 cm charge indiquée sur l’étiquette des caractéristiques. Dimensions* hauteur 32,4 cm En cas de raccordement direct au réseau, il faut intercaler entre profondeur 45,0 cm l’appareil et le réseau un interrupteur à...
-
Page 30: Mise En Marche Et Utilisation
Mise en marche et utilisation 3. Le minuteur est un indicateur sonore de fonctionnement: une fois le temps écoulé, il émet un signal sonore. ! Le minuteur ne contrôle pas l’allumage et l’arrêt du four. AT T E N T I O N ! L e f o u r est équipé... -
Page 31: Programmes
Programmer la durée de cuisson Programme FOUR PÂTISSERIE 1. Appuyer plusieurs fois de suite sur la touche L’élément chauffant inférieur est branché. jusqu’à ce que l’icône et les trois digits numériques de Cette fonction est tout particulièrement indiquée pour la l’AFFICHEUR se mettent à... -
Page 32: Tableau De Cuisson
Tableau de cuisson Niveau Préchauffa Durée Poids Température Programmes Aliments enfournem cuisson (Kg) préconisée (minutes) (minutes) Canard 65-75 Rôti de veau ou de b œ uf 70-75 Rôti de porc 70-80 Biscuits (pâte brisée) 15-20 Tartes 30-35 Four Lasagnes 35-40 Traditionnel Agneau 50-60... -
Page 33: Précautions Et Conseils
Précautions et conseils Mise au rebut • Mise au rebut du matériel d’emballage : conformez-vous aux réglementations locales, les emballages pourront ! Cet appareil a été conçu et fabriqué conformément aux ainsi être recyclés. normes internationales de sécurité. Ces conseils sont •... - Page 34 Nettoyage de la porte Nettoyer la vitre de la porte à l’aide d’éponges et de produits non abrasifs; essuyer ensuite avec un chiffon doux. Ne pas utiliser de matériaux abrasifs ou de racloirs métalliques pointus qui risquent de rayer la surface et de briser le verre. Pour nettoyer plus à...
-
Page 35: Instalación
Instalación ! Es importante conservar este manual para poder consultarlo en todo momento. En caso de venta, de cesión o de mudanza, verifique que permanezca junto al aparato para informar al nuevo propietario sobre su funcionamiento y sobre las advertencias correspondientes. ! Lea atentamente las instrucciones: contienen importante información sobre la instalación, el uso y la seguridad. - Page 36 Conexión del cable de alimentación eléctrica a la red PLACA DE CARACTERÍSTICAS Instale en el cable un enchufe normalizado para la carga ancho 43,5 cm. indicada en la placa de características (ver al costado). Dimensiones* altura 32,4 cm. En el caso de conexión directa a la red, es necesario profundidad 45,0 cm.
-
Page 37: Puesta En Funcionamiento Y Uso
Puesta en funcionamiento y uso ! El temporizador no controla ni el encendido ni el apagado del horno. ATENCIÓN! El horno está dotado de un sistema de El programador electrónico* bloqueo de las parrillas que permite quitarlas sin que sobresalgan del horno (1). Para quitar completamente las parrillas, como se indica en el dibujo, es suficiente... -
Page 38: Programas
2. 2. con los botones “ ” y “ ” regular la duración deseada; Programa HORNO DULCE si se mantienen presionados, los números deslizan mas Se enciende el elemento calentador inferior. velozmente para facilitar la fijación. Esta función es aconsejable para la cocción de alimentos 3. - Page 39 Tabla de cocción Duración Posición Precalenta Peso Temperatura de la Programas Alimentos de los miento (Kg) aconsejada cocción estantes (minutos) (minutos) Pato 65-75 Asado de ternera o de vaca 70-75 Asado de cerdo 70-80 Bizcochos (de pastaflora) 15-20 Torta glaseada 30-35 Horno Lasañas...
-
Page 40: Precauciones Y Consejos
Precauciones y consejos Eliminación • Eliminación del material de embalaje: respete las normas locales, de esta manera los embalajes podrán ser ! El aparato ha sido proyectado y fabricado en conformidad reutilizados. con las normas internacionales de seguridad. • En base a la Norma europea 2012/19/CE de Residuos Estas advertencias se suministran por razones de seguridad de aparatos Eléctricos y Electrónicos (RAEE), los y deben ser leídas atentamente. - Page 41 Limpiar la puerta Limpie el vidrio de la puerta con esponjas y productos no abrasivos y séquelo con un paño suave; no utilice materiales ásperos abrasivos o raederas metálicas afiladas que puedan rayar la superficie y quebrar el vidrio. Para realizar una limpieza más profunda es posible extraer la puerta del horno: 1.
-
Page 42: Instalação
Instalação ! É importante guardar este folheto para poder consultá-lo a qualquer momento. No caso de venda, cessão ou mudança, assegure-se que o mesmo permanece com o aparelho para informar o novo proprietário sobre o funcionamento e sobre as respectivas advertências. ! Leia com atenção as instruções: há... - Page 43 Ligação do cabo de fornecimento à rede eléctrica PLACA DAS CARACTERÍSTICAS Monte no cabo uma ficha em conformidade com as normas para a carga indicada na placa de identificação (veja ao lado). largura 43,5 cm Medidas* altura 32,4 cm No caso de uma ligação directa à rede, será necessário profundidade 41,5 cm interpor, entre o aparelho e a rede, um interruptor omnipolar com abertura mínima entre os contactos de 3...
-
Page 44: Início E Utilização
Início e utilização 2. Volte na direcção contrária aos ponteiros do relógio, configure o tempo que desejar, fazendo coincidir o selector TIMER com o tempo indicado no painel de comandos. ATENÇÃO! O forno está 3. O timer é um contador de minutos: quando tiver passado equipado com um sistema o tempo, toca um sinal acústico. -
Page 45: Programas
Programação da duração da cozedura Programa de FORNO PARA DOLCE 1. Carregue várias vezes na tecla até o ícone e os Acende-se o elemento aquecedor inferior. primeiros três algarismos piscarem no VISOR; Esta função é indicada para cozer pratos delicados, 2. - Page 46 Tabela de cozedura Posição Pré Duração da Peso Temperatura Programas Alimentos aquecimento cozedura (Kg.) aconselhada prateleiras (minutos) (minutos) Pato 65-75 Carne de vitela ou vaca assada 70-75 Carne de porco assada 70-80 Biscoitos (de massa tenra) 15-20 Tortas doces 30-35 Forno Lasanha 35-40...
-
Page 47: Precauções E Conselhos
Precauções e conselhos Eliminação • Eliminação do material de embalagem: obedeça as regras locais, de maneira que as embalagens possam ! Este aparelho foi projectado e fabricado em conformidade ser reutilizadas. com as normas internacionais de segurança. Estas • A directiva Europeia 2012/19/CE relativa aos resíduos advertências são fornecidas por razões de segurança e de equipamentos eléctricos e electrónicos (REEE) prevê... - Page 48 Limpeza da porta Limpe o vidro da porta com esponjas e produtos não abrasivos e enxugue com um pano macio; não use materiais ásperos, abrasivos ou espátulas metálicas afiadas que podem arranhar a superfície e quebrar o vidro. Para uma limpeza mais cuidadosa, é possível retirar a porta do forno.
-
Page 49: Installation
Installation ! Bewahren Sie diese Bedienungsanleitung bitte sorgfältig auf, damit Sie sie jederzeit zu Rate ziehen können. Sorgen Sie dafür, dass sie im Falle eines Verkaufs, eines Umzugs oder einer Übergabe an einen anderen Benutzer das Gerät stets begleitet, damit auch der Nachbesitzer die Möglichkeit hat, darin nachschlagen zu können. - Page 50 Anschluss des Versorgungskabels an das Stromnetz TYPENSCHILD Versehen Sie das Netzkabel mit einem Normstecker für die auf dem Typenschild angegebene Belastung (siehe Breite 43,5 cm Abmessungen* Höhe 32,4 cm nebenstehende Tabelle). Tiefe 45,0 cm Wird das Gerät direkt an das Stromnetz angeschlossen, ist zwischen Stromnetz und Gerät ein allpoliger, der Nutzvolumen* Liter 65...
-
Page 51: Inbetriebsetzung Und Gebrauch
Inbetriebsetzung und Gebrauch Kurzzeitwecker* verwenden 1. In erster Linie muss das Läutewerk durch eine fast komplette Umdrehung (nach rechts) des Knopfes ACHTUNG! Der Ofen ist mit KURZZEITWECKER aufgezogen werden. einem Arretierungssystem 2. Um die gewünschte Zeit einzustellen drehen Sie der Roste ausgestattet. den Knopf (nach links) wieder zurück, bis die auf dem Damit lassen diese sich Knopf KURZZEITWECKER angegebenen Minuten mit... -
Page 52: Programme
Eine Programmierung annullieren 2. Mit den Tasten “ ” und “ ” wird die gewünschte Zeit eingestellt; wenn sie gedrückt gehalten werden, wird Annullieren einer Programmierung der Lauf der eingeblendeten Zeit beschleunigt, um die • die Taste drücken, bis auf dem Display das Symbol Einstellung zu vereinfachen. - Page 53 geschlossener Backofentür. empfindliche Gerichte leicht verbrennen könnten. ! Setzen Sie beim Garen mit den Programmen GRILL die Drehspieß* Fettpfanne zum Auffangen von abtropfendem Fett oder Z u r I n b e t r i e b n a h m e Fleischsaft auf Einschubhöhe 1 ein.
-
Page 54: Vorsichtsmaßregeln Und Hinweise
Vorsichtsmaßregeln und Hinweise Entsorgung • Entsorgung des Verpackungsmaterials: Befolgen Sie die lokalen Vorschriften; Verpackungsmaterial kann ! Das Gerät wurde entsprechend den strengsten wiederverwertet werden. internationalen Sicherheitsvorschriften entworfen und gebaut. • Gemäß der Europäischen Richtlinie 2012/19/EC Nachstehende Hinweise werden aus Sicherheitsgründen über Elektro- und Elektronik-Altgeräte (WEEE) geliefert und sollten aufmerksam gelesen werden. - Page 55 ! Verwenden Sie zur Reinigung der Kochmulde keine Dampf- oder Hochdruckreinigungsgeräte. Backofentür reinigen Die Backofentür aus Glas nur mit einem weichen Schwamm und mildem Reinigungsmittel reinigen. Das Gerät danach mit einem weichen Tuch trocknen. Keine rauen, scheuernden Materialien oder scharfkantige, metallische Schaber verwenden, da sie die Oberfläche zerkratzen oder das Glas beschädigen können.
-
Page 56: Het Installeren
Het installeren ! Bewaar dit boekje zorgvuldig voor eventuele verdere raadpleging. Wanneer u het product weggeeft, verkoopt, of wanneer u verhuist, dient u dit boekje bij het apparaat te bewaren zodat alle nodige informatie voorhanden blijft. ! Lees de gebruiksaanwijzingen zorgvuldig door: er staat belangrijke informatie in over installatie, gebruik en veiligheid. - Page 57 Het aansluiten van de voedingskabel aan het TYPEPLAATJE elektrische net Gebruik voor de voedingskabel een stekker die genormaliseerd breedte 43,5 cm Afmetingen* is voor de lading aangegeven op het typeplaatje. hoogte 32,4 cm Wanneer het apparaat rechtstreeks op het net wordt diepte 45,0 cm aangesloten moet u tussen het apparaat en het net een Inhoud*...
-
Page 58: Starten En Gebruik
Starten en gebruik 3. De timer is een kookwekker: als de tijd verstreken is, hoort u een geluidssignaal. ! De timer heeft niets te maken met het functioneren van BELANGRIJK! De oven de oven. i s u i t g e r u s t m e t e e n blokkeringssysteem voor de grill dat het mogelijk Elektronische programmering*... -
Page 59: Programma
Het programmeren van de kookduur Programma TRADITIONELE OVEN 1. Druk meerdere malen op de toets totdat het symbool De onderste en bovenste verwarmingselementen gaan en de drie cijfers op het DISPLAY beginnen te knipperen; aan. Met deze traditionele kookwijze is het beter een enkel 2. - Page 60 Kooktabel Gewicht Voorverwarming Aangeraden Kooktijd Programma's Gerechten Roosterstanden (kg) (minuten) temperatuur (minuten) Eend 65-75 Braadstuk 70-75 Varkensvlees 70-80 Koekjes (kruimeldeeg) 15-20 Jamtaart 30-35 Traditionele Lasagne 35-40 oven Lamsvlees 50-60 Makreel 30-35 Plum-cake 40-50 Beignets 30-35 Pan di spagna 20-25 Quiche 30-35 Cake 30-40...
-
Page 61: Voorzorgsmaatregelen En Advies
Voorzorgsmaatregelen en Afvalverwijdering • Verwijdering van het verpakkingsmateriaal: houd u aan advies de plaatselijke normen, zodat het verpakkingsmateriaal hergebruikt kan worden. • De Europese Richtlijn 2012/19/EC over Vernietiging van Dit apparaat is ontworpen en vervaardigd volgens de Electrische en Electronische Apparatuur (WEEE), vereist geldende internationale veiligheidsvoorschriften. - Page 62 De ovendeur reinigen Reinig het glas van de deur met een spons en niet schurende producten. Droog met een zachte doek. Gebruik geen ruwe schurende materialen of scherpe schrapertjes die het oppervlak zouden kunnen krassen waardoor als gevolg het glas zou kunnen barsten. U kunt voor een grondige reiniging de ovendeur verwijderen: 1.
- Page 63 Установка ! Важно сохранить данное руководство для его последующих консультации. В случае продажи, передачи изделия или при переезде на новое место жительства необходимо проверить, чтобы руководство оставалось вместе с изделием, для того чтобы его новыи владелец мог ознакомиться с правилами эксплуатации...
- Page 64 Подсоединение сетевого шнура изделия к сети электропитания Установите на сетевой кабель нормализованную штепсельную вилку, расчитанную на нагрузку, указанную на паспортной табличке (см. сбоку). В случае прямого подключения к сети электропитания между изделием и сетью необходимо установить многополюсный вык лючатель с минимальным расстоянием...
-
Page 65: Включение И Эксплуатация,65
Включение и эксплуатация Порядок использования таймера* 1. Прежде всго необходимо завести таймер, повернув рукоятку ТАЙМЕР по часовой стрелке почти на один ВНИМАНИЕ! Д уховой полный оборот. шк аф ук омплек то ва н 2. Поворачивая рукоятку обратно, против часовой системой бл окировки стрелки, задается... - Page 66 Отмена программирования 1. Нажмите несколько раз кнопку до тех пор, пока Порядок отмены запрограммированного значения: на ДИСПЛЕЕ не замигает символ и три цифровые • нажимать на кнопку до тех пор, пока на дисплее значения; не начнет мигать символ установки, который нужно 2.
- Page 67 Практические советы по приготовлению Вертел* Для включения вертела ! В режиме вентилируемого приготовления не (см. схему) выполните используйте 1-ый и 5-ый уровни: они подвергаются следующие операции: прямому воздействию горячего воздуха, который может 1. установите противень сжечь деликатные продукты. на 1-ый уровень; 2.
-
Page 68: Предосторожности И Рекомендации,68
Предосторожности и • В случае неисправности категорически запрещается открывать внутренние механизмы изделия с целью рекомендации их самостоятельного ремонта. Обращайтесь в Центр Сервисного обслуживания (см. Сервисное обслуживание). ! Изделие спроектировано и изготовлено в соответствии • Не ставьте предметы на открытую дверцу духового с... -
Page 69: Техническое Обслуживание И Уход,69
Техническое обслуживание Проверка уплотнений Регулярно проверяйте состояние уплотнения вокруг дверцы и уход духового шкафа. В случае повреждения уплотнения обращайтесь в ближайший Центр Сервисного Обслуживания (см. Сервисное обслуживание). Не рекомендуется Отключение электропитания пользоваться духовкой с поврежденным уплотнением. Перед началом какой-либо операции по обслуживанию или... -
Page 70: Instalare
Instalare ! Este importantă păstrarea acestui manual pentru a putea fi consultat în orice moment. În caz de vânzare, de închiriere sau de schimbare a locuinţei, acesta trebuie să fie înmânat împreună cu cuptorul, pentru a informa noul proprietar cu privire la funcţionare şi la respectivele avertismente. - Page 71 Racordarea cablului de alimentare la reţea PLĂCUŢA DE CARACTERISTICI Montaţi pe cablu un ştecher normalizat pentru sarcinile lăţime cm 43,5 indicate pe plăcuţa de caracteristici (vezi alături). Dimensiuni* înălţime cm 32,4 În cazul branşamentului direct la reţea, este necesar să se adâncime cm 45,0 monteze între aparat şi reţea un întrerupător omnipolar cu deschiderea minimă...
-
Page 72: Pornire Şi Utilizare
Pornire şi utilizare 2. Rotind butonul în sens contrar acelor de ceasornic, reglaţi timpul de coacere astfel încât minutele dorite indicate pe butonul TIMERULUI să fie în dreptul reperului fix de pe ATENŢIE! Cuptorul este panoul de control. prevăzut cu un sistem 3. -
Page 73: Programe
Programarea duratei de coacere jos. Temperaturile mai ridicate sunt atinse într-un timp mai lung, de aceea, în aceste cazuri, se recomandă folosirea 1. Apasati de mai multe ori tasta pîna cînd se aprind funcţiei “Cuptor Tradiţional”. pictograma si cei trei digiti numerici pe DISPLAY; 2. Cu tastele “... - Page 74 Tabel coacere Durata Greutate Poziţia Preîncă lzire Temperatura Programe Alimente coacerii (Kg) rafturilor (minute) recomandată (minute) 65-75 Raţă Friptură de viţel sau vită 70-75 Friptură de porc 70-80 Biscuiţi (din aluat fraged) 15-20 Tarte 30-35 Lasagne 35-40 Tradiţional Miel 50-60 Scrumbie 30-35 Pră...
-
Page 75: Măsuri De Precauţie Şi Recomandări
Măsuri de precauţie şi Eliminarea deşeurilor • Eliminarea ambalajelor: respectaţi reglementările locale; recomandări astfel, ambalajele ar putea fi reutilizate. • Directiva Europeană 2012/19/CE cu privire la deşeurile care provin de la aparatura electrică sau electronică ! Aparatul a fost proiectat şi construit în conformitate cu (RAEE) prevede ca aparatele electrocasnice să... - Page 76 195114190.00 05/2013 - XEROX FABRIANO Curăţarea uşii Curăţaţi geamul uşii cu un burete şi produse neabrazive şi ştergeţi-l cu o cârpă moale; nu folosiţi materiale aspre, abrazive sau raclete metalice, ascuţite, care pot zgâria suprafaţa sau cauza crăparea geamului. Pentru curăţarea minuţioasă a cuptorului, demontaţi uşa acestuia: 1.