Pitney Bowes DM125 Installing Manual
Hide thumbs
Also See for DM125:
- Operator's manual (226 pages) ,
- Software instructions (2 pages) ,
- Instructions (2 pages)
Table of Contents
Advertisement
Quick Links
Advertisement
Table of Contents

Related Manuals for Pitney Bowes DM125


Summary of Contents for Pitney Bowes DM125
- Page 1 Deactivating your DM100i and installing your NEW DM125 Postage Meter ™...
- Page 2 Step 1. Deactivate Your DM100i System Important: For best results, we strongly encourage you to follow the steps in this guide in sequential order. 1. Print a Postage Funds Report (Postage) A. Press Funds B. Press “Page down” to the third screen C.
- Page 3 3. Withdraw Postage Funds From the DM100i and Transfer to Your Postage Account A. Verify that your DM100i is turned on and is connected to the Pitney Bowes Data Centre by USB (if using computer with PC Meter Connect). B. Press Options C.
- Page 4 C. When the printing mechanism has moved forward, open the ink cartridge guard and remove the ink cartridge. This ink cartridge will be installed in your new DM125 system. D. Close the Ink cartridge guard, and close the meter top cover.
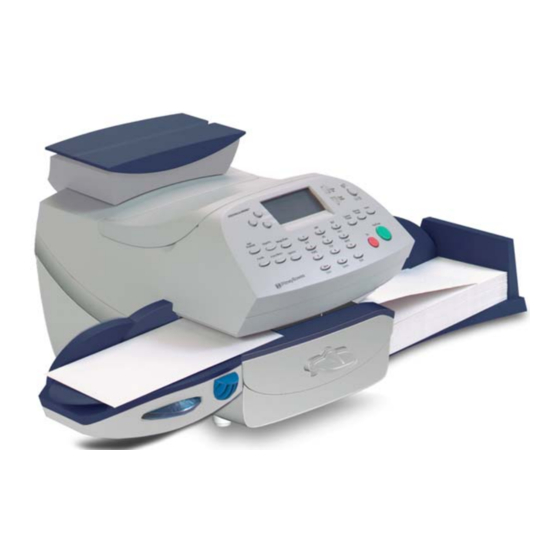
- Page 5 Step 2. Installing Your NEW DM125 system 1. Verify Contents of NEW Mailing System Package Stacker Mailing System Scale (optional) Pitney Bowes Moistener and Print Head Tape Sheets Ink Cartridge in Package EZ-Seal (optional) (Re-order #739-5) postage tape sheets USB Cable LAN Cable &...
- Page 6 2. Remove Shipping Tape Open the top cover of the meter and remove any packing material, protective foam, tape that may be present. After done you can close the cover. 3.Install Additional Components A. Scale platform If your system came with the optional scale, attach it now. The scale consists of two pieces.
- Page 7 Step 3. Select a Connection Method Your system must connect to the Pitney Bowes Data Centre to add funds that were returned from the old system and to download updates. Your new meter can be connected using PC Meter Connect® or LAN adapter.
- Page 8 Screen 5 Screen 6 Screen 7 Screen 8 Screen 9 NOTE: You will now have an icon on your desktop and an icon down in your system tray. Go to Step “4” to finish the install or select a different connection option. page 7...
- Page 9 Option 2: Setup Connectivity Using Constant Connection LAN Adapter Constant Connection is an option that allows you to connect your DM125 system to the Pitney Bowes Data Centre via a LAN network that has internet access. Constant Connection provides faster transmission speed while connecting though your local network.
-
Page 10: Step 4. Connect Power
Step 4. Connect Power Connect the power cord between the back of your meter and a convenient outlet. Keep the meter plugged in at all times to an outlet not controlled by a wall switch. power power On/Off switch If you have this model, turn the On/Off switch on. - Page 11 Step 5. Set Language and Time After the system powers up and completes a self-check, select the language you wish to use. Simply press the small round button next to your choice. Your meter must be set to the correct local time. If the hour value displayed (HH) is correct, select OK and Continue.
- Page 12 Select AM or PM Attention: You MUST set the AM/PM correctly. If the local time is off by 12 hours your system may print the wrong date on your mail and it may be returned by the Post Office. Check one last time, paying special attention to the AM/PM setting. If the current local time is correct, select This is correct.
- Page 13 Step 6. Install the Print Head The following screen should be displayed on your meter. Open the top cover. Unlatch and flip up the guard. ink cartidge guard Remove the print head from the packaging. page 12...
- Page 14 Remove the tape strip from the bottom of the printhead or Remove the plastic cap from the bottom of the printhead, depending on the model. Attention: This step is critical to prevent system damage! Slide the print head pegs into the lower set of grooves. Squeeze the tabs and push the print head flush against the wall.
- Page 15 Step 7. Install the Pitney Bowes Ink Cartridge Remove the ink cartridge from the bag. The silver foil strip on the bottom of the cartridge should remain in the bag when the cartridge is withdrawn. Drop the ink cartridge into the ink cartridge area, next to the print head. The label on the top of the cartridge should face front.
-
Page 16: Step 8. Print A Test Pattern
Step 8. Print a Test Pattern When prompted, insert a spare envelope or a tape sheet for a test print. For proper printing, position mail flat against registration wall and gently slide test piece to the right on feed registration deck. - Page 17 Step 9. Enter Scale Location Code A scale code is needed to calibrate the scale. If you have just attached your scale, key in the correct scale code for your location. (Codes for each province can be found below). Then select Continue.
- Page 18 Step 10.Check Your Account Balance and Transfer Postage to Meter For your security, your meter does not ship with pre-loaded postage. PBP = Postage by Phone It is simply your account balance. When your account is accessed at the Postage-by-Phone® Data Centre, you will see your current balance (Prepaid) and your current credit line (Other).
- Page 19 Select Continue. You will be asked to confirm your choice. Press Yes/Enter or No for a receipt. Yes/Enter Follow the screen prompts to print your receipt. page 18...
- Page 20 Step 11. Last Step - Update Your Software This last step downloads current rates in addition to any additional features you may have ordered into your meter. Select Get update now. The updated files will be sent to, and installed on, your system. Follow the screen prompts.
- Page 21 Congratulations! Your Mailing System is Ready to Use Select OK. To customize your meter settings and learn all about using your system, see the Operator Guide on our WEB Site at: http://www.pitneybowes.ca/support. Follow the link for: Operating Guides. If there are any further problems or questions please feel free to contact us at 1-800-672-6937 and follow prompts for Technical Support or e-mail us at: Pbdiagnostics@pb.com.
- Page 22 Boxing Up and Sending Back Your Old System You are now ready to box up your Pillows or spacer (if needed) old system and ship it back using the provided return way-bill. Once equipment is packaged up, simply call the number on the back of the Prepaid waybill attached to the box.
-
Page 23: Frequently Asked Questions
Windows system tray at the bottom of your screen. PC Meter Connect is now running and you may connect to the Pitney Bowes Data Centre. Alternately, you may click on the Start button >> All Programs >>... -
Page 24: Troubleshooting
Troubleshooting Checking Connectivity Using Constant Connection LAN Adapter Turn the meter ON. Once the meter has finished initializing and the Home screen is displayed, one of the small LED indicators on the LAN adapter should light up within 1 minute. If none of the LED indicators light up, refer to additional information below. -
Page 25: Technical Support
The Operator Guide can be found at the following websites: http://www.pitneybowes.ca/support Product Name: DM100i Model: P7EC Product Name: DM125 Model: PREC If there are any further problems or questions please feel free to contact us at 1-800-672-6937 and follow the prompts for Technical Support or e-mail us at: Pbdiagnostics@pb.com.