Advertisement
Quick Links
Download this manual
See also:
Instruction Manual
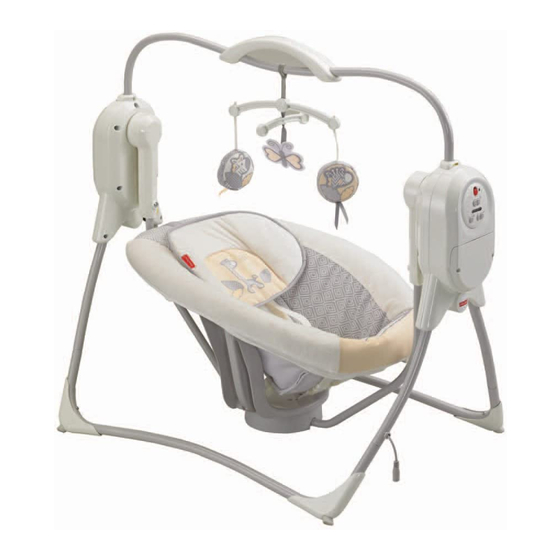
BFX34
Side-to-side
Head-to-toe
IMPORTANT! Please keep these instructions for future reference.
Please read these instructions before assembly and use of this product.
Adult assembly is required. Assembly instructions on back side of this sheet.
Tool needed for assembly: Phillips screwdriver (not included).
Requires four D (LR20) alkaline batteries for operation (not included)
for battery operated use. Battery installation instructions are on page 8.
Requires an AC adapter (input 120 - 240 VAC, 50 - 60Hz,
with an output of 6 VDC) for operation (included) for battery-free operated use.
Product features and decorations may vary from photographs.
fisher-price.com
1
Advertisement

Related Manuals for Fisher-Price BFX34


Summary of Contents for Fisher-Price BFX34
- Page 1 BFX34 Side-to-side Head-to-toe IMPORTANT! Please keep these instructions for future reference. Please read these instructions before assembly and use of this product. Adult assembly is required. Assembly instructions on back side of this sheet. Tool needed for assembly: Phillips screwdriver (not included).
-
Page 2: Storage & Care
• Press the buttons on each hub and push the bases together for storage. UNITED STATES • Lean the swing frame against a wall 1-800-432-5437. Fisher-Price, Inc., for storage. 636 Girard Avenue, East Aurora, NY 14052. • To remove the pad, unbuckle the restraint Hearing-impaired consumers: system and the straps under the seat. - Page 3 IMPORTANT! Before each use or assembly, inspect this product for damaged hardware, loose joints, missing parts or sharp edges. DO NOT use if any parts are missing or ® broken. Contact Fisher-Price for replacement parts and instructions if needed. Never substitute parts.
- Page 4 Using the Restraint System Shoulder Belt Shoulder Belt Waist Belt Waist Belt Crotch Belt • Place your child in the seat. Position the crotch belt between your child’s legs. • Insert the ends of the waist belts through the slots in the shoulder belts. •...
- Page 5 Using the Restraint System Adjusters TIGHTEN LOOSEN To tighten the shoulder belts: Hold the adjuster and pull the front shoulder strap down To loosen the shoulder belts: Slide the adjuster down. Note: After adjusting the belts to fit your child, make sure you pull on them to be sure they are securely fastened.
- Page 6 AC Adapter for Battery-Free Operation • Place the swing near a standard wall outlet. • Plug the AC adapter into the power cord extending from the base. Plug the AC adapter into the wall outlet. • Use the AC adapter only in a wall outlet. Do not plug the adapter into a ceiling outlet. Hint: The power AC adapter cord is designed to easily disconnect if stepped on accidentally.
- Page 7 Power Switch Swing Speed Buttons Music/Sounds Volume Buttons Button Swing • Slide the power switch ON. • Press the swing speed buttons to select any of six speed settings. • Swinging will turn off after approximately four hours. Press a swing speed button to restart.
-
Page 8: Battery Installation
Battery Installation Hint: Install batteries if you need to use this swing away from an outlet. We recommend using alkaline batteries for longer battery life. 1,5V x 4 D (LR20) • Loosen the screws in the battery compartment door with a Phillips screwdriver and remove the battery compartment door. - Page 9 Parts Please remove all parts from the package and identify them before assembly. Some parts may be packed in the pad. 2 Hubs 2 H b Seat Pad Seat Pad Seat Base S t B 2 Bases Seat Back Seat Bottom AC Adapter Handle #8 x ¾"...
- Page 10 Assembly Hub Arms Bases • Fit the tubes on the hubs into the tubes on the bases. Hint: When assembled properly, the hub arms should face each other. Seat Bottom Seat Base • Fit the seat bottom onto the seat base. Hint: The seat bottom is designed to fit onto the seat base one way.
- Page 11 Assembly Seat Back • Fit the seat back onto the seat base. Hint: The seat back is designed to fit onto the seat base one way. If it does not seem to fit, turn it around and try again. • Insert two #8 x ¾" (1,9 cm) screws into the seat back and tighten. Hub Arms •...
- Page 12 Assembly • Insert an M5 x 31 mm screw into each hub arm and tighten. Handle • Fit the ends of the handle into the socket in each hub. • Insert an M5 x 31 mm screw into each hub and tighten.
- Page 13 Assembly LOWEST SLOTS Waist Belts • Insert the waist belts through the lowest slots in the seat pad. Make sure the waist belts are not twisted. LOWER SLOTS Shoulder Belts Lower Slots Smaller Baby • Insert the ends of the shoulder belts through the lower slots in the seat pad back. Make sure the shoulder belts are not twisted.
- Page 14 Assembly UPPER SLOTS Shoulder Belts Upper Slots Larger Baby • Insert the ends of the shoulder belts through the upper slots in the seat pad back. Make sure the shoulder belts are not twisted. • Fit the pad edges around the rim of the seat.
- Page 15 Assembly • Fasten the buckles on the front of the seat pad to the buckles on the seat bottom. Make sure you hear a “click”. Adults Note: If you use this product with the AC adapter, periodically examine the AC adapter for damage to the cord, housing or other parts that may result in the risk of fire, electric shock or injury.
- Page 16 Consumer Information FCC Statement (United States Only) This equipment has been tested and found to comply with the limits for a Class B digital device, pursuant to Part 15 of the FCC Rules. These limits are designed to provide reasonable protection against harmful interference in a residential installation. This equipment generates, uses and can radiate radio frequency energy and, if not installed and used in accordance with the instructions, may cause harmful interference to radio communications.