Table of Contents
Advertisement
Quick Links
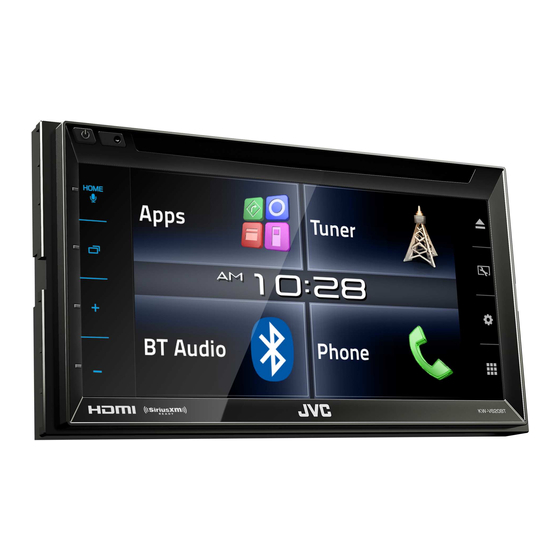
KW-V620BT
MONITOR WITH DVD RECEIVER
INSTRUCTION MANUAL
This instruction manual is used to describe models listed below. Model availability and features
(functions) may differ depending on the country and sales area.
• Region 1 (DVD Region Code 1 area)
• Region 4 (DVD Region Code 4 area)
© 2015 JVC KENWOOD Corporation
B5A-1062-00 (KN/RN)
Advertisement
Table of Contents

Related Manuals for JVC KW-V620BT


Summary of Contents for JVC KW-V620BT
- Page 1 This instruction manual is used to describe models listed below. Model availability and features (functions) may differ depending on the country and sales area. • Region 1 (DVD Region Code 1 area) • Region 4 (DVD Region Code 4 area) © 2015 JVC KENWOOD Corporation B5A-1062-00 (KN/RN)
-
Page 2: Table Of Contents
The marking of products using lasers How to read this manual: • Illustrations of KW-V620BT Region 1 are mainly used for explanation. The displays and panels shown in this manual are examples used to provide clear explanations of the operations. For this reason, they may be different from the actual displays or panels. -
Page 3: How To Reset Your Unit
BEFORE USE BEFORE USE KW-V620BT Region 1 KW-V620BT Region 1 • Do not expose the monitor to direct sunlight. IC (Industry Canada) Notice CAUTION • Do not operate the touch panel using a ball-point This device complies with Industry Canada license- Use of controls or adjustments or performance of pen or similar tool with a sharp tip. -
Page 4: Initial Settings
INITIAL SETTINGS INITIAL SETTINGS Finish the procedure. Select the time display format (1), then set Initial setup the calendar and the clock time (2). When you power on the unit for the first time or • Press [Set] to set the second to “00”. reset the unit, the initial setting screen appears. -
Page 5: Basics
BASICS BASICS 4 HOME/ button Adjusting the volume Component names and functions • Displays the Home screen. (Press) (Page 7) To adjust the volume (00 to 35) • Activates the voice dialing. (Hold) (Page 43) V Caution on the volume setting: button Digital devices produce very little noise compared •... -
Page 6: Common Screen Operations
BASICS BASICS Gesture control on the source control screen: Turning on/off the AV source Common screen operations You can also control playback by moving your finger You can activate the AV function by selecting a Common screen descriptions on the touch panel as follows (for some sources, the source on the Home screen. - Page 7 BASICS BASICS Home screen <Settings> screen Touch screen operations Displays the source control screen and settings Changes the detailed settings. (Page 54) screen. • To display the Home screen, press HOME on the monitor panel. • You can change the Home screen design on the <User Customize>...
-
Page 8: Selecting The Playback Source
Switches to the App screen from display on the external monitor. the connected iPod touch/iPhone/ (Page 36) Android device. (Page 20) * Only for KW-V620BT Region 1. [Tuner] Switches to the radio broadcast. (Page 26 ) [Disc] Plays a disc. (Page 10) [USB] Plays files on a USB device. -
Page 9: Using The Pop-Up Short-Cut Menu
BASICS BASICS Selecting the playback source on the Select an item to jump to. Using the pop-up short-cut menu Home screen While displaying the source control screen, you can jump to the other screen from the pop-up short-cut menu. Display the pop-up short-cut menu. On the source control screen. -
Page 10: Discs
DISCS DISCS Ejecting a disc Playing a disc Playback operations On the Home screen: • If a disc does not have a disc menu, all tracks on When the operation buttons are it will be played repeatedly until you change the not displayed on the screen, touch source or eject the disc. - Page 11 DISCS DISCS Operation buttons For audio playback Operation buttons • Available buttons on the screen and operations • Available buttons on the screen and operations 3 4 5 differ depending on the type of disc/file being differ depending on the type of disc/file being played back.
- Page 12 [J]/[K]. screens exist on the disc. • Press [ ] to open the folder containing the – For DivX (only for KW-V620BT current track. Region 4): Exits the scene • Press [ ] to return to the root folder.
-
Page 13: Settings For Disc Playback
DISCS DISCS For VCD Selecting playback mode Settings for disc playback Display the <Mode> screen. ] Selects Repeat playback mode. ] Selects Random playback mode. Displays the picture size selection screen. • The location of the buttons differ depending on (Page 50) the type of disc/file being played back. - Page 14 <Subtitle Select the initial subtitle language or screen. Language>* turn subtitles off (OFF). (Initial: OFF On the <Mode> screen: for KW-V620BT Region 1/English for KW-V620BT Region 4) (Page 68) <Parental Set the parental lock. <Audio Select the initial audio language. Level>* (See the right column.)
-
Page 15: Usb
[FNC J] Displays the pop-up short-cut menu. Indications and buttons on the source Connecting a USB device (Page 9) control screen • To close the menu, press [K]. You can connect a USB mass storage class device 2 3 4 [S] [T] • Selects a track. (Press) such as a USB memory, Digital Audio Player etc. - Page 16 From the <Category List> screen: Setting picture display time Selecting a track in the list Select the category (1), then the item in the Select the interval between slides during slide-shows Display the list selection screen. selected category (2). of the picture files. Display the <Mode>...
-
Page 17: Ipod/Iphone
iPod/iPhone iPod/iPhone Selecting the iPod/iPhone device to Select the connection method (1), then Preparation play and connection method press [Next] (2). Connecting iPod/iPhone When connecting the iPod/iPhone device for the • For details about connecting iPod/iPhone, see first time, the setup screen (for connection, etc.) page 62 . - Page 18 iPod/iPhone iPod/iPhone Selecting preference settings for iPod/ When selecting <HDMI + Bluetooth> or Playback operations <Bluetooth> as the connection method, iPhone playback the paired device list appears. Select the When the source is “iPod”... When the operation buttons are not displayed on the screen, touch target device (1), then press [Next] (2).
- Page 19 iPod/iPhone iPod/iPhone Operation buttons Video menu: Selecting an audio/video track from the Displays the other operation button menu window. Display the menu screen. • To hide the window, press [ Displays the audio/video track menu. (See the right column.) [FNC J] Displays the pop-up short-cut menu.
-
Page 20: Apps
• For Android devices, you can use more functions touch panel. • To change settings for video playback, see with the JVC Smartphone Control application. For • For some applications such as navigation page 49. details, visit <http://www.jvc.net/car/app/>... -
Page 21: Pandora® (Only For Kw-V620Bt Region 1)
Pandora® Pandora® (Only for KW-V620BT Region 1) (Only for KW-V620BT Region 1) Operation buttons Playback operations You can stream Pandora from iPod touch/iPhone , Displays the other operation button Android or BlackBerry devices. window. • Install the latest version of the Pandora You can operate Pandora using the remote •... - Page 22 Pandora® Pandora® • You can change the page to display more Android™ Selecting a station from the list items by pressing [J]/[K]. • Visit Google play and search for “Pandora” to Display the list selection screen. • The indicator appears on the left of the install.
-
Page 23: Iheartradio (Only For Kw-V620Bt Region 1)
(Only for KW-V620BT Region 1) (Only for KW-V620BT Region 1) iHeartRadio is a free, all-in-one digital radio service Custom talk station screen: Playback operations that lets you listen to your favorite Live Stations or create commercial-free, all-music Custom Stations... - Page 24 iHeartRadio iHeartRadio Operation buttons Selecting the variety level for your Searching for a station Displays the other operation button custom station Display the <Station Search> screen. window. You can adjust the amount of lesser-known music • To hide the window, press [ that gets pushed into your custom station.
- Page 25 iHeartRadio iHeartRadio Android™ Editing the <Favorites> list Select stations (1), then press [Delete] to • Visit Google play and search for “iHeartRadio for delete the selected stations (2). <Favorites> Select on the <Station Auto” to install. Search> screen. • Bluetooth must be built in and the following profiles must be supported.
-
Page 26: Tuner
TUNER TUNER Operation buttons • To display all available operation buttons, press Listening to the radio ] to display the other operation button Displays the other operation button window. window. Preparation: Select the appropriate tuner • To hide the window, press [ * Appears only when FM is selected as the source. - Page 27 (Page 26) areas. FM/AM intervals are set to Select a preset number. 50 kHz/9 kHz. • The initial setting is [US] for KW-V620BT Region 1, and [SA] for KW-V620BT Region 4. (Hold) The station selected in step 1 is stored. ENGLISH...
- Page 28 TUNER TUNER Selecting a preset station Activating/deactivating TI Standby FM RBDS features Reception Display the <Preset List> screen. Searching for FM RBDS programs—PTY Search You can search for your favorite programs being broadcast by selecting the PTY code. • You can also select a preset station by pressing [P1] –...
-
Page 29: Siriusxm® Satellite Radio (Only For Kw-V620Bt Region 1)
SiriusXM® Satellite Radio SiriusXM® Satellite Radio (Only for KW-V620BT Region 1) (Only for KW-V620BT Region 1) Only SiriusXM® brings you more of what you love Operation buttons Listening to the SiriusXM® Satellite to listen to, all in one place. Get over 140 channels,... - Page 30 SiriusXM® Satellite Radio SiriusXM® Satellite Radio Selecting a preset channel Selecting a channel on the list Presetting channels Display the <Preset List> screen. You can obtain information on channels or select a Storing channels in the memory category and then a channel. You can preset 6 channels for each band.
- Page 31 SiriusXM® Satellite Radio SiriusXM® Satellite Radio Replaying content Replay SmartFavorites You can pause, rewind and replay content from the User stored channels (P1 to P6) of current band are currently tuned channel. recognized as SmartFavorites channels. SiriusXM • The SiriusXM Connect Vehicle Tuner continually Connect Vehicle Tuner automatically buffers their buffers up to 60 minutes of audio.
- Page 32 SiriusXM® Satellite Radio SiriusXM® Satellite Radio Display the <Mode> screen. (See the far TuneStart™ TuneScan™ left column.) When you select a SmartFavorites channel, you can When you activate TuneScan™, you will hear 6 Display the <Parental Code Check> listen to the current song from the beginning. seconds of the songs, which have not been listened screen.
- Page 33 SiriusXM® Satellite Radio SiriusXM® Satellite Radio Activating/Deactivating the parental control Display the <Mode> screen. (Page 32) Skipping unwanted channels You can set the parental control feature to lock If you do not want to receive some channels, you any SiriusXM channel(s) or automatically lock all can skip them.
-
Page 34: Other External Components
OTHER EXTERNAL COMPONENTS OTHER EXTERNAL COMPONENTS Changing the AV-IN name Using external audio/video Using the rear view camera You can change the AV-IN name displayed on the players—AV-IN • To connect a rear view camera, see page 63 . “AV-IN” source control screen. •... - Page 35 OTHER EXTERNAL COMPONENTS OTHER EXTERNAL COMPONENTS Displaying the rear view camera screen Using the parking guidelines on the Display the <Display> settings screen. rear view screen (See the left column.) The rear view screen is displayed when you shift the gear to the reverse (R) position.
-
Page 36: Using A Smartphone-Hdmi/Mhl
ADS adapter—Maestro (Only for external monitor High-definition Link. KW-V620BT Region 1) Both interfaces allow your smartphone to connect to Display the <Rear Source> screen. You can control the sources from the component via the device. When it is connected, you can see your On the Home screen: ADS adapter. -
Page 37: Bluetooth
BLUETOOTH BLUETOOTH Auto pairing Information for using Bluetooth® Connecting Bluetooth devices When <Auto Pairing> is set to [ON], iOS devices devices Registering a new Bluetooth device (such as iPhone) are automatically paired when connected via USB. (Page 45) When you connect a Bluetooth device to the unit for the first time, pair the unit and the device. - Page 38 BLUETOOTH BLUETOOTH Pairing a Bluetooth device using a PIN code (for Pairing a Bluetooth device from this unit using a Change the PIN code. Bluetooth 2.0) PIN code (for Bluetooth 2.0) • If you wish to skip changing the PIN code, go to step 3.
- Page 39 BLUETOOTH BLUETOOTH Connecting/disconnecting a registered Select [ON] or [OFF] for the target. Deleting a registered Bluetooth device Bluetooth device Display the <Bluetooth Setup> screen. Two devices can be connected simultaneously. (Page 38) Display the <Bluetooth Setup> screen. (Page 38) Mobile phone Audio device •...
- Page 40 BLUETOOTH BLUETOOTH Ending a call Switching between handsfree mode Using a Bluetooth mobile phone and phone mode While talking... Receiving a call While talking... When a call comes in... Adjusting the volume of calls/earpiece/ Each time you press the button, the talking method •...
- Page 41 BLUETOOTH BLUETOOTH Sending text during a call Making a call Select a method to make a call. You can send text during a call using the DTMF (Dual Display the phone control screen. Tone Multi Frequency) function. On the Home screen: While talking...
- Page 42 BLUETOOTH BLUETOOTH From the preset list/phone book/call lists • To use the A to Z search in the phone book: • To display other phone numbers: When the phone book list is displayed, you can When the phone book list is displayed, you can search by initial.
- Page 43 BLUETOOTH BLUETOOTH Direct number entry Voice dialing Presetting phone numbers You can enter up to 31 numbers. Voice dialing is available only when the connected You can preset up to 5 phone numbers. mobile phone has a voice recognition system. Display the phone control screen.
-
Page 44: Using The Bluetooth Audio Player
BLUETOOTH BLUETOOTH Operation buttons Selecting a track from the menu Using the Bluetooth audio player Displays the other operation button Display the menu screen. window. • To register a new device, see page 37. • To hide the window, press [ •... - Page 45 BLUETOOTH BLUETOOTH Setting items < Auto • ON (Initial): Establishes pairing Settings for Bluetooth devices Pairing> automatically with the connected <Paired Press [Enter] to show the list of You can change various settings for using Bluetooth iOS device (such as iPhone) Device List>...
-
Page 46: Settings
SETTINGS SETTINGS Display the <APP Setup> screen. Check the current device status, then press Settings for using applications of On the Home screen: [Change]. iPod/iPhone/Android Before using applications of iPod/iPhone/Android such as Pandora or iHeartRadio, select the device to use and connection method. Preparation: Connect iPod touch/iPhone/Android device. - Page 47 SETTINGS SETTINGS For iPod/iPhone: • You can delete the Bluetooth registration of a Select the connection method (1), then device. Press [Remove], then press [Yes] after <USB + Select this when the iPod/ press [Next] (2). a confirmation message appears. AV-IN>...
-
Page 48: Sound Adjustment
SETTINGS SETTINGS • You can change the page to display more Adjust the sound. Sound adjustment items by pressing [J]/[K]. Using the sound equalization Storing your own adjustments—Customizing • The adjustment is memorized for each source until preset sound mode you adjust the sound again. -
Page 49: Adjustment For Video Playback
SETTINGS SETTINGS Adjusting the crossover frequency Adjust the picture. Adjustment for video playback Display the <X’over> screen. Adjusting the picture On the Home screen: You can adjust the picture quality. Display the picture adjustment screen. On the source control screen: <Bright>... - Page 50 SETTINGS SETTINGS Changing the aspect ratio <Full>* For 16:9 original pictures Display the magnification level selection 4:3 signal 16:9 signal screen. You can change the aspect ratio for video playback. • You cannot change the aspect ratio while playing On the source control screen: a USB device.
-
Page 51: Changing The Display Design
SETTINGS SETTINGS To change the panel color: Select an item to change, then select the Changing the display design Display the panel color selection screen (1), design or color. You can change the Home screen design, select the dimmer setting ([ ]: dimmer on or To change the Home screen design: background and panel color. -
Page 52: Customizing The Home Screen
SETTINGS SETTINGS Storing your favorite image for the Select the file for the background image Customizing the Home screen background (1), then confirm the selection (2). You can arrange the items to display on the Home You can set your favorite image stored on the screen. -
Page 53: Customizing The System Settings
SETTINGS SETTINGS Adjusting the touch position Touch the center of the marks at the lower Customizing the system settings left and at the upper right as instructed. You can adjust the touch position on the touch Memorizing/recalling the settings panel if the position touched and the operation You can memorize the following settings: performed do not match. -
Page 54: Setting Menu Items
Setting menu items You can update the system by connecting a USB Displaying the <Settings> menu screen device containing an update file. • To update the system, visit <http://www.jvc.net/ Display the <Settings> screen. cs/car/>. On the Home screen: Create an update file, copy it to a USB device, and connect the device to the unit. - Page 55 • OFF: Cancels. • OFF: Cancels. • OFF: Cancels. <X’over> <Parking Assist Pos.>* Adjust the crossover frequency. (Page 49) Select where information about obstacles is displayed on the screen. • Left/Right (Initial) * Only for KW-V620BT Region 1. ENGLISH...
- Page 56 You can update the software. (Page 54) (Page 45) <Open Source Licenses> <Beep> Shows the Open Source Licenses. • ON (Initial): Activates the key-touch tone. • OFF: Cancels. Only for KW-V620BT Region 1. Only for KW-V620BT Region 4.
-
Page 57: Remote Controller
REMOTE CONTROLLER REMOTE CONTROLLER V Caution: Preparation • Keep the battery out of reach of children and in Removing the battery sheet original package until ready to use. Dispose of used batteries promptly. If swallowed contact Pull the battery sheet out from the remote controller physician immediately. - Page 58 Erases the misentry. for changes. • Tuner: 2 Press a number button to select a desired item. * Only for KW-V620BT Region 1. – Searches for stations automatically. • To erase a misentry, press CLR (clear). – Searches for stations manually.
-
Page 59: Connection/Installation
6 Round head screws (M5 x 6 mm) × 6 7 Microphone (3 m) × 1 8 Fixture for HDMI/MHL connector × 1 9 Screws for fixture (M2.6 x 6 mm) × 1 * Only for KW-V620BT Region 4. ENGLISH... - Page 60 Installing the trim plate (only for Installing the unit KW-V620BT Region 4) To prevent a short circuit, remove the key Installing the unit (only for KW-V620BT Attach the trim plate (2). · from the ignition and disconnect the Region 4) battery.
-
Page 61: Connecting Wires To Terminals
Connect SiriusXM Connect Vehicle Tuner (commercially available).* (Page 63) Only for KW-V620BT Region 1. If no connections are made, do not let the cable come out from White ª / White with black stripe · : To front speaker (left) the tab. - Page 62 CONNECTION/INSTALLATION CONNECTION/INSTALLATION Connecting a USB device Connecting an iPod/iPhone iPod/iPhone (30-pin connector models) iPod/iPhone (Lightning connector models) (commercially available) USB device (commercially available) (commercially available) 1.0 m USB 2.0 cable (accessory of the iPod/iPhone) Lightning-Digital AV adapter (accessory of the iPod/iPhone) KS-U62 KS-U59...
- Page 63 Resistance-free stereo type mini plug p Expansion port for connecting SiriusXM Connect Vehicle Tuner (commercially available)* Only for KW-V620BT Region 1. When connecting an external amplifier, connect its ground wire to the chassis of the car; otherwise the unit may be damaged.
- Page 64 CONNECTION/INSTALLATION Connecting microphone for Bluetooth Removing the unit Removing the unit (Only for KW-V620BT Connect the microphone (7) to the MIC terminal. Remove the trim plate. (See the left Region 4) • To install the microphone, peel off the adhesive column.)
-
Page 65: References
4 Mbps. To play new discs • After starting the heater in the car. * Only for KW-V620BT Region 4. New discs may have some rough spots around the • If it becomes very humid inside the car. inner and outer edges. If such a disc is used, this unit Should this occur, the unit may malfunction. - Page 66 “DVD” is selected as the disc type when a +R/+RW disc is loaded. +RW double layer discs are not playable. This unit cannot play back contents protected with CPRM (Content Protection for Recordable Media). Only for KW-V620BT Region 4.
- Page 67 • Do not leave a USB device in the car, or expose • Make sure all important data has been backed up to direct sunlight or high temperature to prevent * Only for KW-V620BT Region 1. to avoid losing the data. deformation or damage to the device.
- Page 68 • When operating an iPod/iPhone, some operations Bashkir Interlingua Burmese Telugu may not be performed correctly or as intended. In Byelorussian Interlingue Nauru Tajik this case, visit the following JVC web site: Bulgarian Inupiak Nepali Thai <http://www.jvc.net/cs/car/> Bihari Indonesian Norwegian Tigrinya •...
-
Page 69: Error Message List
REFERENCES REFERENCES “Connection Error”: “Check application”: Error message list • The device is registered but the connection has • A connection to the application cannot be failed. Connect the registered device. (Page 39) established. If an error occurs while using the unit, a message appears. -
Page 70: Troubleshooting
REFERENCES REFERENCES “No Station”: “SXM Check Antenna”: Troubleshooting • No station is available. • Check the SiriusXM radio antenna connection, and make sure the antenna is firmly attached to the What appears to be trouble is not always serious. “No Active Station”: tuner. - Page 71 REFERENCES REFERENCES Discs Videos cannot be played. • Connect with USB Audio and Video cable JVC Recordable/Rewritable discs cannot be played “Now Reading...” does not disappear from the KS-U59 (optional accessory) for iPod/iPhone 30- back. screen. pin connector model or JVC KS-U60 (optional •...
-
Page 72: Specifications
Video Decoder MPEG1/MPEG2/DivX* target device. If the PIN code of the device is not * Available only for KW-V620BT Region 1. Wow & Flutter Below Measurable Limit indicated in its instructions, try “0000” or “1234.” • Turn off, then turn on the Bluetooth device. - Page 73 REFERENCES REFERENCES USB interface section Bluetooth section FM tuner section USB Standard USB 2.0 High Speed Technology Bluetooth 3.0 Frequency Range With channel interval set to 200 kHz: Compatible Devices Frequency 2.4 GHz to 2.4835 GHz Mass storage class 87.9 MHz to 107.9 MHz (200 kHz) Output Power +4 dBm (MAX), 0 dBm (AVE), Power Class 2...
- Page 74 • “DVD Logo” is a trademark of DVD Format/Logo 1 Vp-p/75 Ω Installation Dimensions (W × H × D) Licensing Corporation registered in the US, Japan KW-V620BT Region 1: Video Output Level (RCA jack) and other countries. 1 Vp-p/75 Ω...
- Page 75 Bluetooth SIG, Inc. and any to endorse or promote products derived from OF A CONSUMER FOR (i) ENCODING VIDEO use of such marks by JVC KENWOOD Corporation is this software without specific prior written IN COMPLIANCE WITH THE MPEG-4 VISUAL under license.
- Page 76 1215 EHHMDWJEIN...