Audio Technica 1800 series Installation And Operation Manual
Atw-r1810 plug-on transmitter system, atw-t1801 unipak body-pack transmitter system, atw-t1802 plug-on and body-pack transmitter system
Hide thumbs
Also See for 1800 series:
- Set up and operation manual (16 pages) ,
- Setup and operation manual (16 pages) ,
- Setup and operation manual (16 pages)
Table of Contents
Advertisement
Quick Links
1800 Series
Camera-mount UHF Wireless
Microphone Systems (dual-channel)
ATW-R 1810 Plug-on Transmitter System
ATW-T 1801 UniPak Body-pack Transmitter System
ATW-T 1802 Plug-on and Body-pack Transmitter System
Installation and Operation
Installation et Utilisation
Installation und Betrieb
Instalación y Manejo
Installazione ed Utilizzazione
Instalação e Funcionamento
Installatie en Bediening
w i r e l e s s
w i r e l e s s
w i r e l e s s
w i r e l e s s
w i r e l e s s
0470
!
EN
FR
DE
ES
IT
PT
NE
Advertisement
Table of Contents

Related Manuals for Audio Technica 1800 series


Summary of Contents for Audio Technica 1800 series
- Page 1 1800 Series w i r e l e s s Camera-mount UHF Wireless Microphone Systems (dual-channel) w i r e l e s s...
-
Page 2: Table Of Contents
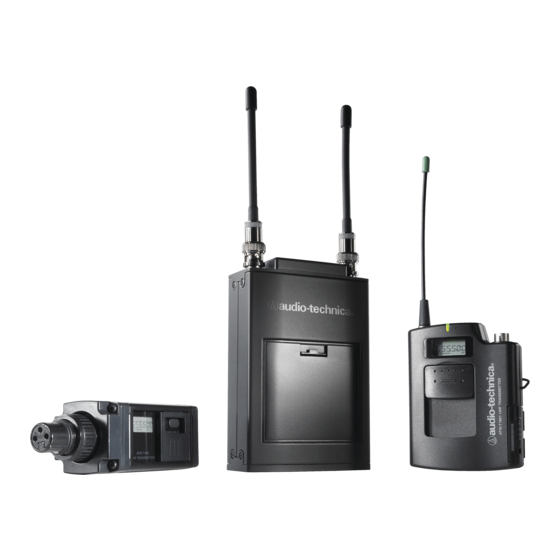
If you need help with operation or frequency selection, please contact your local dealer or Audio-Technica. Extensive wireless information also is available at www.audio-technica.com. Contents Components and System Configurations System Features Quick Overview of System Operation Receiver Controls Operating the Receiver Transmitter Controls Operating the Transmitter Tips for Best Results Available Accessories Scanplans for 1800 Series Specifications Warranty... - Page 3 1800 Series Components (single-channel) Receiver and Included Components/Accessories ATW-R1810 Two detachable 18" output cable, Pouch with belt clip Single-channel receiver antennas TA3F to XLRM (holds receiver) Transmitters ATW-T1801 ATW-T1802 Plug-on transmitter UniPak™ transmitter with included omnidirectional lavalier microphone Note: All model numbers have an additional letter at the end to indicate frequency band.
-
Page 4: System Features
System components of the 1800 Series and 3000 Series UHF Wireless Systems can be used interchangeably* System components of the 1800 Series and 3000 Series Wireless Systems can be used interchangeably* *Note: The 1800 Series offers UHF Wireless operation frequencies in 25KHz step, therefore the 1800 transmitters and receivers feature up to 996 selectable frequencies (depending on the frequency band). -
Page 5: Quick Overview Of System Operation
Quick Overview of System Operation Thank you for purchasing this Audio-Technica 1800 Series Single-channel Camera-mount UHF Wireless Microphone System. All 1800 Series Single-channel systems are designed primarily to be used with video cameras, with the ATW-R1810 Receiver mounted on a camera and connected to the camera's audio input;... -
Page 6: Receiver Controls
ATW-R1810 Single-channel Receiver Controls (front panel) Liquid Crystal Display shows battery status and frequency settings. Antenna Input Jacks BNC-type antenna connectors. Attach the antennas to the antenna input jacks. Make certain that during operation there is a clear open-air path between the receiver antennas and the transmitter. -
Page 7: Output To A Balanced Microphone-Level Input On A Camera, Mixer Or Integrated Amplifier
(rear panel) PIN 1 PIN 3 Balanced Audio Output Jack: TA3M-type connector. Pin 1: ground (shield); Pin 2: “audio +”; Output Pin 3: “audio –”. A standard 2-conductor shielded cable can be used to connect the receiver output to a balanced microphone-level input on a camera, mixer or integrated amplifier. PIN 2 Controls the output level of the receiver. - Page 8 ATW-R1810 Single-channel Receiver Batteries Battery Selection Each ATW-R1810 Single-channel Receiver uses four 1.5V AA batteries, not included. Alkaline type is recommended. Always replace all batteries. Make certain the receiver power is Off before replacing batteries. Note: The ATW-R1810 receiver also functions without batteries if connected to an external power supply (12V DC source, 500 mA nominal current, not included).
-
Page 9: Operating The Receiver
Operating the Receiver NOTE: Transmitter-Receiver pairs must be set to identical frequencies. Overview… Selecting Frequencies 1. To turn the receiver on, press and hold the Power/Set button until the Power LED lights, and on your Receiver the LCD window comes on (about 2-3 seconds). The operating frequency will show in the window after the power-up sequence. -
Page 10: Transmitter Controls
ATW-T 1801 UniPak ™ Body-pack & ATW-T 1802 Plug-on Transmitter Controls POWER MUTE The ATW-T 1801 UniPak ™ body-pack transmitter includes a field-replaceable flexible antenna. For Antenna best results, allow the antenna to hang freely and full length from the bottom of the transmitter. If the received signal is marginal, experiment with different transmitter positions or try repositioning the receiver. -
Page 11: Operating Thetransmitter
Transmitter Batteries ATW-T1801 ATW-T1802 Each transmitter uses two 1.5V AA batteries, not included. Alkaline type is recommended. Battery Selection Always replace both batteries. Make certain the transmitter power is Off before replacing batteries. 1. Open the battery compartment door by sliding the catch down (on body-pack) or pushing in Transmitter Battery direction of arrow (on plug-on transmitter). - Page 12 Transmitter Functions Function Menu Default Setting Choices (Edit) Wrap-around* Frequency Lowest in band up to 996 frequencies (25 kHz steps) RF Power RF LOW RF LOW, RF HI Audio Input Level +6 dB - 6 dB, 0 dB, +6 dB, +12 dB Power/Mute Locks NO.LOC NO.LOC, ALL.LOC,...
-
Page 13: Tips For Best Results
Operating theTransmitter Restore Default Settings 1. A “PRESET” selection in the menu allows you to reset all transmitter functions to their factory-default values. 2. Press the Set button once to move to Menu mode. 3. Press the Up arrow twice to move to “PRESET” in the LCD window. 4. -
Page 14: Available Accessories
Available Accessories Wireless Essentials Microphones and Cables AT829cW Cardioid condenser lavalier microphone ® (all Wireless Essentials accessories are MT830cW Omnidirectional condenser lavalier microphone terminated for use with UniPak™ transmitters) MT830cW-TH“Theater” model, same as MT830cW except beige-color mic and cable AT831cW Cardioid condenser lavalier microphone AT889cW Headworn noise-cancelling condenser microphone... -
Page 15: Scanplans For 1800 Series
Scanplans for 1800 Series Please make certain that you have a licence for the frequency you are intending to use BEFORE you operate the system. The regulations differ from country to country and might change from time to time E-Band (795.500 - 820.000 MHz) -
Page 16: Specifications
Specifications † Overall System UHF Operating Frequencies Band C: 541.500 to 566.375 MHz Band D: 655.500 to 680.375 MHz Band E: 795.500 to 820.000 MHz Band F: 840.125 to 864.875 MHz Number of Operating Frequencies 996 total per band (25 kHz increments) Frequency Stability ±0.005%, Phase Lock Loop frequency control Modulation Mode... -
Page 17: Warranty
Disclaimer Audio-Technica operates a policy of continuous development. Audio-Technica reserves the right to make changes and improvements to any of the products described in this document without prior notice. Under no circumstances shall Audio-Technica be responsible for any loss of data or income or any special, incidental, consequential or indirect damages howsoever caused.