
Related Manuals for Philips DTR3000


Summary of Contents for Philips DTR3000
-
Page 1: User Manual
Register your product and get support at www.philips.com/welcome DTR3000 User manual... - Page 2 Equipped with a silent hard disk drive, it allows easy reception and recording of digital programmes, including those broadcasted in High Definition. The Philips recorder follows a continuous development strategy. Therefore, we reserve the right to make changes and improvements to the product described in this user manual without any prior notice.
-
Page 3: Table Of Contents
Contents 11 Timeshift/Record Timeshift Record 1 Safety recommendations Where to put your Set-top box? 12 Environment Warnings and safety instructions Batteries Meaning of logos present on the product or its Interference packaging USB Storage devices Product recycling and disposal Cleaning the Set-top box European Directive on Waste Electricaland Electronic Equipment (WEEE) Directive on the Restriction of use of certain hazardous... -
Page 4: Safety Recommendations
1 Safety recommendations Warnings and safety instructions • In case of failure, the power cable is the Use of the Set-top boxis subject to safety measures disconnect device for this equipment. To remove designed to protect users and their environment. all electrical power from the equipment, disconnect the power cable from the electrical outlet. -
Page 5: Batteries
Always keep the power cord unit out of the reach of children or domestic animals. Only personnel approved by the manufacturer can repair the Set-top box. Failure to comply with these safety precautions will invalidate the guarantee. Have a specialised installer perform all connections if you want to use cables that are not provided with the Set-top box. -
Page 6: What's In The Box
2 What‘s in the box Your new equipment includes: High Definition Digital Remote control Television Recorder (DTR) with 2 batteries (AAA) Quick start guide warranty card Safety condition... -
Page 7: Front Panel Of The Set-Top Box
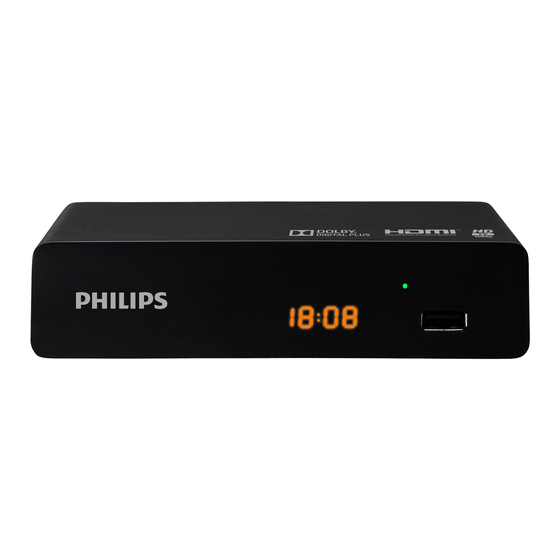
Front panel of the Set-top box Rear panel of the Set-top box Digital display Antenna input Shows the current time when theSet-top box is in Antenna output (Loopthrough only) standby. Shows the programme number when the Set-top box is Digital audio connector (S/PDIF) Shows hard disk activity(recording in progress,pro- gramme playback,...) HDMI Digital video audio connector... -
Page 8: Overview Of The Remote Control
Overview of the remote control • Open up Electronic Program Guide Menu • Move in a page,a menu... /CH+,-/VOL+,- • Display the channel list,confirm a selection MENU • Access menus • Rewind/Fastforward 0 to 9 • Access channels and various on-screen options •... -
Page 9: Connecting Your Devices
3 Connecting your devices Connection to the TV set Connection to a High-Definition television set Before installing your Set-top box: using an HDMI lead • Please check that the delivery is complete (see What‘s in the box, page 6). To take advantage of High Definition picture quality, you •... -
Page 10: Connection To A Home Cinema System
Connection to a Home cinema system Some programmes are broadcast with a high quality multichannel digital sound. The connection of your Set-top box to a Home cinema system will give you a cinematic surround sound experience when watching these programmes. This can easily be done by connecting with a coaxial cable (not supplied) the DIGITAL AUDIO output of your Set-top box to the digital audio coaxial input of your Home cinema amplifier... -
Page 11: Before Starting
4 Before starting Basics of the menu system How to access the main menu? Press the key. How to access a feature? You can access some features using the remote control as well as the main menu. When both possibilities are available, the corresponding procedures are proposed. -
Page 12: Menu Tree
Menu tree The tree below introduces the Set-top box menus: Edit Channel TV Channel List Radio Channel List Delete All Auto Scan Installation Channel Scan Language System Setup Language First Audio Second Audio Subtitle Language Teletext Subtitle TV System Video Resolution Aspect Mode Connection Digital Audio Out... - Page 13 Tools Information Load Factory Setting Software upgrade by OTA Software upgrade by USB Remove USB device safely Game Othello Sudoku Media Player Records Video Music Image HDD Information DVR Setting...
-
Page 14: Getting Started
5 Getting Started Channel Scan Select "Channel Scan", press the "OK" button to enter the Welcome Channel Scan menu. Press cursor button to set Scan mode, Scan Band ,Channel If you use the Set-top box for the first time, the "Welcome" No., Frequency and Bandwidth, then highlight "Search", menu appears. -
Page 15: Opteration
6 Operation Edit Channel Accessing the Electronic Program Edit Channel menu Guide (EPG) Press the "MENU" button to enter main menu. Press "UP" or "DOWN " button to highlight "Edit Channel", Accessing the EPG of all channels: press "RIGHT" button to enter the Edit Channel menu. Press "UP"... -
Page 16: Radio Channel List
Edit Channel All TV Sort Rename Delete 0009 TMF 0010 The HITS 0011 Film4 0012 BBC THREE 0013 BBC NEWS DVBT 0014 BBC TWO Film4 0015 BBC ONE 538000/8K/64QAM PID:701/702/701 GI:1/32 FEC:7/8 Radio Channel List In the Edit Channel menu, select "Radio Channel List", press "OK"... -
Page 17: System Setup
7 System Setup TV System Video Resolution 720p@50HZ System setup menu Aspect Mode Auto System setup menu allows you to set Language, TV System, Connection CVBS Local Time Setting, Timer Setting, Parental Lock, OSD Setting, Favorite, Audio Description Setting, Multiview Setting and Digital Audio Output LPCM Out Other. -
Page 18: Parental Lock
Timer Setting OSD Setting 15:31 12/04/2015 OSD Timeout Timer Mode OSD Transparency Timer Service Channel Wakeup Channel Film4 Wakeup Date 11/06/2015 Wakeup Time 18:20 Duration 02:00 Save Cancel Favourite Parental Lock This menu allows you to rename the favorite group. This menu allows you to protect menu and channel, and In Channel menu, select "Favorite", press "OK"... -
Page 19: Multiview Setting
Multiview Setting Other This menu allows us to set Multiview This menu allows you to set Antenna Power, Channel Play Type, Beeper and Auto Standby. In "System Setup" menu, select "Multiview Setting" and press "OK" button, you can set your desired screen view to 4+1 On/Off Antenna Power: Pictures or 3x3 Pictures . -
Page 20: Tools
8 Tools Press "EXIT" button to exit . Load Factory Setting Tools main menu This operation will delete all channels and settings and Use this menu, you can see the current informations of this Set the system will reboot to the first time installation, Top Box,Load Factory Setting, Update S/W and Remove USB continue? device safely. -
Page 21: Game
9 Game Game menu This menu allows you to play games by the function. Press the "MENU" button to enter main menu. Press "UP" or "DOWN" button to highlight "Game", press "RIGHT" button to enter the Game menu. Press "UP" or "DOWN" cursor button to highlight the desired item and press "OK"... -
Page 22: Media Player
Music: 10 Media Player "RED" button: Press "RED" button to show Play List. Highlight the file which you want to add to "GREEN" button: Media Player main menu play list, then press "Green" button to add. It will mark a favorite icon on the file. Media Player menu allows you to play musics, videos , pictures Press "Yellow"... -
Page 23: Pvr Storage Information
HDD Information HDD Information This menu can display storage state of HDD. USB Disk A:3.75G bytes In "Media Player" menu, select "HDD Information", press "OK" button to open PVR Storage information window. DVR Set Press "EXIT" button to exit. DVR Type REC&TMS FAT/NTFS Format... -
Page 24: Timeshift/Record
11 Timeshift/Record Initiate Ensure Timeshift is actived, in channel mode, press the“Pause” button to switch to Timeshift mode. Plugging an external Mass Storage Device on the USB port Press "RIGHT" or "LEFT" button to move the cursor to gives you access to Time Shift/Record a broadcast programme. the time you desired to view. -
Page 25: Environment
Preservation of the environment is an essential concern of Philips. electronic equipment (RoHS) The desire of Philips is to operate systems observing the environment and consequently it has decided to integrate Your recorder along with the batteries supplied comply with environmental performances in the life cycle of its products, the directive relating to the RoHS –... -
Page 26: Troubleshooting
The Set-top box automatically downloads ’over the air’ new software and services when they become available. You can also upgrade your Set-top box using a USB stick. Please check www.philips.com to find more information and the most recent software version for your product. -
Page 27: Customer Support
14 Customer Support At Philips we believe that a high quality product should come with the highest quality customer service. In the design of this product we have taken great care to ensure the maximum quality possible and are sure that you will be delighted with your purchase. -
Page 28: Specifications
15 Specifications Multichannel 5.1 DOLBY Digital (AC3) Mode: pass through and down mixing DOLBY Digital+ (E-AC3) DUAL DVB-T/T2 FRONT END Mode: pass through, transcoding Dolby Digital, and down RF INPUT mixing Input frequency range: VHF 174~230MHz UHF470-862 (8 MHz bandwidth) Output Resolution Format Input signal level: -90 to -20 dBm Input impedance: 75 Ohms unbalanced... -
Page 29: Power Supply
Power supply Mains supply voltage: 220-240 V~ 50 Hz Max. Power consumption: < 12 W Standby consumption: < 1 W Physical Specifications Set-top box Size (wxdxh): 148x110x35 mm Weight: 0.27Kg Operating temperature: 0°C to +40° Storage temperature: -25°C to +65°C Accessories 1 x Remote control 2 x AAA batteries... - Page 30 PHILIPS and the PHILIPS’ Shield Emblem are registered trademarks of Koninklijke Philips N.V. and are used by Sagemcom Documents SAS under license from Koninklijke Philips N.V. © 2014 Sagemcom Documents SAS All rights reserved Sagemcom Documents SAS Documents Business Unit Headquarters : 250, route de l’Empereur...