Table of Contents
Advertisement
Quick Links
Download this manual
See also:
User Manual
Advertisement
Table of Contents

Related Manuals for Siemens Gigaset E490


Summary of Contents for Siemens Gigaset E490
- Page 1 E490 Issued by Gigaset Communications GmbH Schlavenhorst 66, D-46395 Bocholt Gigaset Communications GmbH is a trademark licensee of Siemens AG © Gigaset Communications GmbH 2008 All rights reserved. Subject to availability. Rights of modifications reserved. www.gigaset.com...
-
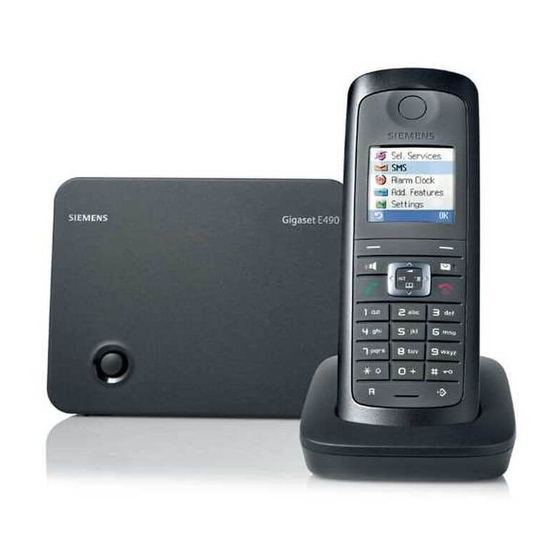
Page 2: The Handset At A Glance
The handset at a glance The handset at a glance 5 End call key, On/Off key End call, cancel function, go back one menu level (press briefly), back to idle status (press and hold), activate/deactivate handset (press and hold in idle status) 6 Hash key Keypad lock on/off (press and hold in idle status);... -
Page 3: Table Of Contents
Contents Contents The handset at a glance ....... . . 1 The base station at a glance . - Page 4 Contents Making cost-effective calls ......30 Linking call-by-call numbers with one number ..... . . 30 Automatic network provider code (preselection) .
- Page 5 Contents Base station settings ........49 Protecting against unauthorised access .
-
Page 6: Safety Precautions
Safety precautions Safety precautions Warning Read the safety precautions and the user guide before use. Explain their content and the potential hazards associated with using the telephone to your children. Only use the mains adapter supplied, as indicated on the underside of the base station or charging cradle. -
Page 7: First Steps
First steps First steps Check the pack contents one Gigaset E490 base station one mains adapter for the base station one Gigaset E49H handset one charging cradle one mains adapter for the charging cradle two batteries one battery cover one belt clip... -
Page 8: Installing The Base Station And Charging Cradle
First steps Installing the base station and charging cradle The base station and charging cradle are designed for use in enclosed dry rooms with a temperature range of +5°C to +45°C. ¤ Place the base station in a central location in your flat or house. Position the base station and charging cradle on a level, non-slip surface or mount them ¢... -
Page 9: Connecting The Charging Cradle
First steps Connecting the charging cradle ¤ Connect the flat plug of the mains adapter 1. ¤ Plug the mains adapter into the plug socket 2. If you need to disconnect the plug from the charging cradle, press the release button and disconnect the plug 2. -
Page 10: Setting Up The Handset For Use
The phone could also malfunction or be damaged as a result of using batteries that are not of the recommended type. * Gigaset Communications GmbH is a trademark licensee of Siemens AG. ¤ Insert the batteries the right way round. - Page 11 First steps ¤ Insert the rubber headset socket cover provided to guarantee the unit is splashproof. If you need to reopen the battery cover, for instance to change the batteries, please proceed as follows: ¤ Turn the lock ring or belt clip anti-clockwise to the end stop (approx.
- Page 12 First steps First battery charge and discharge The correct charge status can only be displayed if the battery is first fully charged and discharged. ¤ Place the handset in the charging cradle for six hours. ¤ Once the battery is fully charged, remove the handset from the charging cradle and do not put it...
- Page 13 First steps Setting the date and time Set the date and time so that the correct date and time can be assigned to incoming calls, and so that the alarm can be used. ¤ If you have not yet set the date Time and time, press the key below to open the input field.
-
Page 14: Connecting The Headset
First steps Display in idle status Once the phone is registered and the time set, the idle display is shown as in this example. Displays ¢ ¼ ½ ¼ Eco Mode + activated ( page 40) ¢ ½ Eco Mode activated ( page 40) INT 1 Charge status of the batteries:... -
Page 15: What Would You Like To Do Next
First steps What would you like to do next? Now you have successfully started your Gigaset, you will probably want to adapt it to your personal requirements. Use the following guide to quickly locate the most important subjects. If you are unfamiliar with menu-driven devices such as other Gigaset tele- phones you should first read the section entitled "Using the phone"... -
Page 16: Using The Phone
Using the phone Using the phone Control key In the description below, the side of the control key (up, down, right, left) that you have to press in the different operating situations is marked in black, e.g. v for "press on the right of the control key". -
Page 17: Display Keys
Using the phone Display keys The function of the display keys changes depending on the particular operating situation. Example: 1 Current display key functions are shown in the bottom display line. 2 Display keys The most important display keys are: Open a context-dependent menu. -
Page 18: Activating/Deactivating The Handset
Using the phone ¤ Navigate to the function using the control key q. Press the display key §OK§ Submenus The functions in the submenus are displayed as lists. To access a function: ¤ Scroll to the function with the control key q and press §OK§... -
Page 19: Illustration In The User Guide
Using the phone Illustration in the user guide The operating steps are shown in abbreviated form. Example The illustration: ¢ ¢ Ð Date/Time means: ¤ To display the main menu, press the right side of the control key in idle status. î... -
Page 20: Menu Tree
Menu tree Menu tree Instead of scrolling to locate a menu function, you can select a function more quickly by opening the menu and keying in a digit combination (or shortcut). Example: v 5 2 2 for "Set ringer for external calls". With the telephone in idle status, press v (open main menu): î... - Page 21 Menu tree Ð Settings ¢ 5-1 Date/Time page 12 ¢ 5-2 Audio Settings 5-2-1 Handset Volume page 47 ¢ 5-2-2 Ringer Settings page 48 ¢ 5-2-3 Advisory Tones page 49 ¢ 5-2-4 Silent Alert page 49 ¢ 5-3 Display 5-3-1 Screen Picture page 47 ¢...
-
Page 22: Making Calls
Making calls Making calls To deactivate the ringer, press the §Silence§ display key. You can take the call as long as it is displayed on the screen. Making an external call Calling Line Identification External calls are calls using the public tel- When you receive a call, the caller's ephone network. -
Page 23: Speaker
Making calls Speaker Switch to mute In speaker mode, instead of holding the You can deactivate the microphone in handset to your ear you can put it down, your handset during an external call. for example on the table in front of you. The other party hears hold music. -
Page 24: Making Calls Using Network Services
Making calls using network services Making calls using network Call waiting during an external call services If the function is activated during an Network services are functions that your external call, you will hear a call waiting network provider makes available to you. tone to signal that another external caller You have to request these services from is trying to get through. -
Page 25: Call Divert (Cd)
Making calls using network services Call divert (CD) Consultation call, call swap, conference When diverting a call, the call is forwarded to another connection. These functions enable you to The following options are available: Call a second external caller (external Calls: Calls are diverted immediately. - Page 26 Making calls using network services Call swap Ending a conference call Press the end call key to end You can speak to both callers one at a time the call with both participants. (call swap). Precondition: You are conducting an Press the display key.
-
Page 27: Using The Directory And Lists
Using the directory and lists Using the directory and lists Storing a number in the directory ¢ New Entry ¤ The options are: Change multiple line input: Directory Number Call-by-call list Enter the number. Last number redial list Name SMS list Enter name. - Page 28 Using the directory and lists Dialling with the directory/call-by-call Delete List Delete all entries in the directory/call- list by-call list. ¢ s / C s (select entry). Copy List Press the talk key. The number Send complete list to a handset ¢...
-
Page 29: Last Number Redial List
Using the directory and lists Copying a displayed number to the Managing entries in the last number directory redial list Numbers displayed in a list, e.g. the calls Press the key briefly. list or the last number redial list, in an SMS Select entry. - Page 30 Using the directory and lists List selection List entry If you press the message key f, only the New messages are displayed at the top. lists that contain messages are shown Example of list entries: (exception: network mailbox). Lists with new messages are identified in bold: All Calls Messages &...
-
Page 31: Making Cost-Effective Calls
Making cost-effective calls Making cost-effective calls All numbers that start with 08 except for 081 and 084 are dialled with the preselec- tion number 0999. Make phone calls through a network pro- Phone number Dialled number vider who offers particularly low-cost call ¢... -
Page 32: Sms (Text Messages)
SMS (text messages) SMS (text messages) Sending an SMS Press the talk key Your phone is supplied ready for sending SMS messages immediately. Press the display key. §Options§ Send Select and press Preconditions: §OK§ Select and press Calling Line Identification is enabled for §OK§... - Page 33 SMS (text messages) Delete: Character Set Text is shown in the selected character Delete Entry §Options§ §OK§ set. Copy to directory: Copy to Directory §Options§ §OK§ Deleting draft message list ¤ Delete entire list: Open the draft message list and then: Delete List §Options§...
-
Page 34: Receiving An Sms
SMS (text messages) Receiving an SMS If necessary select a mailbox and open list by selecting (if necessary enter mail- §OK§ box PIN and confirm by pressing §OK§ All received SMS messages are saved in the incoming message list. Linked SMS The number and date of receipt are dis- messages are displayed as one message. -
Page 35: Notification By Sms
SMS (text messages) Notification by SMS Replying to or forwarding text messages ¤ You can be notified about missed calls via Reading an SMS SMS. Press the display key. §Options§ Precondition: For missed calls, the caller's You have the following options: number (CLI) must have been transmit- ted. -
Page 36: Sms Mailboxes
SMS (text messages) ‰ SMS mailboxes Active mailboxes are marked with the mailbox list. They are shown in the SMS list and can, if necessary, be displayed The general mailbox is the default set- by pressing the message key f. ting. -
Page 37: Setting Sms Centres
SMS (text messages) Setting SMS centres Press the display key. §Save§ Please note SMS messages are exchanged between Ask your service provider for details SMS centres operated by service provid- on how to enter service numbers if you ers. You must enter the SMS centre wish to use personal mailboxes through which you wish to send and (precondition: your service provider... -
Page 38: Sms On A Pabx
SMS (text messages) Activating/deactivating first Editing the entry of an SMS service ¤ Select the SMS service (see above). ringer muting Then: Open menu. §Options§ Open menu. Select and press 5 5 O O Edit Entry §OK§ Press keys. If necessary, change the code, designation or destination Make the first ring audible. -
Page 39: Sms Troubleshooting
SMS (text messages) SMS troubleshooting You have stopped receiving SMS messages. 1. You have changed the ID of your mailbox. ¥ Error codes when sending Give your SMS contacts your new ID or ¢ undo the change ( page 35). E0 Calling Line Identification permanently withheld (CLIR) or Calling Line Identifica- 2. -
Page 40: Using The Network Mailbox
Using the network mailbox Using the network mailbox Viewing the network mailbox message The network mailbox is your network pro- vider's answering machine within the net- When a message is recorded, you receive work. You cannot use the network mail- a call from the network mailbox. -
Page 41: Eco Dect
ECO DECT ECO DECT Status displays Display icon You are helping to protect the environ- Reception strength: ment with your Gigaset E490. Ð i Ñ Ò – good to poor | (flashes) Reduced energy consumption – no reception ½ Eco Mode enabled Your telephone has a power-saving ¼... -
Page 42: Setting The Alarm Clock
¢ ì Manual registration of Gigaset E49H to ¤ Change multiple line input: Gigaset E490 Activation You must activate manual registration of Select or Off. the handset on both the handset and the Time base station. -
Page 43: De-Registering Handsets
Using several handsets De-registering handsets Initiate internal call. You can de-register any other registered Select handset. handset from any registered Gigaset E49H Press the talk key. handset. Open list of internal partici- Calling all handsets ("group call") pants. Initiate internal call. The handset you are currently Press the star key. -
Page 44: Listening In To An External Call
Using several handsets Internal consultation/conference calls Rejecting the external call Press the display key. §Reject§ When you are conducting an external The call waiting tone is turned off. You call, you can call an internal participant at remain connected with the internal partic- the same time for consultation or hold a ipant. -
Page 45: Changing The Name Of A Handset
Using a handset as a room monitor Using a handset as a Changing the name of a handset room monitor The names "INT 1", "INT 2" etc. are assigned automatically on registration. You can change these names. The name If the room monitor is activated, a previ- must be no more than 10 characters. - Page 46 Using a handset as a room monitor Changing a set external destination Warning number You should always check the ¢ ¢ í Room Monitor operation of the room monitor before use. For example, test its Scroll to the Call to line.
-
Page 47: Handset Settings
Handset settings Handset settings Changing the display language You can view the display texts in different Your handset is preconfigured, but you languages. can change the settings to suit your indi- ¢ ¢ ¢ Ð Handset Language vidual requirements. ‰ The current language is indicated by Quick access to functions Select a language and... -
Page 48: Setting The Display Lighting
Handset settings If a screen picture has been activated, Please note the menu item is marked Screen Picture ‰ With the setting, the standby time with ¢ ¢ ¢ of the handset can be significantly Ð Display Screen Picture reduced. The current setting is displayed. -
Page 49: Changing Ringers
Handset settings If t is assigned to another function, Same ringer for all functions ¢ e.g. call swap ( page 25): ¢ ¢ Ringer Settings ¤ Open menu. §Options§ Set volume and ringer (see "Settings for Volume Select and press §OK§... -
Page 50: Activating/Deactivating Advisory Tones
Base station settings ¤ Silent alarm Save the changes. You cannot deactivate the confirmation Incoming calls and other messages are tone for placing the handset in the charg- indicated by a silent alarm. ing cradle. In idle status: ¢ Please note Silent Alert You can also make these settings via ¢... -
Page 51: Activating/Deactivating Music On Hold
Base station settings Repeater support Changing the system PIN You can change the 4-digit system PIN set With a repeater you can increase the range on the base station (default setting: 0000) and reception strength of your base sta- to a 4-digit PIN known only by you. tion. -
Page 52: Connecting The Base Station To The Pabx
Connecting the base station to the PABX Connecting the base station Saving an access code (outside line code) to the PABX Precondition: You may have to enter an The following settings are only necessary access code for external calls in your PABX, when your PABX requires them;... -
Page 53: Setting Pauses
Connecting the base station to the PABX Setting pauses Changing a dialling pause (pause after access code) Precondition: You have saved an access Changing pause after line seizure ¢ code ( page 51). You can change the length of pause that is Open menu. -
Page 54: Service (Customer Care)
Service (Customer Care) Service (Customer Care) You can get assistance easily when you have technical questions or questions about how to use your device by using our online support service on the Internet at: www.gigaset.com/customercare This site can be accessed at any time wherever you are. It will give you 24/7 support for all our prod- ucts. -
Page 55: Questions And Answers
Service (Customer Care) Questions and answers You have entered the wrong system PIN. ¥ ¢ Reset the system PIN to 0000 ( page 50). If you have any questions about the use Forgotten the system PIN. of your phone, you can contact us 24/7 ¥... -
Page 56: Authorisation
Environment Authorisation Environmental management system Gigaset Communications This device is intended for analogue GmbH is certified pursu- phone lines in your network. ant to the international Country-specific requirements have been standards EN 14001 and taken into consideration. ISO 9001. We, Gigaset Communications GmbH, ISO 14001 (Environment): certified since declare that this device meets the September 2007 by TüV SÜD Manage-... -
Page 57: Appendix
Appendix Appendix We recommend the following battery types, because these are the only ones that guarantee the specified operating times, full functionality and long service Care life: ¤ GP 700 mAh Wipe the base station, charging cradle Yuasa Phone 700 mAh and the handset with a damp cloth (do Yuasa AAA 800 mAh not use solvent) or an antistatic cloth. -
Page 58: Writing And Editing Text
Appendix Press the star key * to show the table General specifications of special characters. Select the required character, press the display DECT standard is supported to insert the character at the §Insert§ cursor position. GAP standard is supported The first letter of the name of directory No. -
Page 59: Accessories
Accessories Accessories Gigaset handsets Upgrade your Gigaset to a cordless PABX: Gigaset E49H handset Dust and splashproof casing Illuminated graphic colour display (65k colours) Illuminated keypad Speaker Silent alarm Polyphonic ringers Directory for around 150 entries SMS (precondition: CLIP must be enabled) Headset socket Room monitor www.gigaset.com/gigasete49h... - Page 60 Accessories Gigaset C47H handset Illuminated graphic colour display (65k colours) Illuminated keypad Speaker Polyphonic ringers Directory for around 150 entries SMS (precondition: CLIP must be enabled) Headset socket Room monitor www.gigaset.com/gigasetc47h Gigaset S68H handset Illuminated graphic colour display (65k colours) Illuminated keypad Speaker Polyphonic ringers...
- Page 61 Accessories Gigaset repeater The Gigaset repeater can be used to increase the reception range of your Gigaset handset to the base station. www.gigaset.com/gigasetrepeater Gigaset HC450 – door intercom for cordless phones Use the intercom from your cordless phone - no need for a fixed home phone Intuitive user functions using the display keys (open door, switch on entry light)
-
Page 62: Mounting The Base Station To The Wall
Mounting the base station to the wall Mounting the base station to the wall 99 mm approx. 2.5 mm Mounting the charging cradle to the wall 21 mm approx. 2.5 mm... -
Page 63: Index
Index Index external ..... internal ..... participant listening in . - Page 64 Index Deactivating Earpiece mode ....advisory tones Earpiece volume ....
- Page 65 Index setting ..... . setting up ..... Language, display .
- Page 66 Index Name Recall ......of a handset Recall key ....
- Page 67 Index PIN protection ....reading ....Warning tone, see Advisory tones receiving .