Siemens HiPath 2000 User Manual
Optipoint application module
Hide thumbs
Also See for HiPath 2000:
- User manual (214 pages) ,
- Administration manual (192 pages) ,
- Operating manual (152 pages)
Table of Contents
Advertisement
Quick Links
Advertisement
Table of Contents

Related Manuals for Siemens HiPath 2000


Summary of Contents for Siemens HiPath 2000
- Page 1 HiPath 2000 HiPath 3000 HiPath 4000 optiPoint application module User Manual...
-
Page 2: About This User Manual
An obligation to provide the respective characteristics shall only exist if expressly agreed in the terms of contract. The trademarks used are owned by Siemens AG or their respective owners. Maintenance •... -
Page 3: Labels
About this User Manual Labels The device conforms to the EU guideline 1999/5/EG, as attested by the CE mark. This device has been manufactured in accordance under a certified environ- mental management system (ISO 14001). This process ensures that energy consumption and the use of primary raw materials are kept to a minimum, thus reducing waste production. -
Page 4: Table Of Contents
Contents Contents About this User Manual ......2 Important Notes ......... . . 2 Maintenance . - Page 5 Contents ENB – Your Personal Telephone Directory ..21 Using the ENB ..........21 Set up new entry .
- Page 6 Contents Voice dialling .......59 Online Help ........60 Index.
-
Page 7: Basics Of Operation
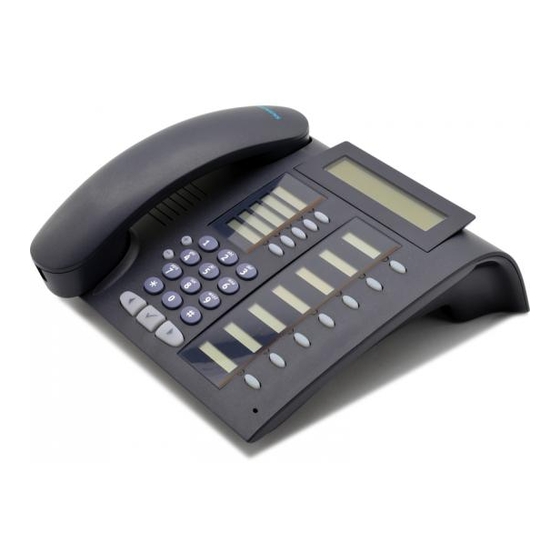
Basics of operation Basics of operation The optiPoint application module is used as an add-on with the optiPoint 410/420 standard/advance and optiPoint 500 basic/standard/ advance. On one hand, it supports you while using the optiPoint tele- phone. On the other, the optiPoint application module offers several other functions that you can use intuitively and effectively to perform different tasks. -
Page 8: Guidance For Reading The Operation Instructions
Basics of operation Guidance for reading the operation instructions The operational steps of the device are represented graphically in a logical sequence in the left column. The representations have the following meanings: Lift handset. Replace handset. Conduct conversion. Press key on the optiPoint application module. Instructions for intuitive operation In many cases there is more than one option for performing the same operation. -
Page 9: Display With Touch Screen Functionality
Basics of operation Display with touch screen functionality Besides the navigation and selection keys Page 13 you can operate the optiPoint application module using the graphics display supporting touch screen functionality. On telephones of the optiPoint 500 product family only the applications "ENB"... -
Page 10: Start Page
Basics of operation Start page There are a number of different icons on the start page (this can be invoked at any time by pressing ); each of these icons represents an application (e.g. "ENB"). On telephones of the optiPoint 500 product family only the applications "ENB"... -
Page 11: System And Application Bar
Basics of operation System and application bar Recurring information and display keys appear in the system bar and the application bar of the display ( Page 9) of your optiPoint application module in different situations. On being clicked, the display keys execute standard functions. In the left area of the system bar: The currently selected application/function is displayed here. -
Page 12: Dialog Messages
Basics of operation Dialog messages In different situations, the optiPoint application module expects the user to confirm an information item in a dialog window. Depending on the content, the buttons "OK", "Yes", "No" and "Cancel" are available for use. Answer the question by clicking on one of the two buttons. Confirm the warning message. -
Page 13: Entering Characters
Basics of operation Entering characters Keyboard on the optiPoint application module The keybord on the optiPoint application module provides a convenient tool for entering text, numbers and special characters. It offers hotkeys for executing frequently used functions. You can easily navigate within the applications and execute functions. -
Page 14: Display Keyboard
Basics of operation Starts dialling or (in combination with the key) starts the voice dialling. Navi Key Moves the cursor to the left. Moves the cursor to the right. Moves the cursor up or scrolls up. Moves the cursor down or scrolls down. Saves an entry or confirms a function. - Page 15 Basics of operation Apart from the alphabetical softkeys, the following softkeys are available: Shift to upper case. Shift to lower case. Shift to the first alternative key assignment (e.g. numeric characters, punctuation marks, brackets). Shift to the second alternative key assignment (e.g. currency symbols). Place the cursor at the beginning of the line.
-
Page 16: Making Call
Making call Step by Step Making call Dial from personal telephone directory You will find a detailed description of the application interface from Page 21. Select entry Precondition: A minimum of one entry must exist in the personal telephone directory. To set up entries,see Page 22. -
Page 17: Dial Selected Telephone Number
Making call Step by Step Dial selected telephone number Select a desired telephone number if you wish to dial a number that is not the standard telephone number. Precondition: One entry in the telephone directory list is highlighted,see Page 24. Click on the desired entry. -
Page 18: Dial From Company Telephone Directory
Making call Step by Step Dial from company telephone directory You will find a detailed description of the application interface from Page 33. Precondition: You have access through a LAN to a company-wide telephone directory and the dialling rules are entered correctly. Click on the icon in the system bar. -
Page 19: Speed Dial
Making call Step by Step Speed dial You will find a detailed description of the application interface from Page 43. Precondition: The midlet "SpeedDialApplet" is installed, and there is at least one entry in the Speed dial list. For information on how to create new entries, see Page 50. -
Page 20: Voice Dialling
Making call Step by Step Voice Dialling Dial numbers by just saying a name. Precondition: ENB entries must have added VoiceDial, Page 28. Observe the instructions shown in the display while dialling. Using voice dialling Lift handset. Press key. Speaker Press the voice dial key combination on the optiPoint application module. -
Page 21: Enb - Your Personal Telephone Directory
ENB – Your Personal Telephone Directory Step by Step ENB – Your Personal Telephone Directory The application "ENB" is your personal telephone direc- tory. You can store telephone numbers and additional information about contacts locally, e.g. addresses and fax numbers. You can store up to four telephone numbers and four additional pieces of information per name/entry and set one of the telephone numbers to be the default number... -
Page 22: Set Up New Entry
ENB – Your Personal Telephone Directory Step by Step Entries or names are sorted alphabetically in the display. You can execute direct searches for entries. Page 16 you find information how to dial a number/entry from the Personal Telephone Directory. In this view, the context menu offers the following: •... - Page 23 ENB – Your Personal Telephone Directory Step by Step System bar Page 11 Edit Entry "Name" register Name Last Name: First Name: "Numbers" register Numbers "Notes" register Notes Save View Application bar Page 11 "Name" register The first field, "Last Name", is activated for input. This field must be filled in.
- Page 24 ENB – Your Personal Telephone Directory Step by Step Use the keys to move from line to line. Use the keys to move the cursor to the left/ right. "Numbers" register The field "Business" is activated for input. Edit Entry Name Numbers Business:...
-
Page 25: Save Entry
ENB – Your Personal Telephone Directory Step by Step "Notes" register The field "Address1" is activated for input. Edit Entry Name Numbers Notes Address1: Address2: Company: Position: Save View Click on the individual fields and enter the data (entering characters, see Page 13). -
Page 26: Cancel Entry
ENB – Your Personal Telephone Directory Step by Step Cancel entry Click on the icon in the system bar. The following warning is displayed: Changes are discarded. Confirm? Click on the "Yes" softkey. All changes are discarded. Search entry Precondition: There have to be existing entries or names in the ENB, see Page 22. - Page 27 ENB – Your Personal Telephone Directory Step by Step Delete entry Click on the icon in the system bar to open the context menu. Select "Delete Entry". The following warning message is Delete Entry displayed: Entry will be deleted. Are you sure? Click on the "Yes"...
-
Page 28: Adding Voicedial To An Entry
ENB – Your Personal Telephone Directory Step by Step Adding VoiceDial to an entry This function is only available on optiPoint 410/ 420 Workpoints. You can add VoiceDial to a maximum of 20 ENB entries. Recording a VoiceDial entry For reliable voice recognition, the intonation, speed and volume of the speaker are important. - Page 29 ENB – Your Personal Telephone Directory Step by Step The context menu now offers the following menu items for this entry: • VoiceDial-Play: play entry, see Page 29. • VoiceDial-Replace: replace entry, see Page 29. • VoiceDial-Remove: remove entry, see Page 29.
-
Page 30: Importing/Exporting The Enb
ENB – Your Personal Telephone Directory Step by Step Importing/exporting the ENB Importing/exporting the ENB via USB This function is only available if your optiPoint application module is connected to an optiPoint 500 or optiPoint 410/420 advance. You can transfer all entries in your personal telephone directory from your PC to your optiPoint application module or save the entries from the module to your PC. - Page 31 ENB – Your Personal Telephone Directory Step by Step Exporting ENB Click on the icon in the system bar to open the context menu. Select "Export". The "Export 1/2" dialog is displayed. Export The field "Server:" is activated for input. Export 1/2 FTP Parameter Server:...
- Page 32 ENB – Your Personal Telephone Directory Step by Step The field "File:" is activated for input. Export 2/2 File Details File: Folder: Export Enter the information into the fields (entering characters, see Page 13). • File: Enter the filename including extension for the export file.
-
Page 33: Ldap - Company Telephone Directory
LDAP – Company telephone directory Step by Step LDAP – Company telephone directory At startup, the "LDAP" application displays a search dia- log; using this dialog you can search and dial entries in your company-wide telephone directory quickly and easily. In case of questions regarding availability and/or dialling rules please ask your service personnel. -
Page 34: Basic Search" Register
LDAP – Company telephone directory Step by Step For information on how to dial from the company telephone directory see Page 18. The context menu offers the following menu items in this view: • Search: Starts the search operation, see Page 34 Page 35. -
Page 35: Advanced Search" Register
LDAP – Company telephone directory Step by Step "Advanced Search" Register The field "Last Name:" is activated for input. LDAP Basic Search Advanced Search Active input field Last Name: First Name: Position: Country: Department: Search Enter the information into the fields (entering characters, see Page 13). -
Page 36: Wap Browser
WAP browser Step by Step WAP browser The "Browser application provides access to the internet and your company intranet. In case of questions regarding availability please ask your service personnel. Using the browser Precondition: The LAN settings have to be configured correctly. -
Page 37: Load A Wap Page
WAP browser Step by Step • Refresh Page: Loads the current page again, see Page 40. • Settings: Enables the configuration of the WAP server and start page, see Page 37. Load a WAP page Enter the WAP address into the input field entering characters, see Page 13). - Page 38 WAP browser Step by Step Use the keys to move from line to line. Use the keys to move the cursor to the left/ right. "Home Page" register The field "Start Page URL:" is activated for input. WAP Settings Web access settings Home Page Start Page URL Active input field...
-
Page 39: Favorites
WAP browser Step by Step Favorites Save favorites You can save a list with the names and addresses of fre- quently accessed domains. To add a favorite, proceed as follows: Click on the softkey in the application bar. The "Favor- Favorites ites"... - Page 40 WAP browser Step by Step Update favorites list If you save more than one WAP addresses,you have to update the favorites list to display all entries in the list. Click on the icon in the system bar to open the context menu.
- Page 41 WAP browser Step by Step Edit Favorites Name Name of the WAP page wap.web.de Domain of the WAP page Save Enter the information into the fields (entering characters, see Page 13). • Name: Enter the desired name for the WAP page. •...
- Page 42 WAP browser Step by Step Delete favorites Click on the icon in the system bar to open the context menu. Select "Manage Favorites". The favorites list with all Manage Favorites entries saved is displayed. Favorites Yahoo Edit Delete Select the desired entry. The entry selected is highlighted.
-
Page 43: Programs - Using Other Programs
Programs – Using other programs Step by Step Programs – Using other programs The application "Programs" provides an interface to extend your optiPoint application module with Java midlets. Java midlets are small programs that are executed local- ly in the optiPoint application module and can be used to provide various functions. -
Page 44: Add A Java Midlet
Programs – Using other programs Step by Step Add a Java midlet Your optiPoint application module is delivered with no Java midlets installed. When you start the "Programs" application for the first time, the "Java Midlets" dialog has no entries. Java Midlets No entries available. - Page 45 Programs – Using other programs Step by Step "FTP Parameters" register Click on the softkey in the application bar. The "Add Add Midlet Midlet 1/2" dialog is displayed. Add Midlet1/2 FTP Parameter Server: User: Password: Account: Next Enter the information into the fields (entering characters, see Page 13).
- Page 46 Programs – Using other programs Step by Step "File Details" register Click on the softkey in the application bar. The "Add Next Midlet 2/2" is displayed. Add Midlet 2/2 File Details File: Folder: Add Midlet Enter the information into the fields (entering characters, see Page 13).
-
Page 47: Delete Java Midlet
Programs – Using other programs Step by Step Delete Java midlet Click on the icon in the system bar to open the context menu. Select "Delete Entry". The following warning message is Delete Entry displayed: Recording will be deleted. Are you sure? Click on the "Yes"... -
Page 48: Starting The Java Environment
Programs – Using other programs Step by Step Starting the Java environment Precondition: There is at least one Java midlet in- stalled, see Page 44. You have to select the desired program and load it into the Java environment to be able to launch it, see Page 49. -
Page 49: Example Application: Speed Dial List
Programs – Using other programs Step by Step Example Application: Speed Dial List Precondition: The Java midlet "SpeedDialApplet" is installed, see Page 44. The application "SpeedDialApplet" is an example application for creating and selecting speed dial entries. The midlet shown here can differ from the version installed on your optiPoint application module. -
Page 50: Creating/Changing An Entry
Programs – Using other programs Step by Step Creating/changing an entry First you will see the following display with all speed dial fields empty (condition as delivered). Run Entry SpeeDialApplet empty empty empty empty empty empty empty empty Previous Next Exit Edit Goes to the selection menu of the installed Java... - Page 51 Programs – Using other programs Step by Step The "Select Action" dialog is displayed, showing a list of possible actions. Run Entry Select Action Import Entry from ENB Enter Entry Manually Delete Entry Back Create/change manually Select "Enter Entry Manually". The "CreateSpeedDialEn- Enter Entry Manually try"...
- Page 52 Programs – Using other programs Step by Step Use the keys to move from line to line. Use the keys to move the cursor to the left/ right. Click on the softkey in the application bar to save the Save entries.
- Page 53 Programs – Using other programs Step by Step The "Select directory entry" dialog is displayed. Run Entry Select directory entry Name 1 Name 2 Name 3 Details Back Select the desired entry. The entry is loaded into the "CreateSpeedDialEntry" dialog, see Page 51.
- Page 54 Programs – Using other programs Step by Step Delete an entry Precondition: There are already entries in your Speed- DialApplet, see Page 50. Start the "SpeedDialApplet" midlet Page 49 and activate the Edit Mode. Select a field to delete. The "Select Action" dialog is Name displayed.
-
Page 55: Display - Application Module Settings
Display – application module settings Step by Step Display – application module settings Using the "Display" application you can adapt the touch- screen display to your environment. You can also configure screen locking as a protection against unauthorized use of your device. You can set a period after which the screen will be locked following the last use. -
Page 56: Display" Register
Display – application module settings Step by Step "Display" register" Settings Display Contrast: Contrast setting Backlight: Backlight setting Calibrate Screen Lock Time Set Screen Lock Password Save Contrast Click on the "Contrast" scroll bar and pull to the right (lower) or to the left (higher). Brightness Click on the "Backlight"... -
Page 57: Screen Lock Time" Register
Display – application module settings Step by Step "Screen Lock Time" register The device is supplied with the screen lock switched off. It becomes active only after you have configured it. Settings Display Screen Lock Time Screen Lock disabled Options for selecting 30 seconds the time for the 1 minute... -
Page 58: Set Screen Lock Password" Register
Display – application module settings Step by Step "Set Screen Lock Password" register The field "Confirm" is activated for input. Settings Display Screen Lock Time Set Screen Lock Password New: Active input field Confirm: Save Enter the information into the fields (entering characters, see Page 13). - Page 59 Voice dialling Step by Step Voice dialling This feature is only available for optiPoint 410/420 Workpoints. The "Voice" application provides general information about the voice dialling application. Double-click on the "Voice" icon on the start page Page 9 to start the application. The "Voice"...
-
Page 60: Online Help
Online Help Step by Step Online Help Click on the "?" icon in the system bar Page 11 to start the application. The help is opened in the WAP browser, see Page 36. To use the online help, this function must be set up correctly. -
Page 61: Index
Index Index Display ............. 9, 55 Backlight ..........56 Calibrate display ........56 Contrast ........... 56 Display Keyboard ........14 Application Bar ........9, 11 Edit Entry ............. 26 Backlight ............56 ............16, 21 Browser ............36 Delete all entries ........ - Page 62 Index Labels,Notes Screen Lock ..........12 Labels Operation ............3 ..........12 LDAP Password ............18, 33 ..........58 Advanced search Screen Lock Time ........35 ........57 Basic search Search entry ..........34 ..........26 Extended search Settings ........18 Simple search Display .........
- Page 63 An obligation to provide the respective characteristics shall only exist if Ref. No.: A31003-A2056-M423-1-7619 expressly agreed in the terms of contract. The trademarks used are owned by Siemens AG or their respective Subject to availability. Right of modification reserved. owners.