Table of Contents
Advertisement
Advertisement
Table of Contents

Related Manuals for Windsor SC20 10052190


Summary of Contents for Windsor SC20 10052190
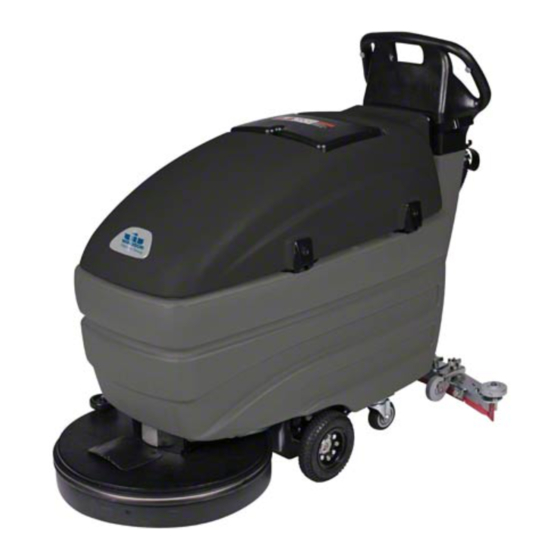
- Page 1 Saber Compact 20 Walk Behind Scrubber Operating Instructions (ENG) MODELS: SC20 10052190 SC20T 10052200 SCX20T 10052370 SCC20 10052230 SCC20T 10052240 SCXC20T 10052420 From Serial Number (Ref No1*) *See Serial Number Page in Spare Parts List or call manufacturer. IPX4 86400640-B 07/22/15...
-
Page 2: Machine Data Label
Machine Data Label Overview The Saber Compact is a battery powered, hard floor scrubber intended for commercial use. The appliance applies a cleaning solution onto a hard floor, scrubs the floor with a brush or pad, and then vacuums the soiled water back into the recovery tank. -
Page 3: Table Of Contents
Table of Contents Machine Data Label ......2 Overview ........2 Table of Contents . -
Page 4: How To Use This Manual
How To Use This Manual This manual contains the following sections: • How To Use This Manual The SAFETY section contains important information regarding hazardous or unsafe practices of the • Safety machine. Levels of hazards are identified that could •... -
Page 5: Safety
Safety IMPORTANT SAFETY INSTRUCTIONS When using this machine, basic precaution must always be followed, including the following: READ ALL INSTRUCTIONS BEFORE USING THIS MACHINE. To reduce the risk of fire, electric shock, or injury: Use only indoors. Do not use outdoors or expose to rain. Use only as described in this manual. - Page 6 Safety MESURES DE SÉCURITÉ IMPORTANTES Lors de l’utilisation d’un appareil à batteries, il est nécessaire de respecter systématiquement des mesures de sécurité de base, comme suit : PRENEZ NOTE DE TOUTES CES MESURES AVANT D’UTILISER CETTE MACHINE Pour réduire le risque d'incendie, d'électrocution ou de blessure : N’utiliser cette machine qu’en intérieur.
-
Page 7: Hazard Intensity Level
Safety The following symbols are used throughout this guide as indicated in their descriptions: Hazard Intensity Level There are three levels of hazard intensity identified by signal words -WARNING and CAUTION and FOR SAFETY. The level of hazard intensity is determined by the following definitions: WARNING - Hazards or unsafe practices which COULD result in severe personal injury or death. - Page 8 Safety Les symboles suivants sont utilisés dans tout ce manuel, tels que décrits ici : NIVEAU D'INTENSITÉ DU DANGER Il existe trois niveaux d'intensité du danger, identifiés par des termes d'avertissement - AVERTISSEMENT, ATTENTION et POUR VOTRE SÉCURITÉ. Le niveau d'intensité du danger est déterminé par les définitions suivantes : AVERTISSEMENT - Les dangers ou des pratiques contraires à...
-
Page 9: Safety Labels
Safety Safety Labels NOTE: These drawings indicate the location of safety labels on the machine. If at any time the labels become illegible, promptly replace them. Les schémas ci-dessous indiquent l’emplacement des plaques de sécurité. Si les plaques deviennent illisibles, les remplacer immédiatement. REMARQUE: Les schémas ci-dessous indiquent l’emplacement des plaques de sécurité. -
Page 10: Operations
Operations Technical Specifications ITEM DIMENSION/CAPACITY Nominal power – non-traction model 1100 W Nominal power – traction model 1200 W Rated Voltage 24VDC Rated Amperage – non-traction model 45 Amps Rated Amperage – traction model 50 Amps 2 x 12 Volt 105-130-195 AH @ 20hr Batteries rate Scrub Brush Motor... - Page 11 Operations ITEM MEASURE Height 43 in. ( 109.2 cm) Length 54 in. (137.1 cm) Width without squeegee 22 in. (55.9 cm) Width of squeegee 31 in. ( 78.7 cm) Width of scrub path 20 in. (51 cm) WIDTH LENGTH HEIGHT This appliance is not intended for use by persons (including children) with reduced physical, sensory or mental capabilities, or lack of experience and knowledge, unless they have been given supervision or instruction concerning use of the appliance by a person responsible for their safety.
-
Page 12: How This Machine Works
Operations How This Machine Works The function of the recovery system is to vacuum the soiled water back into the recovery tank. The recovery The Saber Compact is a battery powered, hard floor system consists of the squeegee, vacuum motor, scrubber intended for commercial use. -
Page 13: Components
Operations Components 1. Control Panel 2. Control Handle 3. Recovery Tank 4. Recovery Tank Drain Hose 5. Scrub Head 6. Scrub Brush Access Cover 7. Solution Tank 8. Solution Tank Cover 9. Solution Tank Drain Hose 10. Solution Strainer 11. Solution Tank Support Arm 12. -
Page 14: Controls - Non Traction
Operations Controls - Non Traction 1. Brush Switch 2. Brush Lift Lever 3. Vacuum Switch 4. Squeegee Lift Lever 5. Solution Control Lever 6. Battery Charge Level Indicator 7. Hour Meter (Optional) 8. Circuit Breakers 86400640 Operator’s Manual - Saber Compact 20... -
Page 15: Battery Charge Level Indicator
Operations 1. Brush Switch 6. Battery Charge Level Indicator Controls the scrub brush motor. Indicates the charge level of the batteries. To turn scrub brush on, press the top of the switch. The meter display is divided into 10 vertical bars. Bars illuminated on the far right indicate full charge. -
Page 16: Controls - Traction
Operations Controls - Traction 1. Solution Control Knob 2. Brush Switch 3. Brush Lift Lever 4. Vacuum Switch 5. Squeegee Lift Lever 6. Key Switch 7. Propel Buttons (Normally Forward) 8. Reverse Propel Button 9. Speed Control Knob 10. Battery Charge Level Indicator 11. -
Page 17: Key Switch
Operations 1. Solution Control Knob 5. Squeegee Lift Lever Controls solution flow to scrub deck. Raises and lowers the squeegee. To increase flow, rotate knob clockwise. To lower the squeegee, lift and pull the lever to the left and then lower. To decrease flow, rotate knob counterclockwise. - Page 18 Operations 9. Speed Control Knob 12. Hour Meter (Optional) Controls the speed of the machine. Records the number of hours the machine’s brush has been in operation. This information is useful in deter- To increase speed, rotate knob clockwise. mining when to service the machine. To decrease speed, rotate knob counterclockwise.
-
Page 19: Machine Operation
Operations Machine Operation 4. Measure the chemical into the solution tank. Liquid chemicals should be added to the solution tank after filling with water. Dry chemicals should be Pre-run Machine Inspection thoroughly mixed before being added into the Do a pre-run inspection to find possible problems that solution tank. -
Page 20: To Begin Scrubbing
Operations To Begin Scrubbing To Stop Scrubbing 1. Release the directional control button(s), if your machine is traction model. When operating the machine around people, pay 2. Turn the scrub brush off. close attention for unexpected movement. Use extra caution around children. 3. -
Page 21: Emptying And Cleaning Tanks
Operations Recovery Tank Emptying And Cleaning Tanks 1. Park the machine next to a floor drain. Drain hoses 1. Unhook the large drain hose from the retainer. are on the rear of the machine. Unscrew the T-handle on the plug enough to loosen it, then lower the hose in the direction of the 2. -
Page 22: Maintenance
Maintenance Batteries The batteries provide the power to operate the When servicing machine, avoid contact with machine. The batteries require regular maintenance to battery acid. keep them operating at peak efficiency. The machine batteries will hold their charge for long Lors de l'entretien de la machine, évitez tout periods of time, but they can only be charged a certain contact avec l'acide de batterie. -
Page 23: To Charge The Batteries
Maintenance Checking Battery Specific Gravity Use a hydrometer to check the battery specific gravity. Batteries emit hydrogen gas. Explosion or fire can result. Keep sparks and open flame away. Keep covers open when charging. Les batteries émettent du gaz hydrogène. Une explosion ou un incendie peut en résulter. - Page 24 Maintenance 4. Check the electrolyte level in each battery cell. Machines equipped with onboard Charger: Before charging, add just enough distilled water to 1. Fully open Recovery Tank / Battery Cover or prop cover the plates. After charging is complete, add in partially open position using bracket (included).
- Page 25 Maintenance On-board Charger Battery Selection Only dipswitch SW1 effects the charging curve. Select the appropriate dip switch setting from the Charging Curve Table. Do not change settings of SW2. Changing settings of SW2 dipswitch could result in charger Disconnect charger from wall outlet before failure.
-
Page 26: Changing Batteries
Maintenance Changing Batteries Stop the machine in a clean area next to the Batteries are a potential environmental hazard. charger.Turn off machine. Consult your battery supplier for safe disposal methods. FOR SAFETY: Before leaving or servicing the machine; stop on level surface, turn off machine and remove key. -
Page 27: Scrub Brushes
Maintenance Scrub Brushes Blue Pads (Scrubbing) are used for heavy-duty scrubbing and light stripping. The blue pads remove NOTE: All original equipment brushes are equipped less finish than brown stripping pads, yet will remove with “Perform Alert©”. This feature will tell the black marks, stains and dirt. -
Page 28: Squeegee Blades
Maintenance Squeegee Blades Check both the front and rear squeegee blades for damage, wear, and adjustment each day in the pre-run The front squeegee blade allows solution to pass check. Change the front blade if it is torn or has an through channels in the blade into the squeegee uneven edge. -
Page 29: To Adjust Squeegee Pitch
Maintenance To Adjust Squeegee Pitch To Replace Or Rotate Rear Squeegee Blade 1. Choose a smooth, level surface. Turn “ON” the key switch and vacuum switch. Lower the squeegee 1. With the squeegee in the up position, turn key and drive forward at least 2 feet (60cm.). switch “OFF”. -
Page 30: Service Schedule
Maintenance Service Schedule MAINTENANCE DAILY WEEKLY MONTHLY Check batteries after charging; add water if necessary Check pad wear to prevent buildup of chemicals Check linkages and connectors for wear and damage Check hoses for wear, blockages, or damage Clean squeegee; check for adjustment; inspect for wear Check handles, switches, knobs, domes, and gaskets for damage... - Page 31 Maintenance PROBLEM CAUSE SOLUTION Debris caught on squeegee Remove debris Worn squeegee blades Replace squeegee blades Vacuum hose clogged Clear obstruction from hose Vacuum hose disconnected from Reconnect vacuum hose squeegee or recovery tank Vacuum hose damaged Replace vacuum hose Poor or no water pick-up Vacuum motor inlet screen dirty Clean inlet screen...
- Page 32 Maintenance PROBLEM CAUSE SOLUTION Solution tank empty Fill solution tank Solution flow turned off or set too Turn on or increase flow setting Little or no solution flow to the floor Solution strainer plugged Clean solution strainer Solution hoses obstructed Clear obstruction from hose Solution solenoid valve obstructed Clean or replace...
-
Page 33: Notes
Notes 86400640 Operator’s Manual - Saber Compact 20... -
Page 34: Suggested Spare Parts - Standard
Suggested Spare Parts - Standard 86400640 Operator’s Manual - Saber Compact 20... -
Page 35: Suggested Spare Parts - Deluxe
Suggested Spare Parts - Deluxe 86400640 Operator’s Manual - Saber Compact 20...