Table of Contents
Advertisement
Available languages
Available languages
Instructions for use
GB
PL
English,1
Polski, 13
SK
CZ
Èeský, 37
Slovenský, 49
AVL 89
Contents
Installation, 2-3
GR
ÅËËÇÍÉÊÁ,25
RO
Leds, 5
Românã, 61
Functions, 7
Disposal, 9
Troubleshooting, 11
Service, 12
WASHING MACHINE
GB
1
Advertisement
Table of Contents

Related Manuals for Ariston AVL 89


Summary of Contents for Ariston AVL 89
- Page 1 Starting and Programmes, 6 Briefly: how to start a programme, 6 Programme table, 6 Personalisations, 7 Setting the temperature, 7 Setting the spin cycle, 7 AVL 89 Functions, 7 Detergents and laundry, 8 Detergent dispenser, 8 Preparing your laundry, 8 Special items, 8...
-
Page 2: Electric And Water Connections
Installation Keep this instruction manual in a safe place for Levelling your appliance correctly will provide it with future reference. Should the appliance be sold, stability and avoid any vibrations, noise and shifting transferred or moved, make sure the instruction during operation. -
Page 3: Technical Details
Technical details exceed 150 cm in length. Electric connection Model AVL 89 Before plugging the appliance into the mains socket, 59.5 cm wide Dimensions 85 cm high make sure that: 53.5 cm deep... -
Page 4: Control Panel
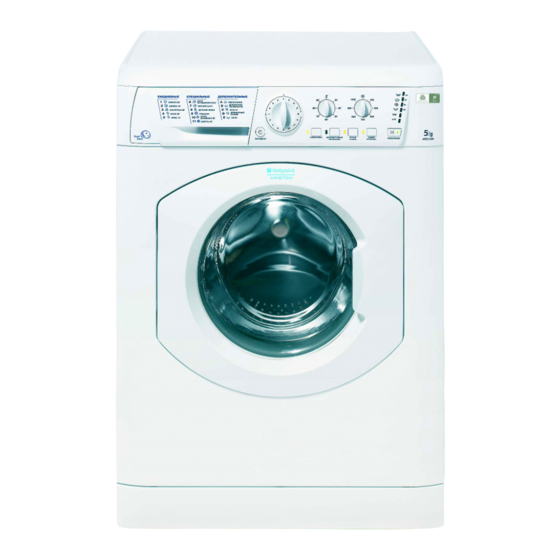
Washing machine description Control panel FUNCTION Buttons Leds START/STOP Button ON-OFF/DOOR LOCK Programme key PROGRAMME Detergent dispenser Knob START/RESET Button TEMPERATURE Knob SPIN SPEED Knob Detergent dispenser: to add detergent and fabric TEMPERATURE knob: to set the temperature or softener (see page 8). the cold wash cycle (see page 7). -
Page 5: Leds
Leds Cycle phase under way: During the wash cycle, the LEDs gradually illuminate The LEDS provide important information. on to indicate the cycle phase under way: This is what they can tell you: Prewash Delay set: If the Delay Timer function has been enabled (see Wash page. -
Page 6: Starting And Programmes
Starting and Programmes Briefly: starting a programme 6. Add the detergent and any fabric softener (see page 8). 1. Switch the washing machine on by pressing button 7. Start he programme by pressing the START/RESET All the LEDS will light up for a few seconds and button. -
Page 7: Setting The Temperature
Personalisations Setting the temperature Turn the TEMPERATURE knob to set the wash temperature (see Programme table on page 6). The temperature can be lowered, or even set to a cold wash ( ). Setting the spin speed Turn the SPIN SPEED knob to set the spin speed for the programme selected. The maximum spin speeds for each programme are as follows: Programmes Maximum spin speed... -
Page 8: Detergents And Laundry
Woolmark Platinum Care compartment 1: Detergent for pre-wash (powder) As gentle as a hand wash. Ariston sets a new standard of superior compartment 2: Detergent for the wash cycle performance that has been endorsed by (powder or liquid) The Woolmark Company with the Liquid detergent should only be poured in prestigious Woolmark Platinum Care brand. -
Page 9: Precautions And Advice
Environmentally-friendly technology If you only see a little water through your appliance General safety door, this is because thanks to the latest Ariston technology, your washing machine only needs less • This washing machine should only be used by than half the amount of water to get the best... -
Page 10: Care And Maintenance
Care and maintenance Cutting off the water or electricity Cleaning the pump supply The washing machine is fitted with a self-cleaning • Turn off the water tap after every wash. This will pump that does not require any maintenance. limit the wear of your appliance's water system Sometimes, small items (such as coins or buttons) and also prevent leaks. -
Page 11: Troubleshooting
Troubleshooting Your washing machine could fail to work. Before calling for Assistance (see page 12), make sure the problem can't easily be solved by consulting the following list. Possible causes/Solution: Problem • The appliance is not plugged into the socket, or not enough to The washing machine won't make contact. -
Page 12: Service
Service 195040693.00 09/2003 - Xerox Business Services Before calling for Assistance: • Check whether you can solve the problem on your own (see page 11); • Restart the programme to check whether the problem has been solved; • If this is not the case, contact an authorised Technical Service Centre on the telephone number provided on the guarantee certificate. - Page 14 (zobacz rysunek). (zobacz rysunek). (zobacz rysunek). (zobacz na s¹siedniej stronie). (zobacz rysunek) .
- Page 15 zobacz rysunek (zobacz obok); zobacz obok ° Po zainstalowaniu pr...
- Page 16 Œwiate³ka sygnalizuj¹ce Pulpit Szufladka œrodków pior¹cych Szufladka na œrodki pior¹ce: zobacz str. 20 (zobacz str. 19). Pulpit: Œwiate³ka sygnalizuj¹ce: (zobacz str. 17). (zobacz str. 17). (zobacz str. 19).
- Page 17 (zobacz str. 19)
- Page 18 (zobacz str. 19). zobacz str. 20 (zobacz str. 19). ° ° ° ° ° ° ° ° ° ° ° ° na nastêpnej stronie Dzienny 30' Zalecamy stosowanie p³ynnego œrodka pior¹cego.
-
Page 19: Potrzeby Indywidualne
Potrzeby indywidualne Nastawienie temperatury Temperaturê prania nastawia siê, obracaj¹c pokrêt³o TEMPERATURY (zobacz Tabelê programów na str. 18). Temperaturê mo¿na zredukowaæ, a¿ do prania w zimnej wodzie ( ). Nastawienie wirowania Obracaj¹c pokrêt³o WIROWANIE, mo¿na nastawiæ szybkoœæ odwirowywania dla wybranego programu. Maksymalne szybkoœci przewidziane dla wybranych programów s¹... - Page 21 • zobacz str. 19...
- Page 22 zobacz rysunek ; zobacz rysunek zobacz rysunek :...
- Page 23 zobacz str. 24 zobacz str. 19). zobacz str. 15). zobacz str. 15). zobacz str. 18 zobacz str. 19). zobacz str. 15 zobacz str. 14). zobacz str. 14 zobacz str. 14 zobacz str. 14 zobacz str. 22 zobacz str. 15...
- Page 24 • zobacz str. 23);...
- Page 26 (âëÝðå åéêüíá). âëÝðå åéêüíá). (âëÝðå åéêüíá). (âëÝðå åðüìåíç óåëßäá). (âëÝðå åéêüíá).
- Page 27 (âëÝðå åéêüíá) Ôå ÷ í éê Ü ó ôïé÷ å ßá A V L 8 9 Ì ïí ôÝ ëï ð ë Ü ô ï ò c m 5 9 ,5 Ä éáó ôÜó å éò ý ø ï ò c m 8 5 â...
- Page 28 ÅíäåéêôéêÝò ëõ÷íßåò ëåéôïõñãßáò ÈÞêç áðïññõðáíôéêþí ÈÞêç áðïññõðáíôéêþí: âëÝðå óåë. 32 (âëÝðå óåë. 31). Áíáëüãéï: ÅíäåéêôéêÝò ëõ÷íßåò: (âëÝðå óåë. 29). (âëÝðå óåë. 29). ÐëÞêôñï åðéëïãÞò (âëÝðå óåë. 31).
- Page 29 (âëÝðå óåë. 31)
- Page 30 (âëÝðå óåë. 31). (âëÝðå óåë. 32). (âëÝðå óåë. 31). Á ð ï ñ ñ õ ð á í ô é - Ä é Ü ñ ê å - Ô ý ð ï ò õ ö á ó ì Ü ô ù í ê á é Ð...
- Page 31 óôç óåë. 30). ÅíåñãÞ ìå ôá Ëåéôïõñãßåò ÁðïôÝëåóìá ÐáñáôçñÞóåéò ãéá ôç ÷ñÞóç ðñïãñÜììáôá: ÐéÝóôå ðïëëÝò öïñÝò ôï ðëÞêôñï ìÝ÷ñé íá áíÜøåé ç åíäåéêôéêÞ ëõ÷íßá ðïñãñáììáôéóìïý ðëýóçò. Káèõóôåñåß ôçí Óôçí ðÝìðôç öïñÜ ðïõ èá ðéÝóåôå ôï ðëÞêôñï, ç åêêßíçóç ôïõ ëåéôïõñãßá èá áðåíåñãïðïéçèåß. ¼ëá...
- Page 33 • âëÝðå óåë. 31...
- Page 34 âëÝðå åéêüíá) âëÝðå åéêüíá âëÝðå åéêüíá) :...
- Page 35 âëÝðå óåë. 36 âëÝðå óåë. 31). âëÝðå óåë. 27). âëÝðå óåë. 27). âëÝðå óåë. 30 âëÝðå óåë. 31). âëÝðå óåë. 27 âëÝðå óåë. 26). âëÝðå óåë. 26 âëÝðå óåë. 26 âëÝðå óåë. 26 âëÝðå óåë. 34 âëÝðå óåë. 27...
- Page 36 • (âëÝðå óåë. 35)
- Page 37 Rozbalení a vyrovnání do vodorovné polohy, 38 Pøipojení k elektrické síti a k rozvodu vody, 38-39 První prací cyklus, 39 Technické údaje, 39 Ovládací panel, 40 Kontrolky, 41 Ve zkratce: uvedení pracího programu do chodu, 42 Tabulka programù, 42 Nastavení teploty, 43 Nastavení rychlosti odstøeïování, 43 Funkce, 43 Dávkovaè...
- Page 38 (viz obrázek) (viz obrázek), (viz obrázek). Tlak v rozvodu vody se musí pohybovat v rozmezí hodnot uvedených v tabulce s technickými údaji (viz vedlejší strana). (viz obrázek)
- Page 39 (viz obrázek) Technické údaje Model Rozmìry Kapacita (viz Napájení vedle) Pøipojení k rozvodu vody (viz vedle) Rychlost ¡ odstøeïování Kontrolní program ° podle normy IEC456 tupná. Hluènost (dB(A) re 1 pW)
- Page 40 Kontrolky Funkèní popis Dávkovaè pracích prostøedkù Dávkovaè pracích prostøedkù (viz str. 43) viz str. 44 Funkèní popis Kontrolky: (viz str. 41) (viz str. 41) (viz str. 43)
- Page 41 (viz str. 43)
- Page 42 (viz str. 44 (viz str. 43) (viz str. 43) P r a c í D o b a D ru h tk a n in y a stu p e ò je jíh o z n e è i P r a c í p r o stø...
- Page 43 str. 42 Aktivní pøi Funkce Efekt Poznámky k pou± z ití programech: Všech Odlo± z ený start 1, 2, 3, 4, 5, 6, 7, 8 Super Wash Všechny kromì 1, 2, 9, 10, vyèerpání vody. Snadné ± z ehlení 1, 2, 3, 4, 5, 6, 7, 8 Rychlé...
- Page 45 • (viz str.
- Page 46 (viz obrázek); (viz obrázek) (viz obrázek):...
- Page 47 (viz str. 48) viz str. 43). (viz str. 39). (viz str. 39). (viz str. 42 (viz str. 43). (viz str. 39 (viz str. 38). (viz str. 38 (viz str. 38 (viz str. 38 – viz str. 46 (viz str. 39...
- Page 48 • (viz str. 47);...
- Page 50 V pr (viï obrázok) (viï obrázok), šného vstupného hrdla, situovaného vpravo hore (viï obrázok). (viï ved¾ajšia strana). iné. (viï obrázok).
- Page 51 (viï obrázok) Technické údaje Model Rozmìry Kapacita (viï Napájení ved¾a) Pøipojení k rozvodu vody (viï ved¾a) Rychlost ¡ odstøeïování Kontrolní program ° podle normy IEC456 Hluènost (dB(A) re 1 pW)
- Page 52 Kontrolky Funkèný popis Dávkovaè pracích prostriedkov Dávkovaè pracích prostriedkov: viï str. 56 Funkèný popis: Kontrolky: (viï str. 53). (viï str. 53).
- Page 53 (viï str. 55)
- Page 54 (viï str. 56 (viï str. 55). (viï str. 55). O rien ta èn á P rací d o b a D ru h tk an in y a stu p eò jej P racie p rostried o k T ep lota A vivá±...
- Page 55 na str. 6). Funkcie Efekt Poznámky k pou± z itiu Aktívna pri programoch: Oneskorený Všetkých štart Super Wash 1, 2, 3, 4, 5, 6, 7, 8 Jednoduché Všetky ± z ehlenie okrem 1, 2, 9, 10, vyèerpanie vody. Rýchle 1, 2, 3, 4, pranie 5, 6, 7, 8...
- Page 57 • (viï str.
- Page 58 (viï obrázok); (viï obrázok) (viï obrázok):...
- Page 59 (viï str. 60) viï str. 55). (viï str. 51). (viï str. 51). (viï str. 54 (viï str. 55). (viï str. 51 (viï str. 50). (viï str. 50 (viï str. 50 (viï str. 50 – viï str. 58 (viï str. 51...
- Page 60 • (viï str. 11);...
- Page 61 Scoaterea din ambalaj ºi nivelarea, 62 Legãturi hidraulice ºi electrice, 62-63 Primul ciclu de spãlare, 63 Date tehnice, 63 Panoul de control, 64 Indicatoare luminoase, 65 Pe scurt: pornirea unui program, 66 Tabel de programe, 66 Stabilirea temperaturii de spãlare, 67 Fixarea vitezei de centrifugare, 67 Funcþii, 67 Sertarul detergenþilor, 68...
- Page 62 Este important sã se pãstreze acest manual O nivelare precisã conferã stabilitate maºinii ºi pentru a-l putea consulta în orice moment. În caz evitã vibraþii, zgomote ºi deplasãri pe timpul de vânzare, de cesiune sau de schimbare a funcþionãrii. În cazul mochetelor sau a unui covor, locuinþei, acesta trebuie sã...
-
Page 63: Date Tehnice
Date tehnice original ºi nu trebuie sã depãºeascã 150 cm. Model AVL 89 lãrgime 59,5 cm Dimensiuni înãlþime 85 cm nainte de a introduce fiºa în priza de curent, profunzime 53,5 cm asiguraþi-vã... - Page 64 Taste/butoane de Indicatoare luminoase Butonul Legendã Indicator Selector Sertarul detergenþilor Butonul Selector Selector Sertarul detergenþilor: pentru a încãrca detergenþi Selector pentru a selecta ºi aditivi (vezi pag. 68). temperatura sau programul de spãlare la rece (a se vedea pag. 67). Legendã: pentru a consulta în orice moment o schemã...
- Page 65 Pe durata ciclului de spãlare, indicatoarele Indicatoarele luminoase furnizeazã informaþii luminoase se vor aprinde în mod progresiv pentru a importante, dupã cum urmeazã: indica starea de avansare: Prespãlare Dacã a fost activatã funcþia Delay Timer (a se Spãlare vedea pag. 67), dupã ce programul ales a fost iniþiat, va începe sã...
- Page 66 5. Selectaþi viteza de centrifugare (a se vedea pag. 67). 6. Vãrsaþi detergenþi ºi aditivi (vezi pag. 68). 1. Porniþi maºina de spãlat apãsând butonul . Toate 7. Porniþi programul apãsând butonul START/RESET. indicatoarele luminoase se vor aprinde timp de Pentru a anula þineþi apãsat butonul START/RESET câteva secunde, dupã...
-
Page 67: Fixarea Vitezei De Centrifugare
Personalizãri Stabilirea temperaturii de spãlare Temperatura de spãlare se obþine prin rotirea selectorului TEMPERATURà pânã ajungeþi în dreptul valorilor dorite. (a se vedea Tabelul de programe de la pag. 66). Puteþi folosi ºi spãlarea la rece ( ). Fixarea vitezei de centrifugare Viteza de centrifugare se obþine prin rotirea selectorului CENTRIFUGÃ... - Page 68 ºi nu depãºiþi 1 kg de rufe. Ariston a introdus un standard nou de Detergentul lichid trebuie vãrsat doar înainte de prestaþii superioare recunoscut de The pornire.
- Page 69 Dacã prin hublou se vede puþinã apã este pentru cã datoritã noii tehnologii Ariston, este suficientã mai puþin de jumãtate din apã pentru a obþine o curãþare maximã: un scop atins pentru respectarea mediului înconjurãtor.
- Page 70 • Închideþi robinetul de apã dupã fiecare spãlare. Maºina de spãlat este echipatã cu o pompã Se limiteazã astfel uzare instalaþiei hidraulice a autocurãþãtoare care nu are nevoie de întreþinere. maºinii de spãlat ºi se eliminã pericolul Se poate întâmpla însã ca obiecte mici (monede, scurgerilor.
- Page 71 Se poate întâmpla ca maºina de spãlat sã nu funcþioneze. Îaninte de a telefona la Asistenþã (vezi pag. 72), verificaþi dacã aceastã problemã nu poate fi remediatã de dvs., astfel: • Fiºa nu este introdusã sau nu a fost suficient introdusã în priza de curent astfel încât sã...
- Page 72 Asistenþã 195040693.00 09/2003 - Xerox Business Services Înainte de a lua legãtura cu Asistenþa: • Verificaþi dacã anomalia poate fi rezolvatã de dvs. (vezi pag. 11); • Porniþi din nou programul pentru a controla dacã inconvenientul a fost eliminat; • În caz contrar, vã recomandãm sã apelaþi la Unitatea de Service. Nu apelaþi niciodatã...