Advertisement
Quick Links
Download this manual
See also:
Instruction Manual
REVO-1 & REVO-4 SERIES
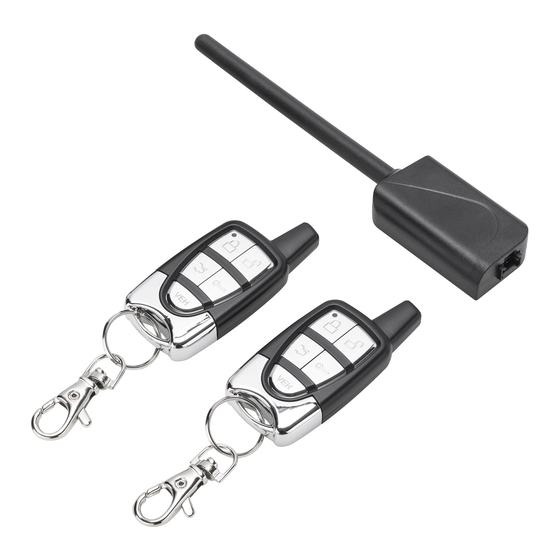
CONGRATULATIONS on your choice of a Crimestopper Revo Start 1-Way Remote Start System. This system is
an RF Antenna Decoder that plugs directly into a Fortin or ADS Data module. No additional remote start module is
needed. The features of the system, depends on the vehicle and data module used. This system requires a Fortin
or ADS data module with a programmer to load correct vehicle software. You will need the vehicle install guide from
Fortin or ADS iDatalink website. Many vehicles have a "Plug n Play" T harness available to simplify the installation.
The remotes need to be programmed after installation of data module before operation. If any questions arise,
contact your installation dealer or Crimestopper Security Products.
CRIMESTOPPER SECURITY PRODUCTS
600 S. ROCKFORD DR., TEMPE, AZ 85281
REV 09-2015
1 - Way Remote Start System
INSTRUCTIONS
This device complies with FCC Rules part 15. Operation is
subject to the following two conditions: 1) This device may not
cause interference, and (2) this device must accept any
interference that may be received, including interference that
may cause undesired operation.
responsible for any radio or TV interference caused by
unauthorized modification to this equipment. Such modification
could void the user's authority to operate the equipment.
The manufacturer is not
Advertisement

Related Manuals for CrimeStopper REVO-1 Series


Summary of Contents for CrimeStopper REVO-1 Series
- Page 1 1 - Way Remote Start System INSTRUCTIONS CONGRATULATIONS on your choice of a Crimestopper Revo Start 1-Way Remote Start System. This system is an RF Antenna Decoder that plugs directly into a Fortin or ADS Data module. No additional remote start module is needed.
-
Page 2: Using The Remote Transmitter
AUX 2 = Trunk + Unlock AUX 3 = Trunk + Start AUX 4 = Lock + Start For REVO-1 Series The transmitter supplied has one Start button. For REVO-4 Series The transmitter supplied with this system has 5 buttons - Lock, Unlock, Trunk Release, Vehicle Select and Start. -
Page 3: Battery Replacement
BATTERY REPLACEMENT To replace the battery on a REVO 1 Series 1 button remote: Simply remove the screw on the back of the transmitter and slide the cas apart as shown. Remove the (2) CR-1620 Lithium batteries and replace. Put the case back together and tighten the screw. - Page 4 BATTERY REPLACEMENT To Replace the Battering in the REVO 4 Series The Remote Control uses two CR-2025 Lithium 3 Volt Batteries. Simply remove the Phillips screw located behind key ring (see diagram below). Use a small screw driver as shown in Figure 2 to remove the back cover. Slide old batteries out.
-
Page 5: Transmitter Programming
6. The system will automatically exit the remote learning procedure after (5) seconds of inactivity or by turning the ignition off. The parking lights will flash (2) times to confirm programming exit. Fortin EVO-ALL Programming: Note: The EVO-ALL must have the CrimeStopper RF kit enabled under the Supported RF kits menu. - Page 6 TRANSMITTER PROGRAMMING Fortin EVO-ALL Programming (cont’d): 1. Press and hold the programming button on the EVO-ALL. 2. Insert the 4-pin Data-Link connector that comes with the EVO-ALL into the open 4-pin power on the power adaptor next to the 2-pin power/ground harness. 3.
- Page 7 TRANSMITTER PROGRAMMING Fortin EVO-ONE Programming: Note: Before you save your settings for programming of the EVO-ONE, ensure that you have Fortin 2 checked on the remote starter options menu. Then save, disconnect and program the EVO-ONE to the vehicle. 1.Using the antenna cable that comes with the REVO kit, plug 1 end into the antenna and the other into the RF port of the EVO-ONE.
- Page 8 TRANSMITTER PROGRAMMING Fortin EVO-ONE Programming (cont’d): 2. Turn the Ignition to the ON position, do not start the vehicle. Press and hold the programming button until the Red LED flashes in the opening where the yellow wires come out. None of the LED’s on top of the module should be flashing.
-
Page 9: Vehicle Operation
2 VEHICLE OPERATION A single Remote Control can control two different vehicles. To set up the 2-Vehicle operation you must first program your remotes to Vehicle #2. Follow the “Transmitter Programming” steps (Pg. 6 - 9) at the second vehicle and learn YOUR remote, along with vehicle #2’s existing remotes. - Page 10 POWER ADAPTOR WIRING NOTE: The power connections are only needed for the EVO-ALL and ADS-ALCA integration modules. The EVO-ONE will not require these connections. If you are using a T-Harness with the EVO-ONE or ADS modules then you will NOT need to connect the power and ground connections. If you are NOT using a T-Harness, then you WILL need to connect the power and ground wires.
- Page 11 POWER ADAPTOR WIRING Chassis Ground EVO-ALL/ALCA Data Harness Connect to the EVO-ALL/ALCA Data port BATTERY A T-Harness will usually supply power from the vehicle to the REVO antenna and the EVO-ALL data module. The power and ground wiring is only used with the REVO series when you ARE NOT using a T-Harness to connect to the EVO-ALL data module to the vehicle.
- Page 12 Phone (800) 998-6880 Fax (800) 366-6724 © 2015 CrimeStopper Security Products...