Daikin BRC1E62 Operation Manual
Wired
Hide thumbs
Also See for BRC1E62:
- Operation manual (64 pages) ,
- Installation manual (28 pages) ,
- Operation manual (64 pages)
Table of Contents
Advertisement
WIRED REMOTE
CONTROLLER
OPERATION MANUAL
BRC1E62
Thank you for purchasing this product.
This manual describes safety precautions required for the use of the
product.
Read this manual carefully and be sure you understand the
information before using the product.
Keep this manual where it is readily accessible after reading it through.
If another user operates the product in the future, be sure to hand over
this manual to the new user.
Refer to the operation manuals attached to the indoor and outdoor units,
etc.
Advertisement
Table of Contents

Related Manuals for Daikin BRC1E62


Summary of Contents for Daikin BRC1E62
-
Page 1: Wired Remote Controller
WIRED REMOTE CONTROLLER OPERATION MANUAL BRC1E62 Thank you for purchasing this product. This manual describes safety precautions required for the use of the product. Read this manual carefully and be sure you understand the information before using the product. Keep this manual where it is readily accessible after reading it through. -
Page 2: Table Of Contents
Contents Notices Safety Precautions – Items to be Strictly Observed – ......2 Button Location and Descriptions......5 Names and Functions..........7 Basic Operation Cool/Heat/Auto/Fan Operation ....... 11 Dry Operation ............15 (Use of Direct Buttons) Setback..............17 Ventilation Operation ..........18 Setting the Cool/Heat Selection Eligibility.... -
Page 3: Items To Be Strictly Observed
Safety Precautions – Items to be Strictly Observed – Read the safety precautions carefully for the proper use of the product. This manual classifies the precautions into WARNINGS and CAUTIONS. WARNING result in death or serious injury. CAUTION result in minor or moderate injury. It may also be used to alert against unsafe practices. - Page 4 CAUTION Do not allow children to play with the remote controller. Accidental operation by children may result in health impairment. Do not disassemble the product. Consult your local dealer for internal inspections and adjustments. Do not press the button of the remote controller with a hard, pointed object. The remote controller may be damaged.
-
Page 6: Button Location And Descriptions
Button Location and Descriptions 1. Mode Selector button 11. LCD (with backlight) 4. Up button 5. Down button 6. Right button 7. Left button 9. Operation lamp (Green) 8. ON/OFF button 3. Menu/Enter button 10. Cancel button manipulable directly by the above button. Advanced settings are manipulable from the Menu screen displayed by the Menu/Enter button. - Page 7 1. Mode Selector button 7. Left button " " Use to select the operation mode of your Used to highlight the next items on the preference. (Refer to page 11.) left-hand side. Display contents are changed to previous model. screen per page. "...
-
Page 8: Names And Functions
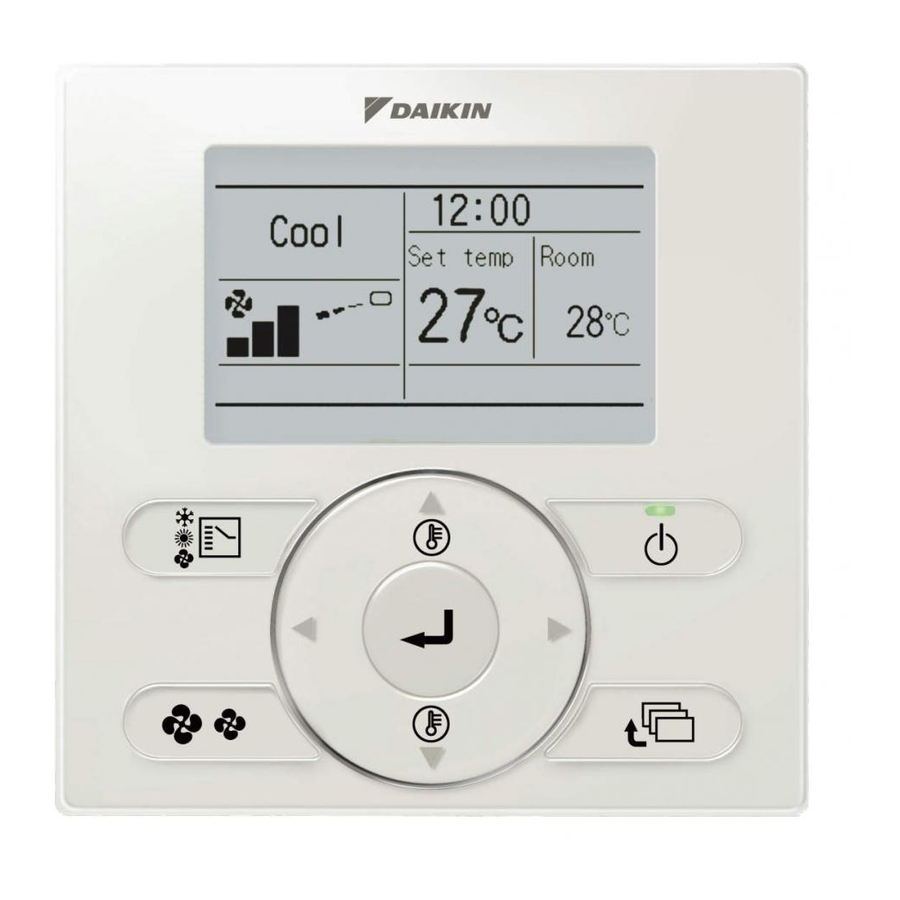
Names and Functions Basic Screen The Standard display screen is set by default. (Refer to page 51.) Standard display screen 11.Changeover Under Control 12.Setback 10.Centralized Control 9. Timer Enabled 8. Key Locked 1. Operation mode et to 3.Airflow Direction 4.Set/Setback isplayed only when the air Temperature display conditioner is in operation. - Page 9 1. Operation Mode "Auto". function. Speed) "Error: Push Menu button" "Warning: Push Menu button" indoor unit. (Refer to page 61). "Quick Start" (Split system only) control function. Displayed if the quick cooling/heating function is turned on (Refer to page 30). "...
- Page 10 10.Centralized Control " " Displayed if the system is under the management of centralized control equipment (optional accessories) and the operation of the system through the remote controller is prohibited. 11. Changeover Under Control " " (VRV only) Displayed if the remote controller has no cool/heat selection eligibility.
-
Page 12: Basic Operation
Basic Operation (Use of Direct Buttons) How to follow the operation manual Operation button Operation procedure Describes the positions of buttons to be pressed. Explains a button operation procedure. Operation Display the Main Menu screen. (Refer to Main Menu Quick Start page 27.) Operation Ventilation... - Page 13 Press ON/OFF button. " button is pressed and decrease by Cool Set to " button is pressed. Cool °C mode. Cool Set to Cool °C " " buttons. Air volume/direction Air volume Direction Position 0 Return Return Setting Setting Medium low Medium High rate from Auto...
- Page 14 < Air volume/direction Air volume Direction Position 0 Position 0 Position 1 Position 2 Position 3 Position 4 Swing Auto using the " " buttons. Return Setting Return Setting Air volume/direction Note Air volume Direction Swing Return Return Setting Setting Left/right direction Air volume/direction Air volume...
- Page 15 operate for approximately 1 minute to remove residual heat from the indoor unit. Note Characteristic of Cooling Operation (in Cool/Auto mode) frost forms on the heat exchanger of the indoor unit. room temperature reaches the set temperature. Characteristics of Heating Operation (in Heat/Auto mode) Starting Operation Heating Operation generally requires a longer time to reach the set It is recommended to start operating in advance by utilizing the timer.
-
Page 16: Dry Operation
Regarding temperature. outdoor air temperature and heating capacity after the system starts operating. direction becomes horizontal. that are set.) a circulator is recommended. Dry Operation Preparation before starting the operation. Dry mode may not be selected if the remote controller has no eligibility to select cooling/ heating mode (Refer to page 20 for details). - Page 17 Note...
-
Page 18: Setback
Characteristics of Dry Operation the room temperature as much as possible for the prevention of excessive cooling. Setback periods. Note turned off from a schedule setting/off timer. This function is disabled by default. This function can be changed enable/disable by Main Menu. (Refer to page 34) The differential can be adjusted in the Setback condition menu (Refer to page 36). -
Page 19: Ventilation Operation
Ventilation Operation When Air Conditioner Interlocked with Heat Reclaim Ventilator Preparation before starting the operation. Operation Press Mode Selector button several times until Vent mode is selected. Vent * Vent mode is for single operation of Heat Reclaim unnecessary. The Ventilation mode can be changed from the Main Menu. (Refer to page 33). -
Page 20: Setting The Cool/Heat Selection Eligibility
Setting the Cool/Heat Selection Eligibility (VRV only) Refer to "Cool/Heat Selection Eligibility" on page 20 for an explanation of Setting Changes the cool/heat selection eglibility. Press Mode Selector button on the remote controller that has cool/heat selection eligibility for at least Cool Set to 4 seconds. - Page 21 Press Mode Selector button on the remote controller that has the cool/heat selection Cool Set to Cool °C " ") several times until the desired mode is selected. Recovery system only. Cool/Heat Selection Eligibility eligibility. Other remote controllers the selection eligibility (Icon "...
-
Page 22: Key Lock
Precautions for Setting Cool/Heat Selection Eligibility case. (Heat Pump System) (Heat Recovery System) BS (Branch Selector) unit: The BS unit is used for cool or heat mode selection. Indoor unit Indoor unit A number of indoor units are A number of indoor units are connected to a single outdoor unit. -
Page 24: Main Menu Items
Quick Reference of Main Menu Main Menu Items Setting and display items Description Reference page Air Flow Individual setting Direction (only if the function is installed) Individual setting list Used to see the table for setting for maximum Individual set all Used to clear all of the individual settings. - Page 25 Setting and display items Description Reference page Energy Off Timer Saving time. Options Possible to set in 10 minutes increments from 30 to 180 minutes. Electricity displayed. This enables you to evaluate the consumption trend of the electricity consumption. Note: This function availability is depending on type of indoor unit.
- Page 26 Setting and display items Description Reference page The draft prevention function can be en- Draft prevention (only abled or disabled. if the sensing sensor is installed) Used to set to standard or detailed display Display mode. Display Standard or detailed display Detailed display settings Selectable from the display room tempera- None.
-
Page 28: Menu Manipulation
Menu Manipulation Manipulating the Main Menu Screen Display Method for Main Menu Operation Press Menu/Enter button. Cool Set to Cool °C Basic screen Air Flow Directio tart e tilatio er y a i ptio s chedule Filter Auto Clea Retur etti appear. - Page 29 Individual Setting Operation Display the Main Menu screen (Refer to Air Flow Directio page 27). tart Select Air Flow Direction in the Main Menu. Direction settings screen. Retur etti Main Menu screen Select Individual setting Air Flow Direction Individual setting Press Menu/Enter button.
- Page 30 " is displayed in the Basic Cool Set to screen. Cool °C Basic screen Individual Setting List Operation Air Flow Direction page 28). Individual setting Individual setting list Individual set all reset Press " " buttons to select Individual setting list Press Menu/Enter button.
-
Page 31: Quick Start (Split System Only)
Individual Set All Reset Operation Air Flow Directio page 28). di idual setti di idual setti Press " " buttons to select di idual set all reset Individual set all reset Press Menu/Enter button. Retur etti Press " " buttons to select Individual set all reset Clear individual Press Menu/Enter button... -
Page 32: Quick Start
Quick Start Off Operation While Quick Start is displayed on the Basic Air Flow Directio tart page 27). e tilatio er y a i ptio s Quick Start Press " " buttons to select chedule Filter Auto Clea Press Menu/Enter button to return to the Basic Retur etti screen. -
Page 33: Ventilation
Ventilation Display Method for Ventilation Screen Operation Display the Main Menu screen. Air Flow Directio (Refer to page 27.) tart Ventilation Press " " buttons to select e tilatio er y a i ptio s chedule Filter Auto Clea Ventilation Retur etti Press Menu/Enter button to display the Ventilation... -
Page 34: Automatic Mode
Changing the Ventilation Mode Operation Display the ventilation screen. e tilatio e tilatio Rate (Refer to page 32.) e tilatio Ventilation Mode Press " " buttons to select Press Menu/Enter button to display the Ventilation mode screen. Retur etti Press " "... -
Page 35: Energy Saving Options
Energy Saving Options Display Method for Energy Saving Options Screen Operation Display the Main Menu screen. Air Flow Directio (Refer to page 27.) tart Press " " buttons to e tilatio er y a i ptio s select Energy Saving Options chedule Filter Auto Clea Press Menu/Enter button to display the Energy... - Page 36 Setpoint Range Setting Operation Display the Energy Saving Options screen (Refer er y ptio s er y list to page 34). etpoi t ra e set et ac co ditio Press “ ” buttons to select Setpoint range set e si e sor (low) e si e sor (stop)
- Page 37 Setback Condition Operation Display the Energy Saving Options screen (Refer er y ptio s er y list to page 34). etpoi t ra e set et ac co ditio Press " " buttons to select Set back condition e si e sor (low) e si e sor (stop)
- Page 38 Sensing Sensor (low) This function cannot be used at the time of group control. mounted in the master indoor unit. Operation Display the Energy Saving Options screen (Refer er y ptio s er y list to page 34). etpoi t ra e set et ac co ditio Press "...
- Page 39 Sensing Sensor (stop) This function cannot be used at the time of group control. mounted in the master indoor unit. Operation Display the Energy Saving Options screen (Refer er y ptio s er y list to page 34). etpoi t ra e set et ac co ditio Press "...
- Page 40 Setpoint Auto Reset Operation Display the Energy Saving Options screen (Refer er y ptio s er y list to page 34). etpoi t ra e set et ac co ditio Press " " buttons to select e si e sor (low) e si e sor (stop) Setpoint Auto Reset...
-
Page 41: Off Timer
Off Timer Operation Display the Energy Saving Options screen. (Refer Energy Saving Options to page 34.) Off Timer Electricity consumption Press " " buttons to select the Off Timer Press Menu/Enter button to display the Off Timer screen. Return Setting Press "... - Page 42 Electricity Consumption This item may not be available depend on the connecting model. Operation Display the Energy Saving Options screen (Refer Energy Saving Options Off Timer to page 34). Electricity consumption Press " " buttons to select Electricity consumption Press Menu/Enter button to display the Electricity Setting Return consumption screen.
-
Page 43: Schedule
Schedule Display Method for Schedule Screen Operation Display the Main Menu screen. (Refer to page 27.) Air Flow Directio tart Press " " buttons to select Schedule e tilatio er y a i ptio s Press Menu/Enter button to display the Schedule chedule Filter Auto Clea screen. - Page 44 Schedule Nr Set This function can be stored in the schedule of 3 patterns. Operation Display the Schedule screen. (Refer to Schedule page 42.) Enable/Disable Schedule nr set Press " " buttons to select Schedule nr set Holidays Settings Press Menu/Enter button to display the Schedule nr set screen.
- Page 45 Holidays Operation Display the Schedule screen. (Refer to Schedule Enable/Disable page 42.) Schedule nr set Press " " buttons to select Holidays Holidays Settings Press Menu/Enter button to display the Holiday setting screen. Return Setting Press " " buttons to select the desired day. Schedule Holidays Press "...
- Page 46 Schedule Settings Operation Display the Schedule screen. (Refer to Schedule page 42.) Enable/Disable Schedule nr set Press " " buttons to select Settings Holidays Settings Press Menu/Enter button to display the Schedule screen. Return Setting schedule number can be changed. To change the schedule number refer to "Schedule Nr Set"...
- Page 47 The cooling and heating set temperature for both chedule r 1 Cool Heat 2 °C 21°C °C "Cool" and "Heat" column: "_ setback temperature for this time period is Retur etti "-- disabled for this time period. A maximum of 5 actions per day can be chedule r 1 Cool Heat...
- Page 48 Enabling or disabling the schedule Operation Display the Schedule screen. Schedule (Refer to page 42.) Enable/Disable Schedule nr set Press " " buttons to select Enable/Disable Holidays Settings Press Menu/Enter button to display the Enable/ Disable screen. Return Setting Press " "...
-
Page 49: Filter Auto Clean
Filter Auto Clean Operation Display the Main Menu screen. (Refer to page 27.) Air Flow Directio tart Press " " buttons to select Filter Auto Clean e tilatio er y a i ptio s and press Menu/Enter button. chedule Filter Auto Clea Retur etti Filter Auto Clean time zone setting can be set. -
Page 50: Maintenance Information
Maintenance Information Display Method for Maintenance Information Operation Display the Main Menu screen. ai te a ce ormatio (Refer to page 27.) Co i uratio Press " " buttons to select Curre t etti Cloc Cale der Maintenance Information and press Menu/Enter ua e button. - Page 51 Operation Display the Main Menu screen. ai te a ce ormatio (Refer to page 27.) Co i uratio Press " " buttons to select Curre t etti Cloc Cale dar Press Menu/Enter button to display the ua e Retur etti Draft prevention Operation Configuration...
- Page 52 Display Display Mode Operation Configuration 50.) Draft prevention Display Press " " buttons to select Display Contrast Adjustment Press Menu/Enter button to display the Display screen. Return Setting Press " " buttons to select Display Mode Display Display Mode Standard Press Menu/Enter button to display the Display Display Item None...
- Page 53 Setting the detailed display item selection Operation Display the Display screen. (Refer to page 51.) Display Display Mode Standard Press " " buttons to select Display Item Display Item None Press Menu/Enter button to display the Display Item screen. Return Setting Display Press "...
- Page 54 Contrast Adjustment Operation Configuration page 50.) Draft prevention Display Press " " buttons to select Contrast Adjustment Contrast Adjustment Press Menu/Enter button to display the Contrast Return Setting Adjustment screen. " Contrast Adjustment buttons until you reach the desired contrast. Dark to the Basic screen.
-
Page 55: Current Settings
Current Settings Manipulating the Current Settings Operation Display the Main Menu screen. ai te a ce ormatio (See page 27.) Co i uratio Press " " buttons to select Current Settings Curre t etti Cloc Cale dar and press Menu/Enter button. ua e Retur etti... -
Page 56: Clock & Calendar
Clock & Calendar Display Method for Clock & Calendar Screen Operation Display the Main Menu screen. (Refer to ai te a ce ormatio page 27.) Co i uratio Curre t etti Press " " buttons to select Clock & Calendar Cloc Cale dar ua e... - Page 57 " buttons. Date 2013 " buttons. o th 0 hursday 0:00 change continuously. Retur etti " buttons. Date 2013 " buttons. o th 0 hursday 12:00 change continuously. Retur etti " buttons. Date 2013 " buttons. o th 0 hursday 12:21 change continuously.
- Page 58 12H/24H Clock Operation Display the Clock & Calendar screen. (Refer to Clock & Calendar page 55.) Date & Time 12H/24H Clock Press " " buttons to select 12H/24H Clock Press Menu/Enter button to display the 12H/24H Clock screen. Return Setting 12H/24H Clock 24H format.
-
Page 59: Language
Language Selectable Languages Operation Display the Main Menu screen. (Refer ai te a ce ormatio to page 27.) Co i uratio Curre t etti Press " " buttons to select Language Cloc Cale dar ua e press the Menu/Enter button. Retur etti Press "... -
Page 60: Maintenance
Maintenance Reset Filter Indicator Operation Cool et to Cool °C ime to clea Retur ilter "Time to clean element" to the indoor unit. Press Menu/Enter button. Press " " buttons to select Reset Filter dicator Reset Filter Indicator and press Menu/Enter Air Flow Directio tart button. -
Page 61: Cleaning Of Remote Controller
Caution Do not wash the remote Be sure to stop the operation of controller. the air conditioner and turn off Doing so may cause electric the power at the time of maintenance. leakage and result in electric shocks Failure to do so may result in electric shocks or injury. -
Page 62: Reference Information
Reference Information Malfunction (Error) code Display Contact Your Dealer in the Following Cases Warning When the air conditioner is malfunctioning (e.g., giving off a burning odor), stop the air conditioner and turn off the power. Contact your local dealer. Operation Operation lamp Cool... -
Page 63: After-Sales Service
After-sales Service Warning Do not disassemble, modify, or Do not relocate or reinstall the repair the remote controller. remote controller by yourself. Improper installation may cause electric Consult your local dealer. Consult your local dealer. Advise the Repairer of the Following Items Model name Date of installation Relocation... - Page 64 3P243520-4F EM12A039 (1303) AK...