Table of Contents
Advertisement
Quick Links
Advertisement
Table of Contents

Related Manuals for Chauvet COLORdash Par-Hex 7


Summary of Contents for Chauvet COLORdash Par-Hex 7
- Page 1 User Manual...
- Page 2 Copyright Notice Chauvet owns the content of this User Manual in its entirety, including but not limited to pictures, logos, trademarks, and resources. © Copyright 2015 Chauvet. All rights reserved.
-
Page 3: Table Of Contents
Table of Contents Table of Contents 1. Before You Begin ............................1 What Is Included ................................1 Claims ......................................1 Manual Conventions ..................................1 Symbols ....................................... 1 Product At A Glance ..............................2 Safety Notes ................................. 2 Personal Safety .................................... 2 Mounting And Rigging .................................. - Page 4 Table of Contents DMX Values (cont.) ..............................17 DMX Values (cont.) ..............................18 5. Technical Information ..........................19 Product Maintenance ..............................19 6. Technical Specifications ......................... 20 Returns ..................................21 Contact Us ..............................21 -ii- COLORdash™ Par-Hex 7 User Manual Rev. 3...
-
Page 5: Before You Begin
If the box or the contents (the product and included accessories) appear damaged from shipping or show signs of mishandling, notify the carrier immediately, not Chauvet. Failure to report damage to the carrier immediately may invalidate your claim. In addition, keep the box and contents for inspection. -
Page 6: Product At A Glance
This product contains no user-serviceable parts. Any reference to servicing in this User Manual will only apply to properly trained Chauvet certified technicians. Do not open the housing or attempt any repairs. -
Page 7: Introduction
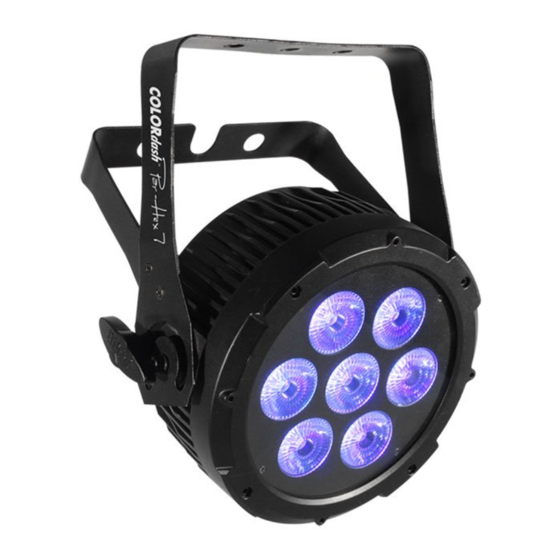
Introduction 2. I NTRODUCTION The COLORdash™ Par-Hex 7 is powered by 7 hex-color RGBAW+UV LEDs that project deeply Description saturated colors, any variation of white, and bold UV, all without multicolor shadows. A split-yoke bracket eliminates the need for floor stands. Power linking, Neutrik® powerCON® power input/output as well as 3- and 5-pin DMX connectors are also included. -
Page 8: Overview
Introduction Overview Control Panel DMX Out DMX Out Gel Frame Holder DMX In DMX In Safety Cable Pass-through Power Power In/Out In/Out Gel Frame Fuse Holder Double-Yoke Bracket Front View Rear View Bracket Adjustment Knob Side View Top View COLORdash™ Par-Hex 7 User Manual Rev. 3... -
Page 9: Dimensions (Gel Frame And Gel Frame Holder Attached)
Introduction Dimensions (gel frame and gel frame holder attached) 7.52 in 191 mm 6.73 in 7.52 in 171 mm 191 mm 4.76 in 121 mm 3.86 in 98 mm 10.22 in 260 mm COLORdash™ Par-Hex 7 User Manual Rev. 3... -
Page 10: Setup
Technical Specifications chart in this manual. The listed current rating indicates the maximum current draw during normal operation. For more information, you may download Sizing Circuit Breakers from the Chauvet website: www.chauvetprofessional.com. · Always connect this product to a protected circuit with an appropriate electrical ground to avoid the risk of electrocution or fire. -
Page 11: Power Linking
27 products at 120 V; up to 46 at 208 V; or up to 52 at 230 V. This product comes with a power input cord. Power linking cables are available from Chauvet for purchase. You can link the COLORdash™ Par-Hex 7 to a DMX controller using a 3- or 5-pin DMX DMX Linking connection. -
Page 12: Mounting
Orientation Always mount this product in a safe position and make sure there is adequate room for ventilation, configuration, and maintenance. Chauvet recommends using the following general guidelines when mounting this product. Rigging · When selecting an installation location, consider easy access to this product for operation, programming adjustments, and routine maintenance. -
Page 13: Operation
Operation 4. O PERATION Control Panel Button Function Description <MENU> Exits from the current menu or function <ENTER> Enables the currently displayed menu or sets the currently selected value in to the current function <UP> Navigates upward through the menu list or increases the numeric value when in a function <DOWN>... -
Page 14: Menu Map
Operation Menu Map Main Level Programming Levels Description Auto Auto 0–4 Speed 0–100 Automatic programs Green Blue Amber White Ultraviolet (UV) Red/Green Red/Blue Red/Amber Red/White Red/UV Green/Blue Green/Amber Green/White Green/UV Blue/Amber Blue/White Blue/UV Static Fix C Amber/White Amber/UV White/UV Red/Green/Blue Red/Green/Amber Red/Green/White Red/Green/UV... -
Page 15: Menu Map (Cont.)
Operation Menu Map (Cont.) Main Level Programming Levels Description Blue/White/UV Green/Amber/White Green/Amber/UV Green/White/UV RGBA Red/Green/Blue/Amber RGBW Red/Green/Blue/White RGBP Red/Green/Blue/UV RGAW Red/Green/Amber/White RGAP Red/Green/Amber/UV RGWP Red/Green/White/UV RBAW Red/Blue/Amber/White RBAP Red/Blue/Amber/UV RBWP Red/Blue/White/UV Fix C (cont.) RAWP Red/Amber/White/UV GBAW Green/Blue/Amber/White GBAP Green/Blue/Amber/UV Static (cont.) GBWP Green/Blue/White/UV... -
Page 16: Menu Map (Cont.)
Operation Menu Map (Cont.) Main Level Programming Levels Description Turns off display backlight after 10 sec of inactivity Turns off display backlight after 20 sec of inactivity BackLite Turns off display backlight after 30 sec of inactivity Display backlight always on Auto Test Turns on all LEDs in sequence for testing... -
Page 17: Configuration (Dmx)
Operation Use DMX configurations to operate the product with a DMX controller. Configuration (DMX) DMX Personality This setting allows you to choose a particular DMX personality. 1. Go to the Channel main level. 2. Select the desired personality (6 Ch, 8 Ch, 12Ch, 13Ch, HSV or HSI). ·... -
Page 18: Configuration (Standalone)
Operation Use standalone configuration to operate the product without a DMX controller. Configuration (Standalone) Fixed Static The Fixed Static Color mode allows for preset RGBAW+UV color mixing without a DMX controller. Color 1. Go to the Static main level. 2. Select the Fix C programming level. 3. -
Page 19: Dimming Modes
Operation Dimming Modes This setting provides three different options to simulate the dimming curve of an incandescent lighting product. 1. Go to the Dim Mode main level. 2. Select a dimmer curve (OFF, DIM 1, DIM 2, or DIM 3). OFF: The output is proportional (linear) to the dimmer. -
Page 20: Dmx Values
Operation DMX Values Channel Function Value Percent/Setting 000 ó 255 0–100% 000 ó 255 0–100% Saturation 000 ó 255 0–100% Value Channel Function Value Percent/Setting 000 ó 255 0–100% 000 ó 255 0–100% Saturation 000 ó 255 0–100% Intensity 6 Ch Channel Function Value... -
Page 21: Dmx Values (Cont.)
Operation DMX Values (cont.) 12Ch Channel Function Value Percent/Setting 000 ó 255 0–100% Dimmer 000 ó 255 0–100% 000 ó 255 0–100% Green 000 ó 255 0–100% Blue 000 ó 255 0–100% Amber 000 ó 255 0–100% White 000 ó 255 0–100% 000 ó... -
Page 22: Dmx Values (Cont.)
Operation DMX Values (cont.) 13Ch Channel Function Value Percent/Setting 000 ó 255 0–100% 000 ó 255 Fine control (16-bit) Fine Red 000 ó 255 0–100% Green 000 ó 255 Fine control (16-bit) Fine Green 000 ó 255 0–100% Blue 000 ó 255 Fine control (16-bit) Fine Blue 000 ó... -
Page 23: Technical Information
Technical Information 5. T ECHNICAL NFORMATION To maintain optimum performance and minimize wear, you should clean this product Product frequently. Usage and environment are contributing factors in determining the cleaning Maintenance frequency. As a rule, clean this product at least twice a month. Dust build-up reduces light output performance and can cause overheating. -
Page 24: Technical Specifications
Technical Specification 6. T ECHNICAL PECIFICATIONS Dimensions and Length Width Height Weight Weight 3.86 in (98 mm) 9.96 in (253 mm) 10.22 in (260 mm) 7.2 lb (3.3 kg) Note: Dimensions in inches rounded to the nearest decimal digit. Power Power Supply Type Range Voltage Selection... -
Page 25: Returns
Be prepared to provide the model number, serial number, and a brief description of the cause(s) for the return. Clearly label the package with an RMA number. Chauvet will refuse any product returned without an RMA number.