Table of Contents
Advertisement
Quick Links
Advertisement
Table of Contents

Related Manuals for Chauvet COLORrail IRC


Summary of Contents for Chauvet COLORrail IRC
- Page 1 User Manual...
-
Page 2: Table Of Contents
ABLE OF ONTENTS 1. Before you Begin ................3 What is Included .................... 3 Unpacking Instructions .................. 3 Text Conventions ..................3 Icons ......................3 Safety Notes ....................4 2. Introduction ..................5 Product Overview ..................5 3. -
Page 3: Before You Begin
Document Information The information and specifications contained in this document are subject to change without notice. CHAUVET® assumes no responsibility or liability for any errors or omissions that may appear in this manual. © Copyright 2011 CHAUVET®. All rights reserved Printed in P.R.C. -
Page 4: Safety Notes
Product at a Glance Use on Dimmer Auto Programs Outdoor Use Auto-ranging Power Supply Sound Activated Replaceable Fuse User Serviceable Master/Slave Duty Cycle Safety Notes Please read the following notes carefully because they include important safety information about the installation, usage, and maintenance of this product. -
Page 5: Introduction
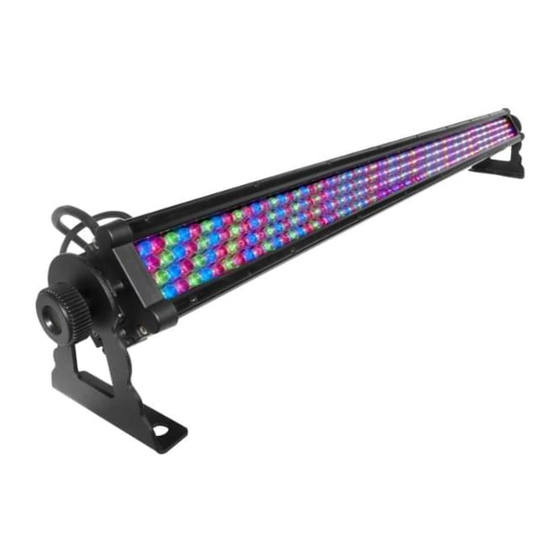
2. I NTRODUCTION Product Overview Control panel (LED display) Power out DMX in DMX out Power in Fuseholder COLORrail™ IRC User Manual (Rev. 03) Page 5 of 22... -
Page 6: Setup
The power linking diagram shown above corresponds to the North American version of this product ONLY! If using this product in other markets, you must consult with the local CHAUVET® distributor as power linking connectors and requirements may differ in your country or region. -
Page 7: Mounting
Mounting Orientation The COLORrail™ IRC may be mounted in any position, provided there is adequate room for ventilation around it. Rigging Be sure that the structure or surface onto which you are mounting this product can support its weight. Please see the “Technical Specifications” section of this manual for weight information. -
Page 8: Operation
4. O PERATION Control Panel Operation To access the control panel functions, use the four buttons located underneath the display. Button Function Press to find an operation mode < > or to back out of the current menu MENU option Press to activate a menu option or <ENTER>... -
Page 9: Configuration (Dmx)
Configuration (DMX) Set this product in DMX mode to control it with a DMX controller. 1) Connect this product to a suitable power outlet. 2) Turn this product on. 3) Connect a DMX cable from the DMX output of the DMX controller to the DMX input socket of this product. -
Page 10: Configuration (Standalone Modes)
Configuration (Standalone Modes) Set this product in one of the standalone modes to control it without a DMX controller. 1) Connect this product to a suitable power outlet. 2) Turn this product on. Sound Active Mode To enable the Sound Active mode, do the following: 1) Press <MENU>... -
Page 11: Master/Slave Mode
Master/Slave Mode This mode allows a single COLORrail™ IRC unit (the “master”) to control the actions of one or more COLORrail™ IRC units (the “slaves”) without the need of a DMX controller. The master unit will be set to operate in either Automatic or Sound Active mode, while the slave units will be set to operate in Slave Mode. -
Page 12: Irc (Infrared Remote Control) Operation
IRC (Infrared Remote Control) Operation Automatic Mode Automatic Mode will enable you to run the automatic programs on the product. To turn on Automatic Mode: Press AUTO on the IRC. Press + or – to choose between the different auto programs. To adjust the speed of the automatic program: Press SPEED on the IRC. -
Page 13: Dmx Channel Assignments And Values
DMX Channel Assignments and Values 26-CH HANNEL ALUE UNCTION HANNEL ALUE UNCTION Master Dimmer Red (section 5) 000 255 000 255 0%~100% Dimmer: 0%~100% Red (section 1) Green (section 5) 000 255 000 255 Dimmer: 0%~100% Dimmer: 0%~100% Green (section 1) Blue (section 5) -
Page 14: 14-Ch
14-CH HANNEL ALUE UNCTION HANNEL ALUE UNCTION Master Dimmer Red (section 3) 000 255 000 255 0%~100% Dimmer: 0%~100% Red (section 1) Green (section 3) 000 255 000 255 Dimmer: 0%~100% Dimmer: 0%~100% Green (section 1) Blue (section 3) 000 ... -
Page 15: 7-Ch
7-CH HANNEL ALUE UNCTION Master Dimmer 000 255 0%~100% 000 255 Dimmer: 0%~100% Green 000 255 Dimmer: 0%~100% Blue 000 255 Dimmer: 0%~100% Color Macro 000 007 No Function 008 015 016 023 Yellow 024 ... -
Page 16: 4-Ch
4-CH HANNEL ALUE UNCTION Master Dimmer 000 255 0%~100% 000 255 Dimmer: 0%~100% Green 000 255 Dimmer: 0%~100% Blue 000 255 Dimmer: 0%~100% 3-CH HANNEL ALUE UNCTION 000 255 Dimmer: 0%~100% Green 000 255 Dimmer: 0%~100% Blue 000 ... -
Page 17: Technical Information
Terminator not connected Install a terminator, as indicated in the “DMX Primer” section. If you still experience problems after trying the above solutions, contact CHAUVET® Technical Support. COLORrail™ IRC User Manual (Rev. 03) Page 17 of 22... -
Page 18: Returns Procedure
As a suggestion, proper UPS packing or double-boxing is always a safe method to use. CHAUVET® reserves the right to use its own discretion to repair or replace returned product(s). Page 18 of 22... -
Page 19: Claims
Therefore, if the received merchandise appears to have damages caused during shipping, the customer must submit the damage report and any related claims with the carrier, not CHAUVET®. The customer must submit the report upon reception of the damaged merchandise. Failure to do so in a timely manner may invalidate the customer’s claim with the carrier. -
Page 20: Dmx Primer
DMX Primer The USITT DMX512-A data transmission protocol (DMX, from now on) is based on the EIA-485 standard and it has 512 channels (001 to 512). This system requires a controller (DMX controller), one or more DMX compatible fixtures, and a DMX circuit (also known as “DMX universe”) to link the fixtures to the controller. -
Page 21: Dmx Cabling
You can purchase CHAUVET® certified DMX cables directly from a dealer/distributor or make your own DMX cable. If you choose to make your own DMX cable, you must use a data-grade cable such... -
Page 22: Technical Specifications
6. T ECHNICAL PECIFICATIONS Dimensions and Weight Length Width Height Weight 43.5 in (1,062 mm) 3 in (88 mm) 6 in (90 mm) 4.4 lbs (2 kg) Note: Dimensions in inches rounded to the nearest decimal digit. Power Power Supply Type Range Voltage Selection Switching (internal)