Delta RPI-M15A Quick Installation Manual
Hide thumbs
Also See for RPI-M15A:
- User manual (71 pages) ,
- Operation and installation manual (154 pages) ,
- Manual (63 pages)
Table of Contents
Advertisement
Quick Links
Advertisement
Table of Contents

Related Manuals for Delta RPI-M15A


Summary of Contents for Delta RPI-M15A
-
Page 1: Quick Installation Guide
Quick Installation Guide RPI-M15A RPI-M20A Europe Australia New Zealand... -
Page 2: Table Of Contents
This manual applies for solar inverter models: ● RPI-M15A ● RPI-M20A Delta Energy Systems (Germany) GmbH Tscheulinstrasse 21 79331 Teningen Germany Table of contents General safety instructions Components of the inverter Information on the type label Scope of delivery Planning the installation Mounting the inverter... -
Page 3: General Safety Instructions
General safety instructions ● The solar inverter can be safely and normally operated if DANGER installed and used in accordance with this manual (see IEC 62109-5.3.3). Delta Energy Systems is not responsible Risk of death by electrocution for damage incurred by failure to observe the installation and Potentially fatal voltage is applied to the solar operating instructions in this manual. For this reason, be sure inverter during operation This potentially fatal to observe and follow all instructions! voltage is still present for 80 seconds after all ●... -
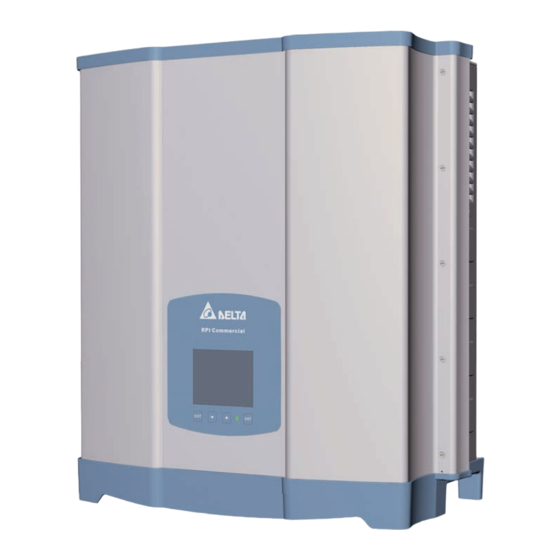
Page 4: Components Of The Inverter
Components of the inverter Display, buttons, LEDs Electrical connectors Air inlets Fans Type label AC Connector RS485 DC Disconnection switch DC Inputs O FF AC O UTPUT RS485 DC SWITCH DC INPUT Screw for grounding Label Designation Usage E-Today: 47kWh 21. Jun 2013 09:30 Multi-color LED to display the general operating status Runtime: 8.2Hrs Power: 12103W... -
Page 5: Information On The Type Label
Information on the type label Type label RPI-M15A Type label RPI-M20A Risk of death by electrocution Potentially fatal voltage is present when the solar inverter is in operation that remains for 80 seconds after being disconnected from power Never open the solar inverter. The solar inverter contains no components that must be maintained or repaired by 80 seconds the operator or installer. Opening the cover will void the warranty. Read the manual delivered with the inverter before working with the solar inverter and follow the instructions contained in the manual Risk of injury from hot surfaces When in operation, the housing of the solar inverter can become very hot. This inverter has no transformer... -
Page 6: Planning The Installation
Planning the installation ► The solar inverter is very heavy Where to mount the inverter The solar inverter must be lifted and carried by at least two 43 kg people ► Always use the mounting plate supplied with the solar inverter ► Check that the wall is capable of bearing the heavy load of the device ► Use dowels and screws that are suitable for the wall material and ✘... -
Page 7: Mounting The Inverter
Mounting the inverter ► Fasten the mounting plate to the wall (max. 12 screws). ► Hang the solar inverter into the mounting plate ► Check that the rail of the solar inverter hangs correctly in the mounting plate ► Secure the inverter to the wall with two M6 screws ►... -
Page 8: Connecting To The Grid (Ac)
Connecting to the grid (AC) DANGER O FF Risk of death or serious injury from electrocution ► Set the DC disconnection switch to position OFF before connecting or disconnecting the AC plug ► For a description how to set the AC connection type on the display, see “Setting the AC connection type”, p 20 DC SWITCH... -
Page 9: Grounding The Inverter
Recommended torque for terminal 0 7 Nm screws Use the proper upstream circuit breaker to protect the inverter: The AC plug delivered with the inverter can be used with fl exible Model Upstream Circuit Breaker copper cables. RPI-M15A 30 A Read and follow the instructions delivered with the AC plug RPI-M20A 40 A When calculating the cross section of the cable, consider: ● material used ● thermal conditions ●... -
Page 10: Connecting To The Solar Modules (Dc)
Connecting to the solar modules (DC) DANGER O FF Risk of death or serious injury from electrocution Potentially fatal voltage may be applied to the DC connections of the solar in- verter When light is falling on solar modules, they immediately start producing energy They do so, even when the sun is not shining ►... -
Page 11: Connecting To A Datalogger Via Rs485 (Optional)
Switch for RS485 termination resistor RS485 Dry contact EPO (Emergency Power Off) Communication port The RS485 connector is used to connect the inverters of the PV plant to a monitoring system If you want to use SOLIVIA Monitor, the Internet based monitor- ing from Delta, you will also need a SOLIVIA M1 G2 Gateway. Default baud rate is 19200 which can be changed on the inverter (see “Setting the baud rate for RS485”, p. 16). 6 5 4 3 2 1 Connecting a single inverter to a datalogger Designation Termination resistor = ON VCC (+12 V) -
Page 12: Connecting Epo And Dry Contacts (Optional)
Connecting EPO and dry contact (optional) Interface for RS485 and VCC Switch for RS485 termination resistor RS485 Dry contact EPO (Emergency Power Off) Communication port EPO (Emergency Power Off) Dry contacts The EPO interface is a RJ45 connector. To use EPO, short pin1 When the fans fail, COM and NO1 will be closed. and pin2 Quick installation guide for RPI M15A M20A inverters... -
Page 13: Commissioning - Basic Settings
Commissioning - basic settings O FF To execute commissioning, the inverter needs to be powered either by AC (the grid) or DC (the solar modules). DC SWITCH Use the buttons to select your country or grid Select country - 2/5 21. Jun 2013 09:30 To confirm your selection, press the button China(Std) China(Std) China(Wide) Czech England France LV FR LV VFR2013 FR LV VFR2014 FR LV VFR2014 To apply your selection, press the button Confirm country 21. -
Page 14: Commissioning - Further Settings (Optional)
Commissioning - further settings (optional) The settings described in this section may not be relevant for your installation. ► Check each setting whether it is needed for you Setting date and time When the default information is displayed, press the button Use the buttons to select Date to open the main menu. Otherwise, repeatedly press To confirm your selection, press the button the button until the main menu is displayed Personal Settings 21. Jun 2013 09:30 E-Today: 47kWh 21. -
Page 15: Display Language
Setting the display language When the default information is displayed, press the button Use the buttons to select Language to open the main menu. Otherwise, repeatedly press To confirm your selection, press the button the button until the main menu is displayed Personal Settings 21. Jun 2013 09:30 E-Today: 47kWh 21. Jun 2013 09:30 Language [ English ] Runtime: 8.2Hrs Power: 12103W Date 02 / 12 / 2013 On Grid (DD/MM/YYYY) P(w) -
Page 16: Baud Rate For Rs485
Setting the baud rate for RS485 For a description of the RS485 connection, see “Connecting to a datalogger via RS485 (optional)”, p. 11 When the default information is displayed, press the button Use the buttons to select Baud rate to open the main menu. Otherwise, repeatedly press To confirm your selection, press the button the button until the main menu is displayed Coefficients Settings 21. Jun 2013 09:30 E-Today: 47kWh 21. Jun 2013 09:30 CO2 Saved kg/kWh 0.00 Runtime: 8.2Hrs... -
Page 17: Inverter Id
Setting the inverter ID If your PV plant contains multiple inverters, a different inverter ID has to be set for each of the inverters. The inverter ID is needed to identify each inverter For a description of the RS485 connection, see “Con- necting to a datalogger via RS485 (optional)”, p. 11 When the default information is displayed, press the button The menu is protected by password 5555. Use the buttons to open the main menu. Otherwise, repeatedly press to set each digit the button until the main menu is displayed To confirm a digit, press the button E-Today: 47kWh 21. -
Page 18: Constant Cos Phi (Cos Φ)
Setting a constant cos phi (cos φ) You should set a constant power factor only when requested by country regulations, authorities or your grid operator When the default information is displayed, press the button Password 21. Jun 2013 09:30 to open the main menu. Otherwise, repeatedly press the button until the main menu is displayed E-Today: 47kWh 21. Jun 2013 09:30 Runtime: 8.2Hrs Power: 12103W On Grid P(w) Use the buttons to select Reactive Power Control. To confirm your selection, press the button Active / Reactive Power 21. -
Page 19: Power Limitation
Setting a power limitation You should set a power limitation only when requested by country regulations, authorities or your grid operator When the default information is displayed, press the button Password 21. Jun 2013 09:30 to open the main menu. Otherwise, repeatedly press the button until the main menu is displayed E-Today: 47kWh 21. Jun 2013 09:30 Runtime: 8.2Hrs Power: 12103W On Grid P(w) Use the buttons to select Active Power Con- trol. To confirm your selection, press the button Active / Reactive Power 21. -
Page 20: Ac Connection Type
Setting the AC connection type Per default, the AC connection type is set to 3P4W (3 phases + N + PE). Only if you use an AC connection with 3 phases + PE (3P3W), you need to change this setting. For a description of the AC connection, see “Connecting to the grid (AC)”, p. 8. When the default information is displayed, press the button Use the buttons to select AC Connection to open the main menu. Otherwise, repeatedly press To change the settings, press the button the button until the main menu is displayed Install Settings 21. Jun 2013 09:30 E-Today: 47kWh 21. Jun 2013 09:30 Reconnection Time Reconnection Time Runtime: 8.2Hrs Power: 12103W ] %/m RCMU... - Page 21 This page is intentionally left blank Quick installation guide for RPI M15A M20A inverters...
-
Page 22: Technical Data
Technical data Input (DC) RPI-M15A RPI-M20A Maximum recommended PV power 19 kW 25 kW Maximum input power total (per input) 16.5 kW (11.1 kW) 22 kW (14.8 kW) Nominal power 15 6 kW 20 6 kW Input voltage range 200 ... 1000 V Maximum input voltage 1000 V Nominal voltage 635 V Startup voltage 250 V Startup power 40 W... - Page 23 43 kg Cooling Fans AC Connector type AC Plug Amphenol C16-3 DC Connector type Multi-Contact MC4 Communication interfaces 2 x RS485, 1 x Dry contact, 1 x EPO General Specification RPI-M15A RPI-M20A Delta model name RPI-M15A RPI-M20A Delta part number RPI153FA0E0000 RPI203FA0E0000 Maximum efficiency 98 3% 98 4% EU efficiency 97 9% 98 1% Operating temperature range +60 °C...
-
Page 24: Service Europe
Slovenia podpora slovenija@solar-inverter com +421 42 4661 333 Spain soporto espana@solar-inverter com 900 958 300 (call free) Switzerland support switzerland@solar-inverter com 0800 838 173 (call free) United Kingdom support uk@solar-inverter com 0800 051 4281 (call free) Other European countries support europe@solar-inverter com +49 7641 455 549 5013224800 00 © Copyright – Delta Energy Systems (Germany) GmbH – All rights reserved. 15 01 2015 - All information and specifications can be modified without prior notice.