Table of Contents
Advertisement
Quick Links
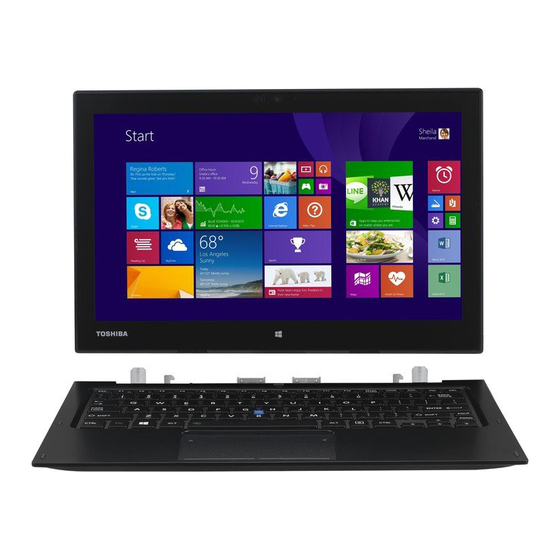
Portégé
Series
User's Guide
(Windows 10)
If you need assistance:
Technical support is available online at Toshiba's Web site at
support.toshiba.com. At this Web site, you will find answers
for many commonly asked technical questions plus many
downloadable software drivers, BIOS updates, and other
downloads.
For more information, see
page 122
®
Z20-B
in this guide.
"If Something Goes Wrong" on
GMAD00432010
08/15
Advertisement
Table of Contents
Troubleshooting

Related Manuals for Toshiba Portege Z20-B Series


Summary of Contents for Toshiba Portege Z20-B Series
- Page 1 User’s Guide (Windows 10) If you need assistance: Technical support is available online at Toshiba’s Web site at support.toshiba.com. At this Web site, you will find answers for many commonly asked technical questions plus many downloadable software drivers, BIOS updates, and other downloads.
- Page 2 (“TOSHIBA”), ITS AFFILIATES AND SUPPLIERS DO NOT WARRANT THAT OPERATION OF THE PRODUCT WILL BE UNINTERRUPTED OR ERROR FREE. YOU AGREE THAT TOSHIBA, ITS AFFILIATES AND SUPPLIERS SHALL HAVE NO RESPONSIBILITY FOR DAMAGE TO OR LOSS OF ANY BUSINESS, PROFITS, PROGRAMS, DATA, NETWORK...
- Page 3 YOUR DATA IS ALTERED OR LOST DUE TO ANY TROUBLE, FAILURE OR MALFUNCTION OF THE HARD DISK DRIVE OR OTHER STORAGE DEVICES AND THE DATA CANNOT BE RECOVERED, TOSHIBA SHALL NOT BE LIABLE FOR ANY DAMAGE OR LOSS OF DATA, OR ANY OTHER DAMAGE RESULTING THEREFROM. WHEN COPYING OR...
- Page 4 Changes or modifications made to this equipment not expressly approved by Toshiba or parties authorized by Toshiba could void the user's authority to operate the equipment. This device complies with Part 15 of the FCC Rules. Operation is subject to the following two conditions: ❖...
- Page 5 The Special Interest Group. Bluetooth modules enable wireless networks over two or more (up to a total of seven) TOSHIBA portable devices. Please contact TOSHIBA computer product support on Web site http://www.toshiba-europe.com/computers/tnt/ bluetooth.htm in Europe or support.toshiba.com in the United States for more information.
-
Page 6: Bluetooth Wireless Technology And Your Health
Because products with wireless technology operate within the guidelines found in radio frequency safety standards and Bluetooth recommendations, TOSHIBA believes wireless technology is safe for use by consumers. These standards and recommendations reflect the consensus of the scientific community and result from deliberations of panels and committees of scientists who continually review and interpret the extensive research literature. -
Page 7: Wireless Interoperability
If you should experience any such problem, immediately turn Bluetooth off your or Wireless LAN device. Please contact Toshiba computer product support on Web site http://www.toshiba-europe.com/computers/tnt/ bluetooth.htm in Europe or support.toshiba.com in the United States for more information. - Page 8 ❖ In any other environment where the risk of interference to other devices, such as medical equipment or services, is perceived or identified as harmful. If you are uncertain of the policy that applies on the use of wireless devices in a specific organization or environment (e.g. airports), you are encouraged to ask for authorization to use the Wireless LAN device prior to turning on the equipment.
-
Page 9: Regulatory Statements
This device is restricted to indoor use due to its operation in the 5.15 GHz to 5.25 GHz frequency range. Industry Canada requires this product to be used indoors for frequency range 5.15 GHz to 5.25 GHz to reduce the potential for harmful interference to co-channel Mobile Satellite systems. - Page 10 EU Declaration of Conformity TOSHIBA declares that this product conforms to the following Standards: Supplementary *The product complies with the Information: requirements of the Low Voltage Directive 73/23/EEC, the EMC Directive 89/336/EEC and/or the R&TTE Directive 1999/5/EC, compatible with the RoHS...
- Page 11 United States. Although the initial emphasis is in Europe, Toshiba is already working with design engineers, suppliers, and other partners to determine appropriate worldwide product life cycle planning and end-of-life strategies for our products.
- Page 12 Bande de fréquence restreinte: seuls les canaux 1- 7 (2400 et 2454 MHz respectivement) doivent être utilisés endroits extérieur en France. Vous pouvez contacter l’Autorité de Régulation des Télécommunications (http://www.art- telecom.fr) pour la procédure à suivre. Italia: License required for indoor use. Use with outdoor installations not allowed.
- Page 13 at that location and consult the local technical support staff responsible for the wireless network. ❖ The 5 GHz Turbo mode feature is not allowed for operation in any European Community country. ❖ This device must not be operated in ad-hoc mode using channels in the 5 GHz bands in the European Community.
- Page 14 2. If this equipment causes RF interference to other radio stations, promptly change the frequency being used, change the location of use, or turn off the source of emissions. 3. Contact TOSHIBA Direct PC if you have problems with interference caused by this product to Other Radio Stations. 2. Indication The indication shown below appears on this equipment.
-
Page 15: Device Authorization
Inc. with all rights reserved. Under the copyright laws, this guide cannot be reproduced in any form without the prior written permission of Toshiba. No patent liability is assumed, however, with respect to the use of the information contained herein. - Page 16 EXPRESSLY DISCLAIMS ANY IMPLIED WARRANTIES OF MERCHANTABILITY OR FITNESS FOR ANY PARTICULAR PURPOSE WITH REGARD TO ANY OF THE FOREGOING. TOSHIBA ASSUMES NO LIABILITY FOR ANY DAMAGES INCURRED DIRECTLY OR INDIRECTLY FROM ANY TECHNICAL OR TYPOGRAPHICAL ERRORS OR OMISSIONS CONTAINED HEREIN OR FOR DISCREPANCIES BETWEEN THE PRODUCT AND THE MANUAL.
- Page 17 Bluetooth word mark and logos are owned by the Bluetooth SIG, Inc. and any use of such marks by Toshiba is under license. Other trademarks and trade names are those of their respective owners. U.S. patents apply to this product. See http://patents.dts.com.
- Page 18 Device Recycling Information As part of a commitment to people and the future, Toshiba promotes the efficient use of resources by working to achieve our zero-waste- to-landfill goal at all our production sites. In addition to our existing waste reduction and recycling policies, Toshiba is strongly committed to reducing electronic waste.
-
Page 19: Table Of Contents
Contents Introduction............26 This guide ............28 Safety icons ............29 Other icons used..........29 Your device’s features and specifications ..30 Documentation ............ 30 Service options ............ 30 Precautions ............ 31 File management tips........... 32 Chapter 1: Getting Started........33 Selecting a place to work ........33 Features and components ........ - Page 20 Recovering from the Internal Storage Drive ............58 Reset your PC ..........59 Installing drivers and applications....61 Using the TOSHIBA Dual Pointing Device ..62 Using the touchpad ..........63 Adjusting touchpad settings ......66 Disabling or enabling the touchpad ....67 Connecting an external device ......
- Page 21 Mouse properties..........82 Starting an app ............ 82 Saving your work ..........83 Backing up your work .......... 83 Toshiba’s online resources ........84 Chapter 3: Mobile Computing ........85 Toshiba’s energy-saver design......85 Running the device on battery power....85 Battery Notice ..........
- Page 22 Using a supervisor password ...... 112 Using a user password ........ 114 Deleting a user password ......116 System Settings..........117 TOSHIBA Recovery Media Creator ....119 Service Station........... 119 TOSHIBA Application Installer ......120 PC Health Monitor ..........121...
- Page 23 Contents Chapter 6: If Something Goes Wrong....122 Problems that are easy to fix ......122 Problems when you turn on the device ..... 123 The Windows operating system is not working ............125 Using Startup options to fix problems ..125 Internet problems.........
- Page 24 Windows operating system....153 Additional help ........... 157 If you need further assistance...... 157 Contacting Toshiba........158 Other Toshiba Internet Web sites ...... 158 Toshiba’s worldwide offices ......158 Appendix A: TOSHIBA Function Keys ....160 Functions ............160 Volume Mute ..........
- Page 25 Contents Disabling or enabling the numeric overlay............ 164 Disabling or enabling the scroll lock .... 164 Keyboard dock eject ........164 Keyboard dock backlight ......164 Zoom In/Out..........164 Volume control ..........165 Zoom (Display resolution) ......165 Cortana ............165 Appendix B: Power Cord/Cable Connectors..166 Glossary............167 Index ...............182...
-
Page 26: Introduction
Introduction Thank you for purchasing your new Toshiba device. With your Toshiba device, your work and entertainment can accompany you wherever you go. ® Your device is ENERGY STAR qualified. Toshiba is a partner in the Environmental Protection Agency’s (EPA) ENERGY STAR Program and has designed this device to meet the latest ENERGY STAR guidelines for energy efficiency. - Page 27 Substances in electrical and electronic equipment (RoHS), which restricts use of certain chemicals including, but not limited to, lead, cadmium, mercury, hexavalent chromium, PBB, and PBDE. Toshiba requires its device component suppliers to meet RoHS requirements and verifies its suppliers’ commitment to...
-
Page 28: This Guide
For more detailed information about the features and specifications on your particular model, please visit Toshiba’s Web site at support.toshiba.com. While Toshiba has made every effort at the time of publication to ensure the accuracy of the information provided herein, product specifications, configurations, prices, system/component/options availability are all subject to change without notice. -
Page 29: Safety Icons
Introduction Safety icons Safety icons This manual contains safety instructions that must be observed to avoid potential hazards that could result in personal injuries, damage to your equipment, or loss of data. These safety cautions have been classified according to the seriousness of the risk, and icons highlight these instructions as follows: Indicates an imminently hazardous situation which, if not... -
Page 30: Your Device's Features And Specifications
To stay current on the most recent software and hardware options for your device, and for other product information, be sure to regularly check the Toshiba Web site at support.toshiba.com. If you have a problem or need to contact Toshiba, see “If Something Goes Wrong” on page 122. -
Page 31: Precautions
Introduction Service options Precautions Your device is designed to provide optimum safety and ease of use, and to withstand the rigors of travel. You should observe certain precautions to further reduce the risk of personal injury or damage to the device. Keep this device away from small children. -
Page 32: File Management Tips
Introduction File management tips File management tips ❖ Back up your files to external media on a regular basis. Label the backup copies clearly and store them in a safe place. As you work with data it exists in the device’s memory. This memory is called “volatile memory”... -
Page 33: Chapter 1: Getting Started
Chapter 1 Getting Started This chapter provides tips for using your device effectively, summarizes how to connect components, and explains what to do the first time you use your device. Please read the safety instruction information on the Quick Start document (that shipped with your device) carefully and make sure you fully understand the instructions before you attempt to use your device in order to avoid potential hazards that could cause bodily injury, property damage, or... -
Page 34: Features And Components
NOTE To view the keyboard dock and touchpad components, refer the Quick Start document that shipped with your device, or see “Using the TOSHIBA Dual Pointing Device” on page “Using the touchpad” on page “Using the keyboard” on page ❖... -
Page 35: Back
Getting Started Features and components ❖ —Allow you to record sounds Internal microphones* using the device’s internal microphones or an optional external microphone. You can listen to audio files using the built-in speakers, headphones, or external speakers. ❖ —Enables the device to adjust Ambient light sensor the screen brightness to conserve battery power. -
Page 36: Left Side
Getting Started Features and components Left side Security lock switch Security lock slot HDMI™ Out port* RGB (Monitor) port* *Available on certain models (Sample Illustration) Left side view Make sure the Security lock switch is in the unlocked position before attaching or detaching the tablet from the keyboard dock, to avoid damaging the tablet and keyboard dock. -
Page 37: Right Side
Getting Started Features and components Right side Power button Volume control button Reset button Power indicator light Battery indicator light Micro USB port Micro HDMI Out port* microSD™ slot Headphone/Microphone jack USB 3.0 ports DC-IN Network port Power indicator light Attach/Detach indicator light *Available on certain models (Sample Illustration) Right side view... -
Page 38: Bottom
Getting Started Features and components ❖ —Supports the use of microSD (SD™) microSD slot media. For more information, see “Using the microSD Card slot” on page 108. ❖ —Allows you to listen Headphone/Microphone jack to or record sounds onto your device. For more information, see “Using external speakers or headphones”... -
Page 39: Underside
Getting Started Features and components Underside Keyboard Reset button (Sample Illustration) Underside view ❖ —Allows you to shut down Keyboard Reset button your device in the event that the device has frozen. Never use a pencil to press the Reset button. Pencil lead can break off inside the device and damage it. -
Page 40: Setting Up A Work Environment
Getting Started Features and components Setting up a work environment Place the device on a hard flat surface that is large enough for the device and any other items you are using, such as a printer. Leave enough space around the device and other equipment to provide adequate ventilation. - Page 41 Getting Started Features and components ❖ Adjust the chair arm rests: they should be about the same height as the keyboard and comfortably support your arms, allowing your shoulders to relax. ❖ When using the keyboard, it should be centered in front of you.
-
Page 42: Using The Notebook With An External Keyboard, Mouse Or Monitor
Getting Started Features and components Using the notebook with an external keyboard, mouse or monitor (Sample Illustration) Correct posture ❖ When using a notebook for long hours, it may be more comfortable to dock the notebook and use an external keyboard, mouse and monitor. -
Page 43: Typing Style
Getting Started Features and components Typing style ❖ Learn to touch type so that you do not have to look down at the keyboard. ❖ Type with straight wrists. ❖ Type lightly. ❖ Learn the keyboard shortcuts for your applications. You will be more productive. -
Page 44: Mobile Computing Tips
Getting Started Features and components Mobile computing tips ❖ When using the notebook at airports, on airplanes or trains, or at meetings, make sure that you take the time to consider the points just mentioned. ❖ When working on the road it may be difficult to set up the notebook in an optimal position. -
Page 45: Check List
Getting Started Features and components Check list ❏ Is your chair comfortable - does it support your back and arms well? ❏ Are your feet flat on the ground? ❏ Is there adequate space under your desk for your legs? ❏... - Page 46 Getting Started Features and components Never allow any liquids to spill into any part of your device, and never expose the device to rain, water, seawater or moisture. Exposure to liquid or moisture can cause electric shock or fire, resulting in damage or serious injury.
-
Page 47: Setting Up Your Device
Getting Started Setting up your device ❖ Keep the device and disks away from objects that generate strong magnetic fields. Information on some disks is stored magnetically. Placing a magnet too close to a disk can erase important files. Handle discs carefully. Avoid touching the surface of the disc. -
Page 48: Connecting To A Power Source
Always use the TOSHIBA AC adaptor that was provided with your device, or use AC adaptors specified by TOSHIBA to avoid any risk of fire or other damage to the device. Use of an incompatible AC adaptor could cause fire or damage to the device possibly resulting in serious injury. -
Page 49: Charging The Main Battery
Getting Started Charging the main battery NOTE To locate your DC-IN port, please refer to your Quick Start document. Connect the power cord/cable to a live electrical outlet. The AC power light on the indicator panel glows. Never attempt to connect or disconnect a power plug with wet hands. -
Page 50: Using The Device For The First Time
Getting Started Using the device for the first time Using the device for the first time The device is now ready for you to turn it on and begin using it, see “Exploring Your Device’s Features” on page To avoid damaging the display panel/tablet when opening it, do not force it beyond the point where it moves easily and never lift the device by the display panel/tablet, when it is attached to the keyboard. -
Page 51: Registering Your Device With Toshiba
100. Registering your device with Toshiba Product registration is strongly recommended, and allows Toshiba to send you periodic updates, announcements, and special offers applicable to your Product. Product registration can be completed by visiting the Toshiba Web site at register.toshiba.com. Type in the requested information and complete the registration process. -
Page 52: To Shut Down Your Device
Getting Started To Shut down your device NOTE To register online, an Internet connection is required. To Shut down your device Click or touch the ) button in the lower-left Start corner of the Desktop or press the ) key. Windows The Start menu opens. -
Page 53: To Restart Your Device
Getting Started To Restart your device To Restart your device Click or touch the ) button in the lower-left Start corner of the Desktop or press the ) key. Windows The Start menu opens. Click or touch the ) icon in the Start menu. Power (Sample Image) Restart Highlight, and then click or touch the... -
Page 54: Adding Optional External Devices
ON or placing the device into Sleep mode, as the functionality may be affected. Adding optional external devices NOTE Before adding external devices, Toshiba recommends setting up your software. See “Initial setup” on page After starting your device for the first time you may want to: ❖... -
Page 55: Creating A Recovery Drive Using Toshiba Recovery Media Creator
AC adaptor. It is strongly recommended that you create a recovery drive (USB flash) using Toshiba Recovery Media Creator. If the recovery files on your internal storage drive become corrupted or are deleted, you can restore your system from your recovery drive. - Page 56 Getting Started Recovering the Internal Storage Drive Click or touch Recovery Media Creator A message may appear asking you to allow this app to make changes to your PC. Click or touch the button. All information stored on your USB flash drive will be erased during the process of creating the recovery drive.
-
Page 57: Restoring From Recovery Media Created By Toshiba Recovery Media Creator
Close For information on using the recovery drive you have created with the preceding steps, see “Restoring from recovery media created by Toshiba Recovery Media Creator” on page Restoring from recovery media created by Toshiba Recovery Media Creator The recovery process deletes information stored on the internal storage drive. -
Page 58: Recovering From The Internal Storage Drive
Getting Started Recovering the Internal Storage Drive NOTE When you restore your system, only the operating system files and drivers originally shipped with the device are restored. Any applications you installed or files that you created are not restored during this process. Be sure to separately save the files you have created to external media using Windows or another backup program. -
Page 59: Reset Your Pc
Reset your PC The Reset process allows you to choose to keep your files or remove them, and then reinstall Windows. Toshiba does not guarantee successful data backup. Be sure to save your work to external media before executing the recovery. See “Backing up your work”... - Page 60 Getting Started Recovering the Internal Storage Drive Click or touch the ) button in the lower-left Start corner of the Desktop or press the ) key. Windows The Start menu opens. Click or touch ) in the Start menu. Settings Select ) in the Settings window.
-
Page 61: Installing Drivers And Applications
Use this option if you are recycling the PC. Installing drivers and applications The TOSHIBA Application Installer allows you to reinstall the drivers and applications that were originally bundled with your device. -
Page 62: Using The Toshiba Dual Pointing Device
Follow the on-screen prompts to complete the installation process, see “TOSHIBA Application Installer” on page 120. Using the TOSHIBA Dual Pointing Device (Available on certain models.) AccuPoint II pointing device AccuPoint II AccuPoint II secondary primary button button (Sample Illustration) TOSHIBA AccuPoint II and buttons... -
Page 63: Using The Touchpad
The touchpad driver is pre-installed on your device. If this driver is removed, the touchpad and touchpad buttons will not work. You will need to reinstall the touchpad driver using the TOSHIBA Application Installer. For more information, see “TOSHIBA Application Installer” on page 120. - Page 64 Getting Started Using the touchpad ❖ Zoom in for a close-up view ❖ Zoom out to see more information at once AccuPoint II primary and secondary control buttons Touchpad eco utility button ON/OFF button Touchpad Primary control button Secondary control button (Sample Illustration) The touchpad and associated control buttons Refer to the table below for specific instructions on...
- Page 65 Getting Started Using the touchpad Do the following: Example: Select an item Move the pointer to the item you want to select. Do one of the following: ❖ Tap the touchpad once ❖ (Sample Illustration) Press and release the Tap once to select primary (left-hand) control button Open or...
-
Page 66: Adjusting Touchpad Settings
Getting Started Using the touchpad Do the following: Example: Scroll Slide your finger along the horizontally bottom edge of the touchpad in the direction you want to scroll. Repeat to scroll a longer distance. (Sample Illustration) Horizontal scrolling active area Zoom in/out To zoom in: ❖... -
Page 67: Disabling Or Enabling The Touchpad
Touchpad setting options vary by device model. The touchpad settings are accessible through the Mouse Properties option of the Windows Control Panel. For more information, please visit support.toshiba.com. Disabling or enabling the touchpad The touchpad is enabled by default. To enable/disable the... -
Page 68: Using External Display Devices
*Available on certain models (Sample Illustration) Video ports on side of device and keyboard dock For more information on purchasing a cable, visit accessories.toshiba.com. Selecting video cables To connect a device to the Micro HDMI Out port, you must purchase the appropriate cable. -
Page 69: Connecting An Hdmi-Compatible Television Or Display Device
Getting Started Using external display devices Connecting an HDMI-compatible television or display device To connect an HDMI-compatible television or display device: ❖ Connect one end of the Micro HDMI or HDMI cable (not included with your device) to the Micro HDMI Out port on the side of your device, and then connect the other end of the cable to your television or display device. -
Page 70: Adjusting The Quality Of The External Display
Getting Started Using external display devices Press the ) keys. The Display options window opens displaying the available options. ) keys allow you to cycle through the display options and highlights the available options in the following order (only the first option is available when you do not have an external monitor attached): ❖... -
Page 71: Customizing Your Device's Settings
Getting Started Customizing your device’s settings Customizing your device’s settings You can go into your device settings to make adjustments to your device to suit your needs. Click or touch the ) button in the lower-left Start corner of the Desktop or press the ) key. -
Page 72: Using A Device Lock
You may want to secure your device to a heavy object such as your desk. The easiest way to do this is to purchase an optional device lock cable. For more information on purchasing a cable lock, visit accessories.toshiba.com. (Sample Illustration) device lock cable To secure the device: Slide the Security Lock switch located on the Keyboard dock to the unlocked position. - Page 73 Getting Started Caring for your device Slide the Security Lock switch to the locked position. Security Lock switch (locked position) (Sample Illustration) Attaching security lock cable Insert the cable’s locking end into the security lock slot on the keyboard dock, and then engage the locking device.
-
Page 74: Chapter 2: Learning The Basics
Chapter 2 Learning the Basics This chapter gives some computing tips and provides important information about basic features. Computing tips ❖ Save your work frequently. Your work stays in the device’s temporary memory until you save it to the internal storage drive. If the network you are using goes down and you must restart your device to reconnect, or your battery runs out of charge while you are working, you will lose all work since you... - Page 75 Learning the Basics Computing tips ❖ Back up your files to external media on a regular basis. Label the backup copies clearly and store them in a safe place. It is easy to put off backing up because it takes time. However, if your internal storage drive suddenly fails, you will lose all the data on it unless you have a separate backup copy.
-
Page 76: Attaching And Detaching The Keyboard Dock
Learning the Basics Attaching and detaching the keyboard dock Attaching and detaching the keyboard dock Make sure the Security Lock switch is in the unlocked position before attaching or detaching the tablet from the keyboard dock, to avoid damaging the tablet and keyboard dock. -
Page 77: Detaching The Tablet And Keyboard Dock
Learning the Basics Attaching the tablet and keyboard dock Slide the Security Lock switch to the locked ( position to secure the tablet to the keyboard dock. Detaching the tablet and keyboard dock Close all applications and save all unsaved files before detaching the tablet from the keyboard. -
Page 78: Using The Keyboard
For example, ) keys turn the touchpad ON/OFF. For more information, see “TOSHIBA Function Keys” on page 160. Special Windows keys Windows key Application key (Sample Illustration) Special Windows keys Your device’s keyboard has two keys that have special... -
Page 79: Overlay Keys
Learning the Basics Using the keyboard Overlay keys The keys with gray numbers and symbols on the front of them form the numeric and cursor overlay. This overlay lets you enter numeric data or control the cursor as you would using the 10-key keypad on a desktop device’s keyboard. -
Page 80: Backlit Keyboard Dock
You can modify the time-out interval or change the keyboard backlight setting to always on or always off. This TOSHIBA Function key enables/disables the keyboard dock backlight. Touch screen NOTE Your device may come with a digitizer feature, enabling direct interaction with display, apps, and programs. - Page 81 Learning the Basics Touch screen —Touch to activate items displayed on the screen, Touch such as app and setting icons or on-screen buttons. Touch to type using the keyboard. —Touch and hold an item on the screen by Touch & hold touching and holding the item in place until an action occurs.
-
Page 82: Mouse Properties
Learning the Basics Mouse properties Mouse properties Mouse properties allow you to change your pointing device or mouse settings. To access Mouse properties: Click or touch the ) button in the lower-left Start corner of the Desktop or press the ) key. -
Page 83: Saving Your Work
Learning the Basics Saving your work You may also enter your search in the field. Search Start menu Search field button (Sample Image) Start menu For more information, see “Using the Start menu” on page 50 “Start button” on page 100. -
Page 84: Toshiba's Online Resources
Toshiba’s online resources Toshiba maintains a number of online sites to which you can connect. These sites provide information about Toshiba products, give help with technical questions and keep you up to date with future upgrades. -
Page 85: Chapter 3: Mobile Computing
Many of these energy-saving features have been preset by Toshiba. We recommend you leave these features active, allowing your device to operate at its maximum energy efficiency, so that you can use it for longer periods while traveling. -
Page 86: Battery Notice
The battery life rating is only achieved on the select models and configurations tested by Toshiba under the specific test settings at the time of publication and is not an estimate of a system’s battery life under any conditions other than the... -
Page 87: Power Management
Your device contains a rechargeable battery that may need to be charged prior to use. Always use the AC adaptor specified by Toshiba. You can order a Toshiba AC adaptor from Toshiba’s Web site at accessories.toshiba.com. NOTE Battery charge time may vary depending on the applications, power management settings, and features used. - Page 88 Mobile Computing Charging the main battery NOTE Please handle your device carefully to avoid scratching or damaging the surface. To charge the main battery, plug the device into a live electrical outlet. The battery charges whether the device is On or Off. TECHNICAL NOTE: The recharging of the tablet’s battery may not occur when your device is using all of the power provided by the AC adaptor to run applications, features,...
-
Page 89: Monitoring Battery Power
Mobile Computing Monitoring battery power Monitoring battery power NOTE To locate your system indicator lights, please refer to your Quick Start document. The device’s main battery light gives you an indication of the main battery’s current charge. ❖ Glows amber while the main battery is being charged (AC adaptor connected) ❖... -
Page 90: Charging The Rtc Battery
Mobile Computing Monitoring battery power Charging the RTC battery Your device may have an internal real-time clock (RTC) battery. The RTC battery powers the System Time Clock and BIOS memory used to store your device’s configuration settings. When fully charged, it maintains this information for up to a month when the device is powered off. -
Page 91: What To Do When The Main Battery Runs Low
Mobile Computing Monitoring battery power With repeated discharges and recharges, the battery’s capacity gradually decreases. A frequently used older battery does not power the device for as long as a new battery, even when both are fully charged. TECHNICAL NOTE: The device drains the battery faster at low temperatures. -
Page 92: Conserving Battery Power
Mobile Computing Monitoring battery power Double-click or touch to display the battery Battery options. (Sample Image) Advanced settings tab of Power Options screen Configure the alarm settings to suit your needs. Click or touch Conserving battery power How long a fully charged battery lasts when you are using the device depends on a number of factors, such as: ❖... -
Page 93: Power Plans
Mobile Computing Monitoring battery power Microsoft has combined these options into preset Power Plans. Using one of these power plans lets you choose between maximum power savings and peak system performance. You may also set individual power-saving options to suit your own needs. The following sections describe how to choose a Power Plan and discuss each power-saving option. -
Page 94: Using The Eco Power Plan
Mobile Computing Using the eco power plan Click or touch under the Change plan settings selected power option to choose the plan you wish to edit. This screen allows you to change basic settings. Click or touch Change advanced power settings access settings for battery notification levels, internal storage drive power save time, etc. -
Page 95: Taking Care Of Your Battery
If you find that a new battery is needed, contact the location where you purchased the device for more information on replacing the battery. Toshiba will not be responsible for any product damage, data loss, service, or part replacement made necessary by improper installation of a new battery. -
Page 96: Maintaining Your Battery
❖ Always travel with the device in a carrying case. Toshiba offers a choice of carrying cases for the device. They all provide plenty of extra space for manuals, power cords, and compact discs. - Page 97 Mobile Computing Traveling tips NOTE Before using your device aboard an aircraft, make sure the Wireless antenna is OFF (Airplane mode is ON) if your device has wireless LAN capability. NOTE To enable/disable the wireless antenna, press the ) keys or use the switch Airplane mode located under...
-
Page 98: Chapter 4: Exploring Your Device's Features
Chapter 4 Exploring Your Device’s Features In this chapter, you will explore some of the special features of your device. Exploring the desktop You can use its features to start applications, find documents, set up system components, and perform most other computing tasks. -
Page 99: Finding Your Way Around The Desktop
Exploring Your Device’s Features Exploring the desktop Finding your way around the desktop Your device’s desktop includes several standard features: icons, Start button, taskbar, notification area, notifications, and background pattern. Notifications Icons Start button Search field Taskbar Notification area (Sample Image) Windows Desktop screen NOTE To change from Desktop mode to Tablet mode, touch the ) icon in the Notification area, and... - Page 100 Exploring Your Device’s Features Exploring the desktop ❖ TECHNICAL NOTE: If you delete a large number of files or very large files from the internal storage drive, there may be insufficient space available in the Recycle Bin to hold these files. In this case, Windows will prompt you to either permanently delete the file(s) or cancel the deletion.
- Page 101 Exploring Your Device’s Features Exploring the desktop ❖ Access Toshiba Utilities ❖ Use the Search function ❖ Suspend system activity and shut down the device For more information, see “Using the Start menu” on page 50 “Starting an app” on page...
- Page 102 Exploring Your Device’s Features Exploring the desktop App tiles The app tiles can be accessed and launched from the Start menu. Typical app tiles are the Calendar tile and Mail tile, as well as tiles representing all other applications downloaded to your system.
-
Page 103: Windows Store
Exploring Your Device’s Features Windows Store —A specialized type of tile notification Badge notifications (shown on the Start menu tile) using symbols to indicate the number of applications that have updates available or the status of a running application. —These run a background task on behalf Raw notifications of an application while that application is not running in order to make available the latest content, such as an online... - Page 104 Exploring Your Device’s Features Setting up for communications Click or touch ) in the Start menu. Settings Select ) in the Settings window. Network & Internet The Network & Internet window allows you to choose from several options in the left pane of the window: ❖...
-
Page 105: Connecting Your Device To A Network
Exploring Your Device’s Features Exploring audio features Connecting your device to a network You can connect your device to a network to increase its capabilities and functionality. Accessing a network For specific information about connecting to the network, consult your network administrator. Many hotels, airports, and offices offer Wi-Fi access. -
Page 106: Using External Speakers Or Headphones
Exploring Your Device’s Features Exploring audio features Click or touch Voice Recorder (Sample Image) Voice Recorder screen Speak normally into the microphone. When you have finished recording, click or touch the button. Stop Recording Your recording file is created and automatically saved for you. -
Page 107: Using The Web Camera
Exploring Your Device’s Features Using the Web Camera TECHNICAL NOTE: When using amplified speakers, use speakers that require an external power source. Other types of speakers will be inadequate to produce sound from the device. To play back sound files through external speakers or headphones: Locate the headphone/microphone jack on the device. -
Page 108: Using The Microsd Card Slot
Exploring Your Device’s Features Using the microSD Card slot Using the microSD Card slot The microSD Card slot supports the use of a microSD Card. This medium can be used with a variety of digital products: digital music players, smartphones, digital cameras, digital video camcorders, etc. -
Page 109: Removing Memory Media
Exploring Your Device’s Features Using the microSD Card slot Removing memory media Prepare the card for removal by clicking or touching the ( ) icon, if necessary, in the Show hidden icons notification area and then selecting the Safely Remove ) icon. -
Page 110: Chapter 5: Utilities And Applications
❖ eco Utility ❖ Supervisor password ❖ User password ❖ System Settings ❖ TOSHIBA Recovery Media Creator ❖ Service Station ❖ TOSHIBA Application Installer ❖ PC Health Monitor... -
Page 111: Eco Utility
Utilities and Applications eco Utility eco Utility The eco Utility monitors your power savings from using the eco power plan by tracking real-time power consumption and accumulated savings over time. To access the eco Utility: In the field, type Search eco Utility Click or touch eco Utility... -
Page 112: Password Utility
TOSHIBA is not responsible for any losses that may occur to you, your organization or others as a result of the inability to access your device. - Page 113 Utilities and Applications Password Utility To set a supervisor password: In the field, type Search Password Utility Click or touch Password Utility Click or touch Supervisor Password (Sample Image) Supervisor Password tab Click or touch Enter your password, and then enter it again to verify. Click or touch NOTE Under User Policy, this option may or may not ask for...
-
Page 114: Using A User Password
TOSHIBA is not responsible for any losses that may occur to you, your organization or others as a result of the inability to access your device. - Page 115 Utilities and Applications Password Utility To register a password for the power-on password functions: In the field, type Search Password Utility Click or touch Password Utility Click or touch User Password (Sample Image) User Password tab Click or touch Enter your password, and then enter it again to verify. Click or touch Click or touch to save your password as a text file.
-
Page 116: Deleting A User Password
Utilities and Applications Password Utility Deleting a user password To cancel the power-on password function: In the field, type Search Password Utility Click or touch Password Utility A pop-up screen appears asking for a password. Enter your password, and then click or touch Verify Click or touch Delete... -
Page 117: System Settings
Utilities and Applications System Settings System Settings System Settings is the TOSHIBA configuration management tool available through the Windows operating system. To access it: In the field, type Search System Settings Click or touch System Settings The System Settings screen appears. - Page 118 Utilities and Applications System Settings ❖ —Allows you to turn on the Panel open/Power on device when opening the display panel while the device is turned off. ❖ —Allows the device to turn on Power On By AC when you plug the AC adaptor in. ❖...
-
Page 119: Toshiba Recovery Media Creator
Utilities and Applications TOSHIBA Recovery Media Creator TOSHIBA Recovery Media Creator The TOSHIBA Recovery Media Creator utility enables you to create recovery media that can be used to return your system to its out-of-box state, if necessary. For detailed information on using the utility to create recovery media, see “Creating a recovery drive using Toshiba Recovery Media... -
Page 120: Toshiba Application Installer
TOSHIBA Application Installer TOSHIBA Application Installer NOTE You must have an Internet connection to reinstall applications. The TOSHIBA Application Installer allows you to reinstall the drivers and applications that were originally bundled with your device. To reinstall drivers and applications: In the... -
Page 121: Pc Health Monitor
This information is used to identify and provide a notification of system conditions that may affect the performance of your TOSHIBA device. It may also be used to help diagnose problems should the device require service by TOSHIBA or TOSHIBA's authorized service providers. Additionally, TOSHIBA may use this information for quality assurance analysis. -
Page 122: Chapter 6: If Something Goes Wrong
This chapter aims to help you solve many problems by yourself. It covers the problems you are most likely to encounter. If all else fails, contact Toshiba. You will find information on Toshiba’s support services at the end of this chapter. Problems that are easy to fix Your program or application stops responding. -
Page 123: Problems When You Turn On The Device
If Something Goes Wrong Problems when you turn on the device Select the program or application you want to close, and then click or touch in the lower right corner. End Task Closing the failed program should allow you to continue working. - Page 124 “trickle-charge” to the battery. Once the battery has been trickle- charged, it may begin working correctly again. If the trickle-charging does not prove effective, you can connect to Support Online by going to Toshiba support at support.toshiba.com.
-
Page 125: The Windows Operating System Is Not Working
If the specifications do match, locate and use the AC adaptor that shipped with your device. If the specifications match, contact Toshiba. See “Contacting Toshiba” on page 158. The Windows operating system is not working... - Page 126 If Something Goes Wrong The Windows operating system is not working If Windows fails to start properly twice, the Windows Boot menu will launch. To enter the Advanced Startup options manually: In the field, type Search Recovery Options Click or touch Recovery Options Scroll down to view the option.
-
Page 127: Internet Problems
If Something Goes Wrong The Windows operating system is not working Startup Settings In previous Operating Systems the majority of the options found on this menu were available by pressing the ( ) key during the Windows boot process: ❖ Enable low resolution video mode Restarts Windows using your current video driver at low resolution. -
Page 128: Power And The Battery
If Something Goes Wrong Power and the battery My browser cannot find the URL address I typed in. Make sure you separated the domain names of the address with the forward slash (/). Check the spelling of each name and the syntax of the address carefully. A single incorrect letter or missed character will make it impossible for your browser to locate the site. -
Page 129: Keyboard Help
If Something Goes Wrong Keyboard help The battery appears not to power the device for as long as it usually does. If you frequently repeat shallow charge and discharge, the battery meter may become inaccurate. Let the battery discharge completely, then try charging it again. Check the power options via your Power Plans (see “Power Plans”... -
Page 130: Reset The Keyboard Dock
If Something Goes Wrong Keyboard help Turn On the device, and try the keyboard again. Reset the Keyboard dock To reset the Keyboard dock, press the Rest button on the Keyboard dock. Never use a pencil to press the Reset button. Pencil lead can break off inside the device and damage it. -
Page 131: Perform A System Restore
If Something Goes Wrong Touchpad help After the driver uninstalls, restart your device, see “To Restart your device” on page The driver is then reinstalled automatically. Perform a system restore You can perform a system restore to a period in time at which the keyboard was working properly. -
Page 132: Install An External Mouse
If Something Goes Wrong Touchpad help Install an external mouse Without a touch screen it may be challenging to navigate your way around the operating system without a working touchpad. To help you troubleshoot the issue you may want to install an (optional) external mouse. Plug a USB mouse into an open USB port on your device. -
Page 133: Download The Latest Touchpad Driver
“To Restart your device” on page The driver is then reinstalled automatically. Download the latest touchpad driver In your Web browser go to http://support.toshiba.com/drivers. Enter your device’s serial number. Filter your search by to find and Touchpad driver download the touchpad driver for your device. -
Page 134: Perform A System Restore
If Something Goes Wrong Display problems Perform a system restore You can perform a system restore to a period in time at which the touchpad was working properly. NOTE If no restore points have been previously created then this method will not work, see “Saving system configuration with restore points”... - Page 135 If Something Goes Wrong Display problems HINT: Pressing the ) keys several times will advance you through the display options. If you are using an external monitor: ❖ Check that the monitor is turned on. ❖ Check that the monitor’s power cord/cable is firmly plugged into a working power outlet.
-
Page 136: Disk Or Storage Drive Problems
If Something Goes Wrong Disk or storage drive problems You can also change the settings for individual components separately by selecting each item. For more information, see the Windows online Help. A message displays saying that there is a problem with your display settings and that the adapter type is incorrect or the current settings do not work with your hardware. - Page 137 If Something Goes Wrong Disk or storage drive problems Right-click or touch the drive you wish to check. (Sample Image) Clicking on or touching the drive In the pop-up menu, click or touch Properties The drive’s “Properties” box appears. Click or touch the tab.
-
Page 138: Web Camera Help
If Something Goes Wrong Web Camera help Your data files are damaged or corrupted. Refer to your software documentation for file recovery procedures. Many software packages automatically create backup files. You may also be able to recover lost data using utility software. -
Page 139: Perform A System Restore
If Something Goes Wrong Web Camera help NOTE select the “Delete the driver software for this device” box. (Sample Image) Web Camera driver - uninstall window After the driver uninstalls, restart your device, see “To Restart your device” on page The driver is then reinstalled automatically. -
Page 140: Check For Problems With Third Party Applications
If Something Goes Wrong Sound help Check for problems with third party applications Uninstall all other applications that use the Web Camera except the pre-installed camera application. If uninstalling the other applications does not fix the problem, reinstall them. If it does fix the problem, try reinstalling them again to check if the Web Camera continues to work. -
Page 141: Check And Set Default Speakers
If Something Goes Wrong Sound help Check and set default speakers In the field, type Search Change system sounds Click or touch Change system sounds Click or touch the tab. Playback Select a playback device. Click or touch the button. Set Default NOTE If only one playback device is listed, that device is set as... -
Page 142: Uninstall The Audio Driver
❖ Take note of the audio driver name(s) in the event you may need to manually download the audio driver from support.toshiba.com/drivers. (Sample Image) Audio driver - uninstall window After the driver uninstalls, restart your device, see “To Restart your device”... -
Page 143: Download The Latest Sound Driver
The various Audio drivers will be listed under “Sound, video and game controllers.” Take note of the Audio driver name(s) in order to locate the proper driver on the Toshiba support Web site, “Drivers & Software” page. Install the desired Audio driver. -
Page 144: Printer Problems
If Something Goes Wrong Printer problems Printer problems This section lists some of the most common printer problems. The printer will not print. Check that the printer is connected to a working power outlet, turned on and ready (on line). Check that the printer has plenty of paper. -
Page 145: Wireless Networking Problems
If Something Goes Wrong Wireless networking problems Wireless networking problems NOTE This section provides general troubleshooting tips for networking problems, specifically wireless (Wi-Fi) networking. The terms and concepts used assume a basic understanding of networks, and may be for more advanced users. -
Page 146: Connecting To The Internet
If Something Goes Wrong Connecting to the Internet ❖ Use IPCONFIG to verify that the device has a useful IP address one other than the private address of 169.254.xxx.xxx assigned by Windows. In the field, type Search Click or touch Command Prompt Enter , and then press... -
Page 147: Using A Wireless Connection
If Something Goes Wrong Connecting to the Internet Using a wireless connection After you have an ISP and you've connected your hardware by following the ISP's instructions, you might already be connected to the Internet. To find out, open your Web browser and try visiting a Web site. -
Page 148: Troubleshooting An Internet Connection - Verify Hardware
If Something Goes Wrong Connecting to the Internet Troubleshooting an Internet connection – Verify hardware Before troubleshooting any problem you are having with connecting to the Internet, verify the following: Make sure all cords/cables are connected, (e.g. modem connection from the wall and connection cables to the router). -
Page 149: Troubleshooting An Internet Connection - How To Verify Tcp/Ip
If Something Goes Wrong Connecting to the Internet NOTE select the “Delete the driver software for this device” box. (Sample Image) Device Manager - Network adapter uninstall After the driver uninstalls, open the menu in Action Device Manager. Select Scan for hardware changes After the driver uninstalls, restart your device, see “To Restart your device”... - Page 150 If Something Goes Wrong Connecting to the Internet At the command prompt, type and press ping 127.0.0.1 ENTER If the network adapter and TCP/IP are functioning correctly, you should receive a response that looks similar to the following: (Sample Image) Command Prompt window If you receive an error message at this point, TCP/IP may not be properly installed.
-
Page 151: Downloading Drivers And Updates
Downloading drivers and updates Using Toshiba Service Station The easiest way to update your device with the latest components and drivers is to use Toshiba Service Station. To access TOSHIBA Service Station: In the field, type... -
Page 152: How To Determine The Correct Drivers To Download
(or connected to) your device. On the “Drivers & Software” area of the Toshiba support Web site, there may be several drivers listed for the same device. -
Page 153: Data And System Configuration Backup In The Windows Operating System
If Something Goes Wrong Develop good computing habits On a regular basis, back up the information stored on your internal storage drive. Use Windows to back up files, or the entire device, to a flash drive, or external hard disk. Here are some ways you can do this: ❖... - Page 154 If Something Goes Wrong Develop good computing habits Saving system configuration with restore points The System Restore feature of the Windows operating system quickly creates restore points ‘snapshots’ of your Windows operating system configuration and saves them for later recall. If you experience problems after installing some new hardware or software, you can easily select a previously established Control Point to ‘turn back the clock,’...
- Page 155 If Something Goes Wrong Develop good computing habits In the field, type . Click Search Create a restore point or touch from the list that Create a restore point appears. tab of the System Properties System Protection window appears. Click or touch System Restore...
- Page 156 If Something Goes Wrong Develop good computing habits Follow these steps to back up your device or files to a flash drive, or an external storage drive: NOTE You cannot back up the device while running on battery power. Connect the AC adaptor before continuing. In the field, type Search...
-
Page 157: Additional Help
If Something Goes Wrong Additional help ❖ Restart the Windows operating system. Always restart the Windows operating system after each installation, even if the installation utility does not prompt you to do so. This will ensure that the installation is completed, and will clean up anything that the installation utility left behind. -
Page 158: Contacting Toshiba
Your dealer is your best source for current information. Technical support is available online at Toshiba’s support Web site at support.toshiba.com. At this Web site you will find answers for many commonly asked technical questions in addition to downloadable software drivers, BIOS updates, and many other downloads. - Page 159 Spain United States The Rest of Europe Toshiba America Information Toshiba Europe (I.E.) GmbH Systems, Inc. Hammfelddamm 8 9740 Irvine Boulevard D-4-1460 Neuss Irvine, California 92618 Germany United States For more information on additional Toshiba worldwide locations, please visit: www.toshiba.co.jp/index.htm.
-
Page 160: Appendix A: Toshiba Function Keys
Appendix A TOSHIBA Function Keys TOSHIBA Function keys provide a quick way to modify selected system functions and to launch applications. Functions TOSHIBA Function keys are used to set or modify the following system functions: ❖ Mute ❖ Lock (Instant security) ❖... -
Page 161: Volume Mute
Power Options window (see “Power Plans” on page 93). This TOSHIBA function key also allows you to enable notifications for power plans. The notifications are disabled by default. Sleep mode This TOSHIBA Function key places the device into... -
Page 162: Hibernation Mode
TOSHIBA Function Keys Functions Hibernation mode This TOSHIBA Function key places the device into Hibernation mode. If Hibernation mode is disabled, this Function key will not respond. Output (Display switch) This TOSHIBA Function key cycles through the display options and highlights the available options, “Directing the display output when your device is... -
Page 163: Display Brightness
TOSHIBA Function Keys Functions Display brightness This TOSHIBA Function key decreases the screen brightness. This TOSHIBA Function key increases the screen brightness. Disabling or enabling wireless devices This TOSHIBA Function key enables/disables the Wi-Fi antenna in your device. NOTE Allow about 5 seconds to switch between modes. -
Page 164: Disabling Or Enabling The Cursor Control Overlay
This TOSHIBA Function key ejects the keyboard dock. Keyboard dock backlight This TOSHIBA Function key enables/disables the keyboard dock backlight. Zoom In/Out This TOSHIBA Function key allows you to zoom out. This TOSHIBA Function key allows you to zoom in. -
Page 165: Volume Control
TOSHIBA Function Keys Functions Volume control This TOSHIBA Function key decreases the speaker volume. This TOSHIBA Function key increases the speaker volume. Zoom (Display resolution) This TOSHIBA Function key switches screen resolution. Cycle through the screen resolutions, and then select [Space bar] the desired resolution. -
Page 166: Appendix B: Power Cord/Cable Connectors
Appendix B Power Cord/Cable Connectors Your device ships with the correct power supply for the country of purchase. This appendix shows the shapes of the typical AC power cord/cable connectors for various parts of the world. Canada UL approved CSA approved United Kingdom Europe VDA approved... -
Page 167: Glossary
Glossary TECHNICAL NOTE: Some features defined in this glossary may not be available on your device. Acronyms The following acronyms may appear in this User’s Guide. Alternating Current Basic Input/Output System BIOS Blu-ray Disc Read-Only Memory BD-ROM bits per second Compact Disc Compact Disc Read-Only Memory CD-ROM... - Page 168 Glossary Dots Per Inch Digital Versatile (or Video) Disc Digital Versatile (or Video) Disc Read-Only DVD-ROM Memory external Serial Advanced Technology eSATA Attachment File Allocation Table Federal Communications Commission gigabyte gigabytes per second GBps Hard Disk Drive High-Definition Multimedia Interface HDMI High-Definition Multimedia Interface Consumer HDMI CEC...
- Page 169 Glossary Secure Digital Synchronous Dynamic Random Access Memory SDRAM Solid State Drive Thin Film Transistor Universal Serial Bus Uniform Resource Locator Wide Area Network World Wide Web Terms The following terms may appear in this User’s Guide. —A liquid crystal display (LCD) made active-matrix display from an array of liquid crystal cells using active-matrix technology.
- Page 170 Glossary —A copy of a file, usually on a removable disk, kept in backup case the original file is lost or damaged. BIOS —See Basic Input/Output System (BIOS) —The speed at which a communication device, such baud rate as a printer or modem, transmits information. Baud rate is the number of signal changes per second (not necessarily bits per second the same as bits per second).
- Page 171 Glossary —A section of very fast memory in which frequently used cache information is duplicated for quick access. Accessing data from cache is faster than accessing it from the computer’s CPU cache, L1 cache, L2 cache main memory. See also CD-ROM —An individual compact disc.
- Page 172 Glossary —A device that controls the transfer of data from a controller computer to a peripheral device and vice versa. For example, disk drives, monitors, keyboards, and printers all require controllers. Central Processing Unit (CPU) —See —A section of very fast memory residing between CPU cache the CPU and the computer’s main memory that temporarily stores data and instructions the CPU will need to execute...
- Page 173 Glossary —A round, flat piece of material, designed to be read from disc and written to by optical (laser) technology, and used in the production of optical discs, such as CDs and DVDs. disk Compare —A round, flat piece of material that can be magnetically disk influenced to hold information in digital form, and used in the production of magnetic disks, such as hard disks.
- Page 174 Glossary —An external device that supports hot swapping and eSATA fast data transfer. Very useful in storing and transferring large files. —A computer program that is ready to run. executable file Application programs and batch files are examples of executable files. Names of executable files usually end with a .bat or .exe extension.
- Page 175 One A/V component can control another while using this HDMI function, if connected with HDMI cables. See also —A feature of many Toshiba computers that saves Hibernation to the internal storage drive the current state of your work, including all open files and programs, when you turn the computer off.
- Page 176 Glossary —A small image displayed on the screen that represents a icon function, file, or program. —A method of refreshing a computer screen, in interlaced which only every other line of pixels is refreshed. Interlaced monitors take two passes to create a complete screen non-interlaced image.
- Page 177 Glossary —To move information from a storage device (such as a load hard disk) into memory for processing. —See local area network —A section of a disk that is recognized by the logical drive operating system as a separate disk drive. A system’s logical drives may differ from its physical drives.
- Page 178 Glossary —A method of refreshing a computer screen, non-interlaced in which each pixel of every line is refreshed as the electron beam scans across and down the screen. Compare interlaced —A disk for storing programs and data that non-system disk system disk cannot be used to start the computer.
- Page 179 Glossary —An icon (usually an arrow) that moves on the screen pointer when you slide your finger across the touchpad or move a mouse. Used to point to and select/activate on-screen items, such as icons, menu items, and buttons. The shape and purpose of the pointer varies depending on the program you are using and what you are doing.
- Page 180 Glossary —A monitor that RGB (Red, Green, Blue) monitor reproduces all colors by mixing red, green, and blue light in various combinations. —An eight-wire connector used to connect a RJ45 connector computer to a network. —Non-volatile memory that can ROM (Read-Only Memory) Non-volatile be read but not written to.
- Page 181 Glossary —The symbol (in the MS-DOS operating system prompt system, generally a drive letter followed by a “greater than” sign) indicating where users are to enter commands. active-matrix display —See TFT display —A list of square or rectangular icons on the Start Tile/Tiles screen representing applications that can be accessed by selecting them.
-
Page 182: Index
Index battery life 86 care 95, 96 AC adaptor 48 changing 94 AC power 87 charge indicator light 49 AC power light 48 charge time 87 accessing charger 87 network 105 charging 49, 87 AccuPoint II 62 charging the real-time clock Primary button 63 (RTC) 90 Secondary button 63... - Page 183 Index setting notifications 91 taking care of 95 data battery indicator light 89 backing up 32 Battery indicator light (device) 37 data/entire system backup BIOS Setup troubleshooting 155 see System Settings data/system configuration button troubleshooting 153 Keyboard Reset 39 DC-IN port 38 Pen-Digital eraser 39 desktop Pen-Right mouse click 39...
- Page 184 Index Toshiba Service Station 151 disabling or enabling wireless drivers devices 163 downloading 151 display brightness 163 Hibernation mode 162 Lock (Instant security) 161 easy to fix problems Output (Display switch) 162 troubleshooting 122 Power plan 161 eco power plan 94...
- Page 185 102 LEDs notifications 102 system indicator lights 89 AC adaptor light 89 AC power light 48, 49 online resources battery light 49 Toshiba 84 Web Camera light 107 optional external devices Licenses 17 adding 54 light Attach/Detach indicator 38 password...
- Page 186 31, 45 Pen-Right mouse click button 39 printer problems port troubleshooting 144 DC-IN 38 problem solving HDMI 68 contacting Toshiba 158 HDMI Out 36 projector headphone/microphone jack connecting 69 internal microphones 35 real-time clock (RTC) Micro HDMI 68, 69...
- Page 187 AC adaptor 48 communications 103 Toshiba Web site 51 worldwide offices 158 device 47 TOSHIBA Application Installer 120 work environment 40 Toshiba Dual Pointing Device 62 settings TOSHIBA Function key customize device settings 71 volume down 165 Shut down volume up 165...
- Page 188 Index contacting Toshiba 157 power cycle 129 corrupted/damaged data files system restore 131 uninstall/reinstall driver 130 data/entire system backup troubleshooting network adapter uninstall/reinstall driver 148 data/system configuration 153 troubleshooting sound device will not start 123 check and set default speakers...
- Page 189 Index Web Camera 107 using the keyboard 78 using the overlay for cursor control using the Toshiba Dual Pointing Device 62 Utilities 110 video projector adjusting display 70 volume control button 37 warranty standard limited warranty 30 Web Camera using 107...