Fujitsu fi-6800 Operator's Manual
Image scanner
Hide thumbs
Also See for fi-6800:
- Consumable replacement and cleaning instructions (26 pages) ,
- Getting started manual (9 pages) ,
- Specifications (4 pages)
Table of Contents
Advertisement
Quick Links
fi-6400/fi-6800
Image Scanner
Operator's Guide
Thank you for purchasing the fi-6400/fi-6800 Color Image Scanner.
This manual explains about the basic operations and handling of this product.
For information on scanner installation, connection, and uninstalling the software, refer to the
"Getting Started" guide.
P3PC-2492-05ENZ0
Explains the names and functions of parts
and basic scanner operation.
Explains how to load documents on the
scanner.
Explains how to use the Operator Panel.
Explains about various ways of scanning.
Explains how to clean the scanner.
Explains how to replace consumables.
Explains about troubleshooting.
Explains how to configure settings by using
the Software Operation Panel.
How to Use This Manual
TOP
Contents
Index
Introduction
Scanner
Overview
How to Load
Documents
How to Use
the Operator
Panel
Various Ways
to Scan
Daily Care
Replacing
Consumables
Troubleshooting
Operational
Settings
Appendix
Glossary
Advertisement
Table of Contents
Troubleshooting

Related Manuals for Fujitsu fi-6800


Summary of Contents for Fujitsu fi-6800
- Page 1 Documents How to Use Explains how to use the Operator Panel. Thank you for purchasing the fi-6400/fi-6800 Color Image Scanner. the Operator This manual explains about the basic operations and handling of this product. Panel For information on scanner installation, connection, and uninstalling the software, refer to the Explains about various ways of scanning.
-
Page 2: How To Use This Manual
How to Use This Manual Contents How to Use This Manual Index Introduction Scanner The following shows the tips for using this manual. Index page Over view Cover page How to Load Documents Jumps to the first page of How to Use each chapter. -
Page 3: Introduction
(double-sided) scanning. the Operator how to replace the consumables, and how to troubleshoot problems. Included in the Panel The differences between fi-6400 and fi-6800 are the following. Setup DVD-ROM. Various Ways Model Interface Scanning speed (*1) - Page 4 Introduction Contents Manufacturer Manual Description Index PFU LIMITED Help - Embedded in Explains how to use and configure the Introduction related applications settings for the application software. Use YOKOHAMA i-MARK PLACE, 4-4-5 Minatomirai, Nishi-ku, help files as necessary. Can be referenced Yokohama, Kanagawa, 220-8567, Japan Scanner from the applications.
-
Page 5: Conventions
Conventions Contents Conventions Index Introduction Scanner Safety Information Naming Conventions in This Manual Overview This manual describes important details for users to use this The operating systems and products in this manual are product safely and correctly. Read this manual thoroughly indicated as follows: How to Load Documents... - Page 6 Conventions Contents Screen Examples in This Manual Product Indication Index ® Windows Windows Windows Server 2012 Standard (64-bit) The screen examples in this manual are subject to change Introduction Server (*1) ® Windows Server 2012 R2 Standard (64-bit) without notice in the interest of product improvement. 2012 If the actual displayed screen differs from the screen examples Scanner...
-
Page 7: Table Of Contents
Contents Contents Contents Index Introduction Scanner How to Use This Manual ........2 How to Fix the Stacker Height......24 Overview Introduction ............. 3 Adjusting the Paper Separation Force .... 25 Conventions ............5 1.10 Resuming from Power Saving Mode ....26 How to Load 1.11 Basic Flow of Scanning Operation .... - Page 8 Contents Contents About the Indicators ..........49 Chapter 6 Replacing Consumables ....93 Index Main Menu ............50 Consumables and Replacement Cycles ..94 Introduction How to Use Main Menu ........50 Replacing the Pick Roller ......... 95 Items Configurable in the Main Menu....59 Replacing the Separator Roller ......
- Page 9 Contents Contents Before You Contact the Scanner Service Specifying Custom Color(s) to Drop Out Index Provider ............128 [Multi dropout colors]........154 Introduction General............... 128 Shortening the Scanning Intervals [Pre-Pick]..156 Error Status ............128 Specifying the Number of Feeding Retries Scanner Checking the Product Labels ......
- Page 10 Contents Contents Scanning Documents with Dark Background Settings Related to Maintenance/Options ..180 Index Color [Scan Setting for Document in Dark Setting the Maintenance/Inspection Cycles Introduction Ground Color] ..........167 for the Scanner Adjusting the Result of the Output Image [Maintenance and Inspection Cycle] ....
-
Page 11: Chapter 1 Scanner Overview
Contents Index Chapter 1 Scanner Overview Introduction Scanner Overview This chapter explains about the names and functions of the scanner components, as well as the methods for basic How to Load operations. Documents How to Use 1.1 Main Features.............................12 the Operator 1.2 Parts and Functions............................13 Panel 1.3 Turning the Power ON/OFF ........................16... -
Page 12: Main Features
How to Use documents. This allows you to scan up to approximately 60,000 sheets prepare and sort the documents. the Operator per day (fi-6800). “Automatic Image Quality Checker” checks through the scanned images Panel Mounts a Liquid Crystal Display (LCD) and displays images that are in poor condition. -
Page 13: Parts And Functions
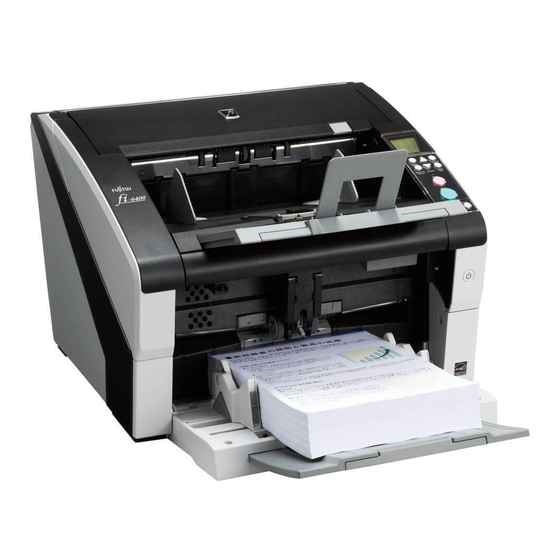
Chapter 1 Scanner Overview Contents Index 1.2 Parts and Functions Introduction This section shows the names of the scanner parts. Scanner Front Overview Paper Output Stacker Ejects the scanned documents. How to Load Stacks up the ejected documents. It Documents can be kept at an optimum height to Top Cover straighten the documents. -
Page 14: Back
For connecting a SCSI cable. Daily Care USB Connector Replacing For connecting a USB cable. Consumables VRS Board (optional) slot (fi-6800) For connecting the VRS board (optional) to use Kofax VRS Troubleshooting (optional). For details, refer to "A.4 Scanner Options" (page 188). -
Page 15: Removable Parts
Chapter 1 Scanner Overview Contents Removable Parts Index Pick Roller Introduction For information on how to remove the pick roller, refer to "6.2 Replacing the Pick Roller" (page 95). Scanner Overview How to Load Documents How to Use the Operator Separator Roller Panel For information on how to remove the separator roller, refer to... -
Page 16: Turning The Power On/Off
Chapter 1 Scanner Overview Contents Index 1.3 Turning the Power ON/OFF Introduction This section explains how to power on/off the scanner. Press the power button on the front of the scanner. Scanner Turning the Power ON Overview Turn on the power in the following procedure: How to Load When connected via SCSI, turn on the scanner and confirm Documents... -
Page 17: Turning The Power Off
Chapter 1 Scanner Overview Contents Turning the Power OFF Index Turn off the power in the following procedure: Introduction Press the power button on the front for more than two Scanner seconds. Overview The power is turned off, and the power button switches off. How to Load If the scanner will not be used for a long time, press the ""... -
Page 18: Opening/Closing The Hopper
Chapter 1 Scanner Overview Contents Index 1.4 Opening/Closing the Hopper Introduction This section describes how to open and close the hopper. How to Close the Hopper Scanner How to Open the Hopper Close the hopper in the following procedure: Overview Open the hopper in the following procedure: Remove all documents from the hopper. -
Page 19: Opening/Closing The Adf
Chapter 1 Scanner Overview Contents Index 1.5 Opening/Closing the ADF Introduction This section describes how to open and close the ADF. Grab the ADF release tab and lift it up to open the ADF. Scanner How to Open the ADF Overview Open the ADF in the following procedure: How to Load... -
Page 20: How To Close The Adf
Chapter 1 Scanner Overview Contents How to Close the ADF Index Close the ADF in the following manner: Introduction Hold the ADF with both hands and push it down slowly. Scanner Push the ADF until it locks. Overview How to Load Documents How to Use the Operator... -
Page 21: Opening/Closing The Top Cover
Chapter 1 Scanner Overview Contents Index 1.6 Opening/Closing the Top Cover Introduction This section describes how to open and close the top cover. How to Close the Top Cover Scanner How to Open the Top Cover Close the top cover in the following manner: Overview Open the top cover in the following manner: Close the top cover and push it down gently until it locks. -
Page 22: Setting The Loading Capacity Of The Hopper
Chapter 1 Scanner Overview Contents Index 1.7 Setting the Loading Capacity of the Hopper Introduction If there are only a few documents, you can set the hopper to a Use the operator panel to adjust the height of the hopper. Scanner higher position and shorten the time to get to the feeding Configure by selecting [10: Hopper Level] in the [Main Menu]... -
Page 23: Stacker Setting
Chapter 1 Scanner Overview Contents Index 1.8 Stacker Setting Introduction When you perform a scan, the document loaded on the Use the paper stop (small) when the document length is Scanner hopper is ejected onto the stacker. short. Lift up the paper stop (small) to about 130 degrees Overview from the stacker level. -
Page 24: How To Fix The Stacker Height
Chapter 1 Scanner Overview Contents How to Fix the Stacker Height Index Highly deformed (curled, folded or creased) documents may Introduction be scattered in the output when they are ejected onto the stacker. In that case, having the stacker height fixed during Scanner scanning may help the documents be stacked neatly. -
Page 25: Adjusting The Paper Separation Force
Chapter 1 Scanner Overview Contents Index 1.9 Adjusting the Paper Separation Force Introduction When you experience frequent multifeeds, pick errors or paper The paper separation force is set to [] when the Scanner jams, you can fix the problem by adjusting the force that power has just been turned on. -
Page 26: Resuming From Power Saving Mode
Chapter 1 Scanner Overview Contents Index 1.10 Resuming from Power Saving Mode Introduction Power saving mode saves the power consumption of the For details, refer to "1.3 Turning the Power ON/OFF" (page Scanner scanner while the power is turned on. 16). -
Page 27: Basic Flow Of Scanning Operation
Chapter 1 Scanner Overview Contents Index 1.11 Basic Flow of Scanning Operation Introduction This section explains about the basic flow of scanning Turn on the scanner. Scanner For information on how to turn on the power, refer to "1.3 Turning the operations. -
Page 28: The Operator
Chapter 1 Scanner Overview Contents Start an image scanning application. Index Select a scanner driver. Introduction For some image scanning applications, selection of a scanner driver may not be needed. Scanner Overview Select a scanner. Make sure to select the scanner model that is connected to the computer. -
Page 29: Centralized Management Of Scanners
Chapter 1 Scanner Overview Contents 1.12 Centralized Management of Scanners Index Introduction This section explains about managing a large number of SCAModule Creator Use this application to create update modules to upload onto the Scanner scanners in a unified manner by providing the following Scanner Central Admin Server. -
Page 30: Chapter 2 How To Load Documents
Contents Index Chapter 2 How to Load Documents Introduction Scanner Overview This chapter explains how to load documents on the scanner. How to Load Documents 2.1 Loading Documents............................31 How to Use 2.2 Documents for Scanning ..........................37 the Operator Panel Various Ways to Scan Daily Care Replacing... -
Page 31: Loading Documents
Chapter 2 How to Load Documents Contents Index 2.1 Loading Documents Introduction This section explains how to load documents on the scanner. Fan the documents. Scanner 1 Hold both ends of the documents and bend them. Preparation Overview Prepare the documents as described below. How to Load For details about the paper size and paper quality required for Documents... -
Page 32: How To Load Documents
Chapter 2 How to Load Documents Contents ■Setting the documents at the center of the How to Load Documents Index hopper There are two ways to load the documents. Introduction Setting the documents at the center of the hopper Load documents on the hopper. This style is used mainly when the documents are of the same size. -
Page 33: The Operator
Chapter 2 How to Load Documents Contents Adjust the hopper side guides to the document width. Make sure that the hopper side guides do not pass the Index Move the hopper side guides while pressing the side guide clutch so line marks embedded on each side of the hopper. -
Page 34: The Operator
Chapter 2 How to Load Documents Contents ■Setting the documents by the left or right side Adjust the stacker extension to the document length, and Index pull up the paper stop. of the hopper For information on how to set the stacker, refer to "1.8 Stacker Introduction Setting"... -
Page 35: The Operator
Chapter 2 How to Load Documents Contents Adjust the hopper side guides to the document width. Make sure that all documents are placed underneath the Index Move the hopper side guides towards the center as you press the pick roller, otherwise the document will not be picked. side guide clutches, and leave no space between the hopper side Good example ... -
Page 36: The Operator
Chapter 2 How to Load Documents Contents Move the other hopper side guide to the target position Start up an application for scanning and scan the Index while pressing the side guide clutch. documents. In this case, slide the left hopper side guide as you press the side Introduction guide clutch and leave no space between the hopper side guide and To unlock the hopper side guide, follow the steps below. -
Page 37: Documents For Scanning
Chapter 2 How to Load Documents Contents Index 2.2 Documents for Scanning Introduction Paper Size Paper Quality Scanner The paper size that can be scanned is specified as follows. Paper type Overview Recommended paper types for scanning are as follows: Wood-free paper ... - Page 38 Chapter 2 How to Load Documents Contents Precautions To scan a document that is semi-transparent, increase the Index The following types of documents may not be scanned successfully: brightness level to avoid bleed-through. Documents of non-uniform thickness (e.g. envelopes, documents with ...
-
Page 39: Loading Capacity
Chapter 2 How to Load Documents Contents Loading Capacity Index The number of sheets that can be loaded on the hopper is Introduction determined by the paper size and paper weight of the document. See the following graph: Scanner Overview Hopper level low Hopper level normal How to Load... -
Page 40: Areas Not To Be Perforated
Chapter 2 How to Load Documents Contents Areas Not to be Perforated Loading Documents with Tabs or Non- Index rectangular Documents An error may occur when there are punched holes in the area Introduction To scan a document with tabs or a document that is non- shaded in light blue in the following picture. -
Page 41: Conditions For Multifeed Detection
Chapter 2 How to Load Documents Contents Conditions for Multifeed Detection Fig.1 Index Reference point Multifeed is an error when two or more sheets are fed through Leading edge Introduction the ADF at once. It is also called a “multifeed” when a different document length is detected. -
Page 42: Restricting The Background Color Area
Chapter 2 How to Load Documents Contents Restricting the Background Color Area Job Separation Sheet Index The scanning area from the leading edge to the first 3 mm The following is a typical form of a Job Separation Sheet. Introduction should be in white (ground color of the document). -
Page 43: Scanning A Mixed Batch Of Documents
Chapter 2 How to Load Documents Contents Scanning a Mixed Batch of Documents Paper size Index When a set of wider documents is placed on top of smaller documents The following restrictions apply when scanning a mixed batch within the same batch, the wider documents on top may hang down and Introduction affect the feeding performance. - Page 44 Chapter 2 How to Load Documents Contents Refer to the table below when mixing documents of different sizes. Index Maximum size Introduction Width (mm) 74.3 64.3 52.5 Scanner Overview How to Load Documents How to Use the Operator Panel Various Ways to Scan Available range Daily Care...
-
Page 45: Chapter 3 How To Use The Operator Panel
Contents Index Chapter 3 How to Use the Operator Introduction Scanner Panel Overview How to Load Documents This chapter explains how to use the operator panel. How to Use the Operator 3.1 Operator Panel ............................46 Panel 3.2 Main Menu..............................50 Various Ways to Scan 3.3 Function Selection ............................66 Daily Care... -
Page 46: Operator Panel
Chapter 3 How to Use the Operator Panel Contents Index 3.1 Operator Panel Introduction The operator panel consists of an LCD, buttons and LED. Scanner Names and Functions of the Operator Panel Overview [Function/Enter] Button How to Load Indicates the status of the scanner. Confirms the selected item. -
Page 47: Indications On Lcd
Chapter 3 How to Use the Operator Panel Contents Indications on LCD Do not use the operator panel while the Software Operation Index Panel is running. Introduction Display Description Buttons on the operator panel are also braille buttons, Processing initialization. ... - Page 48 Troubleshooting power switch. If the indication continues to appear after turning the power Operational back on, contact your FUJITSU Settings scanner dealer or an authorized FUJITSU scanner service Appendix provider. Glossary...
-
Page 49: About The Indicators
Chapter 3 How to Use the Operator Panel Contents About the Indicators Index Paper Separation Force Information Introduction Displays the paper separation appears when a message for replacing consumables/cleaning/ force as follows: Scanner replacing maintenance parts/regular maintenance is displayed. Overview Icon High For instructions on when... -
Page 50: Main Menu
Chapter 3 How to Use the Operator Panel Contents Index 3.2 Main Menu Introduction This section explains about the Main Menu. How to Use Main Menu Scanner When you press the [Menu] button in the [Ready] screen, the This section explains how to use the Main Menu of the Overview [Main Menu] screen is displayed. - Page 51 Chapter 3 How to Use the Operator Panel Contents Operation Description Setting Item Operation Description Setting Item Index Test print for You can run a test 22: Print Test Checking the Information Introduction appears when a Imprinter print when the information imprinter is installed.
- Page 52 Chapter 3 How to Use the Operator Panel Contents ■Operational settings Press the power button on the front of the scanner. Index [Ready] is displayed on the LCD. Introduction Press the [Menu] button. [Main Menu] is displayed on the LCD. Scanner Overview Press the [] or [] button and select a setting item, then...
- Page 53 Chapter 3 How to Use the Operator Panel Contents ■Checking and resetting counters Press the power button on the front of the scanner. Index [Ready] is displayed on the LCD. Introduction Press the [Menu] button. [Main Menu] is displayed on the LCD. Scanner Overview Press the [] or [] button and select [23: Show/Clear...
- Page 54 A message appears to confirm that you want to clear the counter. Scanner The assist roller counter cannot be cleared. It requires a Overview service engineer to clear the counter. For more information, contact your FUJITSU scanner dealer or an authorized FUJITSU scanner service How to Load provider. Documents How to Use Select [1: Yes] by the [] or [] button, and press the...
- Page 55 Chapter 3 How to Use the Operator Panel Contents ■Checking the number of sheets scanned Press the power button on the front of the scanner. Index [Ready] is displayed on the LCD. Press the [Menu] button. Introduction [Main Menu] is displayed on the LCD. Scanner Press the [] or [] button and select [25: Doc Counting Overview...
- Page 56 Chapter 3 How to Use the Operator Panel Contents Load the documents on the hopper, start up a scanning Index application, and perform a scan. Depending on the number of sheets scanned, it will be displayed Introduction as follows: Sheets Display Description...
- Page 57 Chapter 3 How to Use the Operator Panel Contents ■Checking the information Press the power button on the front of the scanner. Index [Ready] is displayed on the LCD. Introduction Press the [Menu] button. [Main Menu] is displayed on the LCD. Scanner Overview Press the [] or [] button and select [Information], then...
- Page 58 Maintenance parts (assist roller) require a service engineer to Documents perform replacement. For more information, contact your FUJITSU scanner dealer or an authorized FUJITSU scanner service provider. How to Use If the message prompts regular maintenance, please have the the Operator...
-
Page 59: Items Configurable In The Main Menu
Chapter 3 How to Use the Operator Panel Contents Items Configurable in the Main Menu Index Introduction Item Description Setting/Value Factory Default - : No settings/values Scanner Overview 1: iMFF Setting When there is paper of the same size attached to a designated 1: Manual mode 1: Manual mode location on the page, you can have the scanner memorize the... - Page 60 Chapter 3 How to Use the Operator Panel Contents Item Description Setting/Value Factory Default Index - : No settings/values Introduction 5: Manual Feed Specify the waiting time to clear Manual Feed mode. SCSI or USB Connector: Scanner Timeout It can also be configured from the Software Operation Panel. 5, 10, 20, 30, 40, 50, 60, 70, 80, 90, 100, 110, 120, 180, 240, 300, 360, 420, 480, Overview...
- Page 61 Chapter 3 How to Use the Operator Panel Contents Item Description Setting/Value Factory Default Index - : No settings/values Introduction 7: MF Quick Enables you to switch whether or not to detect multifeed by a push 1: Disable 1: Disable Scanner Change of a button.
- Page 62 Chapter 3 How to Use the Operator Panel Contents Item Description Setting/Value Factory Default Index - : No settings/values Introduction 13: Button Sound Specify whether or not to make a sound when a button on the 1: OFF 1: OFF Scanner operator panel is pressed.
- Page 63 Chapter 3 How to Use the Operator Panel Contents Item Description Setting/Value Factory Default Index - : No settings/values Introduction 19: Language Specify the language in which data is displayed. 1: Japanese 2: English Scanner 2: English 3: French Overview 4: German 5: Italian How to Load...
- Page 64 Chapter 3 How to Use the Operator Panel Contents Item Description Setting/Value Factory Default Index - : No settings/values Introduction 22: Test Print Use this option to run a test print when the Imprinter is installed. No. of sheets scanned: (*3) Scanner For more details, refer to the “fi-680PRF/PRB Imprinter Operator's...
- Page 65 Chapter 3 How to Use the Operator Panel Contents Item Description Setting/Value Factory Default Index - : No settings/values Introduction Information Message for replacing consumables / Only displayed [Information] appears as an item in [Main Menu] only when Scanner cleaning / replacing maintenance parts / when there is displayed on the LCD.
-
Page 66: Function Selection
Chapter 3 How to Use the Operator Panel Contents Index 3.3 Function Selection Introduction This section explains about the Function Selection. Press the power button on the front of the scanner. [Ready] is displayed on the LCD. The indicator displays [F01] Scanner When you press the [Function/Enter] button in the [Ready] when the power has just been turned on. -
Page 67: Item Configurable In Function Selection
Chapter 3 How to Use the Operator Panel Contents Item Configurable in Function Selection Index Introduction Item Description Setting Factory Default Function Configure the application(s) to be launched by the [Send to/ No.01 to No.50 / No.C (*1) Scanner Selection Pause] button. -
Page 68: Chapter 4 Various Ways To Scan
Contents Index Chapter 4 Various Ways to Scan Introduction Scanner Overview This chapter explains how to configure scanner settings and scan different types of documents with the image scanning How to Load application. Documents How to Use 4.1 Summary ..............................69 the Operator 4.2 Scanning Documents of Different Types and Sizes..................70 Panel... -
Page 69: Summary
Chapter 4 Various Ways to Scan Contents Index 4.1 Summary Introduction The following lists the main ways of scanning documents. Scanner Scanning documents of different types and sizes Overview "Scanning Documents of Different Widths" (page 70) "Scanning a Document Longer Than A3 Size" (page 71) ... -
Page 70: Scanning Documents Of Different Types And Sizes
Chapter 4 Various Ways to Scan Contents Index 4.2 Scanning Documents of Different Types and Sizes Introduction Scanning Documents of Different Widths For information on how to load documents on the hopper, refer to "2.1 Loading Documents" (page 31). Scanner When you scan a batch of documents with different widths, Overview Make sure that all documents are placed underneath the... -
Page 71: Scanning A Document Longer Than A3 Size
Chapter 4 Various Ways to Scan Contents In the scanner driver, configure the scan settings to avoid Scanning a Document Longer Than A3 Size Index skewed images and to detect the paper size automatically. Depending on the resolution setting or the image scanning For details, refer to the scanner driver's Help. -
Page 72: Advanced Scanning
Chapter 4 Various Ways to Scan Contents Index 4.3 Advanced Scanning Introduction Feeding Documents Manually There are two modes in manual feeding. Scanner Single Feed mode Besides the normal automatic document feeding in which you Overview Only one sheet is manually fed and scanned. load a batch of documents on the hopper and scan them one Suitable for scanning thick papers, envelopes and folded papers that ... - Page 73 Chapter 4 Various Ways to Scan Contents ■ Scanning in Single Feed mode Load a document on the hopper with the front side Index (scanning side) facing up. Make sure not to place the document all the way in. Lift up the pick roller unit. Introduction Push up the tab in the middle with your finger.
- Page 74 Chapter 4 Various Ways to Scan Contents ■ Scanning in Continuous Feed mode Repeat step until all the documents are scanned. Index Scanning can be stopped immediately by pressing the Open the hopper if it is closed. Introduction [Counter Reset] button on the operator panel. For information on how to open the hopper, refer to "1.4 Opening/ Scanning stops when no document is loaded on the...
- Page 75 Chapter 4 Various Ways to Scan Contents Insert the document until the top edge touches the rollers Repeat step until all the documents are scanned. Index on the inside. When more than one sheet is loaded, only insert the document on the Scanning can be stopped immediately by pressing the ...
-
Page 76: Customizing The Hardware Settings
Chapter 4 Various Ways to Scan Contents Index 4.4 Customizing the Hardware Settings Introduction Using a Button on the Scanner to Start Scanning Click the [Events] tab and select an event. Scanner From the [Select an event] menu, select an event from which you You can perform scanning by simply pressing the [Scan] want to launch an application. - Page 77 Chapter 4 Various Ways to Scan Contents Select an application to be launched by the [Send to] or Scanner settings Index [Scan] button event and an operation to be performed. Click [Start this program] under [Actions], and select an application Introduction from the menu shown on the right.
-
Page 78: Bypassing Multifeed Detection For A Fixed Format
Chapter 4 Various Ways to Scan Contents Bypassing Multifeed Detection for a Fixed Format Intelligent Multifeed Function Index The following three modes are available: If you attempt to scan a document sheet with a sticky note, Mode Description Introduction receipt, or photo glued on it while the Multifeed Detection Manual mode (Bypass Checks for any papers attached every time a function is enabled, the scanner may falsely judge this as a... - Page 79 Chapter 4 Various Ways to Scan Contents Settings to configure before using this function Operational procedure Index Before using this function, configure [Check Overlapping (Ultrasonic)] or [Check Overlapping and length] for multifeed detection method by After a multifeed error occurs, either press the [Eject] Introduction performing one of following: button to eject the document from the paper path, or open...
- Page 80 Chapter 4 Various Ways to Scan Contents *1: When the paper separation force is set to [] which is the Note that, from hereon, in the LCD switches between shown/ Index maximum level, the part of the message “When [Ready] is displayed, hidden every time the [iMFF] button is pressed.
-
Page 81: Chapter 5 Daily Care
Contents Index Chapter 5 Daily Care Introduction Scanner Overview This chapter describes how to clean the scanner. How to Load Documents The glasses inside the ADF become very hot when the scanner How to Use is being used. Before you start cleaning the inside, make sure to turn off the power, unplug the power cable and wait at least 15 the Operator minutes for the ADF glass to cool down. -
Page 82: Cleaning Materials And Locations That Require Cleaning
Sheet Guide/ Glass Dry cloth Document Operational Sensor For more information about the cleaning materials, contact Settings your FUJITSU scanner dealer or an authorized FUJITSU Friction Pad Appendix scanner service provider. : Cleanable Glossary : Not cleanable... - Page 83 Chapter 5 Daily Care Contents Cleaning cycles may vary depending on the condition of the Index documents. Also, cleaning must be performed more frequently when the following types of documents are scanned: Introduction Smooth-faced documents such as coated paper Documents with printed text/graphics that almost cover the ...
-
Page 84: Cleaning The Adf (With Cleaning Sheet)
Chapter 5 Daily Care Contents Index 5.2 Cleaning the ADF (with Cleaning Sheet) Introduction Use the Cleaning Sheet to clean the rollers on both the upper Adjust the stacker extension to the length of the Cleaning Scanner Sheet, and pull up the paper stop. and lower sides of the paper path. - Page 85 Chapter 5 Daily Care Contents Press the [Scan] button. Reset the cleaning counter. Index The Cleaning Sheet is fed through and ejected onto the stacker. Reset the counter by one of the following methods. Select [23: Show/Clear Counters] from the [Main Menu] on the ...
-
Page 86: Cleaning The Adf (With Cloth)
Chapter 5 Daily Care Contents Index 5.3 Cleaning the ADF (with cloth) Introduction Use a cloth moistened with Cleaner F1 or a Cleaning Wipe to Use a cloth moistened with Cleaner F1 or a Cleaning Scanner Wipe to clean the following locations. clean the ADF and other locations. - Page 87 Chapter 5 Daily Care Contents Brake Roller (1 unit) Paper path lower-side (rollers: 5 locations × 2 units) Index Gently wipe the rollers so that the roller surface does not get damaged. Feed Roller Wipe along the grooves of the roller surface. Remove the roller for easier Introduction cleaning.
- Page 88 Chapter 5 Daily Care Contents Pinch Roller Paper Path/Sheet Guide Index Gently wipe the rollers so that the roller surface does not get damaged. Clean the whole area quickly. Clean the whole surface as you rotate the roller manually. Paper path upper-side ...
- Page 89 Chapter 5 Daily Care Contents Scan Glass 4 Clean the removed glass. Index Clean it lightly. 5 From the gap where the glass was attached, clean Paper path upper-side (glasses: 2 sheets) Introduction the other layer of glass inside, using a cotton swab or Glass (removable) something alike.
- Page 90 Chapter 5 Daily Care Contents Paper path lower-side (glasses: 2 sheets) 5 From the gap where the glass was attached, clean Index Glass (removable) the other layer of glass inside, using a cotton swab or something alike. Introduction Cross-section Scanner Overview Glass...
- Page 91 Chapter 5 Daily Care Contents Document Sensor Paper path lower-side (sensors: 9 units) Index Clean off the dust quickly. Document Sensor Inside the top cover (sensors: 2 units) Introduction Document Sensor Scanner Overview How to Load Documents How to Use the Operator Panel Document Sensor...
- Page 92 Chapter 5 Daily Care Contents Close the hopper/ADF/top cover. Index For information on how to close the hopper, refer to "1.4 Opening/ Closing the Hopper" (page 18). Introduction For information on how to close the ADF, refer to "1.5 Opening/ Closing the ADF"...
-
Page 93: Chapter 6 Replacing Consumables
Contents Index Chapter 6 Replacing Consumables Introduction Scanner Overview This chapter describes how to replace the consumables for the scanner. How to Load Documents The glasses inside the ADF become very hot How to Use when the scanner is being used. Before you replace the consumables, make sure the Operator ... -
Page 94: Consumables And Replacement Cycles
Replacing BRAKE ROLLER PA03575-K013 600,000 sheets or one year Consumables To purchase the consumables, contact your FUJITSU scanner dealer or an authorized FUJITSU scanner service provider. Troubleshooting Please note that some parts (other than the consumables) Operational need to be replaced by a service engineer, depending on the... -
Page 95: Replacing The Pick Roller
Chapter 6 Replacing Consumables Contents Index 6.2 Replacing the Pick Roller Introduction 2 Pull the pick roller off the rotating shaft as you grab the tab on the pick roller (×2). Scanner There are two pick rollers. Make sure to replace both two units. Overview How to Load Remove all documents from the stacker. - Page 96 Chapter 6 Replacing Consumables Contents Close the ADF. Index For information on how to close the ADF, refer to "1.5 Opening/ Closing the ADF" (page 19). Introduction Be careful not to have your fingers caught Scanner when the ADF closes. Overview How to Load Do not close the ADF while the roller cover is open.
-
Page 97: Replacing The Separator Roller
Chapter 6 Replacing Consumables Contents Index 6.3 Replacing the Separator Roller Introduction 2 Pull down the lever which is located on the right-hand side of the separator roller. Scanner Remove all documents from the stacker. Overview Open the ADF. For information on how to open the ADF, refer to "1.5 Opening/ How to Load Closing the ADF"... - Page 98 Chapter 6 Replacing Consumables Contents 4 Pull the lever on the left side of the separator roller towards you, 2 Push up the lever which is located on the left side of the separator Index and remove it with the shaft. roller.
- Page 99 Chapter 6 Replacing Consumables Contents 4 Close the roller cover. Make sure that both ends of the cover are Index locked firmly. Introduction Scanner Separator Roller Overview How to Load Documents Roller cover How to Use the Operator Panel Close the ADF. For information on how to close the ADF, refer to "1.5 Opening/ Various Ways...
-
Page 100: Replacing The Brake Roller
Chapter 6 Replacing Consumables Contents Index 6.4 Replacing the Brake Roller Introduction Remove all documents from the stacker. 2 Remove the brake roller. Lift the left side of the roller first, then pull Scanner out the shaft from left to right. Overview If the hopper has been raised, bring it back down to the lower position. - Page 101 Chapter 6 Replacing Consumables Contents Close the ADF. Index For information on how to close the ADF, refer to "1.5 Opening/ Closing the ADF" (page 19). Introduction Be careful not to have your fingers caught Scanner when the ADF closes. Overview How to Load Do not close the ADF while the roller cover is open.
-
Page 102: Chapter 7 Troubleshooting
Contents Index Chapter 7 Troubleshooting Introduction Scanner Overview This chapter explains about the countermeasures against paper jams and other troubles, items to check before contacting How to Load your scanner service provider, and how to read the product labels on the scanner. Documents How to Use For details about other errors/troubles not mentioned in this... -
Page 103: Paper Jam
Chapter 7 Troubleshooting Contents Index 7.1 Paper Jam Introduction When your document is jammed inside the scanner, remove Open the ADF/top cover. Scanner For information on how to open the ADF, refer to "1.5 Opening/ the document in the following manner. Closing the ADF"... - Page 104 Chapter 7 Troubleshooting Contents Close the ADF/top cover. When a document is jammed in the paper path, be Index For information on how to close the ADF, refer to "1.5 Opening/ careful not to damage the document if you are pulling Closing the ADF"...
-
Page 105: Error Indications On Operator Panel
Chapter 7 Troubleshooting Contents Index 7.2 Error Indications on Operator Panel Introduction When an error occurs, the Check LED lights in orange. Error Write down the information shown in the window and click the Scanner codes displayed on the LCD begin with the letter "J" or "U" for [More Info] button to check for troubleshooting methods. -
Page 106: Temporary Errors
Chapter 7 Troubleshooting Contents Temporary Errors Error Error message Countermeasure Index code The following are lists of temporary errors which can be Introduction J1:50 Paper jam 1 Remove the jammed recovered by operators. Remove the document and try document(s). For Scanner again. - Page 107 Chapter 7 Troubleshooting Contents Error Error message Countermeasure Error Error message Countermeasure Index code code Introduction J0:52 Paper jam 1 Remove the jammed J2:55 Multifeed detected (Overlap) When you press the [Eject] Remove the document and try document(s). For Press the iMFF button to eject button on the operator Scanner again.
- Page 108 Chapter 7 Troubleshooting Contents Error Error message Countermeasure Error Error message Countermeasure Index code code Introduction J2:55 Multifeed detected (Overlap) When you press the [Eject] J8:05 Sensor(s) dirty Clean the sensor(s). Press the iMFF button to button on the operator Clean the IMP-TOP Sensor.
-
Page 109: Device Errors
Panel Check if the Print For more details, refer to "fi-680PRF/ your service engineer of FUJITSU scanner dealer or an Cartridge is mounted PRB Imprinter Operator's Guide". the above error code. authorized FUJITSU scanner Various Ways correctly. - Page 110 FUJITSU scanner dealer or an back on, please inform FUJITSU scanner dealer or an your service engineer of authorized FUJITSU scanner...
- Page 111 Scanner persists after turning problem, write down the displayed Overview the power back on, error code and contact your FUJITSU C0:E5 Memory error (Front) Turn the power off then back on. please inform your scanner dealer or an authorized...
- Page 112 H5:86 power back on, error code and contact your FUJITSU Overview back on, please inform error code and contact your H8:88 please inform your...
- Page 113 Guide". If the problem persists How to Use your FUJITSU scanner dealer or the above error code. after turning the power 2 Turn the power off then back on. the Operator...
-
Page 114: Troubleshooting
Symptoms persists, check each item in "7.4 Before You Contact the Scanner How to Load , and then contact your FUJITSU Service Provider" (page 128) "Scanner cannot be powered ON." (page 115) Documents scanner dealer where you purchased the scanner, or an "Display on LCD switches OFF."... -
Page 115: Scanner Cannot Be Powered On
If the above countermeasures do not solve the problem, check the items in "7.4 Panel Before You Contact the Scanner Service Provider" (page 128) first, then contact your FUJITSU scanner dealer or an authorized FUJITSU scanner service provider. Various Ways to Scan Daily Care Replacing... -
Page 116: Display On Lcd Switches Off
If the above countermeasures do not solve the problem, check the items in "7.4 Various Ways Before You Contact the Scanner Service Provider" (page 128) first, then contact to Scan your FUJITSU scanner dealer or an authorized FUJITSU scanner service provider. Daily Care Replacing Consumables Troubleshooting Operational... -
Page 117: Scanning Does Not Start
If the above countermeasures do not solve the problem, check the items in "7.4 Before You Contact the Scanner Service Provider" (page 128) first, then contact your FUJITSU scanner dealer or an authorized FUJITSU scanner service provider. Operational Settings Appendix... -
Page 118: Quality Of The Scanned Photo/Picture Is Poor When Scanning In Black & White
Before You Contact the Scanner Service Provider" (page 128) first, then contact the Operator your FUJITSU scanner dealer or an authorized FUJITSU scanner service provider. Panel *1: The scanned image may differ from the original image significantly if Various Ways you simply "binarize"... -
Page 119: Quality Of Scanned Text Or Lines Is Unsatisfactory
Before You Contact the Scanner Service Provider" (page 128) first, then contact Daily Care your FUJITSU scanner dealer or an authorized FUJITSU scanner service provider. *1: When scanning in halftone, grayscale or color, the scanned image may Replacing not become sharp and clear. If it can be configured in the scanner... -
Page 120: Images Are Distorted Or Not Clear
If the above countermeasures do not solve the problem, check the items in "7.4 Before You Contact the Scanner Service Provider" (page 128) first, then contact your FUJITSU scanner dealer or an authorized FUJITSU scanner service provider. Replacing Consumables Troubleshooting... -
Page 121: Vertical Streaks Appear On The Scanned Image
If the above countermeasures do not solve the problem, check the items in "7.4 Before You Contact the Scanner Service Provider" (page 128) first, then contact Daily Care your FUJITSU scanner dealer or an authorized FUJITSU scanner service provider. Replacing Consumables Troubleshooting Operational... -
Page 122: Multifeed Error Occurs Frequently
Chapter 7 Troubleshooting Contents Multifeed error occurs frequently. Index Does the condition of the documents fulfill the requirements Use a document that satisfies the required conditions. Introduction described in "Precautions" in "Paper Quality" (page 37)? For more details, refer to "2.2 Documents for Scanning"... - Page 123 If the above countermeasures do not solve the problem, check the items in "7.4 Before You Contact the Scanner Scanner Service Provider" (page 128) first, then contact your FUJITSU scanner dealer or an authorized FUJITSU scanner Overview service provider. *1: "Consumables" refers to the pick roller, separator roller and brake roller.
-
Page 124: Situation In Which The Document Is Not Fed Into The Adf Occur Frequently
If the above countermeasures do not solve the problem, check the items in "7.4 Before You Contact the Scanner Service Provider" (page 128) first, then contact your FUJITSU scanner dealer or an authorized FUJITSU scanner service provider. Operational Settings *1: "Consumables" refers to the pick roller, separator roller and brake roller. -
Page 125: Paper Jams/Pick Errors Occur Frequently
If the above countermeasures do not solve the problem, check the items in "7.4 Before You Contact the Scanner Service Provider" (page 128) first, then contact your FUJITSU scanner dealer or an authorized FUJITSU scanner service provider. Appendix *1: "Consumables" refers to the pick roller, separator roller and brake roller. Glossary... -
Page 126: Scanned Images Turn Out Elongated
"7.4 Consumables Before You Contact the Scanner Service Provider" (page 128) first, then contact your FUJITSU scanner dealer or an authorized FUJITSU scanner service provider. Troubleshooting *1: "Consumables" refers to the pick roller, separator roller and brake roller. Operational Settings... -
Page 127: A Shadow Appears On The Leading Edge Of The Scanned Image
If the above countermeasures do not solve the problem, check the items in "7.4 Various Ways Before You Contact the Scanner Service Provider" (page 128) first, then contact to Scan your FUJITSU scanner dealer or an authorized FUJITSU scanner service provider. Daily Care Replacing Consumables Troubleshooting Operational... -
Page 128: Before You Contact The Scanner Service Provider
Contents Index 7.4 Before You Contact the Scanner Service Provider Introduction Please check the following items before contacting your Error Status Scanner FUJITSU scanner dealer or an authorized FUJITSU scanner ■ Computer connection issues Overview service provider. General Item Findings... - Page 129 Chapter 7 Troubleshooting Contents ■ Image quality issues Index Item Findings Introduction Scanner driver type and version Scanner Overview Interface controller type Example: Adaptec SCSI Card AHA-2940AU How to Load OS version Documents (Windows) Application software How to Use the Operator Panel Scanning side(s) Example: front, back, duplex...
-
Page 130: Checking The Product Labels
Chapter 7 Troubleshooting Contents Index 7.5 Checking the Product Labels Introduction This section describes how to check the labels on the scanner. Label A (example): Shows the scanner information. Scanner Location Overview Locations of the two labels are as follows: Label A Label B How to Load... -
Page 131: Chapter 8 Operational Settings
Contents Index Chapter 8 Operational Settings Introduction Scanner Overview This chapter explains how to configure the scanner settings by using the Software Operation Panel. How to Load Documents 8.1 Starting Up the Software Operation Panel ....................132 How to Use 8.2 Configurable Items ...........................133 the Operator 8.3 Settings Related to Sheet Counters ......................145 Panel... -
Page 132: Starting Up The Software Operation Panel
Chapter 8 Operational Settings Contents Index 8.1 Starting Up the Software Operation Panel Introduction The [Software Operation Panel] dialog box appears. Software Operation Panel is installed together with TWAIN Scanner driver/ISIS driver. Overview With this application, you can configure various settings for operating the scanner and managing the consumables. -
Page 133: Configurable Items
Chapter 8 Operational Settings Contents Index 8.2 Configurable Items Introduction Using the Software Operation Panel, you can configure the Scanner following settings for the scanner that is connected to a Overview computer. Device Setting How to Load Documents Start up the Software Operation Panel. How to Use Refer to "8.1 Starting Up the Software Operation Panel"... - Page 134 Chapter 8 Operational Settings Contents Item Description Setting/Value Factory Default SCSI or USB VRS board (optional) Index Connector connection Introduction : Configurable Scanner Sheet count Check the replacement cycle of the Total Page Count(ADF) / After cleaning / Overview consumables and the total page Brake Roller / Pick Roller / Separator...
- Page 135 Chapter 8 Operational Settings Contents *1: Depending on the "PART NO." on the product label, the factory default setting differs as follows: Index PART NO. Default Introduction fi-6400 fi-6800 PAxxxxx-Bxx1 Selected Scanner 4 Hours Overview PAxxxxx-Bxx2 /Bxx3 /Bxx5 /Bxx7 Selected...
-
Page 136: Device Setting 2
Chapter 8 Operational Settings Contents Device Setting 2 Index Introduction Start up the Software Operation Panel. Refer to "8.1 Starting Up the Software Operation Panel" (page 132). Scanner Overview From the listing on the left, select [Device Setting 2]. How to Load Documents How to Use the Operator... - Page 137 Chapter 8 Operational Settings Contents Item Description Setting/Value Factory Default SCSI or USB VRS board (optional) Index Connector connection Introduction : Configurable -: Not configurable Scanner Overview Multifeed Specify a method for multifeed None / Check Overlapping (Ultrasonic) / Check detection.
- Page 138 Chapter 8 Operational Settings Contents Item Description Setting/Value Factory Default SCSI or USB VRS board (optional) Index Connector connection Introduction : Configurable -: Not configurable Scanner Overview Pre-Pick Select [Yes] to prioritize the Yes / No processing speed and [No] for otherwise.
- Page 139 Chapter 8 Operational Settings Contents Item Description Setting/Value Factory Default SCSI or USB VRS board (optional) Index Connector connection Introduction : Configurable -: Not configurable Scanner Overview Intelligent Multifeed When there is paper of the same Manual mode / Auto mode 1 / Manual mode Function size attached to a designated...
- Page 140 Chapter 8 Operational Settings Contents Item Description Setting/Value Factory Default SCSI or USB VRS board (optional) Index Connector connection Introduction : Configurable -: Not configurable Scanner Overview Retain current Specify whether or not to keep the Remember / Do not remember Do not remember paper thickness operator panel’s paper separation...
- Page 141 Chapter 8 Operational Settings Contents Item Description Setting/Value Factory Default SCSI or USB VRS board (optional) Index Connector connection Introduction : Configurable -: Not configurable Scanner Overview Soft Pick Setting When you experience pick errors Enable / Disable Enable from the separator roller slipping on the paper, or paper jams from...
- Page 142 Chapter 8 Operational Settings Contents Item Description Setting/Value Factory Default SCSI or USB VRS board (optional) Index Connector connection Introduction : Configurable -: Not configurable Scanner Overview Imprinter selection Specify which imprinter to use when Normal (obey Host specification) / Normal you have installed both Front-Side Forcibly select Front-Side Imprinter /...
- Page 143 Chapter 8 Operational Settings Contents Item Description Setting/Value Factory Default SCSI or USB VRS board (optional) Index Connector connection Introduction : Configurable -: Not configurable Scanner Overview Paper Protection Specify whether to enable or disable Enable / Disable Disable Paper Protection.
- Page 144 Chapter 8 Operational Settings Contents Item Description Setting/Value Factory Default SCSI or USB VRS board (optional) Index Connector connection Introduction : Configurable -: Not configurable Scanner Overview Scan Setting for Configure this setting when the Enable / Disable Disable Document in Dark edges of a document with dark...
-
Page 145: Settings Related To Sheet Counters
Chapter 8 Operational Settings Contents Index 8.3 Settings Related to Sheet Counters Introduction Checking and Resetting the Counters Start up the Software Operation Panel. Scanner Refer to "8.1 Starting Up the Software Operation Panel" (page 132). ■ Checking and Resetting the Counters Overview From the listing on the left, select [Device Setting]. - Page 146 The assist roller counter cannot be cleared. It requires a Operational service engineer to clear the counter. For more details, contact Settings your FUJITSU scanner dealer or an authorized FUJITSU scanner service provider. Appendix Glossary In the Software Operation Panel, click the [OK] button.
-
Page 147: Specifying The Cycle To Clean The Scanner [Cleaning Cycle]
Chapter 8 Operational Settings Contents ■ Specifying the Cycle to Clean the Scanner Message for consumable replacement/cleaning Index [Cleaning Cycle] The following may sometimes appear while using the scanner: Introduction Consumable replacement message: You can specify the cleaning cycle for the scanner. The background color of the counter changes to yellow when Scanner the page count after cleaning reaches 100% of the value... -
Page 148: Specifying The Cycle To Replace Consumables
Chapter 8 Operational Settings Contents Specifying the Cycle to Replace Consumables Specify a value for the life cycle for replacing each Index [Life Counter Alarm Setting] consumable (Pick roller, separator roller and brake roller). The specifiable value is from 10,000 to 2,550,000 in increments of Introduction You can specify the replacement cycle of the consumables. -
Page 149: Settings Related To Scanning
Chapter 8 Operational Settings Contents Index 8.4 Settings Related to Scanning Introduction Adjusting the Starting Position for Scanning From the listing on the left, select [Device Setting] and Scanner [Offset/Vertical Magnification Adjustment] click the [Offset] button. Overview When the output position of the scanned image is not correct or the image appears shortened/elongated (vertically), use the How to Load following procedure to adjust the offset and the vertical... - Page 150 Chapter 8 Operational Settings Contents Adjust the offset/vertical magnification as necessary. Vertical magnification Description Index Adjustment Introduction Unit The target for vertical magnification adjustment is fixed Scanner at [ADF]. Overview Vertical magnification Adjusts the vertical (length) Adjustment (length) magnification. How to Load The setting range is from -3.1 to Documents 3.1% in 0.1% increments.
-
Page 151: Eliminating Shadows Or Streaks On The Scanned Image Edge [Page Edge Filler (Adf)]
Chapter 8 Operational Settings Contents Eliminating Shadows or Streaks on the Scanned Specify the width of each margin to fill: top, bottom, right, Index Image Edge [Page Edge Filler (ADF)] and left. T :Top = 0 to 15 mm Introduction Depending on the condition of the document that you scan, B :Bottom= -7 to 7 mm some shadow of the document may be reflected onto the edge... -
Page 152: Eliminating Shadows Or Streaks On The Scanned Image Edge [Page Edge Filler (Automatic Page Size Detection)]
Chapter 8 Operational Settings Contents Eliminating Shadows or Streaks on the Scanned Specify the width of each margin to fill; top, bottom, right, Index Image Edge [Page Edge Filler (Automatic Page and left. Size Detection)] T :Top = 0 to 7.5 mm Introduction B :Bottom = 0 to 7.5 mm When scanning in Automatic Page Size Detection, depending... -
Page 153: Specifying A Color To Drop Out [Dropout Color]
Chapter 8 Operational Settings Contents From the listing on the left, select [Device Setting 2] Specifying a Color to Drop Out Index [Dropout color] [Dropout color]. Introduction By using the "Dropout Color" function, you can scan documents with the specified color removed from the light's Scanner three primary colors which are red, green, and blue. -
Page 154: Specifying Custom Color(S) To Drop Out [Multi Dropout Colors]
Chapter 8 Operational Settings Contents Specifying Custom Color(s) to Drop Out Select how to specify the dropout color(s). Index [Multi dropout colors] Use driver settings: Follows the scanner driver setting. Custom: Specified colors are dropped out. Introduction By using the [Multi dropout colors] function, you can scan When you select [Custom] and click the [Specify Color] button, the documents with any specified colors removed. - Page 155 Chapter 8 Operational Settings Contents [Color 1], [Color 2], and [Color 3] tabs When selecting [Custom], specify [None] for dropout Index Specify the color(s) to be dropped out. Up to three colors can be color in the scanner driver. selected at once.
-
Page 156: Shortening The Scanning Intervals [Pre-Pick]
Chapter 8 Operational Settings Contents Shortening the Scanning Intervals [Pre-Pick] Configure settings for pre-picking. Index Select [Yes] to enable and [No] to disable Pre-pick. “Pre-Pick” refers to feeding the document to the starting Introduction If you cancel in the middle of scanning while Pre-Pick ... -
Page 157: Specifying The Number Of Feeding Retries [Number Of Paper Feeding Retries]
Chapter 8 Operational Settings Contents Specifying the Number of Feeding Retries Specifying the Interval to Feed the Documents Index [Number of paper feeding retries] [Set the interval for feeding sheets] Introduction Configure this setting to change the number of feeding retries If the scanned image is partially missing at the bottom due to a large skew when scanning in Automatic Page Size Detection, upon pick errors. -
Page 158: Setting The Speed To Feed The Documents [Pick Speed]
Chapter 8 Operational Settings Contents Setting the Speed to Feed the Documents Select the paper feeding speed (pick speed). Index [Pick Speed] Normal: Normal paper feeding speed Slower: Slower than normal paper feeding speed Introduction When a multifeed or paper jam occurs frequently, the symptom may be improved by slowing down the speed in Note that it takes more time for scanning as the paper Scanner... -
Page 159: Paper Feeding Operation Setting
Chapter 8 Operational Settings Contents Paper Feeding Operation Setting Specify whether to enable or disable the soft pick setting. Index [Soft Pick Setting] Select [Disable] to reduce pick errors and paper jams, by lowering the pick roller. Introduction When you experience pick errors from the separator roller Skews and multifeeds may occur when you perform slipping on the paper, or paper jams from scanning thin papers Scanner... -
Page 160: Cropping The Image Boundary [Autocrop Boundary]
Chapter 8 Operational Settings Contents Cropping the Image Boundary Select whether to include or exclude the fractional data. Index [AutoCrop Boundary] Select [Optimize] to prevent any exclusion of fractional data from scanned images, and select [Normal] to delete unnecessary data. Introduction Some fractional data may be generated in scanned images in When you scan a document with text near the right... -
Page 161: Setting Automatic Detection For Color/Monochrome [Auto Color Detection]
Chapter 8 Operational Settings Contents Setting Automatic Detection for Color/ Select the slice value. Index Monochrome [Auto color Detection] You can select the Slice value from 1 to 255. Increase the value when black & white documents are recognized as Introduction color documents. -
Page 162: Sounding An Alarm When An Error Occurs [Alarm Setting]
Chapter 8 Operational Settings Contents Sounding an Alarm When an Error Occurs Configure settings for alarm. Index [Alarm setting] Disable alarm: No alarm beeps even when an error occurs. Low volume alarm: Beeps the alarm in small volume when an Introduction Specify whether or not to beep an alarm sound when a paper error occurs. -
Page 163: Detecting Paper Jam Outside Of Scannable Area
Chapter 8 Operational Settings Contents Detecting Paper Jam outside of Scannable Area Select whether to enable or disable [Jam detection Index [Jam Detection outside of scannable area when outside of scannable area when transporting paper]. transporting paper] Select [Enable] to judge such case as paper jam. Introduction Specify whether or not judge the symptom as paper jam when Scanner... -
Page 164: Setting For A Function To Save The Documents From Being Damaged [Paper Protection]
Chapter 8 Operational Settings Contents Setting for a Function to Save the Documents Specify whether to enable or disable Paper Protection. Index from Being Damaged [Paper Protection] When you select [Enable], the scanner stops the scan when it detects a document that is unusually warped. Introduction Specify whether to enable or disable Paper Protection. -
Page 165: Specifying The Sensitivity Level For Paper Protection [Paper Protection Sensitivity]
Chapter 8 Operational Settings Contents Specifying the Sensitivity Level for Paper Specify the sensitivity level for Paper Protection. Index Protection [Paper Protection Sensitivity] Low: Decreases the sensitivity level to detect warped documents. Introduction You can specify the level of sensitivity to detect an abnormal Normal: Monitors the documents in normal sensitivity. -
Page 166: Scan Settings For Documents With Tabs
Chapter 8 Operational Settings Contents Scan Settings for Documents with Tabs/Non- Select one from [Document with tab], [Document without Index rectangular Documents tab] or [Non-rectangular document]. [Scan Setting for Document with Tab (Automatic Introduction Item Description Page Size Detection)] Document with tab Scans up to 20 mm off the bottom edge of Scanner For documents with index stickers or index tabs attached on... -
Page 167: Scanning Documents With Dark Background Color [Scan Setting For Document In Dark Ground Color]
Chapter 8 Operational Settings Contents Scanning Documents with Dark Background Specify the [Density of background color]. Index Color [Scan Setting for Document in Dark Ground When you increase the [Density of background color], it Introduction may falsely detect the edges due to the dust inside the Color] paper path. -
Page 168: Adjusting The Result Of The Output Image [Overcrop/Undercrop]
Chapter 8 Operational Settings Contents Adjusting the Result of the Output Image Adjust the output result by using the slider bar. Index [Overcrop/Undercrop] Item Description Introduction You can adjust the output image result for documents detected Overcrop Adds black areas around the edges of the document in Automatic Page Size Detection. -
Page 169: Adjusting The Output Result For Overscan [Overscan Control]
Chapter 8 Operational Settings Contents Adjusting the Output Result for Overscan Start up the Software Operation Panel. Index [Overscan Control] Refer to "8.1 Starting Up the Software Operation Panel" (page 132). Introduction From the listing on the left, click [Device Setting 2] Specify [Optimize] when you use overscan and the image is [Overscan Control], then select [Optimize]. -
Page 170: Settings Related To Multifeed Detection
Chapter 8 Operational Settings Contents Index 8.5 Settings Related to Multifeed Detection Introduction From the listing on the left, click [Device Setting 2] Specifying a multifeed detection method Scanner [Multifeed] [Multifeed]. Overview Multifeed is an error when two or more sheets are fed through the ADF at once. - Page 171 Chapter 8 Operational Settings Contents Select a detection method. To scan documents with different lengths, specify Index [Check Overlapping (Ultrasonic)]. Detection Description When a photo or a piece of paper is attached on the Introduction document, the overlapping part of the document may None Does not detect multifeeds.
-
Page 172: [Multifeed Detection When Scanning In Manual Feeding Mode]
Chapter 8 Operational Settings Contents Settings for Multifeed Detection in Manual Select a detection method. Index Feeding Detection Description [Multifeed detection when scanning in manual Introduction feeding mode] Disable Does not detect multifeeds. Scanner Follow driver settings Detects multifeeds if multifeed detection is Configure this setting when you want to enable multifeed Overview enabled in the scanner driver settings. -
Page 173: Specifying The Area To Detect Multifeed [Document Check Area Specification For Multifeed Detection]
Chapter 8 Operational Settings Contents Specifying the Area to Detect Multifeed Specify the detection range. Index [Document check area specification for Multifeed Range Description Detection] Introduction Selected range Select the check box to specify the The following setting is only available when you specified detection range (colored in light blue) in the Scanner picture below. - Page 174 Chapter 8 Operational Settings Contents Example 1: Range Description Index Specified position: Left Selected range = Disable, Start = 50 mm, End = 200 mm Displays the end point of the detection by Introduction (Left/Middle/Right) the length from the leading edge of the Specified position: Middle ...
- Page 175 Chapter 8 Operational Settings Contents Example 2: Example 3: (Bad example) Index Specified position: Left Specified position: Left Selected range = Disable, Start = 0 mm, End = 300 mm or more Selected range = Disable, Start = 310 mm, End = 400 mm Introduction Specified position: Middle Specified position: Middle...
-
Page 176: Specifying An Area Not To Detect Multifeed [Intelligent Multifeed Function]
Chapter 8 Operational Settings Contents Specifying an Area Not to Detect Multifeed Select an operation mode and click the [OK] button. Index [Intelligent Multifeed Function] Mode Description Introduction When there is paper of the same size attached to a Manual mode Stops feeding the documents when a multifeed is designated location on the page, the scanner can memorize detected. -
Page 177: Settings Related To The Waiting Time
Chapter 8 Operational Settings Contents Index 8.6 Settings Related to the Waiting Time Introduction From the listing on the left, click [Device Setting 2] Setting the Waiting Time for Manual Feeding Scanner [Timeout for manual feeding] [Timeout for manual feeding]. Overview When you scan by manually loading one sheet at a time (Manual feeding mode), you can specify the waiting time... -
Page 178: Setting The Waiting Time To Enter Power Saving Mode [Power Saving]
Chapter 8 Operational Settings Contents Setting the Waiting Time to Enter Power Saving Index When you select the [Power off after a certain period of Mode [Power saving] time] check box, the scanner will turn itself off Introduction automatically if it is turned on and left unused for the set When the scanner is not being used for a certain period of time. -
Page 179: Settings Related To Power On/Off Control
Chapter 8 Operational Settings Contents Index 8.7 Settings Related to Power ON/OFF Control Introduction Setting the Paper Separation Force upon Turning Specify whether or not to memorize the paper separation Scanner the Power Off force setting of the operator panel upon turning the power Overview [Retain current paper thickness] off. -
Page 180: Settings Related To Maintenance/Options
Chapter 8 Operational Settings Contents Index 8.8 Settings Related to Maintenance/Options Introduction From the listing on the left, click [Device Setting 2] Setting the Maintenance/Inspection Cycles for the Scanner Scanner [Maintenance and Inspection Cycle]. Overview [Maintenance and Inspection Cycle] You can specify the cycle of regular maintenance/inspection How to Load by a service engineer. -
Page 181: Imprinter Settings [Imprinter Selection]
Chapter 8 Operational Settings Contents Imprinter Settings [Imprinter selection] Select the Imprinter to use. Index Normal Follows the scanner driver setting. Specify which imprinter to use when both Front-Side Imprinter (obey Host specification): Introduction and Back-Side Imprinter are installed. Forcibly select Front-Side Forces the Front-Side Imprinter to be This setting does not appear when no imprinter is installed. -
Page 182: Appendix
Contents Index Appendix Introduction Scanner Overview This section provides the following information: How to Load Documents A.1 Basic Specification ...........................183 How to Use A.2 Installation Specification...........................185 the Operator A.3 Outer Dimensions ............................187 Panel A.4 Scanner Options ............................188 Various Ways to Scan A.5 Uninstalling the Software .........................189 Daily Care Replacing... -
Page 183: Basic Specification
200 dpi / 300 dpi (A4, Duplex: 200 pages/min (fi-6400) Replacing Grayscale landscape)(*2) Simplex: 130 sheets/min, Consumables Duplex: 260 pages/min (fi-6800) Color Document Loading Capacity (*3) 500 sheets Paper weight: 80 g/m (20 lb) Troubleshooting Total thickness: 50 mm or less... - Page 184 Item Specification Notes Index Halftone pattern Dither/error diffusion Introduction Interface (*4)(*5) Ultra SCSI (fi-6800) Shielded 50-pin high-density type Scanner USB 2.0 / 1.1 (*6) B Type Overview Liquid Crystal Display Display: FSTN (black & white) Displayed dots: 110 × 65 How to Load Displayed lines: 16 ×...
-
Page 185: Installation Specification
Appendix Contents Index A.2 Installation Specification Introduction Scanner Item Specification Overview Outer dimensions (Width × Depth × Height)(*1) 460 × 430 × 310 (mm) / 18.1 × 16.9 × 12.2 (in.) How to Load Installation space Documents 600 (23.6) How to Use the Operator Panel Various Ways... - Page 186 Appendix Contents Item Specification Index Power consumption Operating 200 W or less Introduction Power Saving 3.2 W or less (100 to 240 Vac) Scanner Power-off less than 0.5 W (100 to 240 Vac) Overview Ambient condition Temperature Operating: 15 to 35˚C (41 to 95˚F) Not operating: -20 to 60˚C (-4 to 140˚F) How to Load Documents...
-
Page 187: Outer Dimensions
Appendix Contents Index A.3 Outer Dimensions Introduction The outer dimensions are as follows: Scanner 684 (26.9) Overview How to Load Documents How to Use the Operator Panel Various Ways to Scan 571 (22.5) Daily Care 699 (27.5) 754 (29.7) Replacing Consumables Troubleshooting Operational... -
Page 188: Scanner Options
Operator's Guide”. Daily Care fi-680CGA FI-680CGA PA03575-K301 An image processing hardware option for FUJITSU image scanner fi-series. VRS option Combined use of this with dedicated application "Kofax VRS Professional" achieves (Kofax VRS advanced image processing at a high speed. (fi-6800) -
Page 189: Uninstalling The Software
Appendix Contents Index A.5 Uninstalling the Software Introduction Start up your computer. To remove Scan to Microsoft SharePoint: (fi-6800) Scanner Click [Scan to Microsoft SharePoint]. Overview To remove ISIS (fi-6800): Log on as a user with Administrator privileges. -
Page 190: Glossary
Glossary Contents Glossary Index Introduction Scanner Density Operational environment Overview A4 size Device error Image processing Operator panel A5 size Dither iMFF (Intelligent MultiFeed Optical sensor How to Load Function) Documents A6 size Overcrop Imprinter A7 size Driver software Interface Overscan How to Use the Operator... -
Page 191: Index Introduction
Glossary Contents Index Separator roller Introduction Shortcut key Zone OCR Simplex scanning mode Numbers Scanner Overview Smoothing 11 × 17 in Soft Pick How to Load Documents Temporary error How to Use Threshold the Operator TÜV Panel TWAIN (Technology Without Various Ways Any Interesting Name) to Scan... - Page 192 Glossary Contents Index Introduction A4 size A standard paper size. Paper size is 210 × 297 mm. Scanner Overview A5 size A standard paper size. Paper size is 148 × 210 mm. How to Load Documents A6 size A standard paper size. Paper size is 105 × 148 mm. How to Use the Operator A7 size...
- Page 193 Glossary Contents Index Introduction Blank Page Skip A function that detects and automatically deletes blank pages (white or black pages) within a batch of documents. Scanner Overview Brake roller A roller that prevents multiple sheets of documents from being fed simultaneously into the ADF. How to Load Documents Brightness...
- Page 194 Glossary Contents Density Index Refers to the darkness of a color in an image. Introduction Device error An error that requires a service engineer to recover from. Scanner Overview Dither The process by which a group of dots is arranged to reproduce the density of grayscale. Grayscale density is reproduced by How to Load configuring preset dot patterns.
- Page 195 Glossary Contents Energy Star Index ENERGY STAR is an international standard for energy-efficient electronic equipment which was established by the US Environmental Protection Agency (EPA) in 1992. The standard program has now been adopted by countries around the world. Introduction Error diffusion Scanner High-quality halftone (pseudo-grayscale) image processing based on black-and-white pixel binarization.
- Page 196 Glossary Contents Index Introduction Gamma A unit which indicates the changes in the brightness of an image. It is expressed as a function of the electric input power to Scanner devices (e.g. scanner, display) and the brightness of the image. If the gamma rate is larger than 1, the brightness of an image Overview increases and vice versa.
- Page 197 Glossary Contents Inversion Index A scanning method in which the black part and the white part of the image are inverted. Introduction ISIS ISIS (Image Scanner Interface Specification) is an API (Application Program Interface) standard for imaging devices (e.g. Scanner scanners, digital cameras) which was developed by Captiva, a division of EMC Corporation (the former Pixel Translations) in Overview 1990.
- Page 198 Glossary Contents Index Introduction Moire patterns Recurrent patterns on scanned images caused by incorrect settings of angles. Scanner Overview Multifeed Multifeed is an error when two or more sheets are fed through the ADF at once. It is also called a “multifeed” when a different document length is detected.
- Page 199 Glossary Contents Optical sensor Index A sensor which detects the changes in the amount of light transmission. Paper feeding errors such as multifeed and paper jam are detected by monitoring the passing of documents. Introduction Overcrop Scanner Refers to cropping the scanned image in a size larger than the document in Automatic Page Size Detection. Overcrop is used Overview to ensure that the whole image is contained and not partially missing.
- Page 200 Glossary Contents Portrait Index Orientation in which the long side of the document is set parallel to the feeding direction. Documents/images are set/displayed vertically. Introduction Pre-pick Scanner Refers to feeding the document in advance to the position to start scanning. It shortens the interval between setting the Overview document and feeding the document to the starting position.
- Page 201 Glossary Contents Shortcut key Index A function that enables frequently used key operations by a simple key sequence. Used to perform key sequences on the operator panel by a simple combination of button sequence. Introduction Simplex scanning mode Scanner A mode for scanning only one side (front or back) of the document. (Duplex scanning mode) Overview Smoothing How to Load...
- Page 202 Glossary Contents Index Introduction Ultrasonic sensor A sensor that detects multifeed errors by ultrasonic wave. It detects multifeeds by monitoring the difference in the amount of Scanner ultrasonic waves transmitted through the documents. Overview Undercrop Refers to cropping the scanned image in a size small than the document in Automatic Page Size Detection. Undercrop is used How to Load to remove excess data (borders) around the image which is generated in the process of cropping.
- Page 203 Glossary Contents Numbers Index Introduction 11 × 17 in A standard paper size used in the U.S.A. and other countries. Paper size is 11 × 17 inches. Scanner Overview How to Load Documents How to Use the Operator Panel Various Ways to Scan Daily Care Replacing...
-
Page 204: Index
Index Contents Index Index Introduction Scanner Overview advanced scanning............72 how to load documents ..........30 how to use this manual............. 2 How to Load Documents basic flow of scanning operation ........27 basic specification ............183 installation specification..........185 How to Use before you contact the scanner service provider.. - Page 205 Index Contents Index Page Edge Filler ........... 151, 152 uninstalling the software..........189 paper jam..............103 Introduction paper separation force............ 25 parts and functions ............13 Scanner various ways to scan ............68 pick roller replacement ........... 95 Overview power saving mode ............26 product label ..............
-
Page 206: Pfu Limited
Overview How to Load Documents How to Use the Operator Panel Various Ways to Scan Daily Care fi-6400/fi-6800 Image Scanner Operator’s Guide Replacing Consumables P3PC-2492-05ENZ0 Issue date: December 2014 Troubleshooting Issued by: PFU LIMITED Operational Copying of the contents of this manual in whole or in part and copying of the scanner applications is prohibited under ...