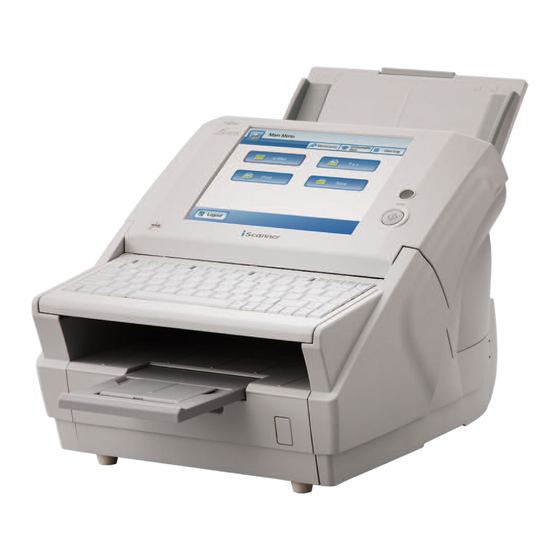
Fujitsu iScanner fi-6010N Getting Started Manual
Network scanner
Hide thumbs
Also See for iScanner fi-6010N:
- Operator's manual (665 pages) ,
- Setup manual (93 pages) ,
- Getting started manual (21 pages)
Table of Contents
Advertisement
Quick Links
Advertisement
Table of Contents
Troubleshooting

Related Manuals for Fujitsu iScanner fi-6010N


Summary of Contents for Fujitsu iScanner fi-6010N
-
Page 1: Getting Started
P3PC-2952-05EN fi-6010N Network Scanner Getting Started... -
Page 2: Table Of Contents
Contents Introduction ................. iii ■ Manuals .................... iii ■ Regulatory Information ..............iii ■ Disclaimer of Liability..............iv ■ Trademarks..................v ■ Important Notes................vi ■ Safety Precautions ................vii Chapter 1 Scanner Features ............ 1 1.1 Scanner Features..............1 1.2 Logging In................2 1.3 From Arrival through Operation ........ - Page 3 3.3 Setting the Scanner Name ..........7 3.4 Setting the Region/Timezone ..........8 3.5 Setting the IP Address/DHCP ..........8 3.6 Setting the Admin Network..........9 3.7 Setting the DNS Server ............ 10 3.8 Setting the WINS Server........... 10 3.9 Checking the Network Connection ......... 11 3.10 Restarting the System .............
-
Page 4: Introduction
Introduction Thank you for purchasing the fi-6010N Network interference to radio communications. However, there is no guarantee that interference will not Scanner. occur in a particular installation. If this equipment This easy-to-operate network scanner is used to scan does cause harmful interference to radio or documents for further use. -
Page 5: Disclaimer Of Liability
For contact information, visit the following web page to find the FUJITSU/PFU office for your country. http://imagescanner.fujitsu.com/warranty.html Or, refer to the contact list on the last page of this... -
Page 6: Trademarks
■ Trademarks Windows ® Windows Server 2003, Standard Edition Server 2003 ® Windows Server 2003, Enterprise Edition Microsoft, Windows, Windows Vista, Windows Server, ® Windows Server 2003, Datacenter Edition and SharePoint are either registered trademarks or ® trademarks of Microsoft Corporation in the United Windows Server 2003 R2, Standard Edition States and/or other countries. -
Page 7: Important Notes
■ Important Notes Do NOT remove from the scanner, ATTENTION stain or scratch the warning labels. Warning Indications Used in This Manual Screen Examples in This Manual This indication alerts operators ARNI N G to an operation that, if not strictly observed, may result in severe The screen examples in this manual are subject to injury or death. -
Page 8: Safety Precautions
Do not pull or forcibly bend or twist the turn the scanner off and unplug the power cable. Contact your FUJITSU scanner cable. dealer or an authorized FUJITSU scanner Do not place any metal near to the plug of service provider. the power cable. - Page 9 Do not use aerosol sprays near the scanner. Do not use any aerosol sprays or alcohol based sprays to clean the scanner. Dust blown up by strong air from the spray may enter the inside of the scanner. This may cause the scanner to fail or malfunction.
- Page 10 AUTION Before moving the scanner, disconnect the power plug from the power outlet. Do not install the scanner on unstable Do not move the scanner with the power and interface cables connected as this can surfaces. damage the cables, which can later cause Make sure that the scanner is installed on a fire, electric shock as well as injury.
- Page 11 Do not place the scanner in areas, which are subject to high levels of shock or vibration. Do not place the scanner in areas, which are subject to high levels of shock or vibration. Doing so may cause the scanner to malfunction.
-
Page 12: Chapter 1 Scanner Features
Scanner Features Chapter 1 1.1 Scanner Features ■ Use for scanned documents with ease This easy-to-operate network scanner may be used to scan documents for further use: 1. Scanned document files can be sent as an e-mail attachment. 2. Scanned document files can be sent by fax. 3. -
Page 13: Logging In
Make sure the scanner package contains all the parts listed in "Checking the Package Contents" that is included in the package box. If any parts are missing or defective, contact your FUJITSU scanner dealer or an authorized FUJITSU scanner service provider. -
Page 14: Names And Functions Of Parts
1.5 Names and Functions of ■ Removable Parts Parts Parts that can be removed from the scanner are dis- played below. This section describes the scanner parts and their func- tions. Separate shaft and roller ■ Front Pad assy Startup button ADF paper chute Pick roller Side guides... -
Page 15: Setting Up The Scanner
Chapter 2 Setting up the Scanner 2.1 Space Requirements The following space is required to set up the scanner: Depth: 700 mm (28 in.) Width: 400 mm (16 in.) Height: 500 mm (20 in.) 2.2 Installing the Scanner 2. Connect the AC adapter connector to the scan- ner's DC inlet. -
Page 16: Attaching The Keyboard Cover
2.4 Attaching the Keyboard Top-left guide Cover Top-center guide The layout of the keyboard may differ according to the language selected for the operating environment. The Top-right guide layout of each keyboard cover is prepared according to language requirements. Take the keyboard cover for the attachment selected language out of its packaging, and attach it to area... -
Page 17: Chapter 3 Setting Up For Network Use
Chapter 3 Setting up for Network Use 3.1 Logging in Do not move or shake the AUTION scanner when it is turned on. This can damage the rotating hard disk drive and cause data to be lost. To set up the network connection, you must login as the administrator. -
Page 18: Changing The Administrator Password
If you change the password, save ATTENTION the new password in a safe location. If you lose the password, contact your FUJITSU scanner dealer or an authorized FUJITSU scanner service provider. This may incur a cost to reset the scanner. -
Page 19: Setting The Region/Timezone
4. Press the [OK] button. 3. Press the [List] button for the "Timezone" input field. The restart confirmation screen appears. The default timezone is "(GMT+09:00) Osaka, 5. Press the [Later] button. Sapporo, Tokyo". A list of timezones appears. 4. Select a timezone. The current scanner name, or changed scanner name after next restart, is displayed. -
Page 20: Setting The Admin Network
3.6 Setting the Admin Network 3. Set the scanner's IP address. This may be done automatically, by pressing the DHCP [On] Set the network settings for connecting to a scanner button. from the Admin Tool or Central Admin Server. The IP address may also be set manually, by pressing the DHCP [Off] button and entering 1. -
Page 21: Setting The Dns Server
4. Select whether or not to enable SSL. 3. Enter the following numerical addresses: Select the [On] button enables SSL. If SSL is Primary DNS enabled, press the [Regenerate] button to create Secondary DNS another SSL Certificate. When a new SSL Certifi- If a DNS server setting is not required, enter cate is created, the contents of the certificate are "0.0.0.0". -
Page 22: Checking The Network Connection
4. Enter the following numerical addresses: 5. Press the [Ping] button. Primary WINS A ping test is performed and the results are Secondary WINS displayed. If the result shows "Lost=0 (0% If a WINS server setting is not required, enter loss)", the network connection is functioning "0.0.0.0". -
Page 23: Installing The Admin Tool
Chapter 4 Installing the Admin Tool As well as operating via the LCD touch panel, the *1: If .NET Framework is not installed, it will be notified. Download .NET Framework from the Microsoft Web site administrator can configure scanner settings via the net- and install it into the computer. - Page 24 2. Enter a "User Name" and "Password", and 5. Press the [Run] button. press the [Login] button. The fi Network Scanner Admin Tool Setup Wizard appears. If .NET Framework is not installed, it will be notified. Download .NET Framework HINT from the Microsoft Web site and install it The "Download"...
- Page 25 8. Select the target user(s), and press the [Next] button. Follow the prompts of the install wizard win- dows until a "fi Network Scanner Admin Tool has been successfully installed" message indicates that the installation has completed. Press the [Close] button. When the installation is completed, logout of the scanner, and close the Web browser.
-
Page 26: Chapter 5 Downloading The Manual
Downloading the Manual Chapter 5 In addition to this "Getting Started" guide, a "Operator's 3. Press the [Connect] button. Guide" is also available. The "Login" screen appears. The "Operator's Guide" contains information about 4. Press the [Download Manual] button. scanner settings, scanner administration, and scanner operations. -
Page 27: Performing A Scan Test
Chapter 6 Performing a Scan Test Perform a scan test to determine if the scanner is work- 4. Select the [Maintenance] button on the "Main ing properly. Login as a regular user to perform the scan Menu" screen. test. 1. Load the documents to be test scanned. The "Login"... - Page 28 [System Settings File] screen on power off and back on again. The administrator the [Maintenance] tab. This can only should contact the FUJITSU scanner dealer or be performed via the network an authorized FUJITSU scanner service provider interface. Backup should be per- for help.
- Page 29 If the problem reoccurs after restarting, try disconnecting the scanner power cord, reattaching it, and restarting again. If the problem still persists, the administrator should contact the FUJITSU scanner dealer or an autho- rized FUJITSU scanner service provider for help. [alphanumeric eight digits] Action...
-
Page 30: Appendix A Calibrating The Lcd Touch Panel
Appendix A Calibrating the LCD Touch Panel This should be done if and when the LCD touch panel responses seem out of alignment with the positions of The keyboard may also be used on the calibration screen: objects on the LCD screen. HINT Press the [Home] key to jump 1. -
Page 31: Appendix B Scanner Care
F1. For details, refer to the "Operator's Guide". Wipes are used instead of moistened cloths. Soft, dry cloth Any commercially available lint- free product Contact your FUJITSU scanner dealer or an authorized FUJITSU scanner service provider to obtain these products. -
Page 32: Cleaning The Lcd Touch Panel
Replace the keyboard cover if stains cannot be removed by cleaning. For more details, refer to the "Operator's Guide". To obtain a keyboard cover, contact your FUJITSU dealer or an authorized FUJITSU scanner service pro- vider. Part Name Part No. -
Page 33: Appendix C Replacing Parts
PICK ROLLER After every 100,000 sheets (PA03289-0001) scanned or once a year To obtain these parts, contact your FUJITSU dealer or an authorized FUJITSU scanner service provider. Pick roller's shaft These replacement cycles are rough guidelines when using 80 g/m (20 lb) A4/Letter woodfree or wood con- taining paper. -
Page 34: For Carrier Sheet
Carrier Sheet After used for 500 (PA03360-0013) scans Contact your FUJITSU scanner dealer or an authorized FUJITSU scanner service provider to obtain these prod- ucts. This replacement cycle is a rough guideline. This may vary according to the type of documents scanned, scan- ner usage, and cleaning frequency. -
Page 35: Appendix D Network Connection Troubleshooting
Appendix D Network Connection Troubleshooting ■ Checking Basic Network Operation with a Ping Test If a network connection is not possible, refer to "3.9 Checking the Network Connection" (page 11) for ping results and how to deal with them. Connection Server name Result Action... -
Page 36: Failure To Connect To A Server Using Its Ip Address
■ Failure to Connect to a Server using its IP Address If a server cannot be connected to by using its IP address, and does not respond to a ping test, try the following steps: Problem Action Connection error between a server and the Check that the LAN cable has been attached to both the scanner scanner, or problem with the LAN cable. - Page 37 Problem Action The network link speed/duplex mode for For this scanner, the default [Link Speed/Duplex Mode] setting the scanner and server are invalid, or is "Auto-Negotiation". Auto-Negotiation is not supported by the On the "Network Status" screen, match the scanner and server's server.
- Page 38 Problem Action A misconfigured firewall between the If there is a firewall between the computer running the Admin Tool or Web browser and the scan- Admin Tool or Web browser and the scanner, check that it ner, is denying access with HTTP/HTTPS settings are not preventing access.
- Page 39 Problem Action A proxy server is being used. Set the proxy server to not be used. Open the "Internet Options" in the "Tools" menu of Internet Explorer, then press the [LAN settings] button in the [Con- nections] tab and remove the check from the "Use a proxy server for your LAN (These settings will not apply to dial-up or VPN connections)"...
-
Page 40: Appendix E Troubleshooting
10 seconds, then reattach the cable and turn back on again, and re-logging in? the power back on again. If the problem persists, contact your FUJITSU scanner dealer or an autho- rized FUJITSU scanner service provider. Even after pressing... - Page 41 If a solution to your problem cannot be found in the above troubleshooting list, refer to the following web page: http://imagescanner.fujitsu.com/g-support.html If the solution to your problem cannot be found on the above web page, refer to the contact information for your Fujitsu office on the following web page: http://imagescanner.fujitsu.com/warranty.html...
-
Page 42: Copyright
Copyright NetAdvantage Redistribution and use in source and binary forms, with or without modification, are permitted provided that the following conditions are met: Copyright 2000-2010 Infragistics, Inc. 1. Redistributions of source code must retain the above copyright notice, this list of conditions and the following disclaimer. LEADTOOLS for .NET 2. - Page 43 Portions Copyright © 1993 by Digital Equipment Corporation. 2. Redistributions in binary form must reproduce the above copyright notice, this list of conditions and the following Permission to use, copy, modify, and distribute this software for any disclaimer in the documentation and/or other materials provided purpose with or without fee is hereby granted, provided that the with the distribution.
- Page 44 The name of Juniper Networks may not be used to endorse or 2. Redistributions in binary form must reproduce the above promote products derived from this software without specific prior copyright notice, this list of conditions and the following written permission. disclaimer in the documentation and/or other materials provided with the distribution.
- Page 45 fi-6010N Network Scanner Getting Started P3PC-2952-05EN Date of issuance: February 2013 Issuance responsibility: PFU LIMITED Copying of the contents of this manual in whole or in part and copying of the scanner application is forbidden under the copyright law. The contents of this manual are subject to change without notice. PFU LIMITED.