Table of Contents
Advertisement
Available languages
Available languages
Advertisement
Chapters
Table of Contents

Related Manuals for ReliOn Micro


Summary of Contents for ReliOn Micro
- Page 1 MICRO Blood Glucose Monitoring System User Instruction Manual...
- Page 2 CAUTION: Before using any product to test your blood sugar (blood glucose), read all instructions and practice the test. Do all quality control checks as directed and consult with a diabetes healthcare professional. These recommendations apply to all blood glucose monitoring systems and are supported by the American Association of Diabetes Educators, the American Diabetes Association, the U.S.
-
Page 3: Table Of Contents
Intended Use ........6 Understanding the ReliOn Micro Blood Glucose Meter ..7 ®... - Page 4 Blood Glucose Testing ........23 The Lancing Device.
-
Page 5: Introduction
INTRODUCTION ReliOn Micro ® Thank you for choosing the Blood Glucose Monitoring System. This system measures blood glucose in fresh capillary whole blood. Results are shown as plasma values. This makes it easy to ReliOn Micro ® compare the Blood Glucose Meter and lab results. -
Page 6: Intended Use
Intended Use ReliOn Micro ® Blood Glucose Monitoring System is intended for the quantitative measurement of glucose in fresh capillary whole blood samples drawn from the fingertips or palm. Testing is done outside the body (In Vitro diagnostic use). It is indicated for use at home (over the counter [OTC]) by persons with diabetes, or in clinical settings by healthcare professionals, as an aid to monitor the effectiveness of diabetes control. -
Page 7: Understanding The Relion Micro Blood Glucose Meter
UNDERSTANDING THE RELION® MICRO BLOOD GLUCOSE METER Bottom Strap Hole Button(1) Display Strap Hole Button(2) Test Strip Port... -
Page 8: Explanation Of The Full Display Screen
Explanation of the full display screen: Memory symbol: Appears when you are Shows you a past result setting the date or time or reviewing in the memory. a past result. Sound mute symbol Delete flag Control test flag Battery symbol Pre-meal flag Thermometer symbol Post-meal flag... -
Page 9: Test Strip
ReliOn Confirm/Micro Test Strips ® These test strips need only 0.3 µL (microliter) of blood. Apply blood to the sample application tip. The strip draws in the blood by capillary action. The blood glucose reacts with the enzyme on the test strip. This produces a current proportional to the blood glucose level. -
Page 10: Changing The Battery
Changing the Battery blood glucose The ReliO ® Micro meter comes with one lithium battery CR2032 (or DL2032). CAUTION Replacing the battery will not delete meter settings or test re- sults stored in the meter unless you: • Touch the metal portion on main unit with your fingers or any metal. • Take over 1 minute to replace battery. • Load the battery incorrectly. - Page 11 To replace battery: 1. Turn meter off. 2. Remove the battery cover on the back of the meter. 3. Slide the battery to the right (a) and remove it (b). CAUTION: Do not touch the metal contacts inside the battery compartment with your finger or any metal.
- Page 12 5. Replace battery cover. If the clock setting has been deleted, SET will appear on the screen. If SET appears, set the time and date. If you do not set the time and date, all subsequent results will be stored with a test date and time of January 1, 2008, 12:00 a.m.
-
Page 13: Meter Set-Up
METER SET-UP Meter set-up allows you to adjust the audible beep volume and to set time, date, and test averaging. Before using the ReliOn Micro blood glucose meter for the first time, set ® the time and date. Do not perform a blood glucose test until you have set- up the meter. - Page 14 Setup mode Date and time Test average display Audible Beep See page 21. See page 16. See page 18. To go to SET: To turn off the 1. Make sure meter, press To change the the meter To change the button.
-
Page 15: Basic Rules
Basic rules for meter set-up: Step 1: Turn off meter. Step 2: buttons at the Press the same time for 5 seconds. A beep sounds and the meter turns on. Next, a second beep sounds and “SET” shows on the screen. Step 3: Use the button to change the set-up screen. -
Page 16: Setting The Audible Beep
Setting the Audible Beep If the audible beep is turned “on”, the beep will sound when: • You insert a test strip into the meter. • You apply blood or control solution to a test strip. • The test has ended and the result is displayed. • The meter is turned on, but you do not use it for several minutes. Meter will beep and automatically shut off. • You go into Memory Mode. Make sure the meter is off. Press the buttons at the same time for 5 seconds. A beep sounds and the meter turns on. - Page 17 Press the button to cycle through the volume levels: “OFF” (no sound) ”on 1” (low) “on 2”(middle) “on 3” (high) “OFF” (no sound) …, etc. A beep sounds at the set volume at each step. If “OFF” is set, the “audible beep mute (Off)”...
-
Page 18: Year
Setting the Year In the year set-up screen, the last two digits of the currently set year appear at the top of the screen. “ y Er” appears in the middle of the screen. The last two digits of the currently set year appear at the (audible beep) bottom of the screen and blink. -
Page 19: Month/Day
Setting the Month Press the button to change the month. After you set the month, press the button to confirm the setting. The screen changes to the day set-up screen. Setting the Day Press the button to change the day. After you set the day, press the button to confirm the setting. -
Page 20: Hour/Minute
Setting the Hour Press the button to change the hour. After you set the hour, press the button to confirm the setting. The screen changes to the minute set-up screen. Setting the Minute Press the button to change the minute. After you set the minute, press the button to confirm the setting. -
Page 21: Test Average Display
Setting Test Average Display NOTE: “Lo” results are included as 20 mg/dL in the averages. “Hi” results are included as 600 mg/dL in the averages. Test results with the following symbol or flag are not part of the result average: temperature error symbol, control solution flag, or delete flag. Press the button to cycle through the test averaging choices: “oFF” (not displayed), “7”... -
Page 22: Ending Set-Up
Ending Set-up To make further changes to set-up settings, press button while “End” is displayed. This will bring up the Audible Beep set-up screen. You can then move through the set-up mode and adjust any settings that you wish. If you are done with set-up, press the button while “End”... -
Page 23: Blood Glucose Testing
BLOOD GLUCOSE TESTING The Lancing Device Note: Do not use the lancet if the cap is missing or damaged. Note: Lancing device is for single-patient use only and should never be shared with another person, even a family member. This lancing device should not be used for multiple patient testing by healthcare providers or at healthcare provider sites. - Page 24 Step 1: Pry the depth adjustment cap sideways to remove it. Holder Step 2: Insert a new, unused lancet into the Holder until it stops. Step 3: Twist off the safety tab. Step 4: Attach the depth adjustment cap.
- Page 25 Step 5: Adjust the depth of puncture setting if necessary. If the obtained amount of blood is excessive, turn the dial to a lower setting. If the obtained amount of blood is insufficient, turn the dial to a larger setting. Level indications Lancing Device. 1 2 3 4 5 Deeper Step 6: Pull the charger to reset the device.
-
Page 26: Getting A Drop Of Blood
Getting a Drop of Blood Step 1: Wash hands with soap and warm water. Dry hands thoroughly. If you use alcohol wipes to cleanse fingers, make sure the area is dry before lancing finger. Residual alcohol may lead to inaccurate readings. Step 2: Let the arm hang down for 10 to 15 seconds. (Holding the arm below the heart and massaging the wrist, palm and finger makes it easier to obtain a blood drop). - Page 27 Step 5: Set aside the Lancing Device and wait a few seconds for a blood drop to form. Keeping the hand warm, lowering the hand to waist level and gently massaging your wrist, palm or the base of the finger helps the flow of blood. Use a different site each time you test to help prevent soreness and calluses.
-
Page 28: Performing A Blood Glucose Test
Performing a Blood Glucose Test NOTE: Four and a half minutes after test strip insertion, a beep sounds every 5 seconds. After 5 minutes, a beep sounds and the meter turns off. Take out unused test strip and insert it again to turn meter back on. Step 1: Remove test strip from the bottle. - Page 29 Step 2: The last test result will then appear. Then the code number (F-2, F-3, or F-4) will appear for three seconds followed by the Apply Blood Verify that the code number on the screen matches symbol the code number printed on the bottle. If the code number does not match, the meter may give a false reading.
- Page 30 Step 3: Obtain a blood drop Apply (see pages 26-27). blood to the end of the test strip. Capillary action will pull the blood into the strip. The meter will beep when it detects that blood has been applied. The meter will begin to count down.
- Page 31 If it takes longer than 20 seconds to obtain a blood sample and to touch the test strip to the blood drop, repeat Step 3. Step 4: The meter will count down, showing a flashing dash. After 7 seconds, a beep sounds and the test result is shown. Results will be shown in units of mg/dL.
-
Page 32: Flagging Test Results
Flagging Test Results Flags help you categorize and identify results. They can be used to omit specific results from result average calculations. You can attach any of the below flags to test results. These flags are then stored in the memory with the test results. Attach: Pre-meal flag Blood glucose result obtained before eating Post-meal flag Blood glucose result obtained after eating Control test flag Control test result. - Page 33 Step 2: When you have selected the desired marker, remove the test strip. When you recall the result from memory, the selected marker will be displayed.
-
Page 34: Alternate Site Testing (Ast)
ALTERNATE SITE TESTING (AST) Important Information About AST: Sites other than your fingertip may have fewer nerve endings so obtaining a blood sample from these sites may be less painful. The technique for alternate site testing is different from fingertip testing. Blood glucose testing results from sites other than your fingertip could be significantly different. Physiological differences in circulation between the fingertip and palm may result in differences in blood glucose measurements between these sites. Differences in glucose concentrations may be observed after eating, taking insulin medication, or exercise and are typically shown more quickly in the fingertip than in the palm. Consult with your diabetes healthcare professional prior to testing from a site other than your fingertips. - Page 35 Use Fingertip Testing: • Within two hours after a meal. • Within two hours after insulin dosing. • Within two hours after physical activity. • If you have a history of hypoglycemia, are experiencing low blood glucose, or suffer from hypoglycemic unawareness (you cannot tell when you have low blood glucose). • To confirm your blood glucose level if your AST result is not consistent with how you feel. • During times of stress or illness. Ask your diabetes healthcare professional about recommended testing procedures when operating machinery or driving a car, as fingertip testing is usually the preferred method of testing under these circumstances. If bruising occurs, you may choose to lance a fingertip instead.
- Page 36 Preparing to Test Your Blood Glucose From an Alternate Site Choose a Site: Select a soft, fleshy area on the palm that is free of visible veins and moles and away from bone. Wash the area with warm, soapy water. Rinse and dry completely. If you use alcohol wipes to cleanse the site, make sure the area is dry before lancing the site.
- Page 37 Performing a Blood Glucose Test From an Alternate Site Step 1: Attach clear cap for Alternate Site Testing to lancing device. Insert lancet and cock lancing device.
- Page 38 Step 2: Remove test strip from the bottle. Immediately replace the bottle cap Insert test strip as shown in tightly. diagram. A beep will sound and the meter will turn on automatically. Verify that all symbols appear on the screen (see page 8).
- Page 39 Step 3: a) PRESS AND VIGOROUSLY RUB THE SELECTED AREA for 10 seconds until it starts to feel warm to the touch. b) Firmly hold the cocked lancing device against the clean skin for 5-10 seconds.
- Page 40 c) Press the release button d) Once a large on the lancing device to enough drop Continue to lance the skin. of blood has hold the lancing device formed, firmly against the skin remove the lanc- until a blood drop forms ing device.
- Page 41 IMPORTANT IF NOT, • Was the sample free of clear or watery fluid? REPEAT TEST. • Was the drop large enough (at least 0.3 µL)? • Did the reaction site fill with enough blood all at once? Step 5: The meter will count down, showing a flashing dash, and display result in 7 seconds. CONSIDER YOUR RESULT. REPEAT ALTERNATE SITE TEST: Filled • IF the blood sample appeared to be diluted with clear fluid. • IF you did not vigorously rub the test site. • IF the blood drop was not large enough to fill the reaction site. • IF the test was accidentally marked as a “Control” result. Not Filled Filled • IF your result was not consistent with how you feel. • I F more than 20 seconds elapsed from sample collection to measurement (evaporation of the blood sample may cause a test result that is higher than the actual value).
- Page 42 If the repeated alternate site result is still not consistent with how you feel, confirm your blood glucose level with fingertip testing. Step 6: record your results in your self-testing logbook Always along with other information such as insulin dosage, diet, and exercise. The result is automatically stored in memory with the time and date. Step 7: Remove the test strip and dispose of it in accordance with local...
-
Page 43: Understanding Test Results
UNDERSTANDING TEST RESULTS The ReliOn Micro blood glucose meter is referenced to a fresh plasma ® sample. Your meter results may differ from clinical lab results. This is due to normal variation. To compare your meter with lab results, follow the guidelines below. - Page 44 ALWAYS wash hands with warm soapy water. Rinse and dry them before ALWAYS testing. use fresh capillary whole blood on meter tests. You may still see a difference from the lab result. This can be due to several causes. Blood glucose levels can change over short periods of time, for example due to food or stress.
- Page 45 Normal Blood Glucose Readings Expected blood glucose levels for adults without diabetes¹ , ²: Fasting 70 to 110 mg/dL 2 hours after meals 70 to 140 mg/dL High Blood Glucose Readings If your blood glucose is above 600 mg/dL, you will receive a “Hi.” Repeat the test with a new test strip.
- Page 46 Low Blood Glucose Readings If your blood glucose is below 20 mg/dL, you will receive a “Lo.” Repeat the test with a new test strip. If this message shows again, contact your healthcare professional immediately! Contact your physician for advice if test results are very low (below 70 mg/dL) and/or you have symptoms of low blood glucose.
-
Page 47: What This Means For You
What This Means For You Frequent blood glucose testing is the best means to track how well you are doing with your diabetes management. It helps you track the effects of medications, diet, exercise, and stress management. Blood glucose test results can also tell you if your diabetes is changing. This may alert you to adjust your treatment plan. -
Page 48: Performing A Control Solution Test
PERFORMING A CONTROL SOLUTION TEST ® It is recommended to use ReliOn Confirm/Micro CONTROL to check if: • the meter and test strips are working correctly as a system. • you are testing correctly. ® To order control solution, call ReliOn at 855.776.0662... - Page 49 • The test strip bottle has been left open or has been exposed to temperatures below 34°F (1°C) or above 86°F (30°C), or humidity levels above 80%. • To check your technique. • When the ReliOn Micro blood glucose meter has been ® dropped or stored below 32°F (0°C) or above 122°F (50°C). • When you open a new bottle of test strips. Important: • U se only with ReliOn Micro blood glucose meter and ®...
- Page 50 (OPEN DATE) as a reminder to dispose of the opened solution after 3 months. • Always replace the cap immediately after use. • ReliOn Confirm/Micro CONTROL is not a cleaning solution. Do ® not clean your ReliOn Micro blood glucose meter with ® ReliOn Confirm/Micro CONTROL. ® • Do not use the control solution when the solution level falls below the bottom edge of the label on the bottle.
- Page 51 Step 1: Insert a test strip as shown in diagram. Test strip should seat firmly into meter. The meter will turn on automatically. The full screen will come on for a moment. Make sure all symbols appear on the screen (see page 8). The last result will then appear.
- Page 52 Step 2: Press the button to enter the control mode. You will see “CONT” on the upper left of the screen. A “CONT” flag can also be attached when results are shown on screen.
- Page 53 Step 3: Remove the cap from the control solution bottle. While the Apply Blood symbol , place a very small drop on is flashing the end of the test strip. The test strip will draw up the solution and the meter will beep. DO NOT put control solution on top of the test strip.
- Page 54 Control solutions are available in three (3) levels - Low (L), Normal (N), and High (H). Repeat Steps 1-5 with other Control Solution levels as per recommendations of your healthcare professional. To order control solution, call ReliOn at 855.776.0662. ® NOTE:...
-
Page 55: Troubleshooting Control Solution Test
Troubleshooting Control Solution Test If the control solution test result is out-of-range, check the following and repeat the test: Check Action Did you do the test in If not, do the test again. control solution mode? Insert a test strip; press the button Do you see “CONT” on for control solution mode. - Page 56 Check Action Did you insert test strip Make sure test strip is inserted firmly into meter? all the way into test strip port. See diagram on page 51. Did you follow the Reread “Performing a Control procedure correctly? Solution Test” (pages 49-54) and retest. Were test strips stored correctly If not, retest with a (between 34-86°F (1-30°C))? new bottle of test strips.
- Page 57 Does your Control Solution result still read outside the range printed on the test strip bottle? If yes, the system may not be working correctly. DO NOT USE the system to test your blood glucose until the control solution result is within range. If you need help, please call Customer Service at 855.776.0662. Contact your diabetes healthcare professional if you can- not reach Customer Service.
-
Page 58: Recalling Results - Entering Memory Mode
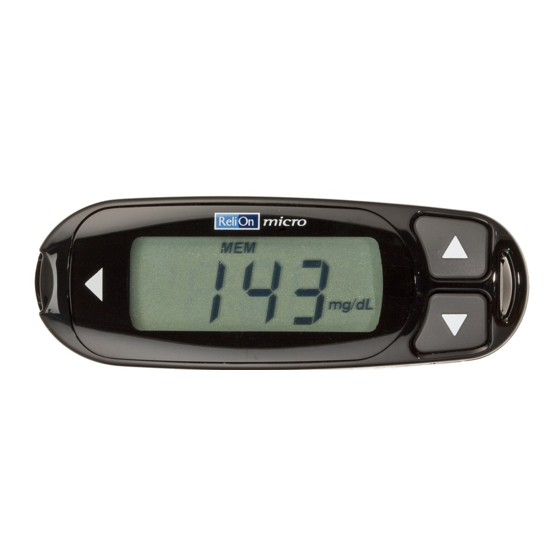
RECALLING RESULTS - ENTERING MEMORY MODE The ReliOn Micro blood glucose meter stores up to 50 test results. When ® more than 50 test results have been performed, the meter drops the oldest result each time you add a new result. Before using the memory, remove test strip from meter and make sure meter is turned off. - Page 59 • If Test Averaging has been turned on, the average result will appear first. • If Test Averaging has been set to “Off”, the display will briefly flash the number “1.” Then, the most recent test result appears with the date and time of the test. “MEM” will display at the top of the screen. This shows it is a stored result. Step 2: Press the button to scroll through memory.
- Page 60 Step 3: After all test results have been reviewed, “End” appears. • Press the button once to go back to the first result in memory. You can then scroll through results in memory again. • Press the button for 2 seconds to exit Memory and turn off the meter. You can exit Memory in this way at any time when recalling results.
- Page 61 Step 2: Hold down the button for 2 seconds to display the most recent test result. If you have turned the result average display on, the result average will appear instead of the most recent result. Step 3: Press the button to go to the “End”...
-
Page 62: Maintenance
MAINTENANCE Cleaning To prevent malfunction of the meter, keep the test strip port free of blood, moisture, dirt, or dust. Use a lint-free cloth dampened with water to clean meter. Thoroughly wring out cloth before use. Do not use an abrasive cloth or antiseptic solution, as these may damage the display screen. -
Page 63: Storage And Handling
Storage and Handling • Store meter at 32°F-122°F (0°C-50°C). • Do not leave the meter in very hot or cold places. Do not leave it near a heat source (radiator) or in a car in hot or cold weather. • Do not store or use meter or test strips: • in high humidity, such as a bathroom or kitchen. • near a strong electromagnetic field such as a microwave oven or cell phone. • Do not use a meter that has been dropped into water, or if any water has entered the meter. Even if you dry it, correct test results may not be obtained, and malfunction may result. • Do not store meter or test strips near bleach or cleaners that contain bleach. -
Page 64: Display Screen And Error Messages
Customer Service. Display Screen and Error Messages Please first read this section. If you still have questions, call Customer Service at 855.776.0662. Contact your healthcare professional if you cannot reach Customer Service. Do not send your meter to ReliOn or your ® local dealer without first calling to get approval to do so. If any part of the display screen... - Page 65 Your blood glucose level is less than 20 mg/dL or there was not enough blood on test strip. Repeat test with new test strip. Make sure you use enough blood to fill the strip. If this message shows again, contact your healthcare professional immediately! Your blood glucose level is more than 600 mg/dL. Repeat test with new test strip.
- Page 66 The battery power is too low for testing. Test results and changes are not stored in the memory. Change the battery. See “Changing the battery” pg 10. The meter is faulty. Contact Customer Service at 855.776.0662. The meter temperature is outside acceptable range of 50˚F-104˚F (10˚C-40˚C). Allow the meter and test strips to warm up or cool down slowly (20 minutes) until the temperature warning...
- Page 67 Test strip problem. Contact bars on test strip may be dirty. Incorrect test strip used. Used test strip has been inserted. Repeat test with new test strip. Additional blood was applied to test strip after test started. Test strip was moved during test. Insufficient blood sample. Code Number. This shows the code number currently in the meter.
- Page 68 Apply Control Solution. The Apply Blood symbol flashes and “CONT” appears at the top of the screen. This shows the meter is ready for you to apply control solution. Test Result. The meter shows results between 20 and 600 mg/dL. Test Average has no results stored. Test Averaging has been set to 7-day, 14-day or 30-day but there are no results stored yet in memory.
-
Page 69: Product Information
PRODUCT INFORMATION Product Specifications ReliOn Confirm/Micro test strips ® Test Strips: Result Range: 20-600 mg/dL . Calibration: Plasma referenced. Sample Size: Minimum 0.3 µL. Blood Source: Fresh capillary whole blood. Hematocrit Range: 30% - 54%. Test Time: 7 seconds. Assay Method: Biosensor, Glucose Oxidase (Aspergillus niger sourced). -
Page 70: Warnings, Precautions & Limitations
Warnings, Precautions & Limitations • Y ou may get test results higher than your actual glucose level if taking PAM (1-Methylpyridine-6-carbaldehyde oxime). Taking unnecessary measures to lower your blood glucose level may induce severe low blood glucose symptoms such as coma. • N ever make significant changes to your diabetes control program or ignore physical symptoms without consulting with your healthcare professional. - Page 71 • N ormal endogenous (within body) natural levels of uric acid, ascorbate (vitamin C), bilirubin, triglycerides, and hemoglobin do not interfere with your blood glucose results obtained. • Externally taken drugs L-dopa, dopamine, methyl-dopa, acetaminophen, and ibuprofen will not interfere with Micro blood glucose results when taken at ReliOn ® therapeutic concentrations.
- Page 72 • T he ReliOn Micro Blood Glucose Monitoring System is not designed to ® be a substitute for pathology laboratory equipment and should not be used for the diagnosis of diabetes. • Use only fresh capillary blood. Do not use serum or plasma or venous whole blood. • Do not use the ReliOn Micro Blood Glucose Monitoring ® System to test neonates. It has not been validated for neonatal use.
-
Page 73: Warranty
Customer. It is important to us that you are ® completely satisfied with your ReliOn® Micro blood glucose meter. ReliOn® warrants your meter will be free from defects in materials and workmanship for a period of five years from the date of the original purchase. If during this time the meter does not work properly because of a defect in materials or workmanship, ReliOn® agrees to replace or repair, free of charge any and all parts proven to be defective and subject to warranty. - Page 74 Returns You must contact ReliOn Customer Service at 855.776.0662 before ® returning your meter. You will be instructed how to return the meter. Returned meters without this authorization will not be accepted. Distributed by: Wal-Mart Stores, Inc. Bentonville, AR 72716 855.776.0662...
- Page 75 MICRO Sistema de monitoreo de glucosa en sangre Manual de instrucciones para el usuario...
- Page 76 PRECAUCIÓN: Antes de usar cualquier producto para hacerse un análisis de azúcar en sangre (glucosa en sangre, o glucemia), lea todas las instrucciones y practique la prueba. Lleve a cabo todas las verificaciones de control de calidad según las indicaciones y consulte con un profesional de atención diabetológica.
- Page 77 Uso previsto ..........6 Descripción del medidor de glucosa en sangre ReliOn Micro ... . . 7 ®...
- Page 78 Prueba de glucosa en sangre ........23 El dispositivo de punción .
-
Page 79: Introducción
INTRODUCCIÓN Gracias por haber elegido el sistema de monitoreo de glucosa en sangre ReliOn Micro. Este sistema permite determinar la cantidad de glucosa presente ® en sangre entera capilar recién obtenida. Los resultados del medidor de glucosa en sangre ReliOn Micro representan valores plasmáticos, lo cual facilita su... -
Page 80: Uso Previsto
Uso previsto El sistema de monitoreo de glucosa en sangre ReliOn Micro está diseñado para ® determinar cuantitativamente la glucosa en muestras de sangre entera capilar recién obtenida de las yemas de los dedos o la palma de la mano. Las pruebas se efectúan fuera del cuerpo (es decir, son para diagnóstico in vitro). -
Page 81: Descripción Del Medidor De Glucosa En Sangre Relion Micro
DESCRIPCIÓN DEL MEDIDOR DE GLUCOSA EN SANGRE RELION MICRO ® Parte superior Parte inferior Orificio para la correa Botón (1) Pantalla Tapa del compartimiento Orificio para de las pilas Botón (2) la correa Orificio de inserción de tiras de prueba... - Page 82 Explicación de la pantalla completa: Símbolo de memoria: Aparece cuando está configurando la le muestra un resultado fecha o la hora o revisando un anterior en la memoria. resultado anterior. Símbolo de señal Indicador de borrar sonora silenciada Indicador de prueba Símbolo de carga de la pila de control Símbolo del termómetro...
- Page 83 Tiras de prueba ReliOn Confirm/Micro ® Estas tiras de prueba requieren sólo 0.3 µl (microlitro) de sangre. Aplique sangre a la punta de aplicación de la muestra. La tira absorbe la sangre mediante acción capilar. La glucosa en la sangre reacciona con la enzima presente en la tira de prueba, lo que produce una corriente proporcional al nivel de glucosa en la sangre.
-
Page 84: Reemplazo De La Pila
Reemplazo de la pila El medidor de glucosa en sangre ReliOn Micro viene con una pila de litio CR2032 (o ® DL2032). PRECAUCIÓN Reemplazar la pila no borra los ajustes del medidor ni los resultados de las pruebas almacenados en el medidor a menos que usted: •... - Page 85 Para cambiar la pila: 1. Apague el medidor. 2. Quite la tapa del compartimiento de las pilas, situada en la parte posterior del medidor. 3. Deslice la pila hacia la derecha (a) y sáquela (b). PRECAUCIÓN: No toque los contactos de metal dentro del compartimiento de la pila con los dedos ni con un metal.
- Page 86 5. Vuelva a colocar la tapa del compartimiento de las pilas. Si se ha borrado el ajuste del reloj, aparecerá SET en la pantalla. Si aparece SET, fije la hora y la fecha. Si no fija la hora y la fecha, todos los resultados sub- siguientes se guardarán con una fecha y hora de prueba de 1 de enero de 2008 a las 12:00 a.m.
-
Page 87: Configuración Del Medidor
La configuración del medidor permite ajustar el volumen de la señal sonora y fijar la hora, la fecha y la función de promedio de las pruebas. Antes de utilizar el medidor de glucosa en sangre ReliOn Micro por primera ®... - Page 88 Finalización Modo de Señal sonora Fecha y hora Pantalla de Promedio de las pruebas configuración Consulte la página 16. Consulte la página 18. Consulte la página 21. Para ir a SET: Para apagar el 1. Asegúrese de medidor, oprima que el medidor Para cambiar el Para cambiar el el botón...
-
Page 89: Reglas Básicas
Reglas básicas para configurar el medidor: Paso 1: Apague el medidor. Paso 2: Oprima los botones al mismo tiempo durante 5 segundos. Se oye una señal y el medidor se enciende. Después, se oye una segunda señal y aparece “SET” (configuración) en la pantalla. Paso 3: Use el botón para cambiar la pantalla de configuración. -
Page 90: Señal Sonora
Configuración de la señal sonora Si está activada, la señal sonora se oirá cuando: • Se inserte una tira de prueba en el medidor. • Se aplique sangre o solución de control a la tira de prueba. • Haya finalizado la prueba y se presente el resultado. •... - Page 91 Oprima el botón para recorrer los niveles de volumen: “OFF” (sin sonido) “on 1” (bajo) “on 2” (medio) “on 3” (alto) “OFF” (sin sonido) …, etc. Se oye una señal en el volumen fijado en cada paso. Si se selecciona “OFF”, se ilumina el símbolo “señal sonora silenciada (apagada)”...
-
Page 92: Año
Configuración del año En la parte superior de la pantalla de configuración del año aparecen los dos últimos dígitos del año actualmente fijado. Aparece “ y Er” en el medio de la pantalla. Los últimos dos dígitos del año actualmente fijado aparecen en la parte inferior de la pantalla (señal sonora) y parpadean. -
Page 93: Mes/Día
Configuración del mes Oprima el botón para cambiar el mes. Después de fijar el mes, oprima el botón para confirmar el ajuste. La pantalla cambia a la pantalla de configuración del día. Configuración del día Oprima el botón para cambiar el día. Después de fijar el día, oprima el botón para confirmar el ajuste. -
Page 94: Hora/Minutos
Configuración de la hora Oprima el botón para cambiar la hora. Después de fijar la hora, oprima el botón para confirmar el ajuste. La pantalla cambia a la pantalla de configuración de los minutos. Configuración de los minutos Oprima el botón para cambiar el minuto. Después de fijar el minuto, oprima el botón para confirmar el ajuste. -
Page 95: Pantalla De Promedio De Las Pruebas
Configuración de la pantalla de Promedio de las pruebas NOTA: En los promedios, los resultados bajos (“Lo”) se incluyen como 20 mg/dl y los altos (“Hi”), como 600 mg/dl. Los resultados de las pruebas con el siguiente símbolo o marca no forman parte del promedio de resultados: símbolo de error de temperatura, marca de solución de control o marca de borrar. -
Page 96: Finalización De La Configuración
Finalización de la configuración Para realizar más cambios a los ajustes de la configuración, oprima el botón mientras aparezca “End” en la pantalla. Aparecerá la pantalla de configuración de la señal sonora. Posteriormente podrá recorrer el modo de configuración y cambiar cualquier ajuste que desee. -
Page 97: Prueba De Glucosa En Sangre
PRUEBA DE GLUCOSA EN SANGRE Botón de liberación Ajuste de profundidad El dispositivo de punción profundo (Marca más larga) Lanceta Indicador de profundidad Cargador Lengüeta de seguridad Ajuste de profundidad superficial (Marca más corta) Ajuste de profundidad medio Tapa del ajuste de profundidad Tapa transparente para pruebas con sangre extraída de... - Page 98 Paso 1: Haga palanca hacia los lados de la tapa del ajuste de profundidad para quitarla. Soporte Paso 2: Introduzca una lanceta nueva y sin usar en el soporte hasta que se detenga. Paso 3: Gire la lengüeta de seguridad para quitarla.
- Page 99 Paso 5: Ajuste el valor de la profundidad de la punción si es necesario. Si la cantidad de sangre obtenida es excesiva, gire el dial a un ajuste inferior. Si la cantidad de sangre obtenida es insuficiente, gire el dial a un ajuste mayor. Indicaciones de nivel No hay ninguna inscripción numérica...
-
Page 100: Obtención De Una Gota De Sangre
Obtención de una gota de sangre Paso 1: Lávese las manos con jabón y agua tibia y séqueselas bien. Si usa toallitas con alcohol para limpiar el dedo, asegúrese de que la piel esté seca antes de pincharla con la lanceta. Los residuos de alcohol podrían alterar las lecturas. - Page 101 Paso 5: Retire el dispositivo de punción y espere unos segundos para que se forme una gota de sangre. Para facilitar el flujo de sangre, mantenga caliente la mano, baje la mano a la altura de la cadera y masajéese suavemente la muñeca, la palma de la mano o la base del dedo.
-
Page 102: Realización De Una Prueba De Glucosa En Sangre
Realización de una prueba de glucosa en sangre NOTA: Después de cuatro minutos y medio de haberse insertado una tira de prueba, se oye una señal sonora cada 5 segundos. Después de 5 minutos, se oye una señal sonora y el medidor se apaga. Saque la tira de prueba sin usar e insértela de nuevo para volver a encender el medidor. - Page 103 Paso 2: Aparece el último resultado de prueba; a continuación aparecerá el número de código (F-2, F-3 o F-4) por tres segundos y luego el símbolo Verifique que el número de código que aparece “Aplicar sangre” en la pantalla coincide con el que está impreso en el frasco. Si el número de código no coincide, el medidor podría producir resultados falsos.
- Page 104 Paso 3: Obtenga una gota de sangre (consulte las páginas agréguela al extremo 26-27) y de la tira de prueba. La acción capilar atraerá la sangre al interior de la tira. El medidor emitirá una señal sonora cuando detecte que se ha aplicado la sangre se iniciará...
- Page 105 Si tardó más de 20 segundos en obtener la muestra de sangre y poner la gota en contacto con la tira, repita el paso 3. Paso 4: El medidor hará una cuenta regresiva, mostrando un guión destellante. Después de 7 segundos, se oirá una señal y aparecerán los resultados de la prueba.
-
Page 106: Marcado De Un Resultado De Prueba
Marcado de un resultado de prueba Las marcas le ayudan a categorizar e identificar los resultados; además pueden usarse para omitir resultados específicos de los cálculos del promedio. Puede adjuntar cualquiera de las siguientes marcas a los resultados de las pruebas. Estas marcas se guardan en la memoria junto con los resultados de las pruebas. - Page 107 Paso 2: Cuando haya seleccionado el marcado deseado, extraiga la tira de prueba. Cuando recupere el resultado de la memoria, aparecerá la marca seleccionada.
-
Page 108: Pruebas Con Sangre Extraída De Lugares Alternativos
PRUEBAS CON SANGRE EXTRAÍDA DE LUGARES ALTERNATIVOS Información importante sobre las pruebas realizadas con sangre obtenida de lugares alternativos: Ciertas partes del cuerpo tienen menos terminaciones nerviosas que las yemas de los dedos, por lo cual obtener una muestra de sangre de esos lugares podría causar menos dolor. - Page 109 Hágase pruebas con sangre obtenida de las yemas de los dedos: • En las dos horas siguientes a una comida. • En las dos horas siguientes a la administración de insulina. • En las dos horas siguientes a la realización de actividad física. •...
- Page 110 Preparativos para la prueba de glucosa en sangre obtenida de un lugar alternativo Elija el lugar: Seleccione una zona blanda y carnosa de la palma de la mano que no tenga venas ni lunares, y que esté alejada del hueso. Lave el área con agua tibia y jabón; enjuáguela y séquela completamente.
- Page 111 Realización de una prueba de glucosa en sangre obtenida de un lugar alternativo Paso 1: Coloque la tapa transparente para pruebas en lugares alternativos en el dispositivo de punción. Inserte la lanceta y prepare el dispositivo de punción para disparar.
- Page 112 Paso 2: Saque una tira de prueba del frasco; enseguida Introduzca la tape el frasco herméticamente. tira de prueba tal como se ilustra en el diagrama. Se oirá una señal y el medidor se encenderá automáticamente. Verifique que en la pantalla aparezcan todos los símbolos (consulte la página 8).
- Page 113 Paso 3: a) PRESIONE Y FROTE ENÉRGICAMENTE EL LUGAR SELECCIONADO durante 10 segundos hasta que comience a estar caliente al tacto. b) Sujete firmemente el dispositivo de punción preparado contra la piel limpia durante 5 a 10 segundos.
- Page 114 c) Oprima el botón de liberación d) Una vez que se del dispositivo de punción para haya formado una Siga sujetando pinchar la piel. gota de sangre lo el dispositivo de punción suficientemente firmemente contra la piel grande, quite hasta que se forme una gota el dispositivo de sangre.
- Page 115 EN CASO IMPORTANTE NEGATIVO, • La muestra, ¿estaba libre de líquido transparente o aguado? REPITA LA • La gota, ¿tenía un volumen suficiente (al menos 0.3 µl)? • La zona reactiva, ¿se llenó con suficiente sangre toda de una vez? PRUEBA.
- Page 116 Si el resultado repetido en el lugar alternativo sigue sin concordar con sus síntomas, confirme su nivel de glucosa haciéndose una prueba con sangre de la yema de un dedo. Paso 6: Anote siempre los resultados en su libreta de registro, junto con otra información como dosis de insulina, dieta y ejercicios. El resultado se almacena automáticamente en la memoria, junto con la fecha y la hora de la prueba.
-
Page 117: Interpretación De Los Resultados De La Prueba
15 minutos. Recoja la sangre para la prueba de laboratorio con un conservante aprobado. Pueden utilizarse muestras de sangre conservadas en heparina. En el folleto de instrucciones para las tiras de prueba encontrará información adicional. El medidor de glucosa en sangre ReliOn Micro está ®... - Page 118 SIEMPRE Antes de hacer la prueba, lávese las manos con agua tibia y jabón, SIEMPRE enjuágueselas y séqueselas. Utilice sangre entera capilar recién obtenida para las pruebas con el medidor. Es posible seguir observando diferencias respecto al resultado de laboratorio, por varias causas.
- Page 119 Lecturas normales de glucosa en sangre Niveles de glucosa en sangre esperados en personas sin diabetes¹ , ²: En ayunas 70 a 110 mg/dl 2 horas después de las comidas 70 a 140 mg/dl Lecturas altas de glucosa en sangre Si su valor de glucosa en sangre es superior a 600 mg/dl, aparecerá...
- Page 120 Lecturas bajas de glucosa en sangre Si su valor de glucosa en sangre es inferior a 20 mg/dl, aparecerá “Lo”. Repita la prueba con una tira nueva. Si este mensaje vuelve a aparecer, comuníquese de inmediato con su profesional de la salud. Consulte con su médico si sus resultados de prueba son muy bajos (inferiores a 70 mg/dl) y/o usted tiene síntomas de bajas concentraciones de glucosa en...
- Page 121 Lo que esto significa para usted La medición frecuente de la glucosa en sangre es la mejor manera de registrar la eficacia de su control de la diabetes, y le ayuda también a determinar los efectos de los medicamentos, la dieta, el ejercicio y el manejo del estrés. Además, los resultados de las pruebas de glucosa en sangre pueden advertirle de cualquier cambio en su diabetes y avisarle que necesita ajustar su plan terapéutico.
-
Page 122: Realización De Una Prueba Con Solución De Control
Se recomienda utilizar la solución de control ReliOn Confirm/Micro CONTROL ® para comprobar que: • el medidor y las tiras de prueba están funcionando conjuntamente como sistema. • se está efectuando la prueba correctamente. Para hacer un pedido de solución de control, llame a ReliOn al 855.776.0662. ®... - Page 123 122 °F (50 °C). • Cuando abra un frasco nuevo de tiras de rueba. Importante: • Utilice esta solución sólo con el medidor de glucosa en sangre ReliOn Micro y las tiras de prueba de glucosa en sangre ReliOn ® ® Confirm/Micro.
- Page 124 3 meses. • Tape siempre el frasco inmediatamente después de usar la solución. • ReliOn Confirm/Micro CONTROL no es una solución de limpieza. No limpie su ® medidor de glucosa en sangre ReliOn Micro con la solución ReliOn...
- Page 125 Paso 1: Introduzca una tira de prueba tal como se ilustra en el diagrama. La tira de prueba debe asentarse firmemente en el medidor. El medidor se enciende automáticamente. Se encenderá la pantalla completa durante un instante. Asegúrese de que en la pantalla aparezcan todos los símbolos (consulte la página 8).
- Page 126 Paso 2: Oprima el botón para entrar en el modo de control. Verá “CONT” en la parte superior derecha de la pantalla. También se puede añadir una marca “CONT” cuando aparecen los resultados en la pantalla.
- Page 127 Paso 3: Destape el frasco de solución de control. Mientras parpadea el símbolo “Aplicar sangre” coloque una gota muy pequeña en el extremo de la tira de prueba. La tira de prueba absorberá la solución y el medidor emitirá una señal sonora.
- Page 128 Las soluciones de control están disponibles en tres (3) niveles: bajo (L), normal (N) y alto (H). Repita los pasos 1-5 con solución de control de otros niveles siguiendo las recomendaciones de su profesional de la salud. Para hacer un pedido de solución de control, llame a ReliOn ® 855.776.0662. NOTA: Los resultados de las pruebas con solución de control no...
-
Page 129: Resolución De Problemas De La Prueba Con Solución De Control
Resolución de problemas de la prueba con solución de control Si el resultado de la prueba con solución de control está fuera del intervalo aceptable, compruebe lo siguiente y repita la prueba: Comprobación Acción ¿Realizó la prueba en modo de solución de En caso negativo, repita la prueba. - Page 130 Comprobación Acción ¿Introdujo la tira de prueba firmemente en Asegúrese de que la tira de prueba esté el medidor? insertada completamente en su orificio. Consulte el diagrama de la página 51. ¿Siguió el procedimiento correctamente? Vuelva a leer la sección “Realización de una prueba con solución de control”...
- Page 131 El resultado con solución de control, ¿sigue estando fuera del intervalo impreso en el frasco de tiras de prueba? En caso afirmativo, es posible que el sistema no esté funcionando correctamente. NO UTILICE el sistema para hacer pruebas de glucosa en sangre hasta que la solución de control produzca un resultado dentro de los límites aceptables.
-
Page 132: Recuperación De Los Resultados - Entrada Al Modo De Memoria
RECUPERACIÓN DE LOS RESULTADOS – ENTRADA AL MODO DE MEMORIA El medidor de glucosa en sangre ReliOn Micro almacena hasta 50 resultados ® de pruebas. Cuando se han realizado más de 50 pruebas, el medidor suprime el resultado más antiguo cada vez que se le agrega un nuevo resultado. Antes de usar la memoria, saque la tira de prueba y asegúrese de que el medidor esté... - Page 133 • Si se ha activado el promedio de pruebas, aparecerá primero el promedio de los resultados. • Si se ha desactivado el promedio de pruebas, en la pantalla parpadeará brevemente el número “1”. Después, aparece el resultado de la prueba más reciente junto con la fecha y la hora.
- Page 134 Paso 3: Después de revisar todos los resultados de las pruebas, aparece “End”. • Oprima una vez el botón para volver al primer resultado de la memoria. Después, puede avanzar por los resultados de la memoria de nuevo. • Oprima el botón durante 2 segundos para salir de la memoria y apagar el medidor.
- Page 135 Paso 2: Mantenga oprimido el botón durante 2 segundos para que aparezca el resultado de prueba más reciente. Si ha activado la pantalla de promedio de resultados, aparecerá el promedio de resultados en lugar del resultado más reciente. Paso 3: Oprima el botón para ir a la pantalla “End”.
-
Page 136: Mantenimiento
MANTENIMIENTO Limpieza Para impedir que el medidor funcione mal, mantenga el orificio de inserción de las tiras de prueba libre de sangre, humedad, suciedad o polvo. Use un paño sin pelusa humedecido con agua para limpiar el medidor. Escurra bien el paño antes de cada uso. -
Page 137: Almacenamiento Y Manejo
Almacenamiento y manejo • Guarde el medidor entre 32 y 122 °F (0 y 50 °C). • No deje el medidor en lugares donde haga mucho calor o mucho frío. No lo deje cerca de una fuente de calor (radiador) ni en un auto con clima cálido o frío. -
Page 138: Mensajes De La Pantalla Y De Error
855.776.0662. Si no puede comunicarse con el servicio de atención al cliente, hable con su profesional de la salud. No envíe su medidor a ReliOn ni a un distribuidor local sin antes llamar para obtener ®... - Page 139 Su nivel de glucosa en sangre es inferior a 20 mg/dl o no había suficiente sangre en la tira de prueba. Repita la prueba con una tira nueva. Asegúrese de usar suficiente sangre para llenar la tira. Si este mensaje vuelve a aparecer, comuníquese de inmediato con su profesional de la salud.
- Page 140 La carga de la pila no alcanza para efectuar pruebas. Los resultados de las pruebas y los cambios no se guardan en la memoria. Cambie la pila. Consulte “Reemplazo de la pila” en la pág. 10. El medidor está defectuoso. Llame al servicio de atención al cliente al 855.776.0662.
- Page 141 Problema con la tira de prueba. Las barras de contacto de la tira de prueba pueden estar sucias. Se ha usado la tira de prueba incorrecta. Se ha insertado una tira de prueba usada. Repita la prueba con una tira nueva. Se aplicó...
- Page 142 Aplicar la solución de control. El símbolo Aplicar sangre parpadea y aparece “CONT” en la parte superior de la pantalla. Esto indica que el medidor está listo para que aplique la solución de control. Resultado de prueba. El medidor muestra resultados entre 20 y 600 mg/dl.
-
Page 143: Información Sobre El Producto
INFORMACIÓN SOBRE EL PRODUCTO Características técnicas del producto Tiras de prueba: Tiras de prueba ReliOn Confirm/Micro ® Intervalo de resultados: 20-600 mg/dl. Calibración: Con referencia a plasma. Volumen de la muestra: 0.3 µl como mínimo. Fuente de sangre: Sangre entera capilar recién obtenida. -
Page 144: Advertencias, Precauciones Y Limitaciones
Advertencias, precauciones y limitaciones • Es posible que obtenga resultados de prueba superiores a su valor real de glucosa si toma PAM (oxima de 1-metilpiridina-6-carbaldehído). Tomar medidas innecesarias para bajar el nivel de glucosa en sangre puede inducir graves síntomas de hipoglucemia, incluso un coma. •... - Page 145 (vitamina C), bilirrubina, triglicéridos y hemoglobina no interfieren con los resultados de glucosa en sangre obtenidos. • Los fármacos L-dopa, dopamina, metildopa, acetaminofén e ibuprofeno administrados externamente no interfieren con los resultados de glucosa en sangre del medidor ReliOn Micro si se toman en concentraciones ® terapéuticas.
- Page 146 • Utilice sólo sangre capilar recién obtenida. Absténgase de usar suero, plasma o sangre venosa entera. • No use el sistema de monitoreo de glucosa en sangre ReliOn Micro para ® realizar pruebas en recién nacidos, ya que no está validado para uso neonatal.
-
Page 147: Garantía
ReliOn Micro. ® ReliOn garantiza que el medidor de glucosa en sangre ReliOn Micro estará ® ® exento de defectos de materiales y mano de obra por un plazo de cinco años a partir de la fecha de compra original. - Page 148 Devoluciones Antes de devolver el medidor, es preciso que llame al servicio de atención al cliente ReliOn al 855.776.0662. Se le indicará cómo proceder para devolver el ® medidor. No se aceptará ningún medidor devuelto sin autorización. Distributed by: Wal-Mart Stores, Inc.