Table of Contents
Advertisement
Available languages
Available languages
Advertisement
Chapters
Table of Contents

Related Manuals for ReliOn Prime


Summary of Contents for ReliOn Prime
- Page 1 ™ Blood Glucose Monitoring System User Instruction Manual 83-04758B...
- Page 2 CAUTION: Before using any product to test your blood sugar (blood glucose), read all instructions and practice the test. Do all quality control checks as directed and consult with a diabetes healthcare professional. These recommendations apply to all blood glucose monitoring systems and are supported by the American Association of Diabetes Educators, the American Diabetes Association, the U.S.
-
Page 3: Table Of Contents
Important Information ....... .8 The ReliOn™ Prime System ......9 Understanding the ReliOn™... - Page 4 Alternate Site Testing (AST) ......28 Important Information About AST..... .28 Preparing to Test Your Blood Glucose From an Alternate Site 30 Performing a Blood Glucose Test From an Alternate Site .
- Page 5 Display Screen Images....... . .56 Caring For Your ReliOn™ Prime Blood Glucose Meter ..62 Cleaning the Meter .
-
Page 6: Introduction
INTRODUCTION Thank you for choosing the ReliOn™ Prime Blood Glucose Monitoring System. Frequent blood glucose testing is important. It tells you how your diabetes is affected by factors such as medication, diet, exercise, and stress management. Blood glucose test results can also tell you if your diabetes is changing in ways that affect your treatment plan. -
Page 7: Intended Use
Intended Use The ReliOn™ Prime Blood Glucose Monitoring System is intended for the quantitative measurement of glucose in fresh capillary whole blood samples drawn from the fingertips or palm. Testing is done outside the body (In Vitro Diagnostic Use). It is indicated for use at home (over the counter [OTC]) by persons with diabetes, or in clinical settings by healthcare professionals, as an aid to monitor the effectiveness of diabetes control. -
Page 8: Important Information
Important Information • Test results below 70 mg/dL indicate low blood glucose (hypoglycemia). • Test results above 240 mg/dL indicate high blood glucose (hyperglycemia). • If results are below 70 mg/dL or above 240 mg/dL, repeat the test. • If results continue to measure below 70 mg/dL or above 240 mg/dL consult your diabetes healthcare professional immediately. -
Page 9: The Relion™ Prime System
THE RELION™ PRIME SYSTEM The ReliOn™ Prime System Includes: • ReliOn™ Prime Meter • Carrying Case • User Instruction Manual • Other materials required but not provided: • ReliOn™ Prime Test Strips • Control Solution • Lancing Device and/or Lancets... -
Page 10: Understanding The Relion™ Prime Blood Glucose Meter
UNDERSTANDING THE RELION™ PRIME BLOOD GLUCOSE METER FRONT BACK Display Screen Data Connection Port Back Button Forward Button On/Off Button Test Strip Port Battery Compartment Cover... -
Page 11: Explanation Of The Full Display Screen
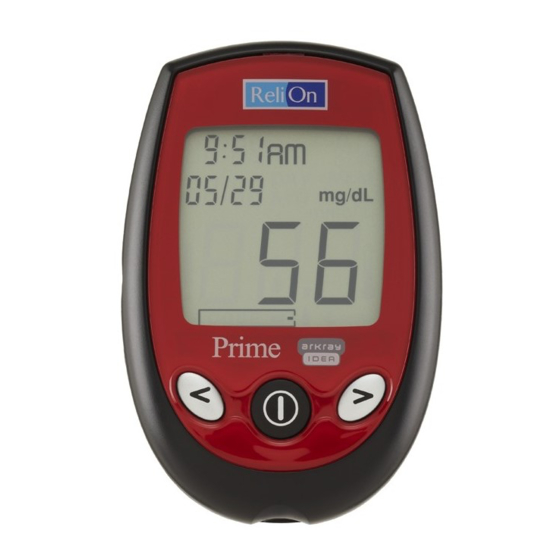
Explanation of the Full Display Screen Control Solution Test Battery Time Memory Mode Date Unit of Measurement Average Test Reading Error Code Temperature Result Warning Warning Main Display: Test Countdown Test Results Insert/Remove Error Codes Test Strip Test Strip Apply Blood If any part of the display screen is missing when the meter is turned on call Customer Service at 855.776.0662. -
Page 12: Relion™ Prime Test Strips
0.5 microliter (µL) of blood and provide an end-fill sample application tip for easy Test Strip Contact Bars blood application. The ReliOn™ Prime Blood Glucose Monitoring System measures the amount of glucose (sugar) in fresh capillary whole blood. When a drop of blood is added to the sample application tip, the sample is drawn into the test strip reaction site. -
Page 13: Testing With Relion™ Prime Test Strips
TESTING WITH RELION™ PRIME TEST STRIPS The ReliOn™ Prime Blood Glucose Monitoring System works with the ReliOn™ Prime Blood Glucose Test Strips. Important Test Strip Information • Store the test strip bottle in a cool, dry place between 39–86°F (4–30°C). -
Page 14: Important Test Strip Information
• Do not bend, cut, or alter a test strip. • Do not reuse a test strip. • Use only ReliOn™ Prime test strips with the ReliOn™ Prime meter. • Ensure your hands are clean and dry before handling test strips. -
Page 15: Changing The Battery
Changing the Battery The ReliOn™ Prime blood glucose meter has a CR2032 battery installed. NOTE: Changing the battery should only take a few seconds. If the battery is changed within 30 seconds, the meter memory is not affected. You will not lose any past test results and the settings are not affected. - Page 16 WARNING: Keep all batteries out of children’s reach. If a battery is swallowed, consult a doctor immediately. When the battery power is getting low, your meter shows . You have enough power for about 100 tests before you need to replace the battery. If the is flashing, there is only enough power for about 20 tests.
- Page 17 How to Change the Battery Step 1 Turn the meter off. The battery cover is on the back of the meter. Step 2 Pull the battery cover up with your finger or fingernail. Remove battery cover. Step 3 Remove the old battery. If necessary, turn the meter over and tap it gently against the palm of your hand until the battery falls out.
-
Page 18: Meter Setup
Meter Setup Before using the ReliOn™ Prime meter for the first time, you must set the time and date. You can choose between the 12-hour format (1–12 o’clock with am or pm) and the Military 24-hour format (0–23). The date format can either be displayed as month/day (U.S.A. - Page 19 Step 3: Set the time format The time can be displayed in either 24-hour format or 12-hour format with a.m. and p.m. The meter displays the current time format. To change format, press either the Back or Forward button. Press the On/Off button to select the time format.
- Page 20 Step 5: Set the hour Press and release the Back or Forward button to change the hour. Hold the Back or Forward button down to scroll through quickly. When the correct hour is displayed, press the On/Off button. The minute setting then flashes on the display. Step 6: Set the minute Hour flashing Press and release the Back or Forward button until the correct...
- Page 21 Step 8: Set the day (If day/month format is selected, then Step 8 will set month) Press and release the Back or Forward button until the correct day appears. Hold the Back or Forward button down to scroll through quickly. When the correct day is displayed, press the On/Off button.
-
Page 22: Blood Glucose Testing
BLOOD GLUCOSE TESTING Obtaining a Drop of Blood Step 1 Wash hands with soap and warm water. Dry hands thoroughly. If you use alcohol wipes to cleanse fingers, make sure the area is dry before lancing finger. Unwashed hands or residual alcohol may lead to inaccurate readings. - Page 23 Step 4 Press the depth adjustment cap to the side of the fingertip. Push the release button. Step 5 Set the lancing device aside and wait a few seconds for a blood drop to form. Keeping the hand warm, lowering the hand to waist level, and gently massaging your wrist, palm or the base of the finger helps the flow of blood.
-
Page 24: Performing A Blood Glucose Test
PERFORMING A BLOOD GLUCOSE TEST NOTE: For Instructions on Alternate Site Testing, refer to pages 28-35. Step 1 Insert a ReliOn™ Prime test strip into the meter. Insert the contact bars Test Strip Port Contact Bars into the test strip port with the reaction Reaction Site site facing up. - Page 25 The test strip and flashing blood drop tells you the meter is ready for you to apply a drop of blood to the sample application tip at the end of the test strip. Step 2 Lance your finger using the lancing device. Touch the sample application tip at the end of the test strip to the ‘Apply Blood’...
- Page 26 IMPORTANT: • The meter will start to count down showing a flashing dash when it detects blood that has been applied. Discard the test strip if the meter does not start to count down after a blood drop is applied. •...
- Page 27 The meter will count down showing a flashing dash. The result is displayed in 7 seconds. Step 3 Always record your results in your self-testing logbook Displaying the Result along with other information such as insulin dosage, diet, and exercise. The result is automatically stored in memory with the time and date.
-
Page 28: Alternate Site Testing (Ast)
ALTERNATE SITE TESTING (AST) Important Information About AST Sites other than your fingertip may have fewer nerve endings so obtaining a blood sample from these sites may be less painful. The technique for alternate site testing (AST) is different from fingertip testing. Blood glucose results from sites other than your fingertip could be significantly different due to blood glucose levels changing rapidly after a meal, insulin, or exercise. - Page 29 Consider Alternate Site Testing When: • Testing before a meal • You are in a fasting state • Two hours have passed since a meal • Two hours have passed since insulin dosing • Two hours have passed since physical activity Use Fingertip When Testing: •...
-
Page 30: Preparing To Test Your Blood Glucose From An Alternate Site
Ask your diabetes healthcare professional about recommended testing procedures before operating machinery or driving a car, as fingertip testing is usually the preferred method of testing under these circumstances. If bruising occurs, you may choose to lance a fingertip instead. Preparing to Test Your Blood Glucose From an Alternate Site Choose a Site: Select a soft, fleshy area on the... -
Page 31: Performing A Blood Glucose Test From An Alternate Site
Performing a Blood Glucose Test From an Alternate Site Step 1 Attach clear cap for AST to lancing device. Insert lancet and cock lancing device. Step 2 a) Insert a test strip into the meter. Insert contact bars into test strip port with reaction site facing up. - Page 32 b) Wait until the test strip with flashing blood drop appears. You now have 2 minutes to apply blood drop before meter shuts off. Step 3 a) Vigorously rub the selected area for 5 to 10 seconds until it starts to feel warm to the touch. b) Firmly hold the cocked lancing device against the clean skin for 5 to 10 seconds.
- Page 33 Step 4 Pick the meter up. Touch the end of the test strip to the blood sample until the reaction site is full. Immediately remove the meter and test strip from the blood drop. IMPORTANT: • Was the sample a deep red color and free of watery fluid? •...
- Page 34 Step 5 The meter will count down, showing a flashing dash and display result in 7 seconds. CONSIDER YOUR RESULT. REPEAT ALTERNATE SITE TEST: • IF the blood sample appeared to be diluted with clear fluid • IF you did not vigorously rub the test site •...
- Page 35 The result is automatically stored in memory with the time and date. If you do not have a logbook, call 855.776.0662, or visit ReliOn.com to obtain a free copy. Step 7 Remove the test strip and dispose of it carefully. A lancet should be used once.
-
Page 36: Using Control Solution
It is important that you carry out this simple check regularly. Control solution contains a known amount of glucose that reacts with the ReliOn™ Prime test strip. Control Solutions are available in two levels: Normal (Level 1) and High (Level 2). -
Page 37: Recommended Use Of Control Solution
39°F (4°C) or above 86°F (30°C), or humidity levels above 80%. • To check your technique. • When the ReliOn™ Prime meter has been dropped or stored below freezing or above 122°F (50°C). • Each time the batteries are changed. -
Page 38: Performing A Control Solution Test
Performing a Control Solution Test Before performing a control solution test, always check the expiration date ) of the control solution. Do not use control solution if it is past the expiration date or if the solution has not been stored correctly. When you open a new bottle of control solution, always write the date of opening on the control solution label. - Page 39 Step 1 Insert a ReliOn™ Prime test strip into the test strip port of the meter with contact bars facing up. The meter turns on automatically. The full screen appears briefly. If any part of the display screen is missing (see page 11), call Customer Service at 855.776.0662.
- Page 40 Step 2 You must press the Back or Forward button BEFORE performing control solution test. Hold the Back or Forward button until appears in the upper right corner of the screen. Verify that remains displayed on the screen. If you do not do this, the control solution result will NOT be valid.
- Page 41 Step 4 Bring meter and test strip to the drop. Test strip will draw up the solution. The meter will show result in 7 seconds. NOTE: Dye added to control solution may stain surfaces or fabric. Use with care. Step 5 Compare the result with the range printed on the test strip bottle you are using.
-
Page 42: Comparing Control Solution Results
• The test strip was used after the expiration date of the bottle • The test strip bottle was open for more than 90 days (3 months) • The ReliOn™ Prime meter has been damaged or has malfunctioned • Contamination due to the tip of the control solution bottle touching the... -
Page 43: Downloading Test Results To A Computer
NOTE: If your control solution result continues to fall outside the required range, the system may not be working correctly. DO NOT USE the system to test your blood. If you are unable to resolve the problem, call Customer Service at 855.776.0662. DOWNLOADING TEST RESULTS TO A COMPUTER We offer a diabetes management software system to help you download your test results to a computer. -
Page 44: Understanding Test Results
UNDERSTANDING TEST RESULTS NOTE: • The ReliOn™ Prime meter is designed to give results at temperatures between 41–113°F (5–45°C) and relative humidity (non-condensing) of 20–80%. • Before testing, always make sure the meter is at operating temperature between 50–104°F (10–40°C). Treat test results obtained outside the optimum temperature range with caution. - Page 45 Before You Compare Perform a control solution test to make sure your meter and test strips are working correctly. Wait at least 2 hours after a meal or drink (other than water) before doing comparison blood tests. Fasting is essential if venous blood is required for the reference analyzer.
- Page 46 You may still experience a difference from the laboratory result because blood glucose levels can change over short periods. This can be for a variety of reasons, such as food, exercise, medication, hematocrit, stress, or loss of body fluids. Data analysis should be performed using a clinically acceptable method. Circulating blood glucose fluctuates naturally over time.
-
Page 47: Expected Blood Glucose Readings
Expected Blood Glucose Readings Expected blood glucose levels for people without diabetes: mg/dL Fasting 70–110 mg/dL 2 hours after meals 70–140 mg/dL High Blood Glucose Readings If your blood glucose is above 600 mg/dL, you will receive a “Hi.” Repeat the test with a new test strip. -
Page 48: Low Blood Glucose Readings
Low Blood Glucose Readings If your blood glucose is below 20 mg/dL, you will receive a “Lo.” Repeat the test with a new test strip. If this message shows again, contact your healthcare professional immediately. Contact your physician for advice if test results are very low (below 70 mg/dL) and/or you have symptoms of low blood glucose. -
Page 49: What This Means For You
What This Means for You Frequent blood glucose testing is the best means you have for keeping track of how well you are doing with the factors that affect your diabetes- medication, diet, exercise, and stress management. Blood glucose test results can also tell you whether your diabetes is changing in ways that might require an adjustment to your treatment plan. -
Page 50: Recommendations For Better Diabetes Control
If you do not have a logbook, call 855.776.0662, or visit ReliOn.com to obtain a free copy. • Review your logbook of test results with your healthcare professional regularly. -
Page 51: Meter Memory
METER MEMORY Marking Results in the Memory You can mark results in the meter memory in two ways. Marking Control Solution Tests You must mark results with the control bottle symbol . Insert test strip into the meter. Hold the Back or Forward button until appears in the upper right corner of the screen. -
Page 52: Marking Other Results
Marking Other Results You can also mark results with an when you do NOT want to include the result in your 14- and 30-day average. For example, if someone else used your meter, or if you believe the test result is incorrect because you applied blood to the test strip incorrectly, use the exclamation mark to ensure that your 14- and 30-day average includes only those results from testing your own blood that you want included in your average. - Page 53 Step 2 Press the Back or Forward button to display the average of tests over the last 14 days. This can include 1 to 250 results, depending on how frequently you test. The number at the top (20n) shows the number of tests that have produced the average.
- Page 54 If a test has not been performed in the last 14 days the meter will display the 14-day average screen with 3 bars. This means there are no results stored to produce the average. If a test has not been performed in the last 30 days the meter will display the 30-day average screen with 3 bars.
- Page 55 Results marked with when the test was performed are not included in the average. The marked results can be seen when you scroll through the results saved in the memory. The memory mode also displays if the result was marked before using control solution.
-
Page 56: Display Screen Images
DISPLAY SCREEN MESSAGES A list of all display screen messages is included below. If you have any questions after reading these messages, or if the meter displays a message not listed here, call Customer Service at 855.776.0662. If the display screen shows , you should be able to clear the error message yourself. - Page 57 The battery has been replaced. Check that the time and date are set correctly. A used test strip has been inserted or the meter is having difficulty reading the test strip. Repeat the test with a new test strip. The battery power is getting low. There is enough power for approximately 100 tests before the battery needs to be replaced.
- Page 58 The battery power is low. There is only enough power for about 20 more tests. Replace with a new CR2032 battery as soon as possible. The battery power is too low for testing. Replace with a new CR2032 battery.
- Page 59 Thermometer flashing. The meter is outside the optimum temperature range of 50–104°F (10–40°C). Treat test results obtained where the thermometer is flashing with caution. The flashing thermometer will be displayed on all screens during glucose testing until the meter has reached acceptable temperature.
- Page 60 Thermometer symbol - E6. Temperature outside of acceptable range of 41–113°F (5–45°C). You will not obtain a reading. Allow the meter to warm up or cool down slowly to between 50–104°F (10–40°C) or at least to 41–113°F (5–45°C). • Before testing, always make sure the meter is at operating temperature between 50–104°F (10–40°C).
- Page 61 Corrupted memory. Call Customer Service at 855.776.0662. Not enough blood was added to the test strip. Retest with new test strip. Apply at least 0.5 µL of blood to sample application tip.
-
Page 62: Caring For Your Relion™ Prime Blood Glucose Meter
Storage The ReliOn™ Prime blood glucose meter is designed to be stored within a 32–122°F (0–50°C) temperature range. • Do not leave your meter in extremely hot or cold places such as near a heat... - Page 63 • Do not store or use your meter or test strips where they may be exposed to high humidity, such as in a bathroom or kitchen. • Never hold the meter or test strips under running water. • Do not use or store your meter on or near a strong electro-magnetic field such as a microwave oven, stereo amplifiers, or a mobile phone.
-
Page 64: Specifications
SPECIFICATIONS TEST STRIPS: RELION™ PRIME BLOOD GLUCOSE TEST STRIPS RESULT RANGE: 20–600 MG/DL CALIBRATION: PLASMA REFERENCED SAMPLE SIZE: MINIMUM 0.5 µL BLOOD SOURCE: CAPILLARY WHOLE BLOOD HEMATOCRIT RANGE: 33–52% TEST TIME: 7 SECONDS GLUCOSE UNITS: MG/DL ASSAY METHOD: BIOSENSOR, GLUCOSE OXIDASE ( ASPERGILLUS NIGER SOURCED) -
Page 65: Warnings, Precautions, And Limitations
WARNINGS, PRECAUTIONS, AND LIMITATIONS • The ReliOn™ Prime Blood Glucose Monitoring System is not designed to substitute for pathology laboratory equipment and should not be used for the diagnosis of diabetes. • Severe dehydration (excessive water loss) may cause false low results. If you believe you are suffering from dehydration, consult your healthcare professional immediately. - Page 66 • Do not use the ReliOn™ Prime system at altitudes in excess of 10,000 ft (3,048 m). • Triglycerides up to 3,300 mg/dL do not significantly affect test results. However, glucose values in specimens beyond this triglycerides level should be interpreted with caution.
-
Page 67: Warranty
WARRANTY You are a valued ReliOn™ customer of. It is important to us that you are completely satisfied with your blood glucose meter. ReliOn™ warrants that your meter will be free from defects in materials and workmanship for a period of five years from the date of the original purchase. - Page 68 You must contact Customer Service at 855.776.0662 before returning your meter. You will be instructed how to return the meter. Returned meters without this authorization will not be accepted. Distributed by: Wal-Mart Stores, Inc. Bentonville, AR 72716 855.776.0662 ReliOn.com P/N 7957-05 Rev 12/15...
- Page 69 ™ Sistema de monitoreo de glucosa en sangre Manual de instrucciones para el usuario 83-04758B...
- Page 70 PRECAUCIÓN: Antes de usar cualquier producto para hacerse un análisis de azúcar en sangre (glucosa en sangre, o glucemia), lea todas las instrucciones y practique la prueba. Lleve a cabo todas las verificaciones de control de calidad según las indicaciones y consulte con un profesional de atención diabetológica.
- Page 71 Tiras de prueba ReliOn™ Prime . . . . . . . . . . . . . . . . . . . . . . . . . .12 Realización de pruebas con las tiras ReliOn™ Prime . . . . . . . . . .13 Información importante sobre las tiras de prueba .
- Page 72 Pruebas con sangre extraída de lugares alternativos . . . . . . . . . .28 Información importante sobre las pruebas realizadas con sangre extraída de lugares alternativos . . . . . . . . . . . . . .28 Preparativos para la prueba de glucosa en sangre obtenida de un lugar alternativo .
- Page 73 Mensajes visualizados en la pantalla . . . . . . . . . . . . . . . . . . . . . .56 Cuidado del medidor de glucosa en sangre ReliOn™ Prime . . . .62 Limpieza del medidor .
-
Page 74: Introducción
Este manual contiene toda la información necesaria para utilizar el sistema de monitoreo de glucosa en sangre ReliOn™ Prime; sírvase leerlo detenidamente antes de usar el sistema. Si tiene preguntas, llame al servicio de atención al cliente al 855.776.0662. -
Page 75: Uso Previsto
Uso previsto El sistema de monitoreo de glucosa en sangre ReliOn™ Prime está diseñado para determinar cuantitativamente la glucosa en muestras de sangre entera capilar recién obtenida de las yemas de los dedos o la palma de la mano. La prueba se efectúa fuera del cuerpo (es decir, el sistema es para diagnóstico in vitro). -
Page 76: Información Importante
Información importante • Los resultados de prueba por debajo de 70 mg/dL indican niveles bajos de glucosa en la sangre (hipoglucemia). • Los resultados de prueba por encima de 240 mg/dL indican niveles altos de glucosa en la sangre (hiperglucemia). • Si obtiene resultados inferiores a 70 mg/dL o superiores a 240 mg/dL, repita la prueba . -
Page 77: El Sistema Relion™ Prime
EL SISTEMA RELION™ PRIME El sistema ReliOn™ Prime consta de los siguientes componentes: • Medidor ReliOn™ Prime • Estuche • Manual de instrucciones para el usuario • Otros materiales requeridos que no se suministran: • Tiras de prueba ReliOn™ Prime •... -
Page 78: Descripción Del Medidor De Glucosa En Sangre Relion™ Prime
DESCRIPCIÓN DEL MEDIDOR DE GLUCOSA EN SANGRE RELION™ PRIME CARA CARA ANTERIOR POSTERIOR Pantalla Orificio para la conexión de datos Botón de Botón de avance retroceso Botón de encendido y apagado Orificio de inserción de tiras de prueba Tapa del compartimiento... -
Page 79: Explicación De La Pantalla Completa
Explicación de la pantalla completa Prueba con Carga escasa solución de control de las pilas Hora Modo de memoria Fecha Unidad Promedio de medida de lecturas de prueba Advertencia Advertencia de resultado por de temperatura código de error P antalla principal: Cuenta regresiva de la prueba Introducir/Retirar Tira de prueba Resultados de prueba... -
Page 80: Tiras De Prueba Relion™ Prime
El sistema de monitoreo de glucosa en sangre ReliOn™ Prime mide la cantidad de glucosa (azúcar) en sangre entera capilar recién obtenida. Cuando se agrega una gota de sangre a la punta de aplicación, la muestra es atraída al interior de... -
Page 81: Realización De Pruebas Con Las Tiras Relion™ Prime
REALIZACIÓN DE PRUEBAS CON LAS TIRAS RELION™ PRIME El sistema de monitoreo de glucosa en sangre ReliOn™ Prime funciona con las tiras de prueba ReliOn™ Prime. Información importante sobre las tiras de prueba • Conserve el frasco de tiras de prueba en un lugar fresco y seco, a temperaturas de 39°F a 86°F (4°C a 30°C). -
Page 82: Información Importante Sobre Las Tiras De Prueba
• No doble, corte ni altere las tiras de prueba. • No vuelva a usar ninguna tira de prueba. • Utilice únicamente tiras de prueba ReliOn™ Prime con el medidor ReliOn™ Prime. • Asegúrese de tener las manos limpias y secas antes de tocar las... -
Page 83: Reemplazo De Las Pilas
Reemplazo de las pilas El medidor de glucosa en sangre ReliOn™ Prime tiene instalada una pila CR2032. NOTA: El proceso de cambiar la pila debe llevar solo unos segundos. Si la pila se cambia en un plazo de 30 segundos, la memoria del medidor no se verá afectada. - Page 84 ADVERTENCIA: Mantenga todas las pilas fuera del alcance de los niños. Si alguien se traga una pila, consulte con un médico inmediatamente. Cuando comienza a descargarse la pila, el medidor muestra . En este momento queda carga suficiente como para efectuar unas 100 pruebas antes de que sea necesario cambiar la pila .
- Page 85 Cómo cambiar la pila Paso 1 Apague el medidor . La tapa del compartimiento de la pila se encuentra en la parte posterior del medidor. Paso 2 Tire de la tapa del compartimiento de la pila con el dedo o una uña. Retire la tapa del compartimiento de la pila .
-
Page 86: Configuración Del Medidor
Configuración del medidor Antes de utilizar el medidor ReliOn™ Prime por primera vez, es preciso que configure la hora y la fecha. Para la hora, puede elegir entre el formato am y pm (12 horas, de 1 a 12) y el formato militar (24 horas, de 0 a 23). La fecha se puede visualizar en formato de mes/día (utilizado en EE. - Page 87 Paso 3: Ajuste el formato de la hora. La hora puede visualizarse tanto en formato de reloj militar (24 horas) como en formato de am y pm (12 horas). El medidor muestra el formato actual de la hora. Para cambiar de formato, oprima el botón de retroceso o avance. Oprima el botón de encendido y apagado para seleccionar el formato de la hora.
- Page 88 Paso 5: Ajuste la hora. Oprima y suelte el botón de retroceso o avance para cambiar la hora. Mantenga oprimido el botón de retroceso o avance para recorrer los valores rápidamente. Cuando aparezca la hora correcta, oprima el botón de encendido y apagado. A continuación destellará...
- Page 89 Paso 8: Ajuste el día. (Si se ha seleccionado el formato día/mes, el paso 8 permite fijar el mes). Oprima y suelte el botón de retroceso o avance hasta que aparezca el día correcto. Mantenga oprimido el botón de retroceso o avance para recorrer los valores rápidamente . Cuando aparezca el día correcto, oprima el botón de encendido y Día destellando apagado.
-
Page 90: Prueba De Glucosa En Sangre
PRUEBA DE GLUCOSA EN SANGRE Obtención de una gota de sangre Paso 1 Lávese las manos con jabón y agua tibia y séqueselas bien. Si usa toallitas con alcohol para limpiar el dedo, asegúrese de que la piel esté seca antes de pincharla con la lanceta. Manos sucias o restos de alcohol puede causar resultados inexactos. - Page 91 Paso 5 Retire el dispositivo de punción y espere unos segundos para que se forme una gota de sangre. Para facilitar el flujo de sangre, mantenga caliente la mano, baje la mano a la altura de la cadera y masajéese suavemente la muñeca, la palma de la mano o la base del dedo.
-
Page 92: Realización De Una Prueba De Glucosa En Sangre
En las páginas 28-35 encontrará instrucciones para extraer sangre de lugares distintos a las yemas de los dedos . Paso 1 Introduzca una tira de prueba ReliOn™ Prime Orificio de inserción en el medidor. Introduzca las barras de de tiras de prueba contacto en el orificio de inserción de tiras... - Page 93 El icono de la tira de prueba con la gota de sangre destellante indica que el medidor está listo para que se aplique una gota de sangre a la punta de aplicación de muestras situada en el extremo de la tira. Paso 2 Pínchese el dedo con el dispositivo de punción.
- Page 94 IMPORTANTE: • En cuanto detecte que se ha aplicado la sangre, el medidor iniciará una cuenta regresiva y mostrará un guión destellante. Si el medidor no inicia la cuenta regresiva después de que se ha aplicado la gota de sangre, deseche la tira de prueba .
- Page 95 El medidor hará una cuenta regresiva mostrando un guión destellante y presenta el resultado al cabo de 7 segundos . Visualización del resultado Paso 3 Anote siempre los resultados en su libreta de registro, junto con otra información como dosis de insulina, dieta y ejercicios. El resultado se almacena automáticamente en la memoria, junto con la fecha y la hora de la prueba .
-
Page 96: Pruebas Con Sangre Extraída De Lugares Alternativos
PRUEBAS CON SANGRE EXTRAÍDA DE LUGARES ALTERNATIVOS Información importante sobre las pruebas realizadas con sangre extraída de lugares alternativos Ciertas partes del cuerpo tienen menos terminaciones nerviosas que las yemas de los dedos, por lo cual obtener una muestra de sangre de esos lugares podría causar menos dolor. - Page 97 En promedio, la sangre extraída de la palma de la mano puede dar resultados hasta un 5% superiores a los de la sangre procedente de la yema de un dedo. Considere la posibilidad de hacerse pruebas con sangre obtenida de lugares alternativos cuando: •...
-
Page 98: Preparativos Para La Prueba De Glucosa En Sangre
Consulte con su profesional de atención diabetológica sobre los procedimientos de prueba recomendados antes de manejar maquinaria o vehículos, ya que generalmente en estas circunstancias es preferible hacerse pruebas con sangre obtenida de la yema de los dedos . Si le salen moretones, quizás le convenga analizar sangre de la yema del dedo en vez de hacerse pruebas en otro lugar. -
Page 99: Realización De Una Prueba De Glucosa En Sangre
Realización de una prueba de glucosa en sangre obtenida de un lugar alternativo Paso 1 Coloque la tapa transparente para pruebas en lugares alternativos en el dispositivo de punción. Inserte la lanceta y prepare el dispositivo de punción para disparar. Paso 2 a) Inserte una tira de prueba en el medidor. - Page 100 b) Espere hasta que aparezca la tira con la gota de sangre destellante . A partir de este momento tiene 2 minutos para aplicar la gota de sangre antes de que el medidor se apague . Paso 3 a) Frote enérgicamente el lugar seleccionado durante 5 a 10 segundos hasta que comience a estar caliente al tacto .
- Page 101 Paso 4 Levante el medidor y ponga el extremo de la tira de prueba en contacto con la muestra de sangre, hasta que se llene la zona reactiva. Retire inmediatamente el medidor y la tira de prueba de la gota de sangre. IMPORTANTE •...
- Page 102 Paso 5 El medidor hará una cuenta regresiva mostrando un guión destellante y presentará el resultado al cabo de 7 segundos . EVALÚE SU RESULTADO. REPITA LA PRUEBA EN EL LUGAR ALTERNATIVO: • SI la gota de sangre parecía estar diluida con un líquido transparente •...
- Page 103 El resultado se almacena automáticamente en la memoria, junto con la fecha y la hora de la prueba. Si no tiene un libro de registro llame al 855.776.0662, o visite ReliOn.com para obtener una copia gratis. Paso 7 Extraiga la tira de prueba y deséchela cuidadosamente. Una lanceta debe utilizarse una sola vez.
-
Page 104: Uso De La Solución De Control
La solución de control contiene una cantidad conocida de glucosa que reacciona con las tiras de prueba ReliOn™ Prime. Las soluciones de control están disponibles en dos niveles: normal (nivel 1) y alto (nivel 2). Compare los resultados obtenidos con solución de control con el intervalo impreso en la etiqueta del frasco de tiras de prueba. -
Page 105: Uso Recomendado De La Solución De Control
80%. • Para verificar su técnica. • Si el medidor ReliOn™ Prime se ha dejado caer o se ha guardado por debajo de la temperatura de congelación o por encima de 122°F (50°C). -
Page 106: Realización De Una Prueba Con Solución De Control
Realización de una prueba con solución de control Antes de efectuar una prueba con solución de control, revise siempre la fecha de vencimiento ( ) que aparece en la etiqueta del frasco. No utilice solución de control vencida o que haya sido mal almacenada. Cuando abra un frasco nuevo de solución de control, anote siempre la fecha de apertura en su etiqueta. - Page 107 Paso 1 Introduzca una tira de prueba ReliOn™ Prime en su orificio en el medidor, orientando las barras de contacto hacia arriba. El medidor se enciende automáticamente. Aparece brevemente la pantalla completa . Si falta cualquier dato de la pantalla (página 11), llame al servicio de atención al cliente, 855.776.0662.
- Page 108 Paso 2 Es imprescindible oprimir el botón de retroceso o avance ANTES de realizar una prueba con solución de control. Mantenga oprimido el botón de retroceso o avance hasta que en la esquina superior derecha de la pantalla aparezca . Verifique que permanece en la pantalla.
- Page 109 Paso 4 Acerque el medidor y la tira de prueba a la gota . La tira de prueba atraerá la solución a su interior. El medidor mostrará el resultado al cabo de 7 segundos . NOTA: El colorante presente en la solución de control puede manchar las superficies o la ropa.
-
Page 110: Comparación De Los Resultados Obtenidos
• El frasco de tiras de prueba ha estado abierto por más de 90 días (3 meses). • El medidor ReliOn™ Prime está dañado o ha fallado. • Se contaminó la solución de control porque la punta del frasco tocó la tira... -
Page 111: Descarga De Los Resultados De Prueba En Una Computadora
Repita la prueba con cuidado, siguiendo las instrucciones al pie de la letra; ponga el medidor en modo de solución de control, y utilice solución de control fresca o una nueva tira (según corresponda). Compare el resultado con el intervalo impreso en el frasco de tiras de prueba utilizado. NOTA: Si el resultado de la solución de control sigue sobrepasando los límites requeridos, significa que posiblemente el sistema no está... -
Page 112: Interpretación De Los Resultados De La Prueba
50–104ºF (10–40ºC). Comparación de resultados del medidor con los de laboratorio El medidor de glucosa en sangre ReliOn™ Prime hace referencia a valores de glucosa en sangre con plasma recién obtenida. La calibración se realizó en un laboratorio clínico con un patrón estándar de glucosa NIST (National Institute... - Page 113 Antes de comparar Realice una prueba con solución de control para asegurarse de que tanto el medidor como las tiras estén funcionando debidamente. Antes de hacer pruebas de comparación con sangre, espere al menos 2 horas después de haber comido o bebido cualquier cosa que no sea agua. Es esencial ayunar si el analizador de referencia requiere sangre venosa.
- Page 114 A pesar de seguir estas pautas, quizás note diferencias respecto al resultado del laboratorio porque los niveles de glucosa en sangre pueden variar en poco tiempo. Estas variaciones pueden deberse a múltiples razones, tales como el consumo de alimentos, el ejercicio, los medicamentos tomados, el valor del hematocrito, el estrés y la pérdida de líquidos corporales.
-
Page 115: Lecturas Esperadas De Glucosa En Sangre
Lecturas esperadas de glucosa en sangre Niveles de glucosa en sangre esperados en personas sin diabetes: mg/dl En ayunas 70–110 mg/dL 2 horas después de las comidas 70–140 mg/dL Lecturas altas de glucosa en sangre Si su valor de glucosa en sangre es superior a 600 mg/dL, aparecerá “Hi”. Repita la prueba con una tira nueva. -
Page 116: Lecturas Bajas De Glucosa En Sangre
Lecturas bajas de glucosa en sangre Si su valor de glucosa en sangre es inferior a 20 mg/dL, aparecerá “Lo.” Repita la prueba con una tira nueva. Si este mensaje vuelve a aparecer, comuníquese de inmediato con su profesional de la salud. Consulte con su médico si sus resultados de prueba son muy bajos (inferiores a 70 mg/dL) o usted tiene síntomas de bajas concentraciones de glucosa en la sangre. - Page 117 Lo que esto significa para usted Hacerse pruebas frecuentes de glucosa en sangre es la mejor manera de comprobar el efecto de los factores que influyen en la diabetes: medicamentos, dieta, ejercicio y control del estrés. Además, los resultados de las pruebas de glucosa en sangre pueden advertirle de cualquier cambio en su diabetes que podría requerir un ajuste de su plan terapéutico.
- Page 118 Recomendaciones para mejorar el control de la diabetes • Siga las recomendaciones de su profesional de la salud. • Siga los planes de ejercicio y comidas que le recomiende su profesional de la salud . • Póngase la insulina o tome su medicamento para la diabetes a la hora prevista .
-
Page 119: Memoria Del Medidor
MEMORIA DEL MEDIDOR Marcado de los resultados en la memoria Los resultados almacenados en la memoria del medidor se pueden marcar de dos maneras. Marcado de pruebas con la solución de control Es preciso que marque los resultados obtenidos con el símbolo del frasco de control . -
Page 120: Marcado De Otros Resultados
Marcado de otros resultados También puede marcar resultados con un cuando NO desee incluirlos en los promedios de 14 o 30 días. Por ejemplo, si alguna otra persona usó su medidor o si cree que el resultado de prueba es incorrecto porque aplicó mal la sangre a la tira de prueba, active la marca del signo de admiración para garantizar que el promedio de 14 y 30 días contenga solo aquellos resultados de su propia sangre que usted desee incluir. - Page 121 Paso 2 Oprima el botón de retroceso o avance para ver el promedio de las pruebas realizadas a lo largo de los últimos 14 días. Este promedio puede incluir entre 1 y 250 resultados, dependiendo de la frecuencia con que usted se haya hecho pruebas. El número en la Visualización del parte superior (20n) representa la cantidad de pruebas promedio (14 días)
- Page 122 Si no se ha realizado ninguna prueba en los últimos 14 días, el medidor mostrará la pantalla de promedio de 14 días con tres barras. Esto significa que no hay ningún resultado almacenado para producir el promedio. Si no se ha realizado ninguna prueba en los últimos 30 días, el medidor mostrará...
- Page 123 Los resultados que se marcaron con el signo cuando se realizó la prueba no se incluyen en el promedio. Es posible ver los resultados marcados cuando se recorren los valores guardados en la memoria . El modo de memoria muestra también si el resultado se marcó...
-
Page 124: Mensajes Visualizados En La Pantalla
MENSAJES VISUALIZADOS EN LA PANTALLA A continuación se presenta una lista de todos los mensajes que pueden aparecer en la pantalla . Si tiene preguntas después de leer estos mensajes, o si el medidor muestra un mensaje que no se describe aquí, llame al servicio de atención al cliente al 855.776.0662. - Page 125 Se ha cambiado la pila. Compruebe que la hora y la fecha sean las correctas. Se ha introducido una tira usada o el medidor tiene problemas para leerla . Repita la prueba con una tira nueva. La pila se está comenzando a descargar. Hay suficiente carga como para efectuar unas 100 pruebas antes de que sea necesario cambiar la pila.
- Page 126 Escasea la carga en la pila. Solo hay suficiente carga como para efectuar unas 20 pruebas más. Cambie la pila por una CR2032 nueva lo antes posible. La carga de la pila no alcanza para efectuar pruebas. Instale una nueva pila CR2032.
- Page 127 El termómetro está destellando. El medidor está fuera de los límites óptimos de temperatura: 50–104°F (10–40°C). Trate con cautela el resultado de prueba obtenido cuando el termómetro destella. Este símbolo destellará en todas las pantallas durante las pruebas de glucosa hasta que el medidor alcance una temperatura aceptable;...
- Page 128 Símbolo de termómetro - E6. La temperatura está fuera de los límites aceptables de 41–113°F (5–45°C). No se obtendrá ninguna lectura. Deje que el medidor se entibien o enfríen lentamente a 50–104°F (10–40°C) o al menos a 41–113°F (5–45°C). • Antes de realizar una prueba siempre asegúrese de que el medior este a una temperatura de funcionamiento de entre 50–104°F (10–40°C).
- Page 129 La memoria está dañada. Llame al servicio de atención al cliente al 855 .776 .0662 . No se agregó suficiente sangre a la tira de prueba. Repita la prueba con una tira nueva. Agregue por lo menos 0.5 µL de sangre a la punta de aplicación de muestras .
-
Page 130: Cuidado Del Medidor De Glucosa En Sangre Relion™ Prime
RELION™ PRIME. Limpieza del medidor El medidor de glucosa en sangre ReliOn™ Prime es un instrumento preciso que debe manejarse con sumo cuidado. Limpie el exterior del medidor únicamente con un paño húmedo; la suciedad, el polvo, la sangre, la solución de control y el agua pueden averiarlo. - Page 131 • No coloque nunca el medidor ni las tiras de prueba bajo un chorro de agua. • No utilice ni almacene el medidor en presencia o en las cercanías de un fuerte campo electromagnético, como por ejemplo un horno de microondas, amplificadores de equipos de sonido o teléfonos celulares.
-
Page 132: Características Técnicas
CARACTERÍSTICAS TÉCNICAS TIRAS DE PRUEBA: TIRAS DE PRUEBA RELION™ PRIME INTERVALO DE RESULTADOS: 20–600 MG/DL CALIBRACIÓN: CON REFERENCIA A PLASMA VOLUMEN DE LA MUESTRA: 0.5 µL COMO MĺNIMO FUENTE DE SANGRE: SANGRE ENTERA CAPILAR INTERVALO DE HEMATOCRITO: 33–52% DURACIÓN DE LA PRUEBA:... -
Page 133: Advertencias, Precauciones Y Limitaciones
ADVERTENCIAS, PRECAUCIONES Y LIMITACIONES • El sistema de monitoreo de glucosa en sangre ReliOn™ Prime no está destinado a sustituir el equipo de un laboratorio de patología, y por lo tanto no debe emplearse para efectuar un diagnóstico de diabetes. - Page 134 • No utilice el sistema ReliOn™ Prime en lugares por encima de 10,000 pies (3,048 m) de altitud . • Lá presencia de triglicéridos en concentraciones de hasta 3,300 mg/dL no altera significativamente los resultados de prueba. Sin embárgo, los valores de glucosa en muestras que contengan más de este nivel de triglicéridos...
-
Page 135: Garantía
Si durante este plazo el medidor no funciona debidamente porque tiene defectos en los materiales o la mano de obra, ReliOn™ se compromete a reemplazar o reparar gratuitamente cualquiera y todos los componentes que demuestren estar defectuosos y estén sujetos a la garantía. - Page 136 Antes de devolver el medidor, es preciso que llame al servicio de atención al cliente al 855.776.0662. Se le indicará cómo proceder para devolver el medidor. No se aceptará ningún medidor devuelto sin autorización. Distributed by: Wal-Mart Stores, Inc. Bentonville, AR 72716 855.776.0662 ReliOn.com N.o de ref. 7957-05 Rev. 12/15...