Table of Contents
Advertisement
EN
Dear Customer,
Gigaset Communications GmbH is the legal successor to
Siemens Home and Office Communication Devices GmbH &
Co. KG (SHC), which in turn continued the Gigaset business
of Siemens AG. Any statements made by Siemens AG or
SHC that are found in the user guides should therefore be
understood as statements of Gigaset Communications
GmbH.
We hope you enjoy your Gigaset.
DE
Sehr geehrte Kundin, sehr geehrter Kunde,
die Gigaset Communications GmbH ist Rechtsnachfolgerin
der Siemens Home and Office Communication Devices
GmbH & Co. KG (SHC), die ihrerseits das Gigaset-Geschäft
der Siemens AG fortführte. Etwaige Erklärungen der
Siemens AG oder der SHC in den Bedienungsanleitungen
sind daher als Erklärungen der Gigaset Communications
GmbH zu verstehen.
Wir wünschen Ihnen viel Freude mit Ihrem Gigaset.
FR
Chère Cliente, Cher Client,
la société Gigaset Communications GmbH succède en droit
à Siemens Home and Office Communication Devices GmbH
& Co. KG (SHC) qui poursuivait elle-même les activités Giga-
set de Siemens AG. Donc les éventuelles explications de Sie-
mens AG ou de SHC figurant dans les modes d'emploi
doivent être comprises comme des explications de Gigaset
Communications GmbH.
Nous vous souhaitons beaucoup d'agrément avec votre
Gigaset.
IT
Gentile cliente,
la Gigaset Communications GmbH è successore della Sie-
mens Home and Office Communication Devices GmbH &
Co. KG (SHC) che a sua volta ha proseguito l'attività della
Siemens AG. Eventuali dichiarazioni della Siemens AG o
della SHC nei manuali d'istruzione, vanno pertanto intese
come dichiarazioni della Gigaset Communications GmbH.
Le auguriamo tanta soddisfazione con il vostro Gigaset.
NL
Geachte klant,
Gigaset Communications GmbH is de rechtsopvolger van
Siemens Home and Office Communication Devices GmbH &
Co. KG (SHC), de onderneming die de Gigaset-activiteiten
van Siemens AG heeft overgenomen. Eventuele uitspraken
of mededelingen van Siemens AG of SHC in de gebruiksaan-
wijzingen dienen daarom als mededelingen van Gigaset
Communications GmbH te worden gezien.
Wij wensen u veel plezier met uw Gigaset
ES
Estimado cliente,
la Gigaset Communications GmbH es derechohabiente de la
Siemens Home and Office Communication Devices GmbH &
Co. KG (SHC) que por su parte continuó el negocio Gigaset
de la Siemens AG. Las posibles declaraciones de la
Siemens AG o de la SHC en las instrucciones de uso se
deben entender por lo tanto como declaraciones de la Giga-
set Communications GmbH.
Le deseamos que disfrute con su Gigaset.
PT
SCaros clientes,
Gigaset Communications GmbH é a sucessora legal da Sie-
mens Home and Office Communication Devices GmbH &
Co. KG (SHC), que, por sua vez, deu continuidade ao sector
de negócios Gigaset, da Siemens AG. Quaisquer declara-
ções por parte da Siemens AG ou da SHC encontradas nos
manuais de utilização deverão, portanto, ser consideradas
como declarações da Gigaset Communications GmbH.
Desejamos que tenham bons momentos com o seu Gigaset.
Issued by
Gigaset Communications GmbH
Schlavenhorst 66, D-46395 Bocholt
Gigaset Communications GmbH is a trademark
licensee of Siemens AG
DA
FI
SV
NO
EL
HR
.
SL
Kære Kunde,
Gigaset Communications GmbH er retlig efterfølger til Sie-
mens Home and Office Communication Devices GmbH &
Co. KG (SHC), som fra deres side videreførte Siemens AGs
Gigaset-forretninger. Siemens AGs eller SHCs eventuelle
forklaringer i betjeningsvejledningerne skal derfor forstås
som Gigaset Communications GmbHs forklaringer.
Vi håber, du får meget glæde af din Gigaset.
Arvoisa asiakkaamme,
Gigaset Communications GmbH on Siemens Home and
Office Communication Devices GmbH & Co. KG (SHC)-yri-
tyksen oikeudenomistaja, joka jatkoi puolestaan Siemens
AG:n Gigaset-liiketoimintaa. Käyttöoppaissa mahdollisesti
esiintyvät Siemens AG:n tai SHC:n selosteet on tämän
vuoksi ymmärrettävä Gigaset Communications GmbH:n
selosteina.
Toivotamme Teille paljon iloa Gigaset-laitteestanne.
Kära kund,
Gigaset Communications GmbH övertar rättigheterna från
Siemens Home and Office Communication Devices GmbH &
Co. KG (SHC), som bedrev Gigaset-verksamheten efter Sie-
mens AG. Alla förklaringar från Siemens AG eller SHC i
användarhandboken gäller därför som förklaringar från
Gigaset Communications GmbH.
Vi önskar dig mycket nöje med din Gigaset.
Kjære kunde,
Gigaset Communications GmbH er rettslig etterfølger etter
Siemens Home and Office Communication Devices GmbH &
Co. KG (SHC), som i sin tur videreførte Gigaset-geskjeften i
Siemens AG. Eventuelle meddelelser fra Siemens AG eller
SHC i bruksanvisningene er derfor å forstå som meddelelser
fra Gigaset Communications GmbH.
Vi håper du får stor glede av din Gigaset-enhet.
Αγαπητή πελάτισσα, αγαπητέ πελάτη,
η Gigaset Communications GmbH είναι η νομική διάδοχος της
Siemens Home and Office Communication Devices GmbH &
Co. KG (SHC), η οποία έχει αναλάβει την εμπορική
δραστηριότητα Gigaset της Siemens AG. Οι δηλώσεις της
Siemens AG ή της SHC στις οδηγίες χρήσης αποτελούν
επομένως δηλώσεις της Gigaset Communications GmbH.
Σας ευχόμαστε καλή διασκέδαση με τη συσκευή σας Gigaset.
Poštovani korisnici,
Gigaset Communications GmbH pravni je sljednik tvrtke
Siemens Home and Office Communication Devices GmbH &
Co. KG (SHC), koji je nastavio Gigaset poslovanje tvrtke
Siemens AG. Zato sve izjave tvrtke Siemens AG ili SHC koje
se nalaze u uputama za upotrebu treba tumačiti kao izjave
tvrtke Gigaset Communications GmbH.
Nadamo se da sa zadovoljstvom koristite svoj Gigaset
uređaj.
Spoštovani kupec!
Podjetje Gigaset Communications GmbH je pravni naslednik
podjetja Siemens Home and Office Communication Devices
GmbH & Co. KG (SHC), ki nadaljuje dejavnost znamke
Gigaset podjetja Siemens AG. Vse izjave podjetja Siemens
AG ali SHC v priročnikih za uporabnike torej veljajo kot izjave
podjetja Gigaset Communications GmbH.
Želimo vam veliko užitkov ob uporabi naprave Gigaset.
© Gigaset Communications GmbH 2008
All rights reserved.
Subject to availability. Rights of modifications
reserved.
www.gigaset.com
Advertisement
Table of Contents

Related Manuals for Siemens Gigaset S100


Summary of Contents for Siemens Gigaset S100
- Page 1 Nadamo se da sa zadovoljstvom koristite svoj Gigaset de la Siemens AG. Las posibles declaraciones de la uređaj. Siemens AG o de la SHC en las instrucciones de uso se deben entender por lo tanto como declaraciones de la Giga- Spoštovani kupec! set Communications GmbH.
- Page 2 Devices GmbH & Co. KG (SHC), kroz koju je nastavljeno poslovanje kompanije Gigaset kao dela Siemens AG. Stoga sve izjave od strane Siemens AG ili SHC koje se mogu naći u korisničkim uputstvima treba tumačiti kao izjave kompanije Gigaset Communications GmbH.
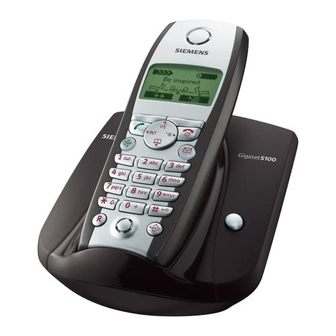
- Page 3 Be inspired...
- Page 4 Issued by Information and Communication mobile Haidenauplatz 1 D-81667 Munich © Siemens AG 2003 All rights reserved. Subject to availability. Right of modification reserved. Printed in Germany (03/2003). Siemens Aktiengesellschaft http://www.my-siemens.com...
- Page 5 Brief overview of the handset Brief overview of the handset Reception strength Display (display field) Talk key Charging status = flat U full Accept a call = flashes: Battery Dial number almost flat or battery Switch from handsfree being charged to "handset"...
-
Page 6: Table Of Contents
Contents Contents Brief overview of the handset ....1 Safety precautions ......5 Preparing the telephone . - Page 7 Contents SMS (text messages) ..... . . 41 General ............41 Prerequisites for sending and receiving text messages (SMS) .
- Page 8 Contents Operating several handsets ....84 Making internal calls ..........84 Changing the name of a handset .
- Page 9 Contents Accessories ......119 Menu table ......121 Main menu .
-
Page 10: Safety Precautions
Safety precautions Safety precautions Only use the power supply unit supplied, as indicated on the underside of the base station. Only use approved rechargeable batteries (page 115) of the same type! I. e. no other type of rechargeable batteries or non-rechargeable batteries because otherwise health risks and personal injuries cannot be excluded. -
Page 11: Preparing The Telephone
Preparing the telephone Preparing the telephone The package contains the following: one base station Gigaset S 100 or S 150, one handset S 1, one power supply unit and cable, one telephone cord, one belt clip for the handset, two batteries, one set of operating instructions. -
Page 12: Connecting The Base Station
Preparing the telephone Connecting the base station Telephone socket Cable duct Telephone plug Underneath of with telephone base station cable (magnified) Insert the small plug on the telephone cable into the jack (clicks into place), place cable in the cable duct, insert telephone jack into the telephone socket. -
Page 13: Operating The Handset
Preparing the telephone Operating the handset Remove the protective plastic film The display is protected by a plastic film. Remove the protective plastic film! Insert the batteries Insert the batteries ensuring correct polarity – see figure on left. Place the cover about 3 mm down lower and then push upwards until it clicks into place, To open, press the grooved area on the cover and slide back. - Page 14 Preparing the telephone Placing the handset into the base station and charging the batteries If you place the handset on the base station, it automatically registers. This can be done as follows: 1. Place the handset in the base station with the display facing upward. 2.
-
Page 15: Attaching The Belt Clip
Preparing the telephone Attaching the belt clip Push the belt clip onto the back of the handset until the side protrusions click into place. Activating/deactivating the handset To activate the handset hold down the end call key a. You will hear a confirmation beep (rising tone sequence). -
Page 16: Using The Telephone And Menus
Using the telephone and menus Using the telephone and menus Keys Control key The control key is the central operating element. It has four arrows and the correspond- ing icons. Pressing the various icons (up, down, right or left) opens a different function. The side you have to press is shown by a black triangle in the operating instructions, e.g.: v key for right = open menu. -
Page 17: Correcting Entries
Using the telephone and menus Display keys The display keys are the horizontal buttons directly below the display. Their functions depend on the operating situation. The current function is shown directly above the button in the display. Example: • §§§§§§§SMS§§§§§ Display keys The various displays have the following meaning: Display... -
Page 18: Idle State
Using the telephone and menus Idle state Display in idle state (example) Gigaset S 100 Ð Date and time have already been set INT 1 20.05.03 09:45 • Gigaset S 150 Ð × The date and time INT 1 have already been 20.05.03 09:45 •... -
Page 19: Date And Time Functions
Date and time functions Date and time functions Setting the date and the time You need to set the date and time so that they can be displayed correctly when calls / messages (S 150) are received. You can set the clock mode to either 12 hour or 24 hour (factory setting) (am = 1st part of the day;... - Page 20 Date and time functions Activating and setting the alarm clock If you want to use your handset as an alarm clock, you have to set the alarm time, choose a melody and activate the alarm clock. Open the menu. Select the menu item and confirm. [______________________________________________] Calendar/Clock Select the menu item and confirm.
-
Page 21: Setting Appointments
Date and time functions Setting appointments You can have your handset remind you of up to five appointments. To do this you have to save the times. Activating and setting appointments Open the menu. Select the menu item and confirm. [______________________________________________] Calendar/Clock Confirm. -
Page 22: Displaying And Deleting Missed Appointments And Anniversaries
Date and time functions Cancelling an appointment Open the menu. Select the menu item and confirm. [______________________________________________] Calendar/Clock Confirm. [______________________________________________] Set Appoints. Select the appointment (1 - 5) and confirm. [______________________________________________] Appoint. 2 Select setting Off. Press the display key to save the setting. [RRRRRRRRRRRRRRRRRRRRRR] Save Switching off or answering an appointment alarm... -
Page 23: Making Calls
Making calls Making calls Making and ending external calls External calls are calls into the public telephone network. Enter the telephone number and press the talk key. The telephone number is dialled. Ending a call: Press the end call key. You can also first press the talk key c (you will hear the dial tone) and then enter the telephone number. -
Page 24: Calling Line Identification
Making calls Calling line identification The caller's number or name will be shown. Prerequisites: 1. You have asked your network provider to have the caller's telephone number (CLIP) or name (CNIP) shown on your display. 2. The caller has asked his or her network provider to have the telephone number shown (CLI). -
Page 25: Handsfree Talking
Making calls Handsfree talking Activating/deactivating handsfree talking Activating while dialling: Enter the telephone number and press the handsfree key (instead of the talk key c ). Activating during a call: Press the handsfree key. Deactivating handsfree talking: Press the talk key As soon as you end handsfree talking, you switch to "handset operation"... -
Page 26: Activating/Deactivating Listening In (At The Base Station) (Only S 150)
Making calls Activating/deactivating listening in (at the base station) (only S 150) You can switch on the base station loudspeaker so that other people in the room can hear what your external caller on the telephone is saying. Prerequisite: You are making a call. Open the menu. -
Page 27: Using The Directory And Other Lists
Using the directory and other lists Using the directory and other lists Directory and speed dial list The directory and speed dial list can store up to 200 telephone numbers depending on the length of the entries, the number of entries in the speed dial list and the email direc- tory (page 36). - Page 28 Using the directory and other lists Saving telephone numbers in the directory Open the directory. Confirm. [______________________________________________] New Entry Write the entry Enter the telephone number. Scroll to the next line and enter the name. either ... Saving the telephone number: à...
- Page 29 Using the directory and other lists Saving numbers in the speed dial list You can assign up to nine entries in the speed dial list to one of the numbers 0, 2 to 9. Already assigned numbers will not be offered. If you hold down one of these numbers in the idle state and press the talk key c you will be immediately connected to the tel- ephone number assigned to that number.
- Page 30 Using the directory and other lists Dialling with the directory/speed dial list Open the directory/speed dial list. either ... Scroll to the entry: Select the entry. Press the talk key The telephone number is dialled. or ... Enter the first letter: Enter the first letter of the name you are looking for, e.g.
- Page 31 Using the directory and other lists Copying and changing a directory entry To avoid having to enter two very similar entries twice, you can make and edit a copy. Open the directory. Select the entry and open the menu. Select the menu item and confirm. [______________________________________________] Copy and Edit Change the telephone number.
- Page 32 Using the directory and other lists Marking an directory entry as VIP You can mark the directory entries for callers who are particularly important as VIP (Very Important Person) using Æ . You can assign a particular ringer melody to a VIP number so you can tell from the tone who is phoning.
- Page 33 Using the directory and other lists Copying a telephone number to the directory If a telephone number is shown in the display (CLIP), you can copy it to your directory. This can be done while dialling from the redialling list, from the caller list /message list (only S 150) or during a call.
- Page 34 Using the directory and other lists Copying an entry or entire list to a handset You can copy individual entries or the entire list to a different handset registered at the same base station. This saves you having to make the same entry twice. The VIP set- tings, voice patterns and speed dial numbers are not copied.
-
Page 35: Voice Dailling
Using the directory and other lists Saving an anniversary for a telephone number You can save anniversaries, e.g. a birthday, in the directory so that you can be reminded about them (anniversary alarm). You have to enter a time so that the anniversary can be signalled with a ringer melody. - Page 36 Using the directory and other lists Recording voice patterns for an existing directory entry Record your voice pattern in quiet surroundings. Step 1: Open the voice directory: Open the directory. Select the entry and press the display key. [RRRRRRRRRRRRRRRRRRRRRRR] Voice Select the menu item and confirm, e.g.
- Page 37 Using the directory and other lists Announcing the name for a call For an incoming external call, you can have the name of the caller announced in addi- tion to the ringer tone. Prerequisite: The telephone number is transmitted (page 20) and you have saved a voice pattern for this number (page 32).
-
Page 38: Redialling List
Using the directory and other lists Changing a user name You can change user names (User 1 to User 4). Open the directory. Select the entry and press the display key. RRRRRRRRRRRRRRRRRRRRRRRR Voice Select the user and confirm, [______________________________________________] User 2 e.g. -
Page 39: Automatic Redialling
Using the directory and other lists Automatic redialling This function automatically redials the number every 20 seconds. The handsfree key flashes and the loudspeaker is on. If the other person answers the call, press the talk key c. If there is no answer, the call is terminated after about 30 seconds. The function switches itself off after 10 unsuccessful attempts. -
Page 40: Email Directory
Using the directory and other lists Email directory Use the email directory to store the email addresses you need for sending SMS texts, for example. You can store a maximum of 200 entries in the directory, email directory and speed dial list. Saving a new email address Step 1: Open the email directory: Open the directory. - Page 41 Using the directory and other lists Opening a email directory, reading and changing an address Prerequisite: You have opened the email directory (page 36). Select the entry and press the display key. The [RRRRRRRRRRRRRRRRRRRRRRR] View number is displayed. Changing an entry: Press the display key.
-
Page 42: Displaying Available Memory
Using the directory and other lists Displaying available memory The memory is shared by the directory, the speed dial list (page 23) and the email direc- tory (page 36). The available memory of all lists is displayed. Open the directory. Select any entry and open the menu. -
Page 43: Caller List And Message List (Only S 150)
Using the directory and other lists Caller list and message list (only S 150) The numbers of the last 30 calls are saved in the caller list. If the list is full and there is a new entry, the oldest one will be deleted. Prerequisite: The incoming call number has been transmitted (page 20). - Page 44 Using the directory and other lists Setting the caller list Press the message key. Select the menu item and confirm. [______________________________________________] Calls List: 01+02 Open the menu. Select the menu item and confirm. The current selec- [______________________________________________] Calls Settings tion is marked with ‰. either ...
- Page 45 Using the directory and other lists Calling back a caller Prerequisite: The incoming call number has been transmitted (page 20). Open the caller list /message list (only S 150). Then: Select the entry. either ... Press the display key. [RRRRRRRRRRRRRRRRRRRRRR] Answer or ...
-
Page 46: Sms (Text Messages)
SMS (text messages) SMS (text messages) You can use your handset to send and receive text messages, so-called SMS (Short Mes- sage Service). You can write, edit, read, delete or forward text messages from any reg- istered handset. If several handsets are in operation, only one handset can use the SMS function at a time. -
Page 47: Prerequisites For Sending And Receiving Text Messages (Sms)
SMS (text messages) Prerequisites for sending and receiving text messages (SMS) Telephone number transmission (page 20) must be activated. Check with your tele- phone company that this function has in fact been activated for your telephone con- nection. If not, you will have to apply for its activation. Before you can receive text messages you have to be registered with your service provider. - Page 48 SMS (text messages) Entering the telephone number for an SMS centre, changing the send centre You can enter or change the telephone number of an SMS centre. You can change an already stored SMS centre telephone number by overwriting it. Please contact your service provider about its offerings and particularities before mak- ing a new entry or deleting the factory settings.
-
Page 49: Sending Text Messages (Sms) And Outgoing List
SMS (text messages) Sending text messages (SMS) and outgoing list If you receive a call while you are writing an SMS, the SMS will automatically be saved in the outgoing list. You can accept the call and finish the SMS later (page 49). Text messages that could not be sent are assigned an error status (page 62) and are saved in the incoming list. - Page 50 SMS (text messages) Predictive text entry While writing a text you may find the EATONI (page 119) predictive text entry function Ç useful. The icon shows you whether EATONI is active (factory setting: on). You can à deactivate EATONI using at any time.
- Page 51 SMS (text messages) Sending an SMS without saving it Prerequisite: You have written an SMS message (page 45) and the entry field is open. à Press the display key to open the menu. Confirm. [______________________________________________] Send Confirm. [______________________________________________] either ... Enter the number you want to send the SMS to (with dialling code).
-
Page 52: Sending Text Messages (Sms) To An Email Address
SMS (text messages) Sending text messages (SMS) to an email address If your service provider supports the SMS to E-Mail function, you can also send text mes- sages to an email address. Ask your service provider about the format for the email address it needs to transmit text messages as emails. - Page 53 SMS (text messages) Sending an SMS as email You have to send the SMS to the telephone number of the email service. If you have entered the email service of your SMS send centre (page 44), this will appear in the entry field.
- Page 54 SMS (text messages) Reading and deleting SMS messages in the outgoing list Prerequisite: You have opened the outgoing list (page 49). Select the SMS. either ... Reading SMS messages: Press the display key. Use s to display the rest of the RRRRRRRRRRRRRRRRRRRRRRRR Read SMS.
- Page 55 SMS (text messages) Inserting templates or email addresses in an SMS You can insert a template (standard text) or an emoticon in your SMS text. Your tele- phone provides: 3 template texts: I am late, Let's meet , Congratulations , 8 emoticons: Happy :-), Sad :-(, Wink ;-), Serious :-|, Sarcastic :->, Laughing :-D, Surprised :-o, Crying :'-(.
-
Page 56: Receiving Text Messages (Sms) And Incoming List
SMS (text messages) Receiving text messages (SMS) and incoming list New SMS messages are signalled by the message "You have new messages Û", flashing message key f on all handsets and a confirmation beep. The date and time (as transmitted by the SMS centre) are shown for each SMS received. The new (not yet read) SMS messages appear in the incoming list before the old ones. - Page 57 SMS (text messages) Open the list via the menu Open the menu. Confirm. [______________________________________________] Confirm. [______________________________________________] Mailbox If several mailboxes have been activated (page 57), select the mailbox and confirm. If necessary, enter the mailbox PIN and confirm. Select the menu item and confirm. [______________________________________________] Incoming 01+05 Reading and deleting SMS messages in the incoming list...
- Page 58 SMS (text messages) Answering or forwarding SMS messages While reading an SMS you can use the following functions: à Press the display key to open the menu. either ... Answering received SMS messages: Confirm. You can answer the SMS immediately in the [______________________________________________] Reply entry field.
- Page 59 SMS (text messages) Copying a telephone number from the SMS text to the directory Your telephone "recognises" telephone numbers in any SMS messages you receive. It shows the number by highlighting them (maximum 32 digits). If the SMS text contains several numbers, the first one will be highlighted.
-
Page 60: Using Several Sms Mailboxes
SMS (text messages) Marking an SMS message as "new" If you want to put an "old" SMS that you have already read back to the head of the incoming list, you have to mark it as "new". Then the f key on the handset will flash. Other members of your family or colleagues, for example, will then know that they have received an SMS Prerequisite: You have opened the incoming list (page 52). - Page 61 SMS (text messages) Setting up a personal mailbox To use several mailboxes, you have to activate each one and assign a "Mailbox ID", a kind of extension number. If an SMS centre receives an SMS for your telephone number (without mailbox ID), the SMS will be sent to your general mailbox.
- Page 62 SMS (text messages) If you deactivate a mailbox (by selecting in line Call Director: Off), all the SMS mes- sages sent to this mailbox will be lost. The SMS messages saved for this mailbox will be deleted. If you deactivate PIN protection, the PIN will be reset to 0000. Sending an SMS to a personal mailbox Before an SMS can reach your personal mailbox, the sender must know your ID and add it to the end of your telephone number.
-
Page 63: Notification Via Sms
SMS (text messages) Notification via SMS You have to go out, but are expecting an important call or a message from your answer- ing machine (only S 150). You can have any SMS-enabled device send a notification via SMS, e.g. to your mobile telephone. To do this you have to save the number to be called in your home telephone (factory setting: off). -
Page 64: Using New Ringer Tones And Logos For Your Handset
You can use other melodies than those supplied with the handset and also add a logo (picture). A range of melodies and logos is available on the Internet at www.my-sie- mens.com/ringtones (melodies) and www.my-siemens.com/logos (logos). The Internet pages will tell you which data are available in your country. Please ask your service pro- vider if it supports the downloading of logos and melodies via SMS. - Page 65 SMS (text messages) Loading a new ringer tone or logo The display shows You have new messages Û. Press the key to open the incoming list (page 52). The first new SMS will be displayed. Scroll to another SMS if you want. Press the display key.
-
Page 66: Text Messages (Sms) On Pabx Systems
SMS (text messages) on PABX systems Text messages (SMS) You can only receive an SMS if the calling number identification is sent to the PABX extension (CLIP). The CLIP of the SMS centre telephone number is evaluated in the Gigaset (telephone). If your Gigaset is connected to a PABX, you may have to insert a prefix to the telephone number (this depends on the PABX you use). - Page 67 SMS (text messages) How to respond to error messages Error message Possible cause Remedy SMS messages cannot be sent. The "calling line identification" Have your telephone company (CLIP) function has not been activate this function. activated. SMS transmission was inter- Send the SMS again.
-
Page 68: Using The S 150 Base Station Answering Machine
Using the S 150 base station answering machine Using the S 150 base station answering machine The Gigaset S 150 has an integrated answering machine that records calls if it is switched on (factory setting). You can operate it: via the base station, via the handset (voice control also possible), via remote operation (voice control also possible). -
Page 69: Operating The Answering Machine Via The Handset
Using the S 150 base station answering machine Meaning of the keys: Several mailboxes are activated To listen to messages on mailbox 1, press the ò key. To listen to messages on mailbox 2, press the ó key. To listen to messages on mailbox 3 , press the ô key. You cannot operate the answering machine from the base station while somebody is operating the answering machine via a handset or a message is being recorded If the on/off key continues to flash after you have switched the answering... - Page 70 Using the S 150 base station answering machine Open the menu. Select the menu item and confirm. [______________________________________________] Voice Mail Select the menu item and confirm. [______________________________________________] Ans Machine You can switch the answering machine on or off in the On/Off: line. If appropriate, scroll to the Mailboxes: line and select the number of mailboxes (1–3) you want to activate.
- Page 71 Using the S 150 base station answering machine Recording personal/advisory announcements Open the menu. Select the menu item and confirm. [______________________________________________] Voice Mail Select the menu item and confirm. [______________________________________________] Announcements either ... Record personal announcement: Confirm. [______________________________________________] Rec Announce or ...
- Page 72 Using the S 150 base station answering machine Deleting announcements Open the menu. Select the menu item and confirm. [______________________________________________] Voice Mail Select the menu item and confirm. [______________________________________________] Announcements Select the menu item and confirm. [______________________________________________] Del Announce Press the display key to confirm the prompt. [RRRRRRRRRR] or ...
- Page 73 Using the S 150 base station answering machine Alternate between recording and announce only setting This function alternates between record and announce only modes. Example: You have set the record mode. Now select a period in which the answering machine is to switch from record to announce only mode, e.g. from 6 pm to 8 am. The record mode set is then automatically activated in the period from 8.01 am to 5.59 pm.
-
Page 74: Playing Back Messages
Using the S 150 base station answering machine Answering machine response when deleting announcements Announcement mode Ans. & Record: The answering machine remains on after the personal announcement has been deleted. The standard announcement is used. Announcement mode Announce Only: The answering machine switches itself off after the advisory announcement has been deleted. - Page 75 Using the S 150 base station answering machine Pausing, jumping forward/back during playback either ... 1. Via the keypad: Pausing playback: Pause playback. Confirm to continue. Jumping forward/back: To the start of the current message. To the previous message. To the next message. To the next message but one.
-
Page 76: Deleting Messages
Using the S 150 base station answering machine Deleting messages You can delete either individual messages or all old messages. Deleting all old messages During playback or pause: Open the menu. Select the menu item and confirm. [______________________________________________] Del All Old Msgs Press the display key to confirm the prompt. -
Page 77: Recording Infotexts
Using the S 150 base station answering machine Recording infotexts Infotexts can be listened to and deleted just like messages. New infotexts are indicated by the flashing ö key (base station) and the f key (handset). You can record more than one infotext. -
Page 78: Operating The Answering Machine By Voice Command
Using the S 150 base station answering machine Recording a call You can use the answering machine to record an external call. The recording time depends on what recording quality (page 79) is set and the available memory. Prerequisite: You are conducting an external call. Open the menu. -
Page 79: Operating The Answering Machine Away From Home (Remote Operation)
Using the S 150 base station answering machine Changing a user name Open the menu. Select the menu item and confirm. [______________________________________________] Voice Mail Select the menu item and confirm. [______________________________________________] Voice Prompts Confirm. [______________________________________________] Record Command Select the user. [______________________________________________] User 2 Press the display key. - Page 80 Using the S 150 base station answering machine Calling the answering machine and playing messages Dial your own telephone number. While you hear your announcement: Press key 9 and enter the system PIN. If several mailboxes are activated: Press the hash key and enter the mailbox number. You will be connected to "your"...
- Page 81 Using the S 150 base station answering machine Activating the answering machine remotely If you forget to activate your answering machine, you can switch it on remotely. Phone your number from a mobile telephone or a telephone with tone dialling and let your phone ring for about a minute.
-
Page 82: Setting The S 150 Base Station Answering Machine
Setting the S 150 base station answering machine Setting the S 150 base station answering machine The answering machine has already been preset for you at the factory. You can however make individual settings using the handset. Ring delay and charge saving function for remote operation You can also decide when the answering machine should be activated. -
Page 83: Setting The Message Length And Recording Quality
Setting the S 150 base station answering machine Setting the message length and recording quality You can set the maximum recording time for a message and its quality. The total record- ing time of your answering machine depends on the quality set. With setting High Quality the total recording time is up to 9 minutes, with Long Play up to 15 minutes. -
Page 84: Resetting The Answering Machine For Fast Access
Setting the S 150 base station answering machine Resetting the answering machine for fast access The (integrated) answering machine has already been preset for fast access at the fac- tory. If you have set fast access for the network mailbox (see page 81), you can restore the factory setting. -
Page 85: Using The Network Mailbox
Using the network mailbox Using the network mailbox The network mailbox is the answering machine on the network of your network service provider. You can only use this mailbox if you have ordered it from your network pro- vider. Setting the network mailbox for speed dialling With speed dialling you can hold down the 1 key to immediately dial the network-mailbox or the integrated answering machine (Gigaset S 150). -
Page 86: Registering And De-Registering Handsets
You can register up to six handset at your base station. An unregistered S 1 handset is registered automatically. Handsets of the Gigaset 1000, 2000, 3000, 4000 families and non-Siemens handsets must be registered manually. An S 1 handset can be registered at up to four base stations. -
Page 87: Manual Registration
Registering and de-registering handsets The base station search is terminated after 60 seconds. If registration is not completed in this period, repeat the process. After successful registration, the handset is assigned the next available number, as described in the chapter "Automatic registration" (page 82). Manual registration: Gigaset 1000 to 4000 and other GAP-supported handsets The following describes how to register Gigaset family handsets, handsets A 2, C 1, C 2... -
Page 88: Looking For Handsets ("Paging")
Registering and de-registering handsets Looking for handsets ("Paging") If you cannot find your handset, you can use the base station to locate it. The Registra- tion/Paging key is to the right of the handset recess on the base station (page 64). Press the Registration/Paging key on the base station for 1 second. -
Page 89: Operating Several Handsets
Operating several handsets Operating several handsets Making internal calls Internal calls are calls to other handsets registered to the same base station. They are free of charge. Calling a particular or all handsets simultaneously Open the handset list. Your own handset is marked with "<". either ... -
Page 90: Changing A Handset's Internal Number
Operating several handsets Changing a handset's internal number During registration, a handset is automatically assigned the next available number (page 82). You can change the internal number of any registered handset (1–6). Open the handset list Open the menu. Confirm. The handset list is displayed. [______________________________________________] Edit H/Set No. -
Page 91: Internal Enquiry Calls
Operating several handsets Internal enquiry calls While you are conducting a call with an external user, you can call an internal user to conduct an enquiry call. You are automatically reconnected to the external user when you end the enquiry call. Open the handset list. -
Page 92: Listening In On An External Call
Operating several handsets Listening in on an external call You are conducting an external call. An internal user can listen in on this call and speak to the other users. This is indicated by a signal tone heard by all those participating in the call. - Page 93 Operating several handsets Activating/deactivating direct inward dialling (only S 150) Open the menu. Select the menu item and confirm. [______________________________________________] Base Settings Select the menu item and confirm. [______________________________________________] Call Director Confirm to activate or deactivate direct inward dial- [______________________________________________] Call Director ling (‰...
-
Page 94: Using A Handset As A Room Monitor
Operating several handsets Playing/deleting direct inward dialling announcement (only S 150) Open the menu. Select the menu item and confirm. [______________________________________________] Base Settings Select the menu item and confirm. [______________________________________________] Call Director either ... Playing back the announcement: Select the menu item and confirm. [______________________________________________] Play Announce or ... -
Page 95: First Time
Operating several handsets If you use an external number for the room monitor call, remember to inform the owner of the telephone. The alarm call to an external number is cut after about 90 seconds, an alarm call to an internal number (handset) is unlimited. The active room monitor function considerably reduces the operating time of the handset. - Page 96 Operating several handsets Changing an external telephone number Prerequisite: You are in the entry field for the room monitor (Step 1, page 91). Scroll to the Call to: line and press the display key. RRRRRRRRRRRRRRRRRRRRRRRR Edit Û Delete the number. either ...
-
Page 97: Setting The Walk And Talk Mode
Operating several handsets Deactivating the room monitor You can deactivate the room monitor remotely. Accept the alarm call sent by the room monitor function and enter O R. The function is deactivated about 90 seconds after the end of the call. No more room monitor alarms will be sent. The other room monitor functions on the handset (e.g. - Page 98 Operating several handsets Activating/deactivating the Walk and Talk mode Open the menu. Select the menu item and confirm. [______________________________________________] Add. Features Select the menu item and confirm. [______________________________________________] Walk and Talk Deactivating Walk and Talk mode: Press the display key. [RRRRRRRRRR] If you now press the talk key c or handsfree key d, the call is sent to all handsets that are in Walk and Talk mode.
-
Page 99: Setting The Handset
Setting the handset Setting the handset Your handset has been preset at the factory. You can change the settings to suit your personal preferences. Changing the display language The display texts can be shown in various languages. Open the menu. Select the menu item and confirm. -
Page 100: Changing The Handsfree Speaking Volume
Setting the handset Changing the handsfree speaking volume You can change the handsfree speaking volume to one of five levels, the loudspeaker volume to one of three levels – even during an external call. Open the menu. Select the menu item and confirm. [______________________________________________] Audio Settings Confirm. - Page 101 Setting the handset Settings for external calls, time controls and name announcement You can set the volume and melody to suit what is being signalled. You can also set the time control for the volume of a call (e.g. quieter during the night). Open the menu.
- Page 102 Setting the handset Individual settings for internal calls, alarm call and appointments You can set the ringer tone for internal calls, alarm calls and appointments to suit your personal preferences. You can also make the ringer tone the same for all these func- tions.
- Page 103 Setting the handset Activating/deactivating the ringer tone All handsets ring when there is an incoming external call. Before taking a call or while the telephone is in the idle state you can deactivate the ringer tone on your handset per- manently or for the current call.
-
Page 104: Activating/Deactivating Advisory Tones
Setting the handset Activating/deactivating advisory tones Your handset points out various activities and states with an acoustic signal. The follow- ing advisory tones can be activated and deactivated independently of each other (fac- tory setting: on). Key beep: Each keystroke is confirmed Acknowledgement tones: –... -
Page 105: Resetting A Handset To The Factory Setting
Setting the handset Resetting a handset to the factory setting You can undo any settings and changes you make. Entries in the directory, caller list, email directory and the speed dialling list, the registration of the handset at the base sta- tion and also any logos and melodies you have loaded will not be affected. -
Page 106: Setting The Base Station
Setting the base station Setting the base station You can make all the base station settings with a registered S 1 handset. Protecting your telephone from unauthorised access You can protect your telephone from unauthorised access by protecting the base station system settings with a system PIN that only you know. -
Page 107: Emergency Numbers
Setting the base station Assigning authorisation per handset You can prevent individual handsets from dialling external numbers. You can set the following authorisations: Internal and external: The handset can be used without restriction. Ext incoming: The handset can be used to make internal calls and receive external calls. -
Page 108: Changing The Loudspeaker Volume Of The Base Station (Only S 150)
Setting the base station Displaying and dialling an emergency number You can dial an emergency number from a handset that is barred for external dialling (page 103) directly or as follows. The handset is barred for external dialling: Press the talk key. Press the display key. -
Page 109: Changing The Base Station Ringer Tones (Only S 150)
Setting the base station Changing the base station ringer tones (only S 150) As with the handset you can choose from several ringer tone volumes and melodies (see page 96). You can also deactivate the ringer tone on the base station. Setting the ringer tone volume at the base station: While an incoming call is being signalled press the base station key ñ... -
Page 110: Changing The Base Station Name
Setting the base station Changing the base station name The name " is assigned automatically. You can change the Base station 1" to "Base station 4" name of your base station. Open the menu. Select the menu item and confirm. [______________________________________________] H/Set Settings Select the menu item and confirm. - Page 111 Setting the base station Factory setting of the base station Name of the handsets "INT 1" to "INT 6" page 85 Authorisation restriction of the handsets Internal and external (none) page 103 Listening in deactivated page 88 Network provider selection (preselection) country specific default setting page 1 Own emergency numbers...
-
Page 112: Connecting The Base Station To A Pabx
Connecting the base station to a PABX Connecting the base station to a PABX The following settings are only necessary if your PABX requires it, please see your PABX operating instructions. You cannot send or receive text messages (SMS) if your PABX does not support telephone number transmission. -
Page 113: Saving The Prefix (Apl)
Connecting the base station to a PABX Saving the prefix (APL) Prerequisite: Your PABX requires a prefix, e. g. "0", before the telephone numbers for external calls. Open the menu. Select the menu item and confirm. [______________________________________________] Base Settings Select the menu item and confirm. [______________________________________________] Add. -
Page 114: Switching Temporarily To Tone Dialling (Dtmf)
Connecting the base station to a PABX Pause after R key You can change the length of the pause if your PABX requires this (see your PABX oper- ating instructions; factory setting: 100 ms). Open the menu. Press key. Enter the pause length (1 = 800 ms; 2 = 1600 ms; 3 = 3200 ms) and confirm. -
Page 115: Appendix
Questions and answers If any questions occur to you while you are using your device, we are available 24 hours a day at www.my--siemens.com/customercare. You will find the most frequently asked questions and answers below. What has happened if ... Possible cause Possible solution ... - Page 116 Appendix What has happened if ... Possible cause Possible solution … (if several handsets are A handset cannot be charged Use an additional charging used) the handset in the base while a telephone call is being unit. station does not charge? made.
-
Page 117: Service (Customer Care)
You can get assistance easily when you have technical questions or questions about how to use your device by using our online support service on the Internet at: www.my-siemens.com/customercare or by referring to the section entitled Questions and answers in this manual (page 111). - Page 118 In some countries repair and replace services are impossible where the products are not sold through our authorised dealers. Your Gigaset S100 / S150 is designed for operation in your country, as indicated on the packaging and on the device itself. Country-specific conditions have been taken into account.
-
Page 119: Technical Data
Appendix Technical data Recommended batteries Nickel-metal-hydride (NiMH) Sanyo Twicell 700 Sanyo Twicell 650 Panasonic 700 mAh GP 700 mAh YDT AAA SUPER 700 VARTA PhonePower AAA 700 mAh The handset's operating times/charging time Capacity Standby time Talktime Charging time (mAh) (hours) (hours) (hours) -
Page 120: General Technical Data
Appendix General technical data Feature Value DECT standard supported GAP standard supported No. of channels 60 duplex channels Radio frequency range 1880 – 1900 MHz Duplex method Time multiplex, 10 ms frame length Channel grid 1728 kHz Bit rate 1152 kbit/s Modulation GFSK Language coding... -
Page 121: Answering Machine Remote Operation (Only S 150)
Appendix Answering machine remote operation (only S 150) The functions of the keys for operating the answering machine remotely are the same for all telephones, handsets and tone transmitters. The ”credit card” shows you how to perform remote operations on an external telephone (e.g. from a pay phone, from a hotel etc.) and the meaning of the keys. - Page 122 Appendix Entering text (without predictive text entry) There are a number of options for entering a text: You can move the cursor with u v t s. Delete characters (to the left of the cursor) with Characters are inserted to the left of the cursor (page 13). To change from upper case (the first letter is automatically written in upper case, all others in lower case) to lower case, press P before entering the letter.
-
Page 123: Predictive Text Entry
Appendix Predictive text entry EATONI predictive text entry is useful when writing the following texts: SMS, Names in directory, Names in the speed dial list, Names in email directory. Each key between Q and O is assigned to several letters and numbers that are all shown in a selection line directly above the softkeys (underneath the text field) as soon as you press a key. -
Page 124: Accessories
Accessories Accessories Gigaset Handsets Upgrade your Gigaset to a cordless PABX: Gigaset Handset S 1 Large illuminated graphic display with date and time display Directory for up to about 200 telephone numbers Handsfree talking in full duplex quality SMS (prerequisite: CLIP available) EATONI predictive text entry Ringer melodies can be set for individual callers (for VIP calls) - Page 125 Directory for up to about 50 telephone numbers Handsfree talking SMS (requirement: CLIP available) All accessories and batteries are available in specialised shops. Or you can order them directly via the my-siemens Online Shop: www.my-siemens.com/shop. Here you will also find the latest product information.
-
Page 126: Menu Table
Menu table Menu table It is quicker to select a menu function by opening the menu and then entering the digit combinations (so-called "shortcut") rather than scrolling to the function. Example: v 5 2 4 for "Choosing the ringer melody for the alarm call". Main menu In telephone idle state v (menu open) press: You have activated an SMS mailbox (general or private) without a PIN... - Page 127 Menu table H/Set Settings Auto Answer Language Register H/Set (List) Select Base 7-4-1 Base 1 7-4-… [til] 7-4-4 Base 4 7-4-5 Best Base Screen Picture Reset Handset Base Settings Audio Settings 8-1-1 Loudspeaker Vol (only S 150) 8-1-2 Ringer Settings 8-1-3 Key Tones System PIN...
- Page 128 Menu table Voice Mail Set Key 1 9-1-1 Network Mailb. S 150 only: 9-1-2 Answer Machine Ans Machine Call Screening 9-3-1 Handset 9-3-2 Base Record Memo Announcements 9-5-1 Rec Announce 9-5-2 Play Announce 9-5-3 Del Announce 9-5-4 Rec Anc Only 9-5-5 Play Anc Only 9-5-6...
-
Page 129: Directory Key And Speed Dialling List Key
Menu table Directory key and speed dialling list key Press directory key s or speed dialling list key C, with s select the entry and press v to open the list. The following menu functions are available: Display Number Edit Entry Delete Entry VIP Entry Applies only for the directory (... -
Page 130: Index
Index Index Answering machine (S 150 only) announcement ... . . Access protection ....announcement mode ... Acknowledgement tones . - Page 131 Index Change dialling mode ....Barring emergency number ... external call ....number of mailboxes .
- Page 132 Index Delete announcement for direct inward EATONI see Predictive text entry dialling (S 150 only) ... Email address see SMS announcements for answering Email directory ....machine (S 150 only) .
- Page 133 Index Handset ..... . . Key 1 (fast access) ... . . activating/deactivating .
- Page 134 Index Manual redialling ....Medical equipment ....OK key ......Melody (ringer tone) .
- Page 135 Index Prefix see Dialling code Ringer tone ....Preparing the activating/deactivating ..handset .
- Page 136 Index ......Speed dial list ....activating/deactivating a logo .
- Page 137 Index Waiting call internal call ....Waiting melody ....Walk and Talk .