
Related Manuals for Onkyo TX-8130


Summary of Contents for Onkyo TX-8130
-
Page 1: Remote Control (Rc-905S) K
Network Stereo Receiver TX-8130 Instruction Manual Thank you for purchasing an Onkyo product. Please retain this manual for future reference. -
Page 2: Table Of Contents
Contents Supplied accessories Names and functions of parts Before use, check the packaging for the main unit and the accessories below. 0 Front 0 Display ∫ Remote control (RC-905S) 0 Remote control ∫ Batteries for remote control (AAA/R03) 0 Rear ∫... -
Page 3: Important Safety Instructions
WARNING: WARNING AVIS TO REDUCE THE RISK OF FIRE OR ELECTRIC RISK OF ELECTRIC SHOCK RISQUE DE CHOC ELECTRIQUE SHOCK, DO NOT EXPOSE THIS APPARATUS TO DO NOT OPEN NE PAS OUVRIR RAIN OR MOISTURE. The lightning flash with arrowhead symbol, within an equilateral triangle, is intended to alert the user to the CAUTION: presence of uninsulated “dangerous voltage”... - Page 4 If water or any other liquid gets inside – Limitation of voltage changes, this unit, have it checked by your Onkyo dealer. voltage fluctuations and flicker – RoHS Directive, 2011/65/EU WEEE...
- Page 5 Precautions DISCLAIMER Through this device you are able to link to other services or websites which are not under the control of any company which has designed, manufactured or distributed/have distributed this device, and its affiliates (collectively, “Company”). We have no control over the nature, content and availability of those services.
-
Page 6: Other Functions
Plays high-quality 192 kHz/24 bit high-res sources Onkyo Remote (smartphone app) You can play high-res sources in formats such as WAV, FLAC, or DSD files (*) distributed over the Internet by using the Home Network feature or connecting a USB storage device. -
Page 7: Names And Functions Of Parts
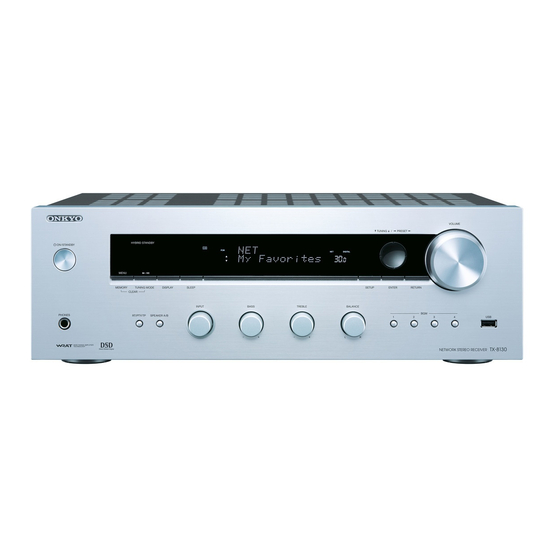
Names and functions of parts Front Í ON/STANDBY button: Press this button to turn the PHONES terminal: Connect headphones with a unit on or put it in standby mode. standard plug. MENU/MEMORY button: Press this button to display RT/PTY/TP button: Use when receiving stations the menu or register a AM/FM station. -
Page 8: Display
Names and functions of parts Display DIRECT indicator: This indicator appears when Direct Message display area: Track information and menus of the audio quality setup is on. appear here. -
Page 9: Remote Control
Names and functions of parts Remote control Í button: Press this button to turn the unit on or put it in standby mode. INPUT SELECTOR buttons: Use these buttons to select the source. Skip (:/9) buttons (*) Search (6/5) buttons (*) REPEAT button: Turns repeat play on and off and selects the mode. -
Page 10: Rear
Names and functions of parts Rear REMOTE CONTROL jack: An Onkyo product with DIGITAL IN OPTICAL/COAXIAL terminals: RI jack can be connected and synchronized with this Connected to players. Use a digital optical cable or unit. digital coaxial cable for connection with the digital FM 75h and AM ANTENNA terminals: The supplied audio output jack of a player. -
Page 11: Connections
Connections ¥ The power cord must be connected only after all other cable connections are completed. 12 - 15 mm Connecting speakers Twist the wires of the speaker cable tightly before inserting into the terminals. After inserting the cables, tighten the terminals firmly by turning to the right. When also connecting to the SPEAKERS B terminals: Connect using the same method described for SPEAKERS A. -
Page 12: Connecting A Player
Connections Connecting a player When connecting a subwoofer: You can enjoy the audio from players such as televisions, Blu-ray disc players, and game consoles. DIGITAL IN connection If the player has an optical or coaxial digital output terminal, connect using either a digital optical cable or digital coaxial cable to one of the DIGITAL IN terminals. -
Page 13: Am/Fm Antenna Connections
Connections LINE IN connection AM/FM antenna connections Use an RCA cable to connect to the LINE OUT terminal Connect the antennas to listen to AM/FM broadcast. on the player to one of the LINE IN terminal on this unit. 0 You may be unable to receive radio transmissions in To play, select the terminal name with the INPUT some areas even if you connect an antenna. -
Page 14: Network Connection
Connections Network connection This enables you to enjoy Internet radio services (*), Spotify, and the home network features. Connect to the same router as the smartphone, computer, or NAS you are going to use. You need to be able to connect to the Internet. Connect to the router to this unit’s ETHERNET port with an Ethernet cable (*). -
Page 15: Listening To Internet Radio
Listening to Internet radio TuneIn Radio Some Internet radio services are registered to the unit by default. You can display the desired service, menu or radio station on the display and play the radio with simple With the radio stations and the on-demand programs remote control operation. - Page 16 Pandora stations. You can create your stations by entering your favorite tracks and artists when prompted. After you have created your account and stations you can return to your Onkyo receiver and press the ENTER button to begin listening to your personalized Pandora.
- Page 17 Listening to Internet radio Create a New Station One touch play with the BGM button Enter the name of a track, artist, or genre and Pandora will create a unique radio station for you based on the musical qualities of that track, artist, or genre. Pandora Menu If you press the MENU button or ENTER button while playing Pandora, the following menu items appear.
- Page 18 Listening to Internet radio Registering your favorite radio stations 3. Use the direction ( ) buttons to display “IP Address”. (My Favorites) You can listen to your favorite radio stations by registering them to “My Favorites”, which appears when you press the NET button.
- Page 19 Listening to Internet radio 3. Press the direction ( ) buttons to select a number to which a radio station is not registered, and press the MENU button. 4. Use the direction ( ) buttons to select “Create new station” and press the ENTER button. 5.
-
Page 20: Playing Music With Spotify
Playing music with Spotify To use Spotify, you must install the Spotify app on your smartphone or tablet and create a Spotify Premium account. 0 You will need a wireless LAN environment to use Spotify. 0 The unit and smartphone or tablet must be connected to the same router. -
Page 21: Playing Tracks Stored On A Usb Storage Device
Playing tracks stored on a USB storage device You can connect a USB storage device to the USB port 5. Use the direction ( ) buttons to select a track and on the front panel and play music files on it. press the playback (1) button. -
Page 22: Home Network Functions
Home network functions Playing music stored on DLNA-compatible ∫ Playing music files by operating the unit devices The unit allows you to use DLNA (*) to play music files stored on a PC or a NAS device. You can play high-res sources in formats such as WAV, FLAC, or DSD files distributed over the Internet. -
Page 23: Music Streaming From A Shared Folder (Home Media)
Home network functions ∫ Using the Play To feature Music streaming from a shared folder (Home Media) Using a controller device or PC that complies with the DLNA standard, you can play music files stored on a server. A shared folder is configured in a network device such as In this section, we explain the steps to perform remote a PC or a NAS device... - Page 24 Home network functions Creating a shared folder 1. Select and right-click the folder to share. 2. Select “Properties”. 3. Select “Advanced Sharing” on the “Sharing” tab. 4. Select the “Share this folder” check box and click “OK”. 5. Click “Share” for “Network File and Folder Sharing”. 6.
-
Page 25: Listening To The Sound From A Connected Player
Listening to the sound from a connected player By connecting an Onkyo component with RI jack to the unit by using an RI cable and an RCA cable, you can link the unit’s power and input selection and enable operation with this unit’s remote control. For details, refer to the instruction manual of the component with the RI jack. -
Page 26: Listening To Am/Fm Radio
Listening to AM/FM radio Tuning into a radio station monaural. This can minimise the noise and audio interruptions. TUNING ∫ Tuning into stations manually If you tune into an FM radio station manually, it will be received in monaural sound. 1. - Page 27 Listening to AM/FM radio “Preset Written” appears on the display, and the radio The preset number stops flashing and lights to indicate station being received is registered. If there is already that the station is registered. a radio station registered, it is replaced. ∫...
- Page 28 Listening to AM/FM radio PTY (Program Type): Allows you to search for RDS 2. Press the ENTER button to search a radio station stations by program type. distributing traffic information. TP (Traffic Program): Allows you to search for radio 3. When a radio station is found, searching stops and stations transmitting traffic information.
-
Page 29: Various Settings
Various settings Adjusting sound quality, etc. Sleep timer , , , AUDIO SLEEP 1. Press the AUDIO button. With the sleep timer, you can set the unit so that it 2. Press the direction ( ) buttons to select the setting automatically turns off after a specified period. -
Page 30: Inputting Characters
Various settings Inputting characters Setup menu , , , , , , , , ENTER ENTER RETURN SETUP While performing network settings or in the Internet radio The unit allows you to configure advanced settings to menu, etc., when the following appears on the display, provide you with an even better experience. - Page 31 30). Network Standby: you can turn on the power of the unit ∫ 5. Network via network using an application such as Onkyo Remote. Make the network setting. 0 If it is not displayed, wait for a moment until the Off (default setting) network feature starts.
-
Page 32: Firmware Update
The program and accompanying online Locked documentation are furnished to you for use at your own risk. Onkyo will not be liable and you will have no Unlocked (default setting) remedy for damages for any claim of any kind whatsoever concerning your use of the program or the accompanying online documentation, regardless of legal theory, and whether arising in tort or contract. - Page 33 Various settings Update procedures ∫ Updating the firmware via USB connection 1. Press the SETUP button. You need a 64 MB or larger capacity USB storage for 2. Use the direction ( ) buttons to select “6. Firmware updating. Update” and press the ENTER button. 0 If it is not displayed, wait for a moment until the Precautions when updating the firmware network feature starts.
- Page 34 Various settings 10. Press the ENTER button with “Update” selected to start update. “Completed!” is displayed when the update is complete. 11. Disconnect the USB storage from the unit. 12. Press the Í ON/STANDBY button on the front panel to put the unit into standby. 0 Do not use the Í...
-
Page 35: Troubleshooting
Troubleshooting 0 If your record player uses an MC cartridge, you must connect an audio equalizer and either an MC head Before starting the procedure Problems may be solved by simply turning the power amp or an MC transformer. on/off or disconnecting/connecting the power cord, which is easier than working on the connection, setting and operating procedure. - Page 36 5 seconds, and then plug it again. Onkyo is not responsible for damages (such as CD rental fees) due to unsuccessful recordings caused by the unit’s malfunction. Before you record important data, make sure...
-
Page 37: Compatible Devices/Media/File Formats
Compatible devices/media/file formats Compatible devices/media Extension .mp3, .MP3 Standard MPEG-1/MPEG-2 Audio Layer-3 ∫ USB storage device Sampling Frequency 8 k/11.025 k/12 k/16 k/22.05 k/24 k/32 k/ The unit supports USB storage devices that support the USB Mass 44.1 k/48 kHz Storage Class. -
Page 38: Amplifier Section
Specifications ∫ Amplifier section ∫ General Rated Output Power (IEC): 2 ch k 110 W at 6 ohms, 1 kHz, Power Supply: AC 230 V, 50 Hz 1 ch Driven of 1 % THD Power Consumption: 200 W MAXIMUM Effective Output 0.2 W (Standby) Power (JEITA): 2 ch k 115 W at 6 ohms, 1 kHz,... - Page 39 The software package installed in this product includes software licensed to Onkyo & Pioneer Corporation (hereinafter, called Thus, it is not the intent of this section to claim rights or contest your rights to work written entirely by you; rather, the intent is "O&P Corporation") directly or indirectly by third party developers.
-
Page 40: Gnu General Public License
not distribute the Program at all. For example, if a patent license would not permit royalty-free redistribution of the Program by all those who receive copies directly or indirectly through you, then the only way you could satisfy both it and END OF TERMS AND CONDITIONS this License would be to refrain entirely from distribution of the Program. - Page 41 (1) bfsh-sk libpng versions 1.0.7, July 1, 2000, through 1.2.5 - October 3, 2002, are Copyright (c) 2000-2002 Glenn Randers-Pehrson, and are distributed according to the same disclaimer and license as libpng-1.0.6 with the following individuals added to the Copyright (c) 2007 Samuel KABAK list of Contributing Authors: Permission is hereby granted, free of charge, to any person obtaining a copy of this software and associated documentation Simon-Pierre Cadieux...
- Page 42 50.[54]Paul A Vixie <vixie@vix.com> TrueTime GPS driver, generic TrueTime clock driver THE SOFTWARE IS PROVIDED "AS IS", WITHOUT WARRANTY OF ANY KIND, EXPRESS OR IMPLIED, INCLUDING 51.[55]Ulrich Windl <Ulrich.Windl@rz.uni-regensburg.de> corrected and validated HTML documents according to the HTML DTD BUT NOT LIMITED TO THE WARRANTIES OF MERCHANTABILITY, FITNESS FOR A PARTICULAR PURPOSE AND References NONINFRINGEMENT.
- Page 43 8. Limitation of Liability. Limitation on Liability. EXCEPT TO THE EXTENT REQUIRED BY APPLICABLE LAW, IN NO EVENT WILL THE AUTHOR OR In no event and under no legal theory, whether in tort (including negligence), contract, or otherwise, unless required by THE PUBLISHER BE LIABLE TO YOU ON ANY LEGAL THEORY FOR ANY SPECIAL, INCIDENTAL, CONSEQUENTIAL, applicable law (such as deliberate and grossly negligent acts) or agreed to in writing, shall any Contributor be liable to You PUNITIVE OR EXEMPLARY DAMAGES ARISING OUT OF THIS LICENSE OR THE USE OF THE WORK OR OTHERWISE,...
- Page 44 The above-mentioned information is subject to change without prior notice. Visit the Onkyo web site for the latest update. F1506-1 (C) Copyright 2015 Onkyo & Pioneer Corporation Japan. All rights reserved. Printed in Malaysia / Imprimé en Malaisie / Напечатано в Малайзии SN 29402062A...