Sign In
Upload
Manuals
Brands
Toshiba Manuals
Laptop
P200D
Toshiba P200D Manuals
Manuals and User Guides for Toshiba P200D. We have
3
Toshiba P200D manuals available for free PDF download: Maintenance Manual, User Manual
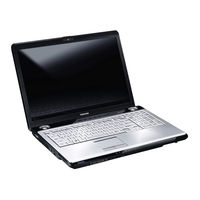
Toshiba P200D User Manual (242 pages)
P205-S6277 User's Guide
Brand:
Toshiba
| Category:
Laptop
| Size: 4 MB
Table of Contents
Critical Applications
3
Fcc Requirements
4
Industry Canada Requirement
4
Fax Branding
5
If Problems Arise
5
Telephone Company Procedures
5
Instructions for IC CS-03 Certified Equipment
6
Wireless Interoperability
7
Wireless Lan and Your Health
7
Canada - Industry Canada (IC)
8
Regulatory Information
8
EU Declaration of Conformity
9
VCCI Class B Information
9
Modem Warning Notice
10
Using this Equipment in Japan
10
Device Authorization
11
Radio Approvals for Wireless Devices
12
Wireless Lan Card
17
Bluetooth Wireless Technology Interoperability
19
Bluetooth Wireless Technology and Your Health
20
European Union (EU) and EFTA
21
Regulatory Statements
21
Location of the Required Label
24
Export Administration Regulation
25
Table of Contents
27
Introduction
34
This Guide
35
Safety Icons
36
Other Icons Used
36
Other Documentation
37
Service Options
37
Chapter 1: Getting Started
38
Selecting a Place to Work
38
Creating a Computer-Friendly Environment
38
Keeping Yourself Comfortable
39
Precautions
39
Important Information on Your Computer's Cooling Fan
40
Setting up Your Computer
41
Setting up Your Software
41
Registering Your Computer with Toshiba
42
Adding Optional External Devices
42
Connecting to a Power Source
43
Charging the Main Battery
45
Using the Computer for the First Time
46
Opening the Display Panel
46
Your Computer's Features and Specifications
47
Turning on the Power
47
Adding Memory (Optional)
48
Installing a Memory Module
48
Removing a Memory Module
54
Checking Total Memory
55
Hard Drive Recovery Utilities
56
Creating Recovery Cds/Dvds
57
Hard Disk Drive Recovery Options
58
Hard Disk Drive Recovery Using the Recovery Media
63
Installing Drivers and Applications
64
Using the Touchpad
64
Scrolling with the Touchpad
65
Control Buttons
65
Disabling or Enabling the Touchpad
65
Using the Dual Mode Pad
66
Using Dual Mode
66
Using External Display Devices
68
Connecting the Display Device
69
Directing the Display Output When You Turn on the Computer
72
Adjusting the Quality of the External Display
74
Using an External Keyboard
74
Using a Mouse
74
Connecting a Printer
74
Setting up a Printer
75
Connecting an Optional External Diskette Drive
76
Turning off the Computer
77
Options for Turning off the Computer
77
Hibernation Mode
78
Sleep Mode
78
Using the Shut down Command
79
Using and Configuring Hibernation Mode
81
Using and Configuring Sleep Mode
83
Closing the Display Panel
86
Customizing Your Computer's Settings
86
Caring for Your Computer
86
Cleaning the Computer
86
Moving the Computer
86
Using a Computer Lock
87
Chapter 2: Learning the Basics
88
Computing Tips
88
Using the Keyboard
89
Character Keys
90
Ctrl, Fn, and Alt Keys
90
Function Keys
90
Special Windows ® Keys
91
Starting a Program
91
Starting a Program from the Start Menu
91
Starting a Program from Windows Explorer
92
Starting a Program Using the Start Search Field
93
Saving Your Work
93
Printing Your Work
95
Backing up Your Work
96
Restoring Your Work
97
Using the Optical Drive
97
Optical Drive Components
98
Media Control Buttons
99
Inserting a Compact Disc
99
Playing an Audio CD
101
Playing Optical Media
102
Creating a CD/DVD/HD DVD
102
Removing a Disc with the Computer on
103
Removing a Disc with the Computer off
103
Caring for CD or DVD Discs
104
Toshiba's Online Resources
104
Chapter 3: Mobile Computing
105
Toshiba's Energy-Saver Design
105
Running the Computer on Battery Power
105
Battery Notice
106
Power Management
107
Using Additional Batteries
107
Charging Batteries
107
Charging the Main Battery
108
Charging the RTC Battery
108
Monitoring Main Battery Power
109
Determining Remaining Battery Power
111
What to Do When the Main Battery Runs Low
111
Setting Battery Notifications
112
Conserving Battery Power
113
Power Plans
114
Using a Hot Key to Set the Power Plan
115
Changing the Main Battery
116
Removing the Battery from the Computer
116
Inserting a Charged Battery
118
Taking Care of Your Battery
119
Safety Precautions
119
Maintaining Your Battery
120
Disposing of Used Batteries
121
Traveling Tips
122
Chapter 4: Exploring Your Computer's Features
123
Exploring the Desktop
123
Finding Your Way Around the Desktop
124
Setting up for Communications
126
Connecting a Modem to a Telephone Line
127
Connecting Your Computer to a Network
128
An Overview of Using the Internet
130
The Internet
130
The World Wide Web
131
Internet Service Providers
131
Connecting to the Internet
131
Surfing the Internet
132
Internet Features
132
Uploading To, and Downloading Files From, the Internet
133
Exploring Audio Features
133
Recording Sounds
133
Using External Speakers or Headphones
134
Web Cam
134
Using an Expresscard
135
Inserting an Expresscard
135
Removing an Expresscard
135
Using the Bridge Media Adapter Slot
136
Inserting Memory Media
137
Removing Memory Media
137
Using the I.link ® Port
138
Chapter 5: Toshiba Utilities
139
TOSHIBA Assist
140
Connect
141
Secure
142
Protect & Fix
143
Optimize
144
Toshiba Application Installer
145
Setting Passwords
146
Using an Instant Password
146
Using a Supervisor Password
147
Using a User Password
148
Deleting a User Password
149
TOSHIBA PC Diagnostic Tool Utility
150
TOSHIBA SD™ Memory Card Format Utility
151
Mouse Utility
152
Toshiba Hardware Setup
153
TOSHIBA Zooming Utility
155
TOSHIBA Button Support
156
CD/DVD Drive Acoustic Silencer
157
TOSHIBA Accessibility
158
Fingerprint Authentication Utility
158
Fingerprint Utility Limitations
159
Fingerprint Enrollment
159
Fingerprint Logon
160
Power-On Security
161
Control Center
162
Password Bank
164
Care and Maintenance of Your Fingerprint Reader
167
Fingerprint Reader Limitations
169
Configfree
169
Getting Started
170
Configfree Utilities
170
Chapter 6: If Something Goes Wrong
173
Problems that Are Easy to Fix
173
Problems When You Turn on the Computer
174
The Windows Operating System Is Not Working
177
Using Startup Options to Fix Problems
177
Internet Problems
178
The Windows Operating System Can Help You
179
Resolving a Hardware Conflict
179
A Plan of Action
179
Fixing a Problem with Device Manager
180
Memory Problems
181
Power and the Batteries
182
Keyboard Problems
183
Display Problems
184
Disk Drive Problems
186
Optical Drive Problems
187
Sound System Problems
188
Expresscard™ Problems
189
Printer Problems
191
Modem Problems
191
Wireless Networking Problems
192
DVD Operating Problems
195
Develop Good Computing Habits
196
Data and System Configuration Backup in the Windows Operating System
197
If You Need Further Assistance
201
Before You Contact Toshiba
201
Contacting Toshiba
202
Other Toshiba Internet Web Sites
202
Toshiba's Worldwide Offices
203
Appendix A: Hot Keys/Toshiba Cards
205
Hot Key Cards
205
Using the Hot Key Cards
206
Application Cards
207
Using the Application Cards
208
Card Case
208
Hot Key Functions
210
Volume Mute
210
Password Security
211
Power Plan
212
Sleep Mode
213
Hibernation Mode
214
Display Modes
215
Display Brightness
216
Disabling or Enabling Wireless Devices
217
Disabling or Enabling the Touchpad or Dual Mode Pad
218
Changing Screen Resolution
219
Keyboard Hot Key Functions
220
Appendix B: Power Cord/Cable Connectors
221
Glossary
222
Index
236
Advertisement
Toshiba P200D User Manual (216 pages)
Brand:
Toshiba
| Category:
Laptop
| Size: 5 MB
Table of Contents
Macrovision License of Notice
3
Safety Instructions
3
When Using Your Computer
3
Fcc Information
5
EMC Regulatory Information
6
EU Declaration of Conformity
6
Canadian Regulatory Information (Canada Only)
7
BSMI Notice (Taiwan Only)
7
Following Information Is Only for EU-Member States
7
Optical Disc Drive Safety Instruction
8
International Precautions
16
Modem Warning Notice
17
Conformity Statement
17
Network Compatibility Statement
17
Japan Regulations
18
Region Selection
18
Fax Branding
19
Instructions for IC CS-03 Certified Equipment
20
Notes for Users in Australia and New Zealand
21
Modem Warning Notice for Australia
21
Notes for Use of this Device in New Zealand
22
General Conditions
23
Important Notice
24
General Precautions
24
Heat Injury
25
Pressure or Impact Damage
25
Mobile Phones
25
Table of Contents
27
Preface
32
Manual Contents
32
Conventions
33
Equipment Checklist
34
Chapter 1 Satellite P200D/Satellite Pro P200D Series Features
37
Features
37
Ports (Depending on Configuration)
44
Special Features
46
TOSHIBA Value Added Package
48
Utilities and Applications
49
Options
51
Chapter 2 The Grand Tour
53
Front with the Display Closed
53
Right Side
55
Left Side
56
Underside
58
Front with the Display Open
60
Keyboard Indicators
63
Optical Disc Drive
63
Region Codes for DVD Drives and Media
63
Writable Discs
64
HD DVD-ROM Drive
65
HD DVD-R Drive
65
Chapter 3 Getting Started
67
Connecting the AC Adapter
68
Opening the Display
69
Turning on the Power
69
Starting up for the First Time
70
Turning off the Power
70
Shut down Mode (Boot Mode)
70
Sleep Mode
71
Hibernation Mode
72
Restarting the Computer
74
System Recovery Options
74
Restoring the Pre-Installed Software from the Product Recovery Disc
75
Create an Optical Recovery Discs
76
Restoring the Pre-Installed Software from the Recovery Hard Disk Drive
77
Restoring the Pre-Installed Software from Your Created Recovery Discs
78
Chapter 4 Operating Basics
79
Using the Touchpad/Dual Mode Pad
79
Dual Mode Pad Button Function (Dual Mode Pad Is Provided with some Models)
80
Using the Fingerprint (Fingerprint Sensor Is Provided with some Models)
81
How the Swipe the Finger
82
Points to Note about the Fingerprint Sensor
82
Points to Note about the Fingerprint Utility Software
84
Setup Procedure
85
Fingerprint Registration
85
Window Logon Via Fingerprint Authentication
86
Fingerprint Power-On Security
86
How to Enable Fingerprint Power-On Security Settings
87
Fingerprint Single Sign-On Feature
87
Fingerprint Utility Limitations
88
Using the Web Camera
88
Using the Software
89
Using the Internal Modem
90
Important Safety Instructions
90
Properties Menu
91
Autorun Mode
92
Modem Selection
92
Dialing Properties
92
Lan
93
Connecting the Lan Cable
93
Disconnecting the LAN Cable
94
Wireless LAN
94
Bluetooth Wireless Technology
95
Worldwide Operation
95
Radio Links
95
Product Support
96
Wireless Communication Switch
97
Wireless Communication LED
97
Using Optical Disc Drives
97
Loading Optical Disc Media
98
Removing Compact Discs
100
CD/DVD Play Control Buttons
101
TOSHIBA Disc Creator
102
Data Verification
103
Media Care
103
Discs
104
TV-Out & HDMI
104
Setting up more than One Display
105
Cleaning the Computer
106
Moving the Computer
106
Chapter 5 About the HD DVD
107
Summary
107
Using TOSHIBA HD DVD PLAYER to Enjoy HD Dvds
109
HD DVD Playback Restrictions
109
Display Devices & Audio
111
Using TOSHIBA HD DVD PLAYER
112
Starting TOSHIBA HD DVD PLAYER
112
Operating TOSHIBA HD DVD PLAYER
113
Open TOSHIBA HD DVD PLAYER HELP
115
TOSHIBA HD DVD PLAYER Control Window
115
Using the Computer in Place of an HD DVD Player
118
Before Connecting
118
Connecting to the Computer
118
Switching between Computer and Television Display
119
Notes on Operation
119
HD DVD-R Disc Writing Software
119
Display Compatibility
120
Writing Cds/Dvds on a DVD Super Multi Drive or HD DVD-ROM Drive Supporting Double Layer Disc Recording
120
Important Message
120
Before Writing or Rewriting
121
When Writing or Rewriting
123
Writing Cds/Dvds/Hd Dvds on a HD DVD-R Drive
124
How to Make a DVD-Video
128
How to Learn more about Ulead DVD Moviefactory
128
Chapter 6 The Keyboard
131
Typewriter Keys
131
Soft Keys: Fn Key Combinations
132
Emulation Keys
132
Hotkeys
133
Windows Special Keys
134
Number Pad
134
Generating ASCII Characters
134
Chapter 7 Power and Power-Up Modes
135
Power Conditions
135
Power Indicators
137
Battery Indicator
137
Battery Types
138
Battery Pack
138
Real Time Clock Battery
138
Care and Use of the Battery Pack
139
Safety Precautions
139
Charging the Batteries
141
Monitoring Battery Capacity
143
Maximizing Battery Operating Time
143
Extending Battery Life
144
Replacing the Battery Pack
144
Removing the Battery Pack
144
Installing the Battery Pack
146
TOSHIBA Password Utility
147
Power-Up Modes
148
Panel Power Off/On
148
System Automatic Sleep/Hibernation
148
Chapter 8 HW Setup
149
Accessing HW Setup
149
HW Setup Window
149
Chapter 9 Optional Devices
153
Power Devices
153
Peripheral Devices
153
Express Card
154
Installing an Express Card
154
Removing an Expresscard
154
SD/SDHC/MMC/MS/MS Pro/XD Memory Cards
155
Installing a Memory Card
156
Removing a Memory Card
156
Memory Card Care
157
Memory Expansion
157
Additional Battery Pack
160
Additional AC Adapter
160
External Monitor
160
Television
161
Hdmi
163
Connecting the HDMI out Port
163
Settings for Display Video on HDMI
164
Settings for Audio on HDMI
164
Remote Controller
165
Using the Remote Controller
167
Installing/Removing Batteries
169
Type of Battery that Can be Used for the Remote Controller
169
Installing the Batteries
170
Replacing the Batteries
171
I.link (Ieee1394A)
172
Security Lock
173
Chapter 10 Troubleshooting
175
Problem Solving Process
175
Preliminary Checklist
176
Analyzing the Problem
176
Hardware and System Checklist
177
System Start-Up
178
Overheating Power down
179
LCD Panel
181
Hard Disk Drive
181
Sound System
184
Pointing Device
184
USB Mouse
185
TV Output Signal
186
Disk Drive
191
Real Time Clock
191
Fingerprint Sensor
192
Web Camera
192
TOSHIBA Support
193
Before You Call
193
Where to Write
194
Chapter 11 Disclaimers
195
Cpu
195
Memory (Main System)
196
Battery Life
196
HDD Drive Capacity
197
Lcd
197
Graphics Processor Unit ("GPU")
197
Wireless LAN
197
Non-Applicable Icons
197
Copy Protection
198
Images
198
LCD Brightness and Eye Strain
198
Appendix A Specifications
199
Environmental Requirements
200
Built-In Modem
200
Display Modes
203
Displaying Movies on a TV or CRT
204
AC Power Cord and Connectors
207
Certification Agencies
207
Toshiba P200D Maintenance Manual (249 pages)
Brand:
Toshiba
| Category:
Laptop
| Size: 7 MB
Table of Contents
Table of Contents
6
Chapter 1 Hardware Overview
11
Table of Contents
14
Features
15
System Unit
19
Figure 1-1 2.5-Inch HDD
20
Inch HDD Specifications
20
Table
20
Inch HDD Specifications (Continued)
21
Table
21
Inch Hard Disk Drive
20
Optical Disc Device
22
DVD Super Multi Double Layer Drive Specifications
22
Table
22
HD DVD-ROM Drive Specifications
23
Table
23
Power Supply
24
Batteries
26
Battery Specifications
26
Chapter 2 Troubleshooting Procedures
29
Table of Contents
31
Troubleshooting Introduction
33
Troubleshooting Flowchart
34
Power Supply Troubleshooting
39
Display Troubleshooting
44
Keyboard Troubleshooting
47
External USB Devices Troubleshooting
49
TV-Out Failure Troubleshooting
51
Touchpad Troubleshooting
53
Speaker Troubleshooting
55
Optical Drive Troubleshooting
57
Modem Troubleshooting
60
Express Card Troubleshooting
62
IEEE 1394 Troubleshooting
64
Wireless LAN Troubleshooting
66
Camera Troubleshooting
68
Bluetooth Troubleshooting
70
In 1 Card Troubleshooting
72
HDD Troubleshooting
74
CRT Failure Troubleshooting
76
HDMI Troubleshooting
78
SPDIF Troubleshooting
80
MIC Troubleshooting
82
Finger Printer Troubleshooting
84
Chapter 3 Tests and Diagnostics
86
The Diagnostic Test
88
Executing the Diagnostic Test
89
Display Configuration
93
Speaker Audio Test
94
Fan ON/OFF Test
95
Main Battery Charge Test
96
FDD Test
97
ODD Test
98
Keyboard Test
99
Mouse (Pad) Test
101
LCD Pixels Mode Test
102
Magnetic Switch Test
103
LAN Test
105
RTC Test
108
Read 1394 GUID
109
Write SKUID
112
Front Edge Logo Check
113
Fingerprint DOS Test
115
Clear Fingerprint Test
117
Write DMI
119
Button Test
128
Replacement Procedures
129
Table of Contents
131
Chapter 4 Contents
135
General
135
Battery
141
PC Card
143
Memory Card
145
Hdd
150
Expansion Memory
152
Modem
155
Optical Drive Module
157
Optical Drive
159
Keyboard
161
Display Assembly
164
Function Button Board
168
Wireless LAN Unit
170
Bluetooth
172
Top Cover
173
Touch Pad
176
Fingerprint Module
178
Speakers
180
Subwoofer Unit and USB Board
182
System Fan
185
Crt Pcb
187
System Board
189
VGA Board
191
Fan and CPU
193
Display Mask
197
Removing the Connectors
199
Removing the FL Inverter Board
199
Figure
200
Removing the LCD Module
201
Figure
202
Figure
203
Removing the LVDS Cable
203
Removing the CMOS Cable
204
Removing the Camera Module
204
Camera and Microphone
204
Figure
205
Removing the Microphone
205
Appendix A Handling the Lcd Module
206
Appendix B Board Layout
211
Pin Assignments
215
Appendix F Series Screw Torque List
247
Appendix G Reliability
249
Advertisement
Advertisement
Related Products
Toshiba Satellite P200 Series
Toshiba P200-ST2061
Toshiba P200-ST2071
Toshiba Satellite P200-1JR
Toshiba Satellite P205-S6297
Toshiba Satellite P205-S6247
Toshiba P205-S7469
Toshiba P205-S7482
Toshiba Satellite P20-25 Series
Toshiba P205-S7457
Toshiba Categories
Laptop
Air Conditioner
TV
LCD TV
All in One Printer
More Toshiba Manuals
Login
Sign In
OR
Sign in with Facebook
Sign in with Google
Upload manual
Upload from disk
Upload from URL