Sign In
Upload
Manuals
Brands
ThermoFisher Scientific Manuals
Laboratory Equipment
QuantStudio 1
ThermoFisher Scientific QuantStudio 1 Manuals
Manuals and User Guides for ThermoFisher Scientific QuantStudio 1. We have
2
ThermoFisher Scientific QuantStudio 1 manuals available for free PDF download: Installation, Use And Maintenance Manual, User Manual
ThermoFisher Scientific QuantStudio 1 Installation, Use And Maintenance Manual (110 pages)
Real-Time PCR System
Brand:
ThermoFisher Scientific
| Category:
Laboratory Equipment
| Size: 1 MB
Table of Contents
Table of Contents
3
About this Guide
8
CHAPTER 1 Product Information
9
Instrument Hardware Description
9
Instrument Overview
9
Parts of the Instrument
11
Parts of the Home Screen
12
Software Description
14
Features of the Instrument, Desktop, and Thermo Fisher ™ Connect Software
14
Folders, Templates, Experiments, and Projects
15
Third-Party Software
17
Supported Options for Instrument and Computer Connections
17
Experiment Types
19
CHAPTER 2 General Procedures to Operate the Instrument
21
Precautions for Use
21
Power on the Instrument
22
Power off the Instrument
22
Sign in
22
Sign out
23
Load and Unload a Plate in the Quantstudio
23
Transfer, View, or Manage Files and Results
24
Transfer EDS Files from the Instrument Home Screen
24
View Run History and Delete or Transfer Files from the Instrument
24
Manage Templates (EDT Files)
25
CHAPTER 3 Configure the Instrument and Manage Instrument Profiles
26
Initial Start-Up
26
Installation and Instrument Verification
27
Use the Instrument Without Signing in
27
Create an Administrator Instrument Profile During Initial Start-Up
27
Create a New Instrument Profile
28
Overview of Settings
29
Manage Instrument Settings
31
Manage the Instrument Name (Administrator Only)
32
Enable Sleep Mode
32
Set the Idling Temperature for the Heated Cover
32
Configure the Network Drive
32
OEM Connection Only (Administrator Only)
33
Select a Region for Thermo Fisher ™ Connect (Administrator Only)
33
Set the Date and Time (Administrator Only)
33
Configure the Network
33
Restore Factory Defaults
35
Select a Language
35
Learn about the Instrument
35
View Instrument Specifications
35
View and Export the License Agreement
36
Manage Home Screen Notifications
36
Manage Maintenance, Service, and Calibrations
36
Update Instrument Software (Administrator Only)
36
Enable Remote Instrument Monitoring (Administrator Only)
37
View Instrument Statistics
37
View Instrument Logs
37
Manage Users
38
Require Instrument Profile Sign-In (Administrator Only)
38
Manage the Sign out Timer (Administrator Only)
38
Manage Instrument Profiles
38
Link an Instrument Profile to Thermo Fisher
39
Connect
39
Link an Existing Instrument Profile to Thermo Fisher
40
Connect
40
Create a New Instrument Profile and Link to Thermo Fisher
40
Workflow
41
CHAPTER 4 Create and Run Experiments on the Instrument
42
Run an Experiment
42
Create and Run an Experiment from a Template
42
Run an Experiment from a Saved File
42
Repeat the Last Instrument Run
43
Edit an Experiment before Starting a Run
44
Enter or Edit Template Properties
44
Edit the Run Method
45
Define, Assign, and View Well Details
48
View, Pause, or Stop a Run
49
View Real-Time Data and Plots on the Instrument Touchscreen
49
Adjust the Display of Real-Time Plots on the Instrument Touchscreen
49
Pause or Stop an Instrument Run
50
Lock the Touchscreen During a Run
50
Transfer EDS Files from the Instrument Home Screen
50
CHAPTER 5 Calibrate and Verify Instrument Performance
52
Calibration and Verification Schedule
52
Calibration Descriptions
53
View the Calibration Status and Set Reminders
54
View Calibration Status and Set Reminders in the Instrument
54
View Calibration Status and Set Reminders in Thermo Fisher
54
Connect
54
Perform Roi/Uniformity, Background, and Dye Calibrations
55
Workflow: Calibration
55
Prepare a Calibration Plate
56
Perform Calibrations
57
View Calibration Images and Transfer Results to USB
58
Troubleshoot Calibration Failure
59
Identify Contamination
59
Create a Background Plate (Optional)
60
Perform Instrument Verification Using Rnase P Plates
60
Instrument Verification Description
61
Rnase P Instrument Verification Plate
61
Performance Specifications Pass Criteria
62
Prepare an Rnase P Plate
62
Perform Rnase P Verification
63
Troubleshoot Verification Failure
64
Calibrate Custom Dyes
65
Custom Dyes Overview
65
Use a Dilution Series to Determine an Optimal Custom Dye Concentration
65
Calibrate the Custom Dye
67
Calibrate for a Custom Melt Curve Experiment
70
CHAPTER 6 Maintain the Instrument
73
Backup or Restore the Instrument
73
Decontaminate the Sample Block
74
Materials Required
74
Clean the Sample Block
74
Detailed Procedures for Cleaning the Sample Block
76
Replace the Instrument Fuses
77
Materials Required
77
Replace the Fuses
77
Prepare the Instrument to Store, Move, or Ship
78
Move the Instrument
78
Return the Instrument for Service
79
Workflow: Install and Connect to a Network
80
APPENDIX A Install and Connect the Instrument to a Network
81
Before You Begin
81
Instrument and Computer Connections
81
Unpack and Install the Instrument
82
Power on and Follow the Startup Wizard
83
Connect the Instrument and the Computer Directly or to a LAN
84
Networking
85
Supported Options for Instrument and Computer Connections
85
Control and Monitor Networked Instruments
86
Ethernet Port Overview
87
Firewall Ports that Must be Open
87
Networking Guidelines and Best Practices
87
APPENDIX B Troubleshooting
88
APPENDIX C Instrument Specification and Layout
90
Configured System Dimensions
91
Instrument Clearances
92
Electrical Requirements
92
Environmental Requirements
93
Network Requirements
93
APPENDIX D Parts and Materials
95
Kits, Consumables, Accessories, and Reagents
95
Consumables (96-Well, 0.2-Ml Format)
95
Accessories
96
General-Use Materials and Consumables
96
APPENDIX E Safety
98
Symbols on this Instrument
98
Conformity Symbols
99
Safety Alerts on this Instrument
100
Location of Safety Labels on the Instrument
100
Safety Information for Instruments Not Manufactured by Thermo Fisher Scientific
101
Instrument Safety
101
General
101
Physical Injury
101
Electrical Safety
101
Cleaning and Decontamination
102
Safety and Electromagnetic Compatibility (EMC) Standards
102
Safety Compliance
102
Emc
103
Environmental Design
103
Chemical Safety
104
Biological Hazard Safety
105
APPENDIX F Documentation and Support
106
Related Documentation
106
Customer and Technical Support
106
Limited Product Warranty
106
Index
107
Advertisement
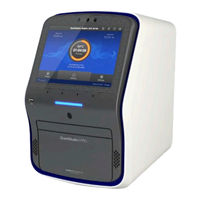
ThermoFisher Scientific QuantStudio 1 User Manual (66 pages)
Real-Time PCR System
Brand:
ThermoFisher Scientific
| Category:
Laboratory Equipment
| Size: 0 MB
Table of Contents
Table of Contents
3
CHAPTER 1 About the Software
7
Compatible Instruments
7
Compatible Data Files
7
CHAPTER 2 Workflow
9
CHAPTER 3 Set up a Plate File
10
Select a System Template or Existing Plate File to Set up a New Plate File
10
Confirm or Edit Run Method
12
Run Method Elements
12
Apply the Recommended Run Method for Your Master MIX
12
Edit Temperature Ramp Rate, Temperature, and Time Length for a Step
13
Add or Remove a Step
13
Add or Remove a Stage
13
Add, Edit, or Remove a Pause Cycle in a PCR Stage
14
Edit the Ramp Increment for the Melt Curve Dissociation Step
15
Enable, Edit, or Disable Auto Delta
15
Enable, Edit, or Disable Veriflex Zones
16
Confirm or Edit Filter Settings
16
Confirm or Edit Plate Setup
17
Select Plate Wells
17
Add Samples and Assign to Plate Wells
17
Add Targets or SNP Assays and Assign to Plate Wells
21
Edit Reagent Information
25
Select a Passive Reference
25
Set up the Standard Curve
26
Add Biogroups and Assign Samples
27
Edit Plate File or Data File Information
27
Review the Plate File and Save
28
Export a Plate Setup File
28
CHAPTER 4 Review and Analyze Data
29
Workflow: General Procedures to Review the Primary Analysis Results
29
Open a Data File
30
Review Results in the Amplification Plot
30
Evaluate the Overall Shape of the Curves in the Amplification Plot
30
Review the Amplification Status for each Well
31
Review or Edit Threshold Settings in the Amplification Plot
31
Review or Edit Baseline Settings in the Amplification Plot
33
Optimize Display of Negative Controls in the Amplification Plot
33
Identify and Omit Outliers from Analysis
34
Review Results in the Multicomponent Plot
35
Review Results in the Raw Data Plot
36
Review Results the Melt Curve Plot
36
Review QC Alerts in the Well Table
37
Edit Primary Analysis Settings
37
View or Edit C Settings
37
View or Edit QC Alerts Settings
38
View or Edit Melt Analysis Settings
39
Use the Analysis Settings from Another File
39
View Instrument Calibration Results
40
Review Roi/Uniformity Calibration Results
40
Review Background Calibration Results
40
Review Dye Calibration Results
41
Override the Calibration Data
41
Perform Additional Analysis
42
CHAPTER 5 Export Results
43
Export the Well Table
43
Export Plate Layout as an Excel ™ Spreadsheet
43
Export Plate Layout Image
43
Export Images of Plots
43
Export Data in the Quantstudio ™ File Format
44
Export Data in the RDML Format
44
Generate a Report
44
CHAPTER 6 General Procedures to Analyze Data in the Quality Check Tab
47
View the Post-Run Summary
47
Configure the Layout of the Quality Check Tab
47
Review Individual Well Results in the Well Table
48
Review Replicate Group Results
48
Configure General Plot Settings
48
CHAPTER 7 Manage Plate Files and Data Files
49
About System Templates and Plate Files
49
About Data Files
50
Save a Plate File or Data File
50
Restrict Editing of a Plate File or Data File
50
Add a Plate File to My Plate Files
51
Search for a Plate File or Data File
51
CHAPTER 8 Manage Analysis Modules
52
About Analysis Modules
52
Select an Analysis Module
53
CHAPTER 9 Manage Export Settings
54
About Export Settings
54
View or Edit Export Settings
54
View Files in the Export Settings Library
55
Download an Export Settings File
55
Import an Export Settings File
56
CHAPTER 10 About Data Analysis
57
About the Quantification Cycle (C Q )
57
About Melt Curve Analysis
57
Primary Analysis Settings Overview
58
Settings Overview
58
Guidelines for Manual Threshold and Baseline Settings for C Analysis
59
Melt Analysis Settings Overview
59
Plots Overview
59
Amplification Plot Overview
59
Raw Data Plot Overview
60
Multi-Component Plot Overview
60
Melt Curve Plot Overview
61
APPENDIX A Troubleshooting
62
Documentation and Support
63
Related Documentation
63
Customer and Technical Support
63
Limited Product Warranty
63
Index
64
Advertisement
Related Products
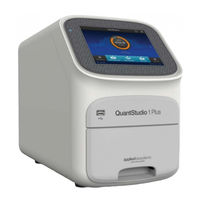
ThermoFisher Scientific QuantStudio 1 Plus
ThermoFisher Scientific MicroCL 17R
ThermoFisher Scientific MicroClick 18x5
ThermoFisher Scientific QuantStudio 12K Flex OpenArray AccuFill System
ThermoFisher Scientific Invitrogen HulaMixer 15920D
ThermoFisher Scientific QuantStudio Series
ThermoFisher Scientific QuantStudio 5 Real-Time PCR
ThermoFisher Scientific QuantStudio 6 Pro
ThermoFisher Scientific QuantStudio 7 Pro
ThermoFisher Scientific QuantStudio 5
ThermoFisher Scientific Categories
Laboratory Equipment
Measuring Instruments
Microscope
Data Loggers
Security Sensors
More ThermoFisher Scientific Manuals
Login
Sign In
OR
Sign in with Facebook
Sign in with Google
Upload manual
Upload from disk
Upload from URL