
Thermo Scientific Partisol 2025i Manuals
Manuals and User Guides for Thermo Scientific Partisol 2025i. We have 1 Thermo Scientific Partisol 2025i manual available for free PDF download: Instruction Manual
Thermo Scientific Partisol 2025i Instruction Manual (423 pages)
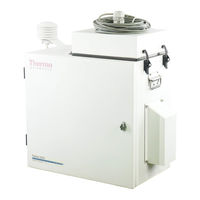
Sequential Air Sampler
Brand: Thermo Scientific
|
Category: Laboratory Equipment
|
Size: 4 MB
Table of Contents
-
-
Overview31
-
Inlet System33
-
Programming33
-
-
-
-
-
-
Start Time92
-
System Setup92
-
Average Temp92
-
Filter Fan93
-
Auto Run93
-
-
-
Flow Calibration118
-
-
Display127
-
Pushbuttons128
-
Soft Keys129
-
Power-Up Screen132
-
Run Screen132
-
Main Menu133
-
Auto Populate134
-
Apply EPA Times135
-
Sample (1-16)135
-
Start136
-
Stop136
-
Filter Blank137
-
Filter ID137
-
Cassette ID138
-
Filter Type138
-
Filter139
-
Interval/Srec142
-
User/Lrec142
-
Method147
-
Separators148
-
Start Time149
-
Duration149
-
Repeat Time149
-
Trigger Method150
-
Signal150
-
System Setup151
-
Average Pressure152
-
Flow/Flow2154
-
Setpoint 1-5155
-
Reset Flow Cal155
-
FTS Constant M/B155
-
Datalogging156
-
Select Content156
-
Fields 1-32157
-
Analog Inputs157
-
Non-Measurements157
-
Commit Content158
-
Data Treatment161
-
Flag Status Data161
-
Site ID163
-
Communications164
-
Serial Settings164
-
Baud Rate165
-
Data Bits165
-
Parity165
-
Stop Bits165
-
Instrument ID166
-
Add Labels168
-
Add Flags169
-
Item Number169
-
Measurements169
-
Analog Inputs169
-
Non-Measurements169
-
TCP/IP Settings174
-
Use DHCP174
-
IP Address174
-
Netmask175
-
Default Gateway175
-
Host Name176
-
USB Setup176
-
File Format176
-
Date Format176
-
Format USB Drive176
-
Date/Time178
-
Password Menu178
-
Set Password179
-
Lock Instrument179
-
Change Password180
-
Remove Password181
-
Restore Defaults181
-
Audit Mode182
-
Advance Filter182
-
Audit182
-
Record Reference183
-
View History183
-
Calibration184
-
Ambient Pressure185
-
Filter Pressure186
-
Flow186
-
Slope187
-
Intercept187
-
Cal Setup187
-
Setpoint 1-5188
-
Reset Flow Cal188
-
Ambient RH189
-
Leak Checks189
-
System Status191
-
Status Codes191
-
Alarms194
-
USB Menu194
-
USB Port195
-
Export Data Logs195
-
Update Firmware198
-
Service Menu198
-
Manual Motion199
-
Discrete Actions199
-
Screen Contrast200
-
Run Screens201
-
Edit Run Screen202
-
Edit Title202
-
Enabled202
-
Number of Items202
-
Item Number203
-
Analog Inputs206
-
Non-Measurements207
-
Logic State208
-
Instrument State208
-
Alarms209
-
Non-Alarm209
-
Logic State210
-
Select Range212
-
Descriptor216
-
Units216
-
Decimal Places217
-
Volts218
-
User Value218
-
Options Menu219
-
Bypass Shuttle219
-
Enable I/O Board219
-
Service Mode220
-
Diagnostics220
-
Program Versions221
-
Voltages221
-
Digital Inputs223
-
Relay States223
-
Cleaning the PM229
-
Inlet229
-
Troubleshooting255
-
Diagnostics255
-
System Status256
-
Alarms256
-
Servicing280
-
Firmware Updates280
-
Parts Lists281
-
Internal Cables285
-
Filter Log289
-
-
-
Electronics293
-
Motherboard293
-
I/O Components294
-
Digital Inputs296
-
Serial Ports296
-
USB Port298
-
-
-
Commands302
-
Commands List303
-
Measurements307
-
Diagnostics310
-
Datalogging311
-
Keys/Display319
-
Text336
-
Value Source336
-
Selection Table337
-
Examples338
-
-
Slave Address342
-
MBAP Header342
-
Function Code342
-
Data342
-
Error Check343
-
Function Codes343
-
-
Iport353
-
Rpcomm353
-
Using Rpcomm357
-
Executing Rpcomm357
-
Downloading Data364
-
Advertisement