Sign In
Upload
Manuals
Brands
Teledyne Manuals
Digital Camera
Princeton Instruments Quad-RO
Teledyne Princeton Instruments Quad-RO Manuals
Manuals and User Guides for Teledyne Princeton Instruments Quad-RO. We have
1
Teledyne Princeton Instruments Quad-RO manual available for free PDF download: System Manual
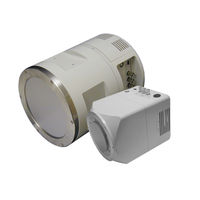
Teledyne Princeton Instruments Quad-RO System Manual (116 pages)
Brand:
Teledyne
| Category:
Digital Camera
| Size: 12.64 MB
Table of Contents
Table of Contents
3
Chapter 1 Introduction
9
Noise Reduction
9
Shuttering and Synchronization
9
When Flexibility Counts
9
Quad-RO System Components
10
Software Solutions
10
About this Manual
11
Conventions Used
11
Figure 1-1: Standard System Components
11
Manual Organization
12
Environmental Conditions
13
Grounding and Safety
13
Safety Related Symbols Used in this Manual
13
1.10 Repairs
14
1.12 Cautions
14
Beryllium
14
Coolant
14
Warnings
14
1.13 Cleaning
15
1.14 Teledyne Princeton Instruments Customer Service
15
Beryllium Window
15
Camera
15
Fiberoptic Expertise
9
Chapter 2 System Components
17
Connectors
18
Figure 2-1: Quad-RO Control Panel Connectors
18
Coolant Ports
19
Figure 2-2: Quad-RO Power Supply
19
Mounting Holes
19
Power Supply
19
Cables
20
User Manuals
20
Application Software
21
Optional Items
21
Coolant Circulator
22
Chapter 3 Initial System Verification
23
Table 3-1: Quad-RO Installation Actions
23
Figure 3-1: System Block Diagram: Quad-RO System
24
Chapter 4 System Setup
25
Unpacking the System
25
Coolant
26
Environmental
26
System Requirements
26
Vacuum
26
Ventilation
26
Host Computer
27
Power
27
Adapter (Right)
28
Figure 4-1: Mounting Hole Locations: Bottom of Camera (90 MM)
28
Figure 4-2: Mounting Holes on 165 MM Camera (Left); Mounting
28
Mount the Camera
28
Figure 4-3: Typical Winview/32 Installation Select Installation Type Dialog
29
Install Application Software
29
Winview/32 Software
29
Figure 4-4: Typical Lightfield Installation Wizard Dialog
30
Lightfield Software
30
Configure a Firewire (IEEE 1394A) Interface
31
Configure Default Camera System Parameters
31
Figure 4-5: Pin Firewire (IEEE 1394A) Port
31
Winview/32
31
Dialog
32
Figure 4-6: Typical Winview/32 Camera Detection Wizard - Welcome
32
Figure 4-7: Typical Lightfield Experiment Workspace
33
Lightfield
33
Figure 4-8: Quad-RO Camera Back Panel
34
Make the Circulator-Camera Connections
34
Chapter 5 Operation
35
System On/Off Sequences
36
Cabling
37
First Light for Winview/32
37
Configure Parameters
38
Acquiring Data
39
Figure 5-2: Typical Winview/32 First Light Acquired Data
39
First Light for Lightfield
40
Getting Started
40
Configure Parameters
41
Figure 5-3: Typical Lightfield Available Devices Area
41
Acquire Data
42
Figure 5-4: Typical Lightfield Experiment Devices Area
42
Figure 5-5: Typical Lightfield View Area
42
Figure 5-6: Typical Lightfield View Area Displaying an Image
43
CCD Array Architecture
44
Circulator Power down Procedure
44
Exposure and Signal
44
Exposure Time
44
CCD Temperature
45
Setting the Temperature
45
Temperature Stabilization
45
Dark Charge
46
Saturation
46
Figure 5-7: High-Level Block Diagram: CCD with Four Output Amplifiers
47
Readout
47
Figure 5-8: Post-Exposure Pixel Readout, Full Frame at Full Resolution
48
Full Frame Readout
48
Figure 5-9: Post-Exposure Pixel Readout, Symmetrical 12 X 8 Region
49
Of Interest
49
Partial Frame ROI with Four-Port Readout
49
Define a Symmetrical Partial Frame ROI for Four-Port Readout
50
Figure 5-10: Typical Winx/32 Experiment Setup: ROI Setup Tab
50
Figure 5-11: 4096 X 4096 CCD with Symmetrical 2048 X 1024 Region
51
Of Interest
51
4096 Only)
52
Figure 5-12: Post-Exposure Pixel Readout, Asymmetrical 12 X 8 Region
52
Of Interest
52
Binning
53
Hardware Binning
53
Figure 5-13: Typical Winx/32 Experiment Setup: ROI Setup Tab, Use
54
Software Binning
54
Winview: Define a Binned ROI for Four-Port Readout
55
Figure 5-14: Typical Lightfield Edit Regions of Interest Dialog
56
Lightfield: Define a Binned ROI for Four-Port
56
Readout
56
Analog Gain
57
Digitization
58
Digitization Rate
58
Chapter 6 Advanced Topics
59
Figure 6-1: Typical Winx/32 Experiment Setup, Timing Tab: Free Run
59
Table 6-1: Camera Timing {Trigger Response} Modes
60
Timing {Trigger Response} Modes
60
Figure 6-2: Free Run {No Response} Shutter Actions
61
Free Run {No Response
61
Figure 6-3: Timing Diagram: Free Run
62
Table 6-2: Typical Shutter Compensation Time {Closing Delay
62
External Sync
63
Figure 6-4: Typical Winx/32 Experiment Setup Dialog, Timing Tab
63
Figure 6-5: External Sync Shutter Actions
64
External Sync with Continuous Cleans {Clean until Trigger
65
Figure 6-6: Timing Diagram: External Sync Mode
65
Figure 6-7: Continuous Cleans {Clean until Trigger} Shutter Actions
66
Fast Mode
67
Fast Mode and Safe Mode
67
Figure 6-8: Timing Diagram: Continuous Cleans {Clean until Trigger
67
Safe Mode
68
Figure 6-9: Comparison of Safe Mode with Fast Mode
69
Figure 6-10: Typical Winx/32 Hardware Setup Dialog: Controller
70
LOGIC out Control
70
Figure 6-11: LOGIC out Control Signals Comparison
71
Quad-RO Camera
17
Checking the Equipment and Parts Inventory
25
Figure 5-1: Block Diagram of Light Path in System
35
Chapter 7: Troubleshooting
73
Table 7-1: List of Recommended Troubleshooting Procedures
73
Acquisition Started but Data Display Is Empty
74
Figure 7-1: Typical Winx/32 Acquisition Display and Invalid ROI
74
Acquisition Started but Viewer Contents Do Not Update
75
Baseline Signal Suddenly Changes
75
Figure 7-2: Typical Lightfield Acquisition Display
75
Camera Not Found
76
Camera Is Not Detected by the Camera Detection Wizard
76
Figure 7-3: Typical Camera Not Found Dialog
76
Figure 7-4: Typical Winview/32 Camera Detection Wizard: no
76
Figure 7-5: Typical Winview/32 Camera Detection Wizard: with
77
Camera Stops Working
78
Camera1 (or Similar Name) in Camera Name Field
78
Figure 7-6: Using a Text Editor to Edit Camera Name Within PVCAM.INI
78
Figure 7-7: Updated Camera Name on Hardware Setup Dialog
78
Changing the Power Supply Line Voltage and Fuses
79
Figure 7-8: Power Input Module
79
Figure 7-9: Voltage Selector Drum
79
Figure 7-10: Typical Fuse Holder
80
Figure 7-11: Properly Installed Fuse Holder
80
Figure 7-12: Selected Voltage Setting in Power Module Window
80
Controller Is Not Responding
81
7.10 Cooling Troubleshooting
82
Temperature Lock Cannot be Achieved or Maintained
82
Over-Temperature Failsafe
82
Camera Loses Temperature Lock
82
Gradual Deterioration of Cooling Capability
83
Data Loss or Serial Violation
83
7.12 Device Is Not Found
84
7.13 Error Creating Controller Message
84
Figure 7-13: Typical Lightfield Load Experiment: Devices Missing Dialog
84
Figure 7-14: Typical Winview/32 Error Creating Controller Dialog
84
Appendix A: Specifications
85
CCD Arrays
85
Camera Window
85
Table A-1: Quad-RO CCD Array Specifications
85
Camera Connector
86
Camera Cooling
86
Gain
86
Table A-2: Connector Pinout: 6-Pin Firewire (IEEE 1394A)
86
Table A-3: Connector Pinout: 4-Pin Firewire (IEEE 1394A)
86
Temperature Control
87
Power Supply
87
Table A-4: Approximate Cooling Temperatures by Camera Model
87
Table A-5: Fuse Specifications
87
Dimensions
88
Firewire (IEEE 1394A)
88
A.10 Ttl I/O
88
A.11 Mounting
88
Table A-6: Quad-RO Camera System Dimensions and Weight
88
Fiber Ratios
89
Custom Phosphors
89
Appendix B: Outline Drawings
91
Figure B-1: Outline Drawing: Quad-RO:4096 (90 MM) Without Phosphor
91
Figure B-2: Outline Drawing: Quad-RO:4096 (90 MM) with Phosphor
92
Figure B-3: Outline Drawing: Quad-RO:4096 (165 MM) Without Phosphor
93
Figure B-4: Outline Drawing: Quad-RO:4096 (165 MM) Camera Mount
94
Figure B-5: Outline Drawing: Quad-RO:4320 Without Phosphor
95
Figure B-6: Outline Drawing: Quad-RO:4096/4320 (165 MM) with
96
Figure B-7: Outline Drawing: Quad-RO Power Supply
97
Appendix C: Swagelok Fittings
99
Installation
99
Figure C-1: Insert Tubing into Swagelok Tube Fitting
99
Figure C-3: Tighten Swagelok Nut
99
High Pressure Applications or High-Safety-Factor Systems
100
Retightening Instructions
100
Appendix D: Restore the Vacuum
101
Figure D-1: Typical Vacuum Pumping Fitting
101
Figure D-2: Typical Indium-Tipped Vacuum Valve
101
Required Equipment
102
Vacuum Restoration Procedure
102
Appendix E: CCD Coverage: 165 MM Taper
105
Figure E-1: Quad-RO:4096 with 165 MM Taper, Taper Ratio
105
Figure E-2: Quad-RO:4320 with 165 MM Taper, Taper Ratio
106
Appendix F: Winx/32 to Lightfield Term Cross Reference
107
Winx/32-To-Lightfield Terminology
107
Table F-1: Winx/32-To-Lightfield Cross Reference
107
Lightfield to Winx/32
109
Table F-2: Lightfield-To-Winx/32 Cross Reference
109
Warranty and Service
111
Limited Warranty
111
Basic Limited One (1) Year Warranty
111
Limited One (1) Year Warranty on Refurbished or Discontinued Products
111
XP Vacuum Chamber Limited Lifetime Warranty
111
Sealed Chamber Integrity Limited 12 Month Warranty
112
Vacuum Integrity Limited 12 Month Warranty
112
Image Intensifier Detector Limited One Year Warranty
112
X-Ray Detector Limited One Year Warranty
112
Software Limited Warranty
112
Owner's Manual and Troubleshooting
113
Your Responsibility
113
Contact Information
114
Advertisement
Advertisement
Related Products
Teledyne Princeton Instruments Sophia-XO
Teledyne Princeton Instruments PI-MTE
Teledyne Princeton Instruments Nano-XF
Teledyne Princeton Instruments NIRvana
Teledyne Princeton Instruments NIRvana HS
Teledyne Princeton Instruments PI-MAX 3
Teledyne ProEM Series
Teledyne ProEM:512B
Teledyne ProEM:512BK
Teledyne ProEM:1024B
Teledyne Categories
Measuring Instruments
Analytical Instruments
Digital Camera
Test Equipment
Security Camera
More Teledyne Manuals
Login
Sign In
OR
Sign in with Facebook
Sign in with Google
Upload manual
Upload from disk
Upload from URL