Sign In
Upload
Manuals
Brands
TANDBERG Manuals
Conference System
EDUCATOR2
TANDBERG EDUCATOR2 Manuals
Manuals and User Guides for TANDBERG EDUCATOR2. We have
1
TANDBERG EDUCATOR2 manual available for free PDF download: Installation & Configuration Manual
TANDBERG EDUCATOR2 Installation & Configuration Manual (65 pages)
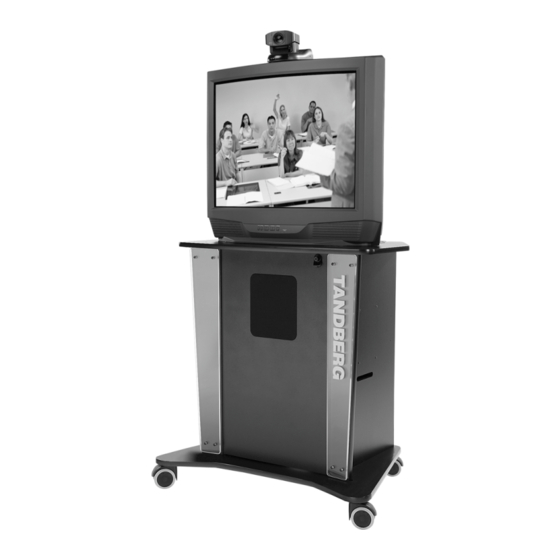
fully featured distance learning system
Brand:
TANDBERG
| Category:
Conference System
| Size: 7 MB
Table of Contents
Trademarks and Copyright
2
Technical Support
2
Table of Contents
3
1 Introduction
7
Figure 1 Educator
7
Introduction
7
Manual Content
7
System Description
8
Touch Panel Control
8
Audio Controls
8
Audio/Video Sources
8
Instructor, Student, and Document Cameras
8
Auxiliary Sources
8
Vcr/DVD Player
8
PC Presenter
9
Student Monitors
9
Instructor Monitor(S)
9
Touch Panel Video Window
9
Optional Equipment
9
Vcr (Video Cassette Recorder)
9
DVD (Digital Versatile Disc) Player
9
Monitor Upgrades
9
Additional Microphone
9
Director Microphone
10
Touch and Talk Microphones
10
Pressure Mats (Automatic Camera Positioning)
10
Tandberg Trackers (Automatic Camera Positioning)
10
Auxiliary 35 MM Slide to Video Converter
10
Auxiliary Room Camera with Wide Angle Lens
10
Auxiliary High Quality Vga/Svga Scan Converter
10
Network Terminating Units Nt1 and Nt
10
Installation
11
Precautions
11
Room Configuration and Setup
12
Figure 2 Recommended Room Layout
12
NAM and TAM Location
13
NAM and TAM Module Installation
14
Cabling
15
Cabling Configurations
16
Touch Panel
16
Figure 3 TAM Located in Instructor Desk/Podium
16
Figure 4 TAM Located in Student Cart
16
Instructor
17
Student
18
Audioscience Microphone
19
Network
19
Isdn Bri
19
Isdn E1/T1
19
External Network
19
Ethernet
19
Network Terminating Units NT1 and NT384
20
Installing Optional Equipment
20
Document Camera
21
Vcr
21
DVD Player
22
Scan Converter
23
35Mm Slide to Video Converter
23
PC Presenter
23
Vga
23
Vnc
23
Pressure Mats
24
TANDBERG Trackers
25
Room Camera
25
Telephone Add-On
25
Touch and Talk Microphones
25
The Director Microphone
25
System Configuration
26
Protected Setup Page
26
Time and Date
26
Figure 5 Touch Panel Opening Page
26
System Set up Button
27
Key Pad
27
Terminal Setup Page
28
Figure 6 Terminal Setup Page (ISDN-BRI Settings)
28
Figure 7 Set up Call Control Options
28
ISDN-BRI Settings
29
Switch Type
29
Figure 8 Terminal Setup ISDN-BRI Settings Page
29
Advanced Setup
30
Call Quality
30
ISDN-PRI Settings
31
Switch Type
31
Figure 9 Terminal Setup ISDN-PRI Settings Page
31
Advanced Setup
32
Call Quality
32
External Network Settings
33
Call Control
33
Network Clocking
33
Figure 10 External Setup Page
33
Leased E1/T1 Description
34
Network Type
34
Leased E1/T1 Settings
34
Figure 11 Leased E1/T1 Page
34
Call Quality
35
Figure 12 Call Quality Configuration Screen
35
Ethernet H.323 & IP Setup
36
Dhcp
36
Current Active IP Status
36
Nat
36
Figure 13 Ethernet Diagnostic Setup Page
36
Gatekeeper & Routing Settings
37
Streaming
38
Restart
38
Equipment Setup Page
39
Figure 14 Equipment Setup Page
39
Student/Instructor Camera
40
Sony WAVE Camera Setup (Student, Instructor)
41
Document Camera
42
VCR or DVD Player
43
Auxiliary Device #1
44
Room Camera Setup
44
Auxiliary Device #2
45
Pressure Mats Configuration
45
Audio Setup Page
46
Telephone Add-On
46
Audio Input Settings
46
Figure 15 Audio Setup Page (with Input Selected)
46
Audio Output Settings
47
Input/Output Controls
47
Room Properties
48
Restore Audio Defaults
48
System Setup Page
49
Figure 16 System Setup Page
49
External Control
50
Data Port Setup Page
51
Data Mode
51
Figure 17 Data Port Setup Page
51
T120 Mode
52
Codec Test Page
52
Abbreviations
53
Appendix 1: Audioscience Microphone
54
Audioscience Microphone Parts Listing
54
Tools Required for Assembly and Installation
54
Installation Considerations
55
Selecting a Mounting Location
56
Assembly and Installation Instructions
57
Appendix 2: the Tracker
59
Appendix 3: Installation and Setup, Educator/Tutor Extended Height Cart (EHC-03) and Monitor Interface Box (MIB)
60
Introduction
60
Monitor and Cart Installation
60
Optional Acrylic Shelf Installation
61
Monitor Interface Box (MIB) Installation
61
TAM Installation
61
Power Bar Installation
62
Connecting the MIB
62
SVGA Connections
63
Monitor Setup
64
Touch Panel Setup
65
Advertisement
Advertisement
Related Products
TANDBERG Educator MXP
TANDBERG Educator & Professional MXP
TANDBERG ENTRYPOINT
TANDBERG EX90
TANDBERG Edge 95 MXP
TANDBERG Edge 75 MXP
TANDBERG Edge 85 MXP
TANDBERG E20
TANDBERG E10075
TANDBERG E5782
TANDBERG Categories
Conference System
Software
Receiver
Cassette Player
Tape Deck
More TANDBERG Manuals
Login
Sign In
OR
Sign in with Facebook
Sign in with Google
Upload manual
Upload from disk
Upload from URL