Sign In
Upload
Manuals
Brands
Sun Microsystems Manuals
Server
Netra 120
Sun Microsystems Netra 120 Manuals
Manuals and User Guides for Sun Microsystems Netra 120. We have
1
Sun Microsystems Netra 120 manual available for free PDF download: User Manual
Sun Microsystems Netra 120 User Manual (200 pages)
Sun Microsystems Server User's Guide
Brand:
Sun Microsystems
| Category:
Server
| Size: 5 MB
Table of Contents
Table of Contents
3
How this Book Is Organized
17
Shell Prompts
19
Typographic Conventions
19
Accessing Sun Documentation Online
20
Related Documentation
20
Sun Welcomes Your Comments
20
Safety Precautions
21
Part I Installation and Configuration
23
Introduction
25
Overview of the Sun Fire V120 and Netra 120 Servers
25
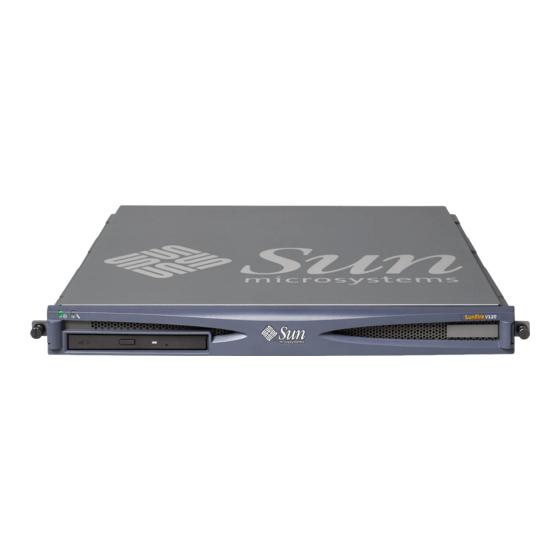
FIGURE 1-1 the Sun Fire V120 Server
26
Chapter 1 Introduction
27
FIGURE 1-2 Contents of the Ship Kit
28
Optional Hardware and Software
29
Section 1.3, "Optional Hardware and Software
29
TABLE 1-2 Customer-Installable Hardware and Software
29
FIGURE 1-3 the Front Panel of the Sun Fire V120 and Netra 120 Servers
30
Front Panel
30
Section 1.4, "Front Panel
30
Back Panel
31
FIGURE 1-4 the Back Panel of the Sun Fire V120 Server
31
FIGURE 1-5 the Back Panel of the Netra 120 Server
31
Section 1.6, "The Fans Inside the Sun Fire V120 and Netra 120 Servers
32
The Fans Inside the Sun Fire V120 and Netra 120 Servers
32
Tools You Need for Installation
32
Environmental Specifications
33
Acoustic Noise Generated by the Server
33
Environmental Compliance Information
33
Section 1.8, "Environmental Specifications
33
Tolerance of Environmental Conditions
33
Choosing between a Rack and a Cabinet
34
Section 1.9, "Choosing between a Rack and a Cabinet
34
What's Next
34
Estimating Heat Dissipation
35
Operating Power Limits and Ranges
35
Power and Cooling
35
Operating Power Limits and Ranges
36
Power Consumption
37
TABLE 2-2 Power Consumption for the Available Configurations of the Server
37
Contents of the Ship Kit
27
TABLE 1-1 Contents of the Ship Kit
27
Chapter 2 Power and Cooling
37
Estimating Heat Dissipation
38
Using DC Power
39
FIGURE 3-1 the Location of the Grounding Studs for Connecting the Two-Hole Lug
40
Grounding the Netra 120 Server
40
Assembling the DC Input Power Cable
41
Assembling the DC Power Connectors
41
The Insulated Conductors You Need to Use
41
FIGURE 3-2 Stripping the Insulation from the Wire
42
FIGURE 3-3 Opening the DC Connector Cage Clamp (Lever Method)
43
FIGURE 3-4 Opening the DC Connector Cage Clamp (Screwdriver Method)
44
FIGURE 3-5 Assembling the DC Input Power Cable
44
FIGURE 3-6 Inserting the Bottom Portion of the Strain Relief Housing
45
Installing the Strain Relief Housings
45
FIGURE 3-7 Routing the Wires out of the Strain Relief Housing
46
FIGURE 3-8 Securing the Wires to the Strain Relief Housing
46
FIGURE 3-9 Assembling the Strain Relief Housing
47
Installing Optional Hardware Components
49
Installing and Removing Hot-Pluggable SCSI Hard Disk Drives
50
Section 4.1, "Installing and Removing Hot-Pluggable SCSI Hard Disk Drives
50
Chapter 4 Installing Optional Hardware Components
51
FIGURE 4-2 Using the Antistatic Wrist Strap Supplied with the Server
52
Opening the Server
52
Section 4.2, "Opening the Server
52
FIGURE 4-3 Removing the Top Cover
53
FIGURE 4-4 Components of the Sun Fire V120 and Netra 120 Servers
54
Identifying Server Components
54
Section 4.3, "Identifying Server Components
54
Installing and Removing a DVD or CD-ROM Drive
55
Installing a DVD or CD-ROM Drive
55
Section 4.4, "Installing and Removing a DVD or CD-ROM Drive
55
FIGURE 4-5 Installing an Internal DVD or CD-ROM Drive
56
Removing a DVD or CD-ROM Drive
57
Installing and Removing Memory
57
Section 4.5, "Installing and Removing Memory
57
FIGURE 4-6 Installing Memory into a Socket on the System Board
58
Section 4.7, "Replacing the Server's Top Cover
58
Installing and Removing a PCI Card
59
Installing a PCI Card
59
FIGURE 4-7 the Rotating Retention Bracket and the Position of a PCI Card
60
FIGURE 4-8 Using the PCI Card Retainer, Slide Support Rail, and Plastic Bracket
61
Removing a PCI Card
62
Replacing the Server's Top Cover
62
FIGURE 4-9 Replacing the Top Cover
63
What's Next
63
Installing the Server into a Rack
65
FIGURE 5-1 Cable Management Bracket
66
Installing into a 19-Inch Four-Post Rack
66
TABLE 5-1 19-Inch Rackmounting Kit
66
The 19-Inch Rackmounting Kit
66
Assembling the Slides and Mounting the Server
67
FIGURE 5-2 Positioning the Slide Mounts for a Sun Storedge 72-Inch Tall Rack
67
FIGURE 5-3 Positioning the Slide Mounts for a Standard 19-Inch Wide Rack
67
FIGURE 5-4 Fastening the Slide Mounts to a Sun Storedge 72-Inch Tall Rack-Rear View (Side Panels Removed for Clarity)
69
FIGURE 5-5 Fastening the Slide Mounts to a Sun Storedge 72-Inch Expansion Rack-Front View (Side Panels Removed for Clarity)
70
FIGURE 5-6 Fastening the Slide Mounts to a Standard 19-Inch Rack
71
FIGURE 5-7 Sliding the Server into a Standard 19-Inch Rack
72
FIGURE 5-8 Adjusting the Slide Mounts and Screwing the Server into the Rack
73
FIGURE 5-9 Fitting the Cable Management Bracket to a Sun Storedge or a Standard 19-Inch Rack
74
Fitting the Cable Management Bracket
74
Tips for Using a Sun Storedge 72-Inch Rack
75
Attaching the Fixed-Mounting Brackets
76
FIGURE 5-10 Removing the Thumbscrew Brackets
76
Installing into a Two-Post Relay Rack
76
TABLE 5-2 Fixed Mounting Bracket Kit
76
The Fixed Mounting Bracket Kit
76
FIGURE 5-11 Fitting the Fixed Mounting Brackets
77
FIGURE 5-12 the Server Installed in a Two-Post Rack
78
Connecting the Cables
79
Connecting the Cables to the Server
80
FIGURE 6-1 Connecting the Cables to the Sun Fire V120 Server
80
FIGURE 6-2 Connecting the Cables to the Netra 120 Server
80
FIGURE 4-1 Inserting and Removing Hard Disks
51
Chapter 6 Connecting the Cables
81
Setting up Serial Connections
82
Connecting to a Terminal Server
83
FIGURE 6-3 Patch Panel Connection between a Terminal Server and a Sun Fire V120
83
FIGURE 6-5 Pins 1 to 8 on the Serial Ports
85
TABLE 6-2 Pin Inter-Connections Performed by the Sun DB-25 (25-Pin) Adapter
85
Using a DB-25 Adapter for Your Serial Link
85
FIGURE 6-6 Pins 1 to 8 on the Serial Ports
86
TABLE 6-3 Pin Inter-Connections Required to be Performed by a DB-9 (9-Pin) Adapter
86
Using a DB-9 Adapter for Your Serial Link
86
Settings for the Serial Connections
87
Using a Single DC Power Cord
82
Connecting to Your Server from a Laptop Running Microsoft Windows 6-10
88
Connecting the Sun Fire V120 or Netra 120 Server to the Laptop
88
FIGURE 1 Connecting the Server to the Serial Port on a Laptop
88
Using Microsoft Windows Hyperterminal
89
Powering on the Sun Fire V120 or Netra 120 Server
91
Configuring from a Terminal or Workstation
92
Preparing to Configure the Server
92
Using a Terminal Server
92
Powering on for the First Time with the Server's Details Registered at a Name Server
93
Powering on the Server
93
Using the Power (On/Standby) Switch
97
Chapter 7 Powering on the Sun Fire V120 or Netra 120 Server
93
Powering on the Server for the First Time Without Having Its Details Registered
94
Powering on a Standalone Server for the First Time
95
Clearing Your Configuration and Starting Again
96
Part II Remote and Local Management
99
Managing the Server from the Lom> Prompt
101
FIGURE 8-1 the Location of the Lights-Out Management Device on the System Board
102
Introduction to Lights-Out Management
102
Section 8.1, "Introduction to Lights-Out Management
102
Powering on or Resetting the Server from the LOM Shell
103
Section 8.2, "Powering on or Resetting the Server from the LOM Shell
103
Displaying the Lom> Prompt
104
Powering the Server on or down to Standby Mode
104
Exiting from the Lom> Prompt
105
Resetting the Server
105
Controlling the Server's Booting Behavior
106
Displaying the Ok or Kadb Prompt
106
TABLE 8-1 Boot Modes
107
Monitoring the Server from the LOM Shell
108
Checking How Long the Server Has Been Running
108
Checking the Current Status of All Components
108
Section 8.3, "Monitoring the Server from the LOM Shell
108
FIGURE 8-3 Sample LOM Device Event Log (Oldest Event Reported First)
110
Viewing the LOM Device's Event Log
110
Checking that a Component Has Been Fixed
112
Setting up LOM Privileges for Named Users
113
Permission Levels Available for LOM Users
113
Section 8.4, "Setting up LOM Privileges for Named Users
113
Creating a LOM User Account
114
Specifying the Password for a LOM User Account
114
Changing Your Own User Password
115
Deleting a LOM User Account
115
Viewing Details of a LOM User Account
115
Specifying Permissions for a Named User
116
Quitting a LOM Named User Session
117
Setting the LOM Device's Configurable Variables
117
Section 8.5, "Setting the LOM Device's Configurable Variables
117
Turning the Fault LED off
117
Turning the Fault LED on
117
Setting the Alarmoff N Software Flag
118
Setting the Alarmon N Software Flag
118
Stopping the LOM Sending Event Reports to the Serial A/LOM Port
118
Separating the LOM from the Console on the Serial A/LOM Port
119
Dedicating Serial A/LOM to the LOM
119
Section 8.6, "Separating the LOM from the Console on the Serial A/LOM Port
119
Section 8.7, "Viewing the Event Reports that the LOM Sends to Syslogd
120
Sharing Serial A/LOM between the LOM and the Console
120
Viewing the Event Reports that the LOM Sends to Syslogd
120
Section 8.8, "The LOM Shell Command List
121
The LOM Shell Command List
121
Checking the Status of the Server's Fans
123
FIGURE 8-4 Locations of Fans 1, 2, 3, and
123
Managing the Server from the Solaris Prompt
125
Checking the Power Supply Unit (Lom -P)
126
Monitoring the System from Solaris
126
Viewing Online LOM Documentation
126
Checking the Fans (Lom -F)
127
Checking the Supply Rail Voltages and Internal Circuit Breakers (Lom -V)
127
Configuring Automatic Server Restart (ASR)
132
Configuring the LOM Watchdog to Restart the System after a Lockup
132
Enabling the LOM Watchdog Process from Your Own Script or Command (Lom -W On)
133
Setting the Hardware Reset Option from a Script or Command (Lom -R On)
134
Other LOM Tasks You Can Perform from Solaris
135
Turning Alarms on and off (Lom -A)
135
Turning the Fault LED on and off (Lom -F)
135
Changing the First Character of the Sequence for Escaping to the Lom> Prompt (Lom -X)
136
Stopping the LOM from Sending Reports to the Serial A/LOM Port (Lom -E Off)
136
Making the LOM Interface Backward Compatible (Lom -B)
137
Upgrading the LOM Firmware (Lom -G Filename)
137
Chapter 9 Managing the Server from the Solaris Prompt
127
Checking the Internal Temperature (Lom -T)
128
Changing the LOM Automatic Server Restart Configuration (Lom -W)
129
Checking the Status of the Fault LED and Alarms (Lom -L)
129
Viewing All Component Status Data with the LOM Device's Configuration Data (Lom -A)
130
Viewing the Configuration of the LOM Device (Lom -C)
130
FIGURE 9-1 Sample LOM Device Event Log (Oldest Event Reported First)
131
Viewing the Event Log (Lom -E)
131
Part III Troubleshooting and Maintenance
139
Troubleshooting
141
Introduction to the POST, Obdiag, and Sunvts Diagnostic Tools
142
Using POST Diagnostics
142
FIGURE 10-1 Sample Obdiag Menu
143
Using Openboot Diagnostics (Obdiag)
143
Additional Diagnostic Tests for Specific Devices
148
FIGURE 10-2 Probe-Scsi Output Message
148
FIGURE 10-3 Probe-Scsi-All Output Message
148
Using the Probe-Scsi Command to Confirm that Hard Disk Drives Are Active
148
FIGURE 10-4 Probe-Ide Output Message
149
Using the Probe-Ide Command to Confirm that the DVD or CD-ROM Drive Is Connected
149
Using the Watch-Net and Watch-Net-All Commands to Check the Network Connections
149
FIGURE 10-5 Watch-Net Diagnostic Output Message
150
FIGURE 10-6 Watch-Net-All Diagnostic Output Message
150
Solutions to Problems You Might Encounter
150
Interpreting the Front and Back Panel Leds
152
FIGURE 10-7 Front Panel Power and Fault Leds
153
FIGURE 10-8 Back Panel Ethernet Link, Fault and Power Leds
153
Chapter 10 Troubleshooting
143
TABLE 10-1 Open Boot Diagnostics Tests
144
Using Sunvts
145
Installing Sunvts
146
TABLE 10-2 Sunvts Tests
146
Viewing Sunvts Documentation
146
Replacing a Server or Replacing Individual Components
155
Replacing Fan 3
155
Replacing a Server
156
Section 11.1, "Replacing a Server
156
Chapter 11 Replacing a Server or Replacing Individual Components
157
Field Replaceable Units
158
Section 11.2, "Field Replaceable Units
158
TABLE 11-1 Frus Available for the Sun Fire V120 and Netra 120 Servers
158
Replacing the Memory Card Reader for the System Configuration Card
159
Section 11.3, "Replacing the Memory Card Reader for the System Configuration Card
159
FIGURE 11-2 Removing the System Configuration Card Reader
160
Replacing the DVD or CD-ROM Drive, Cable, and Paddleboard
161
Section 11.4, "Replacing the DVD or CD-ROM Drive, Cable, and Paddleboard
161
FIGURE 11-3 Replacing the Paddleboard at the Back of the DVD or CD-ROM Drive Enclosure
162
Replacing the NVRAM Chip
163
Section 11.5, "Replacing the NVRAM Chip
163
FIGURE 11-4 the Location of the NVRAM Chip
164
FIGURE 11-5 Replacing the NVRAM Chip
165
Replacing the System Board
166
Removing the Old System Board
166
Section 11.6, "Replacing the System Board
166
FIGURE 11-6 Unplugging and Removing the Fan 3 Assembly
167
Installing the New System Board
169
FIGURE 11-8 Replacing the Fan 3 Assembly
170
Replacing the Power Supply Unit
171
FIGURE 11-9 Replacing the Power Supply Unit
172
Replacing the Rear Fan Subassembly (Fans 1 and 2)
173
FIGURE 11-10 Replacing the Rear Fan Subassembly (Fans 1 and 2)
174
FIGURE 11-11 Disconnecting the Power Cable for Fan 3 and Lifting the Fan out
175
Replacing Fan
175
IV Appendixes
177
Installing and Removing a SCSI Hard Disk Drive with Solaris Running
179
Installing a SCSI Hard Disk Drive with Solaris Running
180
Removing a SCSI Hard Disk Drive with Solaris Running
182
Reinstalling the Solaris Operating Environment
185
Reinstalling Solaris
186
Reinstalling the Lights-Out Management Software
186
Configuring the LOM Device Driver
187
The LOM Device Driver
188
Configuring the LOM Device Driver
189
TABLE C-1 LOM Configuration File Parameters
190
System Board Jumper Settings
193
TABLE D-1 Factory-Default Jumper Settings
194
FIGURE D-1 System Board Jumper Locations and Default Settings
196
Index
197
FIGURE 11-1 Replacing the System Configuration Card
157
Advertisement
Advertisement
Related Products
Sun Microsystems Netra 1290
Sun Microsystems Sun Fire Netra 1280
Sun Microsystems Netra 1120
Sun Microsystems Netra 1400
Sun Microsystems Netra 1125
Sun Microsystems Netra 1405
Sun Microsystems Netra 150
Sun Microsystems Netra ct
Sun Microsystems Netra 3.1
Sun Microsystems Netra 440
Sun Microsystems Categories
Server
Storage
Desktop
Computer Hardware
Adapter
More Sun Microsystems Manuals
Login
Sign In
OR
Sign in with Facebook
Sign in with Google
Upload manual
Upload from disk
Upload from URL