Sign In
Upload
Manuals
Brands
Snapmaker Manuals
3D Printers
Snapmaker
Snapmaker Snapmaker Manuals
Manuals and User Guides for Snapmaker Snapmaker. We have
2
Snapmaker Snapmaker manuals available for free PDF download: Quick Start Manual
Snapmaker Snapmaker Quick Start Manual (37 pages)
3-in-1 3D Printer
Brand:
Snapmaker
| Category:
3D Printers
| Size: 3 MB
Table of Contents
Table of Contents
2
Before You Start
3
Get the Screwdriver Ready
3
Used Symbols
3
Attach the Feet to the Base Plate
4
Assemble the 3D Printer
4
Attach the Heated Bed to One of the Linear
5
Attach the y Axis to the Base Plate
6
Attach the Z Axis to the Base Plate
7
Attach the X Axis to the Z Axis
9
Attach the 3D Printing Module to the X Axis
10
Attach the Controller to the Z Axis
11
Attach Filament Holder to the Z Axis
12
Connect the Modules to the Controller and Power on
13
Level the Heated Bed
14
Load Filament
14
Start Printing
14
Use the 3D Printer
14
Level the Four Corners in Order
16
Level the First Corner
17
Get an A4 Paper
18
Adjust the Distance between the Heated Bed
19
And the Nozzle
19
Use the Paper to Adjust the Distance
20
Level the Second to Fourth Corner
21
Save the Settings
22
Reset the Calibration to Factory Settings
23
Reposition the 3D Printing Module
24
Load Filament
24
Get the Nozzle Ready
25
Hang the Filament over the Filament Holder
27
Insert the Filament
28
Keep Inserting the Filament
29
Clean the Filament
30
Start Printing
31
Download the Software
32
Generate G-Code
33
Choose a Way to Print
34
Support
35
Advertisement
Snapmaker Snapmaker Quick Start Manual (36 pages)
Brand:
Snapmaker
| Category:
3D Printers
| Size: 8 MB
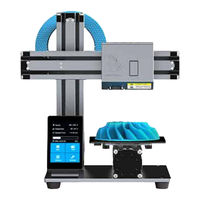
Table of Contents
Table of Contents
2
Before You Start
5
Bevor Sie Beginnen | Avant de Commencer | Antes de Empezar
5
Befestigen Sie die Füsse an der Grundplatte. | 将脚垫固定在底板上
6
Befestigen Sie die Y-Achse an der Grundplatte. | 将 y 轴连接到底板上
8
Befestigen Sie die Z-Achse an der Grundplatte. | 将另一个直线模组 (后称 Z 轴) 连接到底板上
9
Befestigen Sie die X-Achse an der Z-Achse. | 将最后一个直线模组 (后称 X 轴) 固定到 Z 轴上。 6/10
11
Befestigen Sie das 3D-Druckmodul an der X-Achse. | 将 3D 打印模组固定到X轴上。 7/10
12
使用 3D 打印机 | 3Dプリンターの使用 | 3D 프린터 사용하기
16
Use the 3D Printer
16
Level the Heated Bed
17
Load Filament
26
3D-Druck Starten | Débuter L'impression | Comenzar a Imprimir | 开始打印 | 造形を始めよう | 프린팅 시작하기
34
Start Printing
34
Advertisement
Related Products
Snapmaker SM-A150SET
Snapmaker 2.0
Snapmaker 3-in-1 3D Printer
Snapmaker 80012
Snapmaker 80016
Snapmaker A150
Snapmaker A250
Snapmaker A250T
Snapmaker A350
Snapmaker A350T
Snapmaker Categories
3D Printers
Enclosure
Safety Equipment
Printer
Air Cleaner
More Snapmaker Manuals
Login
Sign In
OR
Sign in with Facebook
Sign in with Google
Upload manual
Upload from disk
Upload from URL