Sign In
Upload
Manuals
Brands
Sabo Manuals
Lawn Mower
52-PRO S A PLUS
Sabo 52-PRO S A PLUS Manuals
Manuals and User Guides for Sabo 52-PRO S A PLUS. We have
2
Sabo 52-PRO S A PLUS manuals available for free PDF download: Operator's Manual
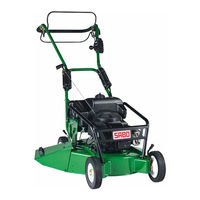
Sabo 52-PRO S A PLUS Operator's Manual (84 pages)
Brand:
Sabo
| Category:
Lawn Mower
| Size: 2 MB
Table of Contents
Deutsch
7
Table of Contents
7
1 Einführung
8
Mäher
8
Schallleistungspegel
8
2 Erklärung des auf der Maschine Angebrachten Typenschildes
8
3 Erklärung der Piktogramme
8
4 Erklärung der Symbole
8
5 Bestimmungsgemässer Gebrauch
9
6 Allgemeine Sicherheitsvorschriften für den Handgeführten Sichelrasenmäher (Benzin)
9
Allgemeine Sicherheitshinweise
9
Vorbereitende Maßnahmen
9
Handhabung
10
Wartung und Lagerung
11
7 Beschreibung der Bauteile
12
8 Vorbereitende Arbeiten
12
Führungsholm Hochstellen (Abbildung A1 + E1 + B1 )
12
Stützholm-Montage (Abbildung W2 + D1 )
12
Einhängen des Motor-Brems-Bowdenzuges am Motor (Abbildung H1 )
12
Holmstart-Montage (Abbildung L1 )
12
Prallblech Anbauen (Abbildung T1 )
12
Schnitthöhe Einstellen (Abbildung I )
13
9 Vor der Ersten Inbetriebnahme
13
Öl Einfüllen (Abbildung Y1 )
13
Kraftstoff Einfüllen
13
10 Starten des Motors (Abbildung a + D + E )
13
11 Abstellen des Motors (Abbildung F + a )
13
12 Anhalten IM Notfall
13
Bedienung des Hinterradantriebes (Abbildung G )
13
13 Fahrantrieb
13
14 Mähbetrieb
14
Mähen an Hanglagen
14
Ölstandkontrolle
14
Prüfung der Betriebssicherheit
14
Zeitliche Einschränkungen
14
Tipps zur Rasenpflege
14
Mähen (Abbildung M )
14
Mulchen
14
Umbau auf Seitenauswurfmäher (Abbildung R3 )
14
Geschwindigkeitseinstellung (Abbildung H )
14
15 Wartungsintervalle
15
16 Pflege und Wartung des Mähers
15
Reinigung (Abbildung a + O )
15
Aufbewahrung
15
Umklappen des Führungsholmes (Abbildung B4 )
15
Transport und Sicherung des Gerätes (Abbildung N + N4 )
15
Wartung des Messerbalkens
16
Nachschleifen und Auswuchten des Messerbalkens (Abbildung Q )
16
Auswechseln des Messerbalkens
16
Wartung der Vorderräder
16
Wartung des Hinterradantriebs (Abbildung R )
16
Wartung des Antriebs
16
Auswechseln des Antriebkeilriemens
16
17 Wartung des Motors
16
Ölwechsel
16
Reinigen Bzw. Austausch des Luftfilters (Abbildung W )
16
Kontrolle der Zündkerze (Abbildung y )
17
Vorschriftsmäßiges Überwintern des Motors (oder Längerer Nichtgebrauch)
17
18 Störungsursachen und Deren Beseitigung
17
19 Technische Daten
18
Motor
18
Français
19
1 Introduction
20
Niveau de Puissance Acoustique
20
Tondeuse
20
2 Explication de la Plaque Signaletique Placée Sur la Machine
20
3 Explication des Pictogrammes
20
4 Explication des Symboles
20
5 Utilisation Conforme a L'emploi Prevu
21
6 Prescriptions Générales de Sécurité Relatives Ala Tondeuse Commandée a la Main (À Essence)
21
Consignes Générales de Sécurité
21
Mesures Préparatoires
21
Maniement
22
Entretien Et Rangement
23
7 Description des Elements
24
8 Travaux Préliminaires
24
Dépliage de la Fourche du Guidon (Illustration A1 + E1 + B1 )
24
Montage de la Barre D'appui (Illustration W2 + D1 )
24
Accrochage Sur Le Moteur du Câble Bowden de Frein Moteur (Illustration H1 )
24
Montage du Câble de Lancement Sur Le Guidon (Illustration L1 )
24
Montage de la Tôle de Chicane (Illustration T1 )
25
Réglage de la Hauteur de Coupe (Illustration I )
25
9 Avant la Première Mise en Marche
25
Remplissage D'huile (Illustration Y1 )
25
Remplissage de Carburant
25
10 Démarrage du Moteur (Illustration a + D + E )
25
11 Arrêt du Moteur (Illustration F + a )
25
13 Mecanisme de Translation
26
Fonctionnement des Roues Arrière Motrices (Illustration G )
26
Réglage de la Vitesse (Illustration H )
26
14 Opération de Tonte
26
Tonte Sur des Terrains en Pente
26
Contrôle du Niveau D'huile
26
Contrôle de la Sécurité de Fonctionnement
26
Restrictions Horaires
26
Conseils Pour L'entretien des Pelouses
26
Tonte (Illustration M )
26
15 Intervalles D'entretien
27
16 Entretien Et Maintenance de la Tondeuse
27
Nettoyage (Illustration a + O )
27
Stockage
27
Escamotage du Guidon (Illustration B4 )
27
Transport Et Sécurité de la Tondeuse (Illustration N + N4 )
27
Maintenance de la Lame
28
Affûtage Et Équilibrage de la Lame (Illustration Q )
28
Remplacement de la Lame
28
Maintenance des Roues Avant
28
Maintenance des Roues Arrière Motrices (Illustration R )
28
Entretien de la Transmission
28
Remplacement de la Courroie Trapézoïdale de Transmission
28
17 Maintenance du Moteur
28
Vidange D'huile
28
Nettoyage Ou Remplacement du Filtre À Air (Illustration W )
29
Contrôle de la Bougie D'allumage (Illustration y )
29
Hibernation du Moteur Conforme Au Règlement (Ou Non Utilisation Prolongée)
29
18 Causes de Dérangements Et Élimination
29
19 Caractéristiques Techniques
30
Moteur
30
English
31
1 Introduction
32
Sound Power Level
32
5 Proper Use
33
6 General Safety Guidelines for the Hand-Held Rotary Lawnmower (Petrol)
33
General Safety Instructions
33
Handling
34
Maintenance and Storage
35
7 Description of Components
35
8 Preparation
36
Opening out the Handle (Illustration A1 + E1 + B1 )
36
Support Bar Assembly (Illustration W2 + D1 )
36
Attaching the Motor Brake Bowden Cable to the Engine (Illustration H1 )
36
Handle Starter Assembly (Illustration L1 )
36
Attaching the Deflector (Illustration T1 )
36
Adjusting the Cutting Height (Illustration I )
36
9 Before Using the Lawnmower for the First Time
36
Filling with Oil (Illustration Y1 )
37
Filling with Fuel
37
10 Starting the Engine (Illustration a + D + E )
37
11 Switching off the Engine (Illustration F + a )
37
12 Emergency Stopping
37
13 Movement Drive
37
Operating the Rear Wheel Drive (Illustration G )
37
Adjusting the Speed (Illustration H )
37
14 Mowing
37
Mowing on Slopes
37
Time Restrictions
38
Tips on Caring for Your Lawn
38
Mowing (Illustration M )
38
Mulching
38
Converting the Machine to Side Ejection (Illustration R3 )
38
15 Service Intervals
38
16 Care and Servicing of Your Lawnmower
39
Cleaning (Illustration a + O )
39
Storage
39
Collapsing the Handle (Illustration B4 )
39
Transporting and Securing the Equipment (Illustration N + N4 )
39
Maintenance of the Blade
39
Sharpening and Balancing the Blade (Illustration Q )
39
Replacing the Blade
39
Servicing the Front Wheels
39
Servicing the Rear Wheel Drive (Illustration R )
39
Changing the Drive V-Belt
40
17 Servicing the Engine
40
Oil Change
40
Cleaning and Replacing the Air Filter (Illustration W )
40
Checking the Spark Plug (Illustration y )
40
Correct Winter Storage of the Engine (or When Not Used for a Long Period of Time)
40
18 Troubleshooting
40
19 Technical Data
41
Engine
41
Mower
41
Dutch
43
1 Inleiding
44
2 Verklaring Van Het Op de Machine Aangebrachte Typeplaatje
44
3 Verduidelijking Van de Pictogrammen
44
4 Verklaring Van de Symbolen
44
5 Gebruik Conform de Voorschriften
45
6 Algemene Veiligheidsvoorschriften Voor Handmatig Bestuurde Cirkelmaaiers (Benzine)
45
Algemene Veiligheidsinstructies
45
Voorbereidende Maatregelen
45
Gebruik
46
Onderhoud en Opslag
47
7 Beschrijving Van de Componenten
48
Geleidestangen Omhoog Plaatsten (Afbeelding A1 + E1 + B1 )
48
Inhangen Van de Motorrem-Bowdenkabel Aan de Motor (Afbeelding H1 )
48
Instellen Van de Maaihoogte (Afbeelding I )
48
Montage Van de Startstang (Afbeelding L1 )
48
Montage Van de Steunboom (Afbeelding W2 + D1 )
48
Monteren Van de Stuitplaat (Afbeelding T1 )
48
8 Voorbereidende Werkzaamheden
48
Bediening Van de Achterwielaandrijving (Afbeelding G )
49
Olie Bijvullen (Afbeelding Y1 )
49
Brandstof Invullen
49
9 Voor de Eerste Ingebruikneming
49
10 Starten Van de Motor (Afbeelding a + D + E )
49
Regelen Van de Snelheid (Afbeelding H )
49
11 Uitschakelen Van de Motor (Afbeelding F + a )
49
12 Stoppen in Geval Van Nood
49
13 Rijaandrijving
49
14 Het Maaien
50
Maaien Op Hellingen
50
Oliepeilcontrole
50
Controle Van de Bedrijfsveiligheid
50
Tijdelijke Beperkingen
50
Tips Voor de Verzorging Van Het Gazon
50
Maaien (Afbeelding M )
50
Mulchen
50
Ombouw Naar Zijkantuitworp (Afbeelding R3 )
50
15 Onderhoudsintervallen
50
Reiniging (Afbeelding a + O )
51
Opbergen
51
Neerklappen Van de Geleidestangen (Afbeelding B4 )
51
Transport en Beveiliging Van Het Apparaat (Afbeelding N + N4 )
51
Onderhoud Van de Messenbalk
51
Bijslijpen en Uitbalanceren Van de Messenbalk (Afbeelding Q )
52
Vervangen Van de Messenbalk
52
Onderhoud Van de Voorwielen
52
Onderhoud Van de Achterwielaandrijving (Afbeelding R )
52
Onderhoud Van de Aandrijving
52
Vervangen Van Aandrijf-V-Riem
52
16 Verzorging en Onderhoud Van de Maaier
51
17 Onderhoud Van de Motor
52
Olie Wisselen
52
Schoonmaken Resp. Vervangen Van de Luchtfilter (Afbeelding W )
52
Controle Van de Bougie (Afbeelding y )
52
Overwinteren Van de Motor Volgens Voorschrift (of Bij Langdurige Stilstand)
53
18 Oorzaken Van Storingen en Het Verhelpen Daarvan
53
19 Technische Gegevens
53
Motor
53
Español
55
Introducción
56
Advertencias Generales sobre la Seguridad
57
Medidas Preparatorias
57
Manejo
58
Mantenimiento y Almacenamiento
59
Descripción de Los Componentes
60
Levantar el Larguero de Guía (Ilustración A1 + E1 + B1 )
60
Montaje del Larguero de Soporte (Ilustración W2 + D1 )
60
Enganche del Cable Bowden para el Freno del Motor en el Motor (Ilustración H1 )
60
Montaje del Arrancador de Larguero (Ilustración L1 )
60
Montaje de la Chapa de Rebotamiento (Ilustración T1 )
61
Apagado del Motor (Ilustración F + a )
61
Arranque del Motor (Ilustración a + D + E )
61
Antes del Primer Uso
61
Llenado de Aceite (Ilustración Y1 )
61
Llenado de Combustible
61
Parada de Emergencia
61
Siega
62
Siega en Laderas
62
Control del Nivel de Aceite
62
Verificación de la Seguridad de Funcionamiento
62
Restricción de Horarios
62
Indicaciones para el Cuidado del Césped
62
Siega (Ilustración M )
62
Accionamiento de Avance
62
Manejo de la Propulsión de las Ruedas Traseras (Ilustración G )
62
Ajuste de la Velocidad de Marcha (Ilustración H )
62
Cuidado y Mantenimiento del Cortacésped
63
Limpieza (Ilustración a + O )
63
Cómo Guardar el Aparato
63
Plegado del Larguero de Guía (Ilustración B4 )
63
Transporte y Aseguramiento del Aparato (Ilustración N + N4 )
63
Mantenimiento de la Cuchilla
64
Afilado Posterior y Equilibrado de la Cuchilla (Ilustración Q )
64
Sustitución de la Cuchilla
64
Mantenimiento de las Ruedas Delanteras
64
Mantenimiento de la Propulsión de las Ruedas Traseras (Ilustración R )
64
Mantenimiento de la Transmisión
64
Recambio de la Correa Trapezoidal de Transmisión
64
Intervalos de Mantenimiento
63
Mantenimiento del Motor
64
Cambio de Aceite
64
Limpieza O Recambio del Filtro de Aire (Ilustración W )
65
Control de la Bujía (Ilustración y )
65
Instrucciones para el Periodo Invernal del Motor (O Prolongado Desuso)
65
Causas de Averías y Su Eliminación
65
Datos Técnicos
66
Motor
66
Italiano
67
1 Introduzione
68
2 Spiegazione Della Targhetta D'identificazione Applicata Sulla Macchina
68
Livello DI Potenza Sonora
68
3 Spiegazione Dei Pittogrammi
68
4 Spiegazione Dei Simboli
68
5 Impiego Conforme Allo Scopo Previsto
69
6 Norme DI Sicurezza Generali Per la Tagliaerba Manovrata a Mano (Benzina)
69
Misure Preliminari
69
Uso
70
Manutenzione E Deposito
71
7 Descrizione Dei Componenti Costruttivi
72
8 Lavori DI Preparazione
72
Posizionamento Alto del Longherone DI Guida (Illustrazione A1 + E1 + B1 )
72
Montaggio Della Sbarra DI Appoggio (Illustrazione W2 + D1 )
72
Agganciare Il Cavetto del Tirante Bowden del Freno Motore al Motore (Illustrazione H1 )
72
Montaggio Dello Starter Sul Manubrio (Illustrazione L1 )
72
Montare la Lamiera Deflettrice (Illustrazione T1 )
72
Regolare L'altezza DI Taglio (Illustrazione I )
73
9 Prima Della Prima Messa in Funzione
73
Rifornimento Dell'olio (Illustrazione Y1 )
73
Rifornire DI Carburante
73
10 Avviamento del Motore (Illustrazione a + D + E )
73
11 Spegnere Il Motore (Illustrazione F + a )
73
12 Fermare Il Motore in Caso DI Emergenza
73
13 Trasmissione DI Marcia
74
Comando Della Trazione Posteriore (Illustrazione G )
74
Regolazione Della Velocità (Illustrazione H )
74
14 Funzionamento del Tagliaerba
74
Controllo del Livello Dell'olio
74
Controllo Della Sicurezza DI Funzionamento
74
Limitazioni Temporali
74
Consigli Per la Cura del Prato
74
Mietitura (Illustrazione M )
74
Pacciamatura
74
15 Intervalli DI Manutenzione
75
16 Pulizia E Manutenzione del Tagliaerba
75
Pulitura (Illustrazione a + O )
75
Conservazione
75
Ribaltamento del Longherone DI Guida (Illustrazione B4 )
75
Trasporto E Fissaggio Dell'apparecchio (Illustrazione N + N4 )
75
Manutenzione del Coltello a Barra
76
Riaffilatura E Bilanciamento del Coltello a Barra (Illustrazione Q )
76
Cambio Della Lama
76
Manutenzione Delle Ruote Anteriori
76
Manutenzione del Sistema Propulsore
76
Cambio Della Cinghia Trapezoidale Trazione
76
17 Manutenzione del Motore
76
Cambio Dell'olio
76
Pulizia O Cambio del Filtro Dell'aria (Illustrazione W )
77
Controllo Della Candela DI Accensione (Illustrazione y )
77
Prescrizioni Per un Corretto Svernamento del Motore (Oppure Non Utilizzo Prolungato)
77
18 Cause Dei Disturbi E Loro Eliminazione
77
19 Dati Tecnici
78
Advertisement
Sabo 52-PRO S A PLUS Operator's Manual (115 pages)
Brand:
Sabo
| Category:
Lawn Mower
| Size: 4 MB
Table of Contents
Deutsch
17
Table of Contents
17
Erklärung des auf der Maschine Angebrachten Typenschildes
18
Einführung
18
Erklärung der Symbole
19
Bestimmungsgemässer Gebrauch
20
Allgemeine Sicherheitsvorschriften für den Handgeführten Sichelrasenmäher (Benzin)
20
Allgemeine Sicherheitshinweise
20
Vorbereitende Maßnahmen
21
Handhabung
22
Wartung und Lagerung
24
Beschreibung der Bauteile
25
Vorbereitende Arbeiten
25
Holmabstützung Anbauen (Abbildung D1 )
25
Führungsholm-Unterteil Anbauen (Abbildung C1 + W2 )
25
Führungsholm-Oberteil Anbauen (Abbildung E1 )
26
Einhängen des Motor-Brems-Bowdenzuges (Abbildung J1 )
26
Einhängen des Fahrantrieb-Bowdenzuges (Abbildung I1 )
26
Holmstart-Montage (Abbildung D + L1 )
26
Prallblech Anbauen (Abbildung T1 )
26
Schnitthöhe Einstellen (Abbildung I )
26
Vor der Ersten Inbetriebnahme
27
Öl Einfüllen (Abbildung Y1 )
27
Kraftstoff Einfüllen
27
Starten des Motors
27
52-PRO S a (Abbildung Z + E )
28
52-PRO S a PLUS (Abbildung a + Z + E )
28
Abstellen des Motors (Abbildung F + a )
28
Anhalten IM Notfall
28
Fahrantrieb
28
Bedienung des Hinterradantriebes (Abbildung G )
28
13 Mähbetrieb
29
Mähen an Hanglagen
29
Ölstandkontrolle
29
Prüfung der Betriebssicherheit
29
Zeitliche Einschränkungen
29
Tipps zur Rasenpflege
29
Mähen (Abbildung M )
29
Mulchen
30
Was Versteht man unter Mulchen
30
Wie Erreicht man einen Perfekten Rasenschnitt
30
Umbau auf Seitenauswurfmäher (Abbildung R3 )
30
Wartungsintervalle
31
Pflege und Wartung des Mähers
32
Reinigung (Abbildung a + O )
32
Aufbewahrung
32
Transport und Sicherung des Gerätes (Abbildung N + N4 )
32
Wartung des Messerbalkens
32
Nachschleifen und Auswuchten des Messerbalkens (Abbildung Q )
33
Auswechseln des Messerbalkens
33
Wartung der Vorderräder
33
Wartung des Hinterradantriebs (Abbildung R )
33
Wartung des Antriebs
33
Nachspannen und Auswechseln des Antriebkeilriemens
33
Wartung des Motors
33
Ölwechsel
34
Ölfilter Wechseln (52-PRO S a PLUS) (Abbildung X )
34
Reinigen Bzw. Austausch des Luftfilters (Abbildung W )
34
Kontrolle der Zündkerze (Abbildung y )
35
Vorschriftsmäßiges Überwintern des Motors (oder Längerer Nichtgebrauch)
35
Störungsursachen und Deren Beseitigung
35
Français
37
Explication de la Plaque Signaletique Placée Sur la Machine
38
Introduction
38
Explication des Symboles
39
Prescriptions Générales de Sécurité Relatives a la Tondeuse Commandée a la Main (À Essence)
40
Consignes Générales de Sécurité
40
Mesures Préparatoires
41
Maniement
42
Entretien Et Rangement
44
Utilisation Conforme a L'emploi Prevu
40
Description des Elements
44
Travaux Préliminaires
45
Montage du Support de Guidon (Illustration D1 )
45
Montage de la Partie Inférieure du Guidon (Illustration C1 + W2 )
45
Montage de la Partie Supérieure du Guidon (Illustration E1 )
45
Accrochage du Câble Bowden de Frein Moteur (Illustration J1 )
45
Accrochage du Câble Bowden du Système D'entraînement (Illustration I1 )
46
Montage du Câble de Lancement Sur Le Guidon (Illustration D + L1 )
46
Montage de la Tôle de Chicane (Illustration T1 )
46
Réglage de la Hauteur de Coupe (Illustration I )
46
Avant la Première Mise en Marche
46
Remplissage D'huile (Illustration Y1 )
47
Remplissage de Carburant
47
Démarrage du Moteur
47
52-PRO S a (Illustration Z + E )
47
52-PRO S a PLUS (Illustration a + Z + E )
48
Arrêt D'urgence
48
Arrêt du Moteur (Illustration F + a )
48
Mecanisme de Translation
48
Fonctionnement des Roues Arrière Motrices (Illustration G )
48
Opération de Tonte
48
Tonte Sur des Terrains en Pente
48
Contrôle du Niveau D'huile
48
Contrôle de la Sécurité de Fonctionnement
49
Restrictions Horaires
49
Conseils Pour L'entretien des Pelouses
49
Tonte (Illustration M )
49
Production de Paillis
49
Qu'est-Ce que la Production de Paillis
50
Comment Obtenir Une Tonte Parfaite
50
Passage en Mode D'éjection Latérale (Illustration R3 )
50
Intervalles D'entretien
50
Entretien Et Maintenance de la Tondeuse
51
Nettoyage (Illustration a + O )
51
Stockage
52
Transport Et Sécurité de la Tondeuse (Illustration N + N4 )
52
Maintenance de la Lame
52
Affûtage Et Équilibrage de la Lame (Illustration Q )
52
Remplacement de la Lame
52
Maintenance des Roues Avant
53
Maintenance des Roues Arrière Motrices (Illustration R )
53
Entretien de la Transmission
53
Retension Et Remplacement de la Courroie Trapézoïdale de Transmission
53
Maintenance du Moteur
53
Vidange D'huile
54
Remplacement du Filtre À Huile (52-PRO S a PLUS) (Illustration X )
54
Nettoyage Ou Remplacement du Filtre À Air (Illustration W )
54
Contrôle de la Bougie D'allumage (Illustration y )
55
Hibernation du Moteur Conforme Au Règlement (Ou Non Utilisation Prolongée)
55
Caractéristiques Techniques
55
Causes de Dérangements Et Élimination
55
English
57
Explanation of the Rating Plate Affixed to the Machine
58
Introduction
58
Explanation of the Symbols
59
General Safety Guidelines for the Hand-Held Rotary Lawnmower (Petrol)
60
General Safety Instructions
60
Preparatory Measures
61
Handling
61
Maintenance and Storage
63
Proper Use
60
Description of Components
64
Preparation
64
Assembling the Handle Support (Illustration D1 )
64
Assembling the Handlebar Lower Section (Ilustration C1 + W2 )
64
Assembling the Handlebar Upper Section (Illustration E1 )
65
Attaching the Engine Brake Bowden Cable (Illustration J1 )
65
Hanging up the Motor Drive Bowden Cable (Illustration I1 )
65
Handle Starter Assembly (Illustration D + L1 )
65
Attaching the Deflector (Illustration T1 )
65
Adjusting the Cutting Height (Illustration I )
65
Before Using the Lawnmower for the First Time
66
Filling with Oil (Illustration Y1 )
66
Filling with Fuel
66
Starting the Engine
66
52-PRO S a (Illustration Z + E )
67
52-PRO S a PLUS (Illustration a + Z + E )
67
Emergency Stopping
67
Movement Drive
67
Operating the Rear Wheel Drive (Illustration G )
67
Mowing
67
Mowing on Slopes
67
Checking the Oil Level
67
Checking Operating Safety
68
Time Restrictions
68
Tips on Caring for Your Lawn
68
Mowing (Illustration M )
68
Mulching
68
What Is Understood by the Term Mulching
68
How Is the Perfect Grass Blade Cut Achieved
69
Converting the Machine to Side Ejection (Illustration R3 )
69
Switching off the Engine (Illustration F + a )
67
Service Intervals
69
Care and Servicing of Your Lawnmower
70
Cleaning (Illustration a + O )
70
Storage
70
Transporting and Securing the Equipment (Illustration N + N4 )
70
Maintenance of the Blade
71
Sharpening and Balancing the Blade (Illustration Q )
71
Replacing the Blade
71
Servicing the Front Wheels
71
Servicing the Rear Wheel Drive (Illustration R )
71
Servicing the Drive
71
Tensioning and Changing the Drive V-Belt
71
Servicing the Engine
72
Oil Change
72
Oil Filter Change (52-PRO S a PLUS) (Illustration X )
72
Cleaning and Replacing the Air Filter (Illustration W )
73
Checking the Spark Plug (Illustration y )
73
Correct Winter Storage of the Engine (or When Not Used for a Long Period of Time)
73
Troubleshooting
73
Dutch
75
Inleiding
76
Verklaring Van Het Op de Machine Aangebrachte Typeplaatje
76
Verklaring Van de Symbolen
77
Algemene Veiligheidsvoorschriften Voor Handmatig Bestuurde Cirkelmaaiers (Benzine)
78
Algemene Veiligheidsinstructies
78
Voorbereidende Maatregelen
79
Gebruik
79
Onderhoud en Opslag
81
Gebruik Conform de Voorschriften
78
Beschrijving Van de Componenten
82
Voorbereidende Werkzaamheden
82
Bovenste Deel Van de Duwboom Aanbouwen (Afbeelding E1 )
83
Inhangen Van de Motorrem-Bowdenkabel (Afbeelding J1 )
83
Inhangen Van de Rijaandrijving-Bowdenkabel (Afbeelding I1 )
83
Montage Van de Startstang (Afbeelding D + L1 )
83
Onderste Deel Van de Duwboom Aanbouwen (Afbeelding C1 + W2 )
83
Versteviging Stang Aanbouwen (Afbeelding D1 )
83
Instellen Van de Maaihoogte (Afbeelding I )
84
Monteren Van de Stuitplaat (Afbeelding T1 )
84
Olie Bijvullen (Afbeelding Y1 )
84
Brandstof Invullen
85
Voor de Eerste Ingebruikneming
84
52-PRO S a (Afbeelding Z + E )
85
52-PRO S a PLUS (Afbeelding a + Z + E )
85
Starten Van de Motor
85
Uitschakelen Van de Motor (Afbeelding F + a )
85
Bediening Van de Achterwielaandrijving (Afbeelding G )
86
Het Maaien
86
Maaien Op Hellingen
86
Oliepeilcontrole
86
Controle Van de Bedrijfsveiligheid
86
Tijdelijke Beperkingen
87
Tips Voor de Verzorging Van Het Gazon
87
Maaien (Afbeelding M )
87
Mulchen
87
Wat Verstaat Men Onder Mulchen
87
Hoe Bereikt Men Een Perfect Gesneden Gazon
87
Ombouw Naar Zijkantuitworp (Afbeelding R3 )
88
Rijaandrijving
86
Stoppen in Geval Van Nood
86
Onderhoudsintervallen
88
Reiniging (Afbeelding a + O )
89
Opbergen
89
Transport en Beveiliging Van Het Apparaat (Afbeelding N + N4 )
89
Onderhoud Van de Messenbalk
90
Bijslijpen en Uitbalanceren Van de Messenbalk (Afbeelding Q )
90
Vervangen Van de Messenbalk
90
Onderhoud Van de Voorwielen
90
Onderhoud Van de Achterwielaandrijving (Afbeelding R )
90
Onderhoud Van de Aandrijving
90
Bijspannen en Vervangen Van Aandrijf-V-Riem
91
Verzorging en Onderhoud Van de Maaier
89
Onderhoud Van de Motor
91
Olie Wisselen
91
Oliefilter Wisselen (52-PRO S a PLUS) (Afbeelding X )
91
Schoonmaken Resp. Vervangen Van de Luchtfilter (Afbeelding W )
92
Controle Van de Bougie (Afbeelding y )
92
Overwinteren Van de Motor Volgens Voorschrift (of Bij Langdurige Stilstand)
92
Oorzaken Van Storingen en Het Verhelpen Daarvan
93
Advertisement
Related Products
Sabo 52-PRO S A
Sabo 52-S A
Sabo 54-pro k vario plus
Sabo 54-A ECONOMY
Sabo 54-VARIO / 54-VARIO E
Sabo 54-K VARIO B
Sabo 54-PRO A
Sabo 54-PRO VARIO
Sabo 51-A CLASSIC
Sabo 53-M VARIO
Sabo Categories
Lawn Mower
Lawn and Garden Equipment
Trimmer
Blower
Battery Charger
More Sabo Manuals
Login
Sign In
OR
Sign in with Facebook
Sign in with Google
Upload manual
Upload from disk
Upload from URL