Sign In
Upload
Manuals
Brands
RTS Manuals
Keypad
KP-5032
RTS KP-5032 Manuals
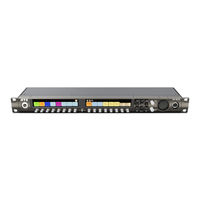
Manuals and User Guides for RTS KP-5032. We have
1
RTS KP-5032 manual available for free PDF download: Technical Manual
RTS KP-5032 Technical Manual (307 pages)
Keypanels
Brand:
RTS
| Category:
Keypad
| Size: 10 MB
Table of Contents
Important Safety Instructions
3
Table of Contents
5
List of Figures
9
Features
13
Introduction
13
Specifications
14
KP-4016/5032 Block Diagram
16
Reference View - KP-5032
17
Reference View - KP-4016
18
Connector Pinouts
19
Installation
21
Requirements
21
KP-5032/5032PB Installation
22
KP-4016/4016PB Installation
23
Connecting the Keypanel to the Intercom
24
Naming the OMI in Azedit
24
Configure the OMI Using Azedit
24
Add the OMI to the Device Catalog in Ipedit
25
Configure the OMI Using Ipedit
25
Add the KP-Series Keypanels to the Device Catalog in Ipedit
26
Configure the KP-Series Panels Using Ipedit
26
Power up
27
Connecting the KP-Series Panels through the OMNEO Offers Menu
27
To Configure an Available OMNEO Device Connection Port
27
Address Setting
28
KP-Series Addressing
28
Connections
29
Frame Connector
29
Ethernet Connector
29
Panel Microphone Connector
29
Headset Connector
30
Changing the Front Headset Connector
31
GPIO 12-Position Terminal Block Connector
34
To Connect the 12-Position Terminal Block to the Keypanel
34
To Detach the 12-Position Terminal Block Connector from the Keypanel
34
Speaker 2-Position Terminal Block Connector
35
Footswitch Cabling
36
Basic Operation
37
Intercom Keys and Displays
37
Display Icons
38
Keypad Reference View
41
Primary Mode
41
Dial Mode
41
SHIFT Mode
41
INFO Button
46
Breadcrumb Menu Navigation
47
Menu Navigation and Shaft Encoder Knobs
47
CLR Button
48
Basic Key Operation
48
Lever Key
48
Pushbutton
49
Key Gain Adjustment
50
Talk/Listen Indicator
50
To Adjust the Crosspoint Gain Using the Keypanel Key
50
To Adjust the Crosspoint Gain Using the AUX Volume Encoder Shaft
50
To Adjust the Crosspoint Gain on a Pushbutton Keypanel
51
Keypanel Volume Adjustments
52
Aux Volume Adjustments
54
To Adjust Listen Volume Level
54
To Change the Focus of the Volume Control
55
Priority Call Volume Control
56
To Configure Priority Call Volume Control
57
Operation of Intercom Keys with Auto Functions
58
Operation of Intercom Keys with Options
59
Operation of Intercom Talk Keys with the Speaker DIM Setting
59
Operation of Intercom Keys Assigned to TIF Ports
60
User Quick Select Scrolling
60
To Use the User Quick Select Scroll Feature to Call a User
60
To Page Scroll
60
Graphical Call Waiting Window
61
Graphical Call Waiting Window Operation
62
Graphical CWW Call Description
62
To Answer a Call on the Graphical CWW
63
Clearing the CWW List
63
Mute the Microphone
64
MIC Select
65
Source Configuration Matrix and Display Icons
65
Setup Pages
67
Menu Passwords
68
Voice Messaging (Audio Package Only)
68
Voice Messaging Icons
69
To Toggle on AFK Mode
70
To Toggle off AFK Mode
70
To Leave a Message
70
Voice Messages Menu
71
VM Playback Menu
72
To Listen to a Message
72
To Rewind or Fast Forward a Message
72
To Pause the Message
72
User Programmable Buttons
73
To Assign a Menu Item to a UPG Button on the Keypanel
73
To Assign a Menu Item to a UPG Button Using the SHIFT Menu
73
To Assign a Relay to a UPG Button
74
To Activate the Screen Saver from a UPG Button
74
Other Common UPG Assignments
74
Keypanel Color Window
75
Recent Colors Group Box
76
Current Color Group Box
76
Function Types Page
76
Select Intercom Drop down Menu
76
Color Grid
77
Function Type Column
77
Color Column
77
Key Assignment Page
78
Select Function Type Drop down Menu
79
Function Number Column
79
Assignment Groups Page
80
Select Assignment Group Drop down Menu
80
Intercom Column
80
Miscellaneous Colors Page
82
Enhanced Tallies
83
Tally # Column
84
Mode Column
84
Description Column
84
Duration Column
84
Characteristics Column
85
Chime # Column
85
Legacy Action Column
86
Flash Text Characteristics Window
87
Flash State Group Box
87
Swap Foreground / Background Colors Check Box
87
Set Text Color Check Box
87
Normal State Group Box
88
Set Alternate Text Check Box and Entry Field
88
Selected Color Cell and Ellipsis Button
88
Set Background Color Check Box
88
Show Icon Characteristics Window
89
Duty Cycle Drop down Menu
89
Enhanced Tally Icons
91
Panel Tally
93
Create and Download New Icons
94
Key Overlay Icons
94
Panel Icons
95
Keypanel Mirroring (Control Package Only)
96
To Disable Mirroring on a Keypanel
97
To Enable Mirroring on a Keypanel
98
Real-Time Control in Azedit (Control Package Only)
99
Intercom Volume Controls
99
To Take Control of a Target Keypanel
99
To Exit Mirror Mode on the Keypanel
99
To Enable Real-Time Intercom Volume Adjustments
100
To Adjust the Intercom Volumes Via the Port Volumes Window
102
Keypanel Volume Controls
103
MIC Mute
105
To Mute a Microphone from Azedit
105
To Unmute a Microphone that Is Muted from Azedit
105
Headset Transfer
106
To Switch to Headset Mode on the Keypanel from Azedit
106
To Switch to Speaker Mode on the Keypanel from Azedit
106
AFK Mode
107
Enable Tone
108
Keypanel Configuration (Control Package Only)
109
Load Button
109
Save All Button
110
Save Changes Button
110
Apply Button
110
Download a Configuration File to Multiple Keypanels
110
Panel Options Page
111
LCP Encoder Assignments Group Box
112
Panel Options Page – LCP Encoder Assignments
112
Panel Swap Group Box
113
To Configure Panel Swap
113
UPG Key Definition Group Box
114
Quick-Assign Listen Assignments Group Box
115
Panel Mode Group Box
115
Miscellaneous Group Box
116
Snoop Tally Group Box
116
GPI Inputs Assignments Group Box
117
GPI Output Assignments Group Box
117
Footswitch Mode Group Box
118
Display Page
119
Keypad Backlight Group Box
120
Key Display Options Group Box
120
Panel Display Options Group Box
121
To Configure the Keypanel Display
121
LCD Backlight Group Box
122
Screen Saver Group Box
122
Key Options Page
123
Solo and Exclusive Keys Group Box
124
Latch Disable Group Box
125
To Latch Disable Specific Talk and Listen Keys
125
To Latch Enable or Disable All Keys (Global Latch Enable)
125
Button Lock Group Box
126
Tallies Group Box
127
To Configure Tally Times
127
To Generate Indefinite Call Tallies
127
Autodial Numbers Group Box
128
One-Touch Autodials Group Box
129
Key Groups Group Box
130
Chimes Group Box
131
Key Icons Group Box
132
Key Volumes Group Box
133
Allow Key Volume Adjustments Check Box
133
Minimum Key Volumes Table
133
Audio Options Page
134
MIC Modes Group Box
135
Speaker / Headset Modes Group Box
135
Aux Inputs Group Box
136
Input Display Column
136
Mode Drop down Menu Column
136
Number of Analog Aux Inputs Drop down Menu
137
MIC Options Group Box
138
Matrix out and Sidetone Options Group Box
139
Headset Configuration Group Box
140
Ganged Volume Group Box
140
Tone Generator Group Box
141
VM Options Group Box
141
Audio Levels Page
142
Input Volumes Group Box
143
Output Volumes Group Box
144
Minimum Output Volumes Group Box
144
Output DIM Amounts Group Box
145
Minimum Input Volumes Group Box
145
Maximum Output Volumes Group Box
146
Chime Volumes Group Box
147
Advanced Page
148
AGC Group Box
149
Mixing Group Box
150
To MIX Inputs and Outputs
150
Compression Group Box
151
Gating Group Box
152
Noise Gate Group Box
153
Filters Page
154
Input Bandpass Filters Group Box
155
Output Bandpass Filters Group Box
156
Input Equalization Filters Group Box
157
Output Equalization Filters Group Box
158
Notch Filter Mode
159
Firmware Download
161
Download Firmware to the Keypanel from Azedit
161
Download Firmware to the Keypanel Using the Firmware Upload Tool
163
Enable Downloading New Bootloader from the Keypanel
166
Download Firmware Using the Bootloader
166
Display the FPGA Version on the Keypanel
169
Download and Upgrade the FPGA to the KP-5032/4016
169
Download a Splash Screen
173
Download a Font File
175
Download an Icon File
177
Download User Chimes (Control Package Only)
179
Download Screen Savers (Control Package Only)
181
Main Menu Access
185
Kp-4016/5032 Menu System
185
Menu System, Audio Options
186
Audio Options Menu, Advanced
187
AEC (Acoustic Echo Cancellation)
187
MIC Priority
187
The AGC (Automatic Gain Control)
188
Attack
188
Decay
188
Compression
189
To Configure the Decay Speed for a Microphone Source
189
Filters
190
Bandpass
190
To Configure a Bandpass Range for Inputs
190
To Configure a Bandpass Range for Outputs
190
Equalization
191
To Configure a Preset Frequency Response for an Input
191
Adjustable 5-Band Equalization – Audio Package Only
192
To Configure a Preset Frequency Response for an Output
192
To Adjust the Low and High Frequency Cutoff Filters for Inputs
192
To Adjust the Low and High Frequency Cutoff Filters for Outputs
193
To Configure the 5-Band Gain for Inputs
193
Notch
194
To Configure the 5-Band Gain for Outputs
194
Gating
195
Metering
196
Mixing
197
To Configure Mixing
198
Resources Table
198
MIX Mode
199
Noise Gate
199
Noise Gate – Audio Package Only
199
Audio Options Menu, Chime
200
Audio Options Menu, DIM
200
To Configure Chime Volume on the Keypanel
200
Audio Options Menu, Ganged Vols
201
Audio Options Menu, Headset MIC
201
Auto-Mute
201
Mode
201
Type
202
To Configure the Headset MIC Auto-Mute
202
To Configure the Headset MIC Mode
202
To Configure the Headset MIC Type
202
Audio Options Menu, Headset Speaker
203
Volume Control
203
Auto-Transfer
203
Audio Options Menu, Inputs
204
To Configure the Headset Spkr Mode
204
To Enable or Disable an Input
204
Audio Options Menu, Key Volumes
205
Minimum
205
To Enable Key Volumes/To Set the Minimum Volume on Individual Keys
205
To Reset All Key Gains to Their Default Value
205
Audio Options, Menu, LCP 16 CLD
206
Audio Options Menu, Matrix out
206
Audio Options Menu, Max Volume
207
Audio Options Menu, MIC Gain
207
To Set the MIC Gain Level
207
To Enable/Disable MIC Gain from the Front Panel of the Keypanel
207
Audio Options Menu, MIC Mute
208
Audio Options Menu, Min Volume
208
Audio Options Menu, Output Level
208
Audio Options Menu, Panel MIC
209
Audio Options Menu, Preamp out
209
To Configure the Preamp Output Connector
209
Audio Options Menu, Sidetone
210
Audio Options Menu, Speaker
210
Audio Options Menu, Tone Gen
211
To Enable/Disable the Tone Generator
211
To Set the Frequency Level for the Tone
211
Audio Options Menu, VM Options (Audio Package Only)
212
Playback Menu
212
Recording Menu
212
When Mailbox Full
212
Menu System, Display
214
Display Menu, Assign Type
214
Display Menu, Auto Dial
214
Display Menu, Chans on
215
Display Menu, Chime
215
Display Menu, Exclusive
215
Display Menu, Key Groups
215
Display Menu, Key List
216
Display Menu, LCP 16 CLD
216
Display Menu, Level 2
216
Display Menu, Listen/Display Menu, MAC Address
216
Display Menu, Matrix
217
Display Menu, Panel ID
217
Display Menu, solo
217
Display Menu, Version
217
Menu System, Key Assign Menu
218
Key Assign Menu, Matrix (Trunked System Only)
218
Key Assign Menu, Pt-To-Pt
219
Key Assign Menu, Party Line
219
Key Assign Menu, IFB
219
Key Assign Menu, Special List
220
Key Assign Menu, Sys Relay
220
Key Assign Menu, Camera ISO
221
Key Assign Menu, UPL Resources
221
Key Assign Menu, IFB Spcl List
221
Key Assign Menu, Auto Funcs
222
To Assign an Auto Function
222
Menu System, Key Options Menu
223
Key Options Menu, Auto Dial
223
To Store an Auto Dial Number
223
Key Options Menu, Chime
224
To Delete a Stored Auto Dial Number
224
To Configure a 1-Touch Auto Dial Key
224
To Add a Chime Tone to Keypanel Keys
224
Key Options Menu, Clear
225
Key Options Menu, Exclusive
225
To Create an Exclusive Key Assignment
225
To Remove an Exclusive Key Assignment
225
Key Options Menu, Icons
226
To Enable/Disable Icon Overlays
226
Key Options Menu, Key Groups
227
To Create a Key Group
227
To Delete a Key Group
227
Key Options Menu, Latching
228
To Configure Global Latching on a Keypanel
228
To Configure Per Key Latching on a Keypanel Key
228
Key Options Menu, Lock (Button Lock)
229
Key Options Menu, Panel Swap
230
Number of Virtual Ekps Supported with Different Keypanel
230
Panel Swap Control Options
231
Navigation Mode for Panel Swap
231
Panel Swap Key States
232
To Enable Virtual Keypanels
232
To Configure How to Access the Virtual Ekps from the Front of Keypanel
232
Key Options Menu, solo
233
To Configure the Panel Swap Key States
233
To Erase any Programming from the Panel Swap Configuration
233
To Create a solo Key/To Remove a solo Key
233
Key Options Menu, Tallies
234
Key Options Menu, Turn off
234
To Turn off Keys on the Keypanel Using the Menu
234
To Configure a UPG to Turn off Keys
234
Menu System, OMNEO Offers
235
OMNEO Matrix Connection Configuration
235
OMNEO Aux Port Configuration
235
To Configure a UPG to Require a Confirmation before Turning off Keys
235
Menu System, Save Config
236
To Save the Configuration
236
Menu System, RVON Offers (Only Available When an RVON-IO Is Detected)
236
Menu System, Service
237
Service Menu, Alphas
237
To Set the Alpha Size
237
Service Menu, Aux Select
238
Service Menu, CWW
238
Number of Entries
238
Service Menu, Display
239
On New Caller
239
Menu Context
239
Show Volume
239
Service Menu, Footswitch
240
KP32 Emulation
240
Service Menu, Intercom Mode
241
Latch Operation
241
Service Menu, Key View
242
Service Menu, Keypad
243
Backlight
243
To Configure the Keypad Setup Option
244
To Set the Keypad Activation Option
244
SEL Key
245
Service Menu, LCD Backlight
246
To Configure a GPIO Input to Control an Individual Talk Key
246
To Configure a GPIO Input to Control a Key Group
247
To Setup a GPIO Input to Track Its Corresponding GPIO Output
247
To Configure Local Control of a GPIO Output
247
Service Menu, Mirror (Control Package Only)
248
Service Menu, OMNEO Setup
248
To Enable DHCP from the Keypanel
248
To Configure the OKP Device Name
249
To Configure the OKP IP Address
249
To Configure the Gateway Address
250
To Configure the Netmask Address
250
To Configure DNS Server
250
To Configure the Domain Name
251
Service Menu, Page Change
252
Service Menu, Reset Cfg
252
Service Menu, RVON Setup
252
To Configure the IP Address for the RVON-I/O
252
Service Menu, Scrn Saver
254
To Set the Delay Option for the Keypanel Screen Saver
254
To Set the Brightness of the Display
254
Service Menu, Set Address
255
To Set the Screen Saver Mode (Type)
255
Service Menu, Snoop Tally
256
Service Menu, Test Panel
257
Telephone Interface (TIF) Operation
259
Receiving a Phone Call
259
Dialing and Hanging up
259
To Manually Dial
259
Auto Dial
260
Keypanel Hang up
260
To Program a Keypanel UPG Key to Activate the TIF Key
260
To Redial a Phone Number
260
Centralized Auto Dials
261
Centralized Auto Dial
261
To Add a Telephone Number to the Auto Dial Database
262
To Add Description to Telephone Number You Added to Auto Dial Database
262
To Use Centralized Auto Dial Numbers
263
To Use Centralized Auto Dial Numbers with Keypanel Keypad Sequences
263
Keypad Quick Reference
265
Keypad Sequence Introduction
265
Keypad Sequences
266
Keypanel Menu Quick Reference
269
Audio Options
269
Display Menu
277
Key Assign Menu
278
Key Options Menu
279
OMNEO Offers Menu
282
Service Menu
283
EKP-4016 Specifications
287
EKP-4016 Expansion Panel
289
Expansion Panel Cabling Reference
290
Unicode Support
293
To Configure the Keypanel for Unicode Operation
294
Power Supply Mounting Options
297
Power Supply Mounting Bracket Instructions
297
Mounting the Power Supply to a Standard Rack
301
Audio and Control Add-On Package
303
Download License Files
304
Advertisement
Advertisement
Related Products
RTS KP-4016
RTS KP-12
RTS KP-632
RTS KP-832
RTS KP96 SERIES
RTS KP-32
RTS KP95
RTS CLD Color Keypanel Family KP 32 CLD
RTS KP95-0
RTS KP-832-20
RTS Categories
Intercom System
Toy
Recording Equipment
Radio
Power Supply
More RTS Manuals
Login
Sign In
OR
Sign in with Facebook
Sign in with Google
Upload manual
Upload from disk
Upload from URL