Sign In
Upload
Manuals
Brands
Roland Manuals
Electronic Keyboard
Fantom-S
Roland Fantom-S Manuals
Manuals and User Guides for Roland Fantom-S. We have
3
Roland Fantom-S manuals available for free PDF download: Owner's Manual, Quick Start Manual, Turbostart
Roland Fantom-S Owner's Manual (228 pages)
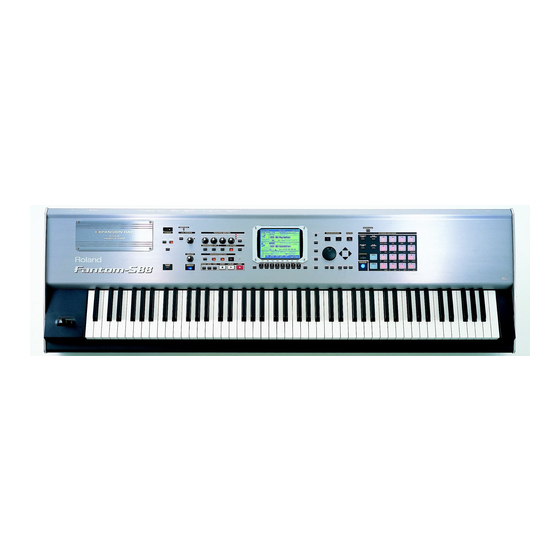
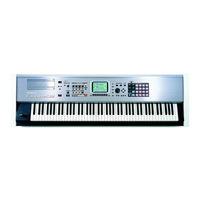
ROLAND CORPORATION Fantom-S, Fantom-S88 Keyboard Owner's Manual
Brand:
Roland
| Category:
Electronic Keyboard
| Size: 9.91 MB
Table of Contents
Important Safety Instructions
2
Using the Unit Safely
3
Important Notes
5
Table of Contents
6
Main Features
13
Panel Descriptions
14
Rear Panel
16
Overview of the Fantom-S
17
How the Fantom-S Is Organized
17
About Memory
19
About the Onboard Effects
20
Temporary Area
20
System Memory
20
About the Sequencer
21
About the Sampling Section
23
Basic Operation of the Fantom-S
24
Moving the Cursor
25
Playing in Patch Mode
26
About the Patch Play Screen
26
Displaying Patch Play Screen
26
Selecting a Patch
27
Selecting Favorite Patches (Favorite Sound)
28
Selecting Patches from the List
28
Auditioning Patches (Phrase Preview)
29
Selecting Patches by Category (Patch Finder)
29
Registering a Favorite Patch (Favorite Sound)
30
Registering Favorite Rhythm Sets (Favorite Sound)
31
Transposing the Keyboard in Octave Units (Octave Shift)
31
Transposing the Keyboard in Semitone Steps (Transpose)
32
Selecting the Tones that will Sound (Tone On/Off)
32
Playing Single Notes (Mono)
32
Creating Smooth Pitch Changes (Portamento)
33
Selecting the Parameter Controlled by the Realtime Controllers or D Beam Controller (Control Setting)
33
Specifying the Part that will be Affected by the Controller
33
Assigning a Parameter to a Controller
34
Playing Percussion Instruments
37
Selecting a Rhythm Set
37
Playing a Rhythm Set
38
Creating a Patch
39
How to Make the Patch Settings
39
Editing in a Graphic Display (Zoom Edit)
40
Initializing Patch Settings (Init)
40
Copying Patch (Tone) Settings (Copy)
40
Cautions When Selecting a Waveform
41
Saving Patches You've Created (Write)
42
Auditioning the Save-Destination Patch (Compare)
42
Functions of Patch Parameters
43
Settings Common to the Entire Patch (General)
43
Patch Level
43
Patch Pan
43
Patch Priority
43
Patch Coarse Tune
43
Patch Fine Tune
43
Stretch Tune Depth
43
Patch Category
43
Modifying Waveforms (Wave)
45
Changing How a Tone Is Sounded (TMT)
46
Ring Modulator
47
Tmt Velocity Control
48
Tmt Velocity Control Switch
48
Modifying Pitch (Pitch/Pitch Env)
49
Tone Coarse Tune
49
Tone Fine Tune
49
Modifying the Brightness of a Sound with a Filter (TVF/TVF Env)
50
Adjusting the Volume (TVA/TVA Env)
53
Patch out Assign
55
Modulating Sounds (LFO)
56
Apply Portamento or Legato to the Sound (solo Porta)
58
Miscellaneous Settings (Misc)
60
Tone Delay Mode
60
Tone Delay Time
60
Matrix Control Settings (Ctrl1-4)
61
Setting Effects for a Patch (Effects/Mfx/Mfx Control/Chorus/Reverb)
63
Creating a Rhythm Set
64
How to Make the Rhythm Set Settings
64
Editing in a Graphic Display (Zoom Edit)
64
Initializing Rhythm Set Settings (Init)
65
Copying Rhythm Tone Settings (Copy)
65
Cautions When Selecting a Waveform
66
Saving Rhythm Sets You've Created (Write)
66
Auditioning the Save-Destination Rhythm Set (Compare)
67
Functions of Rhythm Set Parameters
67
Making Settings Common to the Entire Rhythm Set (General)
67
Modifying Waveforms (Wave)
68
Changing How a Rhythm Tone Is Sounded (WMT)
70
Modifying Pitch (Pitch/Pitch Env)
71
Modifying the Brightness of a Sound with a Filter (TVF/TVF Env)
72
Adjusting the Volume (TVA/TVA Env)
73
Output Settings
75
Setting Effects for a Rhythm Set (Effects/Mfx/Mfx Control/Chorus/Reverb)
75
Playing in Performance Mode
76
Displaying Performance Layer Screen
76
Displaying Performance Mixer Screen
76
Functions in the PERFORMANCE Layer/Mixer Screen
77
Selecting a Performance
78
Selecting Performances from the List
78
Selecting Favorite Performances (Favorite Sound)
78
Registering a Favorite Performance (Favorite Sound)
79
Using the Layer Screen
79
Selecting a Part
79
Selecting the Part that You Want to Sound
79
Selecting the Sound for a Part
79
Combining and Playing Sounds Together (Layer)
80
Playing Different Sounds in Different Areas of the Keyboard (Split)
80
Using the Mixer Screen
81
Selecting a Part
81
Selecting the Sound for a Part
81
Editing the Part Settings
82
Selecting a Part to Play Individually (Solo)
82
Silencing the Playback of a Specific Part (Mute)
82
Viewing the Part Settings as a List (Performance Part View)
83
Performing with the Arpeggio/Rhythm Function
83
Performing with the Realtime Controllers and D Beam Controller
83
Confirming MIDI Information for each Part (Part Information)
83
Creating a Performance
84
Viewing the Part Settings as a List (Performance Part View)
84
Adjusting the Parameters of each Part
84
Part Decay Time Offset
87
Part Vibrato Delay
88
Part Vibrato Rate
88
Part Vibrato Depth
88
Velocity Curve
90
Selecting the Parameter Controlled by the Realtime Controllers or D Beam Controller (Control Setting)
91
Make Settings for the Realtime Controllers and D Beam Controller (Ctrl)
92
Setting Effects for a Performance (Effects/Mfx/Mfx Control/Chorus/Reverb)
95
Changing the Settings of the Patch Assigned to a Part
95
Initializing Performance Settings (Init)
96
Saving Performance You've Created (Write)
96
Modifying the Sound in Real Time
98
Waving Your Hand over the D Beam to Modify the Sound (D Beam Controller)
98
Making Settings for the D Beam Controller
98
Using Knobs or Buttons to Modify the Sound (Realtime Controller)
101
Making Realtime Controller Settings
101
Using a Pedal to Modify the Sound (Control Pedal)
102
Making Control Pedal Settings
102
Playing Arpeggios (ARPEGGIO/RHYTHM Function)
104
About Arpeggio
104
Playing Arpeggios
104
Turning Arpeggio on and off
104
Determining the Tempo for Arpeggio Performances
104
Holding an Arpeggio
104
Turning Arpeggio Switch on and off
105
Arpeggio Settings
105
Selecting Styles for Arpeggio Performances (Arpeggio Style)
105
Changing the Beat and Shuffle (Grid)
106
Applying Staccato and Tenuto (Duration)
106
Selecting Ascending/Descending Variations (Different Ways of Playing the Sounds) (Motif)
106
Adjusting the Velocity of the Arpeggio (Arpeggio Velocity)
106
Selecting the Part that will Play Arpeggios in Performance Mode (Part)
107
Hanging the Range of the Arpeggio (Octave Range)
107
Changing the Accent Strength (Accent Rate)
107
Using the Realtime Control Knobs to Edit the Arpeggio Settings
107
Creating Your Own Styles
107
Saving the Styles You Have Created (WRITE)
109
Using the Chord Memory Function (CHORD MEMORY)
110
About the Chord Memory Function
110
Performing with the Chord Memory Function
110
Turning Chord Memory Function on and off
110
Selecting Chord Forms
110
Creating Your Own Chord Forms
111
Saving the Chord Forms You Have Created
111
Playing Rhythms
112
About Rhythm Patterns
112
Using Rhythm Groups
112
Playing Rhythm
112
Turning Rhythm on and off
112
Determining the Tempo for Rhythm Pattern Performances
112
Select the Rhythm Group
113
Rhythm Pattern Settings
113
Selecting Rhythm Patterns
113
Changing the Beat and Shuffle (Grid)
113
Applying Staccato and Tenuity (Duration)
114
Changing the Velocity of Rhythm Pattern (Rhythm Pattern Velocity)
114
Changing the Accent Strength (Accent Rate)
114
Using the Realtime Control Knobs to Control the Rhythm
114
Turning Rhythm Switch on and off
114
Creating Your Own Styles (Rhythm Pattern Edit)
115
Saving the Patterns You Have Created (WRITE)
116
Creating Your Own Styles (Rhythm Group Edit)
116
Saving the Rhythm Group You Have Created (WRITE)
117
Sampling
118
Making Input Source Settings (INPUT SETTING)
118
Input Effect Setup Settings
119
Sampling Procedure
119
Dividing a Sample During Sampling
121
Sampling Earlier in Time (Skip Back Sampling)
121
Editing a Sample
122
Selecting a Sample (Sample List)
122
Selecting a Sample
122
Loading a Sample
123
Loading All Samples
123
Unloading a Sample
123
Deleting a Sample
123
Importing a Audio File
124
Displaying Sample Edit Screen
124
Magnifying/Shrinking the Waveform Display (Zoom In/Out)
124
Setting the Start/End Points of the Sample
125
Making Settings for Sample (Sample Parameters)
125
Assigning Samples to a Pad (Assign to Pad)
126
From Patch Mode
126
From Performance Mode
126
Assigning a Sample as a Patch to a Part (Assign to Keyboard)
127
From Patch Mode
127
From Performance Mode
127
Create a Rhythm Set (Create Rhythm)
128
Creating a Multisample (Create Multisample)
128
Unloading a Sample (Unload)
129
Removing Unwanted Portions of a Sample (Truncate)
129
Boosting or Limiting the High-Frequency Range of the Sample (Emphasis)
130
Maximizing the Volume of a Sample (Normalize)
130
Amp
131
Stretching or Shrinking a Sample (Time Stretch)
131
Dividing a Sample into Notes (Chop)
132
Procedure for Dividing a Sample
132
Automatically Dividing a Sample (Auto Chop)
132
Auditioning the Divided Samples
133
Joining Two or more Samples (Combine)
133
Saving a Sample
134
Using the Pads
135
Using the Hold Function to Sustain a Sound
135
Using the Roll Function to Play Sounds
135
Using the Clipboard to Copy Pad Settings
136
Copying One Pad Setting
136
Copying Two or more Pad Setting
136
Adjusting the Pad Settings (PAD SETTING)
136
Multi-Velocity
137
Assigning a Pattern to a Pad (RPS Function)
137
Using the Pads to Play Rhythms
137
Playing Back a Song
138
Playing a Song Immediately (Quick Play)
138
Playing Back Songs Consecutively (Chain Play)
138
Various Playback Methods
139
Fast-Forward and Rewind During Playback
139
Playing Back Correctly from the Middle of the Song (MIDI Update)
139
Muting the Playback of a Specific Instrument
139
Changing the Playback Tempo of a Song
139
Playing a Song Back at a Fixed Tempo (Muting the Tempo Track)
140
Playing Back a S-MRC Format Song
140
Playing Back a Song Repeatedly (Loop Play)
140
Using the D Beam Controller to Start/Stop Song Playback
140
Recording Songs
141
Two Recording Methods
141
Before You Record a New Song
141
Select the Sound to be Used for Recording
141
Erasing the Song/Pattern from Internal Memory (Song Clear)
141
Specify the Time Signature
141
Recording Your Performance as You Play It (Realtime Recording)
142
Basic Operation for Realtime Recording
142
Recording Tempo Changes in a Song (Tempo Recording)
143
Loop Recording and Punch-In Recording
143
Correct the Timing of Your Playing as You Record (Recording Quantize)
144
Start Point
144
Selecting the Sequencer Data that will be Recorded (Recording Select)
145
Erasing Unwanted Data While You Record (Realtime Erase)
145
Auditioning Sounds or Phrases While Recording (Rehearsal Function)
145
Inputting Data One Step at a Time (Step Recording)
146
Inputting Notes and Rests
146
Assigning a Pattern to a Phrase Track
148
Editing Songs
149
Loading the Song You Want to Edit
149
Loading Individual Tracks/Patterns of Song Data
149
Using Different Sound Generators for each Track
150
Silencing the Playback of a Track (Mute)
150
Assigning Markers (Locate Positions) to a Song
150
Specifying the Area of a Song that will Repeat (Loop Points)
151
Editing Sequencer Data over the Specified Range (Track Edit)
151
Basic Operation for Track Editing
151
Aligning a Song's Timing (Quantize)
152
Erasing Unwanted Performance Data (Erase)
154
Deleting Unwanted Measures (Delete)
155
Copying Phrases (Copy)
155
Inserting a Blank Measure (Insert)
156
Transpose the Key (Transpose)
156
Changing the Velocity (Volume) (Change Velocity)
157
Changing the MIDI Channel (Change Channel)
158
Modifying the Length of Notes (Change Duration)
158
Combining Two Phrase Tracks or Patterns into One (Merge)
159
Extracting and Moving a Part of Sequencer Data (Extract)
159
Shifting Performance Data Forward and Back (Shift Clock)
160
Thinning out the Sequencer Data (Data Thin)
161
Swapping Two Phrase Tracks or Patterns (Exchange)
161
Adjusting the Song's Playback Time (Time Fit)
162
Deleting Blank Measures (Truncate)
162
Editing Individual Items of Sequencer Data (Micro Edit)
162
Editing Sequencer Data (Basic Procedure in the Microscope)
162
Sequencer Data Handled by a Phrase Track/Pattern
163
Viewing Sequencer Data (View)
164
Inserting Sequencer Data (Create)
165
Erasing Sequencer Data (Erase)
165
Moving Sequencer Data (Move)
165
Copying Sequencer Data (Copy)
166
Changing the Tempo Midway through the Song
166
Changing the Time Signature Midway through the Song
167
Assigning a Name to a Song (Song Name)
167
Saving/Loading a Song (SAVE/LOAD)
168
Saving a Song (Save)
168
Basic Procedure
168
Saving a Song with Samples (Save Song+Samples)
168
Saving a Song (Save Song)
169
Saving Samples (Save All Samples)
169
Saving a Song as an SMF File (Save as SMF)
170
Loading a Song (Load)
170
Basic Procedure
170
Loading a Song with Samples (Load Song+Samples)
171
Loading a Song (Load Song)
171
Loading Samples (Load All Samples)
171
Importing a WAV/AIFF File (Import Audio)
171
Playing a Phrase at the Touch of a Finger (RPS Function)
172
Before You Use the RPS Function
172
Record a Pattern
172
Settings for the RPS Function
172
Using the RPS Function While You Perform
173
Recording a Performance Using the RPS Function
174
Adding Effects
175
Turning Effects on and off
175
Making Effect Settings
175
Applying Effects in Patch Mode
175
Specifying How the Sound will be Output (Routing)
175
Signal Flow Diagram and Parameters
176
Applying Effects in Performance Mode
178
Specifying How the Sound will be Output (Routing)
178
Signal Flow Diagram and Parameters
178
Making Multi-Effects Settings (MFX1-3)
180
Making Multi-Effects Settings (MFX Control)
181
Specifying the Multi-Effect Structure (MFX Structure)
182
Making Chorus Settings (Chorus)
182
Making Reverb Settings (Reverb)
182
Structure Type
182
Mastering Effect
183
Transferring Data To/From Your Computer Via USB
184
Before You Use USB Connection
184
Connections
184
Specify the Connection-Destination Area (USB)
184
Cautions Regarding Folders and Files
184
Importing Audio File (Import Audio)
185
Using a Bitmap File as a Background in the Display
185
Importing a Bitmap File (Import BMP)
185
Canceling USB Communication
186
File-Related Functions (File Utility)
187
Basic Procedure
187
Copying a File (COPY)
187
Deleting a File (DELETE)
187
Moving a File (MOVE)
187
Initializing a Memory Card (Format)
187
Settings Common to All Modes (System Function)
188
How to Make the System Function Settings
188
Saving the System Settings (Write)
188
Functions of System Parameters
189
Pedal/D Beam
189
Keyboard
189
System Ctrl
190
Screen Saver
190
Background
190
Sync/Temp
190
Sys Ctrl 1–4 Source
190
Sync Mode
190
System Control
190
Metronome
192
MIDI
192
Sound
193
Preview
194
Scale Tune
194
Sampling
195
Start up
195
System Information
195
Data Management Functions Reset to Default Factory Settings (Factory Reset)
196
Basic Procedure
196
Backing up User Data (User Backup)
196
Restoring User Data that You Backed up (User Restore)
196
Factory Reset
196
Playing in Piano Mode
197
Selecting Piano Mode
197
Selecting a Patch
197
Selecting Patches by Category
197
Selecting from the Patch List Screen
197
Changing the Piano Sound (Open/Close)
197
Adjusting the Keyboard Touch (Key Touch)
198
Adjusting the Depth of Resonance (Resonance)
198
Saving a Sound (Patch)
198
Using Fantom-S Editor
199
Installing Fantom-S Editor into Your Computer
199
Making Connections
199
Using Fantom-S Librarian
199
Fantom-S Editor System Requirements
199
System Requirements (Windows)
199
System Requirements (Mac OS)
200
About V-LINK
201
Pad Mode
202
Installing the Wave Expansion Board
203
Installation de la Carte D'expansion Wave
205
Expanding the Memory
207
Ajouter de la Mémoire
209
Troubleshooting
211
Problems Concerning the Entire Fantom-S
211
Issues Related to Sound
211
Issues Related to Effects
213
Issues Related to Saving Data
213
Issues Related to Sequencer
214
Issues Related to MIDI and External Devices
215
Issues Related to Sampling
215
Issues Related to a Memory Card
216
Specifications
217
Index
218
Advertisement
Roland Fantom-S Quick Start Manual (52 pages)
Fantom-S; Fantom-S88
Brand:
Roland
| Category:
Synthesizer
| Size: 6.09 MB
Table of Contents
Quick Start
1
Table of Contents
2
Getting Ready
3
Connecting an Amp and Speaker System
3
Placing the Fantom-S88 on a Stand (for Fantom-S88 User)
4
Turning on the Power
4
Adjusting the Display Contrast (LCD Contrast)
5
Turning off the Power
5
Listen to the Demo Song
6
Try out the Sounds
7
Playing the Sounds
7
Selecting Patches by Category
8
Selecting Patches by Group
9
Auditioning Patches with Phrases (Phrase Preview)
10
Changing the Patch Settings
10
Playing Percussion Sounds with the Pad (Rhythm Set)
11
Changing the Rhythm Set Settings
12
Layering Two or more Patches (Layer)
12
Changing the Performance Settings
13
Splitting the Keyboard to Play an Ensemble (Split)
13
Changing the Performance Settings
14
Try out the Various Performance Features
15
Moving Your Hand above the D Beam Controller to Apply Effects (D Beam Controller)
15
Changing D Beam Controller Settings
16
Using Knobs and Buttons to Modify the Sound in Realtime (Realtime Controller)
17
Changing Realtime Controller Settings
19
Playing Arpeggios(Arpeggio/Rhythm Function)
20
Changing Arpeggio Settings
21
Performing Rhythms While a Rhythm Pattern Plays
22
Changing Rhythm Group Settings
23
Other Performance Features
25
Velocity/Aftertouch
25
Pitch Bend/Modulation Lever
25
Octave Shift (Oct)
25
Hold Pedal
25
Control Pedal
26
Transpose (Trans)
26
Using the RPS Function
27
Using Skip Back Sampling to Sample a Favorite Phrase (Skip Back Sampling)
29
Assigning a Sample to a Pad (Assign to Pad)
30
Creating a Song
31
Erasing a Song from Internal Memory (Song Clear)
32
Selecting a Performance
33
Selecting a Part
34
Assigning a Vocal Phrase to a Part as a Patch
35
Assigning the Selected Sample to a Part as a Patch (Assign to Keyboard)
36
Recording the Rhythm Part
38
Selecting the Part to Record
38
Selecting the Recording Method
38
Playing and Recording Rhythm Part
39
Recording the Bass Part
42
Recording the Piano Part
43
Recording the Vocal Part
44
Mixing in the MIXER Screen
45
Loop the Song
45
Making Fine Adjustments in the MIXER Screen
46
Using Effects
48
Switching the Effects On/Off
48
Editing the Effect Settings
49
Saving the Song You Recorded
50
Roland Fantom-S Turbostart (2 pages)
Workstation Keyboard
Brand:
Roland
| Category:
Electronic Keyboard
| Size: 0.11 MB
Advertisement
Advertisement
Related Products
Roland Fantom-S88
Roland Fantom-X7
Roland Fantom-X8
Roland Fantom-G none
Roland Fantom-Xa
Roland Fantom-X
Roland Fantom-X Workshop
Roland FANTOM-06
Roland FANTOM-07
Roland FANTOM-08
Roland Categories
Musical Instrument
Synthesizer
Recording Equipment
Drums
Electronic Keyboard
More Roland Manuals
Login
Sign In
OR
Sign in with Facebook
Sign in with Google
Upload manual
Upload from disk
Upload from URL