Sign In
Upload
Manuals
Brands
Prusa Research Manuals
3D Printers
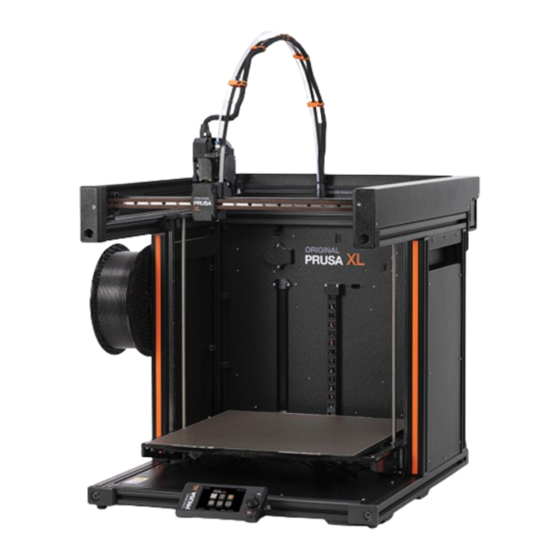
Original Prusa XL
Prusa Research Original Prusa XL Manuals
Manuals and User Guides for Prusa Research Original Prusa XL. We have
2
Prusa Research Original Prusa XL manuals available for free PDF download: Instruction Manual, Handbook
Prusa Research Original Prusa XL Instruction Manual (104 pages)
Brand:
Prusa Research
| Category:
3D Printers
| Size: 20 MB
Table of Contents
Table of Contents
1
1 Introduction
5
STEP 1 Preparing the Upgrade Kit
6
STEP 2 Getting the Necessary Tools
6
STEP 3 Getting the Necessary Tools
7
STEP 4 Labels Guide
7
STEP 5 Cheatsheet
8
STEP 6 Front, Left, Right and Rear Side
8
STEP 7 Manipulating with the Printer
9
STEP 9 Silicone Sock
10
STEP 10 View High Resolution Images
10
STEP 11 We Are here for You
11
STEP 12 How to Successfully Finish the Assembly
12
STEP 13 Reward Yourself
13
STEP 14 Prepare Your Desk
13
2 Printer Preparing
14
STEP 1 Preparing the Printer
15
STEP 2 Protecting the Heatbed
15
STEP 3 Printer Unpluging
16
STEP 4 Can I Open the Haribo
16
STEP 5 Let's Get Started
17
3 Detaching the Nextruder
18
STEP 1 Tools Necessary for this Chapter
19
STEP 2 Wi-Fi Antenna Detaching
19
STEP 3 PTFE Unpluging
20
STEP 4 Disconnecting the Nextruder Cable
20
STEP 5 Detaching the Dock
21
STEP 6 Detaching the Nextruder
21
STEP 7 Detaching the Nextruder
22
STEP 8 Still no Sweets
22
STEP 9 Good Job
23
4 Toolchanger Assembly
24
STEP 1 Tools Necessary for this Chapter
25
STEP 2 Preparing the X-Carriage
25
STEP 3 Installing the Toolchanger: Parts Preparation
26
STEP 4 Preparing the Toolchanger
26
STEP 5 Installing the Toolchanger
27
STEP 6 Covering the X-Carriage
27
STEP 7 Haribo
28
STEP 8 Almost Done
28
5 Nextruder Upgrade
29
STEP 1 Tools Necessary for this Chapter
30
STEP 3 Dock Disassembly: Cable Bundle
31
STEP 4 Dock Disassembly
31
STEP 5 New Dock Assembly: Parts Preparation
32
STEP 6 New Dock Assembly: Inserting the Nut
32
STEP 7 New Dock Assembly: Metal Dock
33
STEP 9 New Dock Assembly: Lower Screw
34
Step 10 - New Dock Assembly: Cable Support
34
Step 11 - New Dock Assembly: Cable Support
35
STEP 12 New Dock Aseembly: PTFE Tube
35
STEP 13 New Dock Assembly: Parts Preparation
36
STEP 14 New Dock Assembly: Cable Bundle
36
STEP 15 New Dock Assembly: Cable Bundle Securing
37
STEP 16 New Dock Assembly: Nozzle Seal
37
STEP 17 Nextruder Disassembly: Cable Bundle
38
STEP 18 Nextruder Disassembly: Nextruder Body
38
STEP 19 Nextruder Disassembly: Heatsink Screw
39
STEP 20 Grub Screw Relocate
39
STEP 21 Nextruder Assembly: Parts Preparation
40
STEP 22 Tool-Changer Cable Connecting
40
STEP 23 Fan-Shield Assembly
41
STEP 24 Tool-Changer Assembly
41
STEP 25 Tool-Changer Securing
42
STEP 26 Tool-Changer Connecting
42
STEP 27 Tool-Changer Connecting
43
STEP 28 Haribo
43
6 PSU & Electronics Assembly
45
STEP 1 Tools Necessary for this Chapter
46
STEP 2 Back Antenna Disconnecting
46
STEP 3 Back Antenna Disassembly
47
STEP 4 Back Covers Disassembly
47
STEP 5 PSU Assembly: Parts Preparation
48
STEP 6 PSU Assembly: PSU Preparing
48
Step 7 - PSU Assembly: PSU Preparing
48
STEP 8 PSU Assembly: Printer Preparing
49
STEP 9 Attaching the PSU
50
STEP 10 Securing the PSU
50
Step 11 - PSU Covers: Parts Preparations
51
STEP 12 PSU Covers: Side Cover
51
STEP 13 PSU Covers: Lower Cover
52
STEP 14 PSU Power Cable Cover: Parts Preparation
52
STEP 15 PSU Power Cable Cover: Lower Cover
53
STEP 16 PSU Power Cable Cover: Power Cable
53
STEP 17 PSU Power Cable Cover: Middle Cover
54
STEP 18 PSU Power Cable Cover: Upper Cover
54
STEP 19 XL-Splitter: Parts Preparation
55
STEP 20 Xl_Splitter Installation
55
STEP 21 Filament Sensor Cable: Parts Preparation
56
STEP 22 Filament Sensor Cable: Connecting the Cable
56
STEP 23 Metal Plate Cable Covers: Parts Preparations
57
STEP 24 Adjusting the XL-Buddy-Box-Cover
57
STEP 25 Lower Metal Plate Cable Covers
58
STEP 27 XL Buddy Cover
59
STEP 28 Reward Yourself
59
STEP 29 Well Done
60
7 Nextruder & Accessories Assembly
61
STEP 1 Tools Necessary for this Chapter
62
STEP 2 Filament Sensor: Parts Preparation
62
STEP 3 Right Filament Sensor
63
STEP 5 Guiding the Nextruder Cable
64
STEP 6 Attaching the Nextruder Docks
64
STEP 7 Dock Inspection
65
STEP 8 Dock Inspection: Video
65
Step 11 - Installing the Rear Wi-Fi Antenna Holder
67
STEP 12 Connecting the Side Wi-Fi Antenna
67
Step 9 - Connecting the Nextruder Cables
68
STEP 13 Connecting the Nextruder Cables
68
STEP 14 XL Buddy Box Covering
68
Step 15 - Guiding the Docks PTFE Tubes
69
Step 16 - Guiding the Docks PTFE Tubes
69
STEP 17 Installing the Wi-Fi Antenna: Parts Preparation
70
STEP 18 Installing the Wi-Fi Antenna
70
STEP 19 Spool Holder: Parts Preparation
71
STEP 20 Assembling the Spool Holder
71
Step 21 - Preparing the Spool Holder
72
Step 22 - Spool Holder: Left Side Assembly
72
Step 23 - Spool Holder: Right Side Assembly
73
Step 24 - Nextruder Assembly: Parts Preparation
73
STEP 25 How to Dock the Nextruder
74
STEP 26 Nextruder Cable Bundle Assembly
74
STEP 27 Nextruder Cable Bundle Assembly
75
STEP 28 Nozzle Seal Height Calibration
75
STEP 29 Nozzle Seal Height Calibration
76
STEP 30 Haribo Time
76
STEP 31 Remaining Fasteners
77
STEP 32 Almost Done
78
8 First Run
79
STEP 1 before You Start with Multi-Tool
80
STEP 2 Preparing the Printer
80
STEP 3 Factory Reset
81
STEP 4 Prusa Nextruder Sock (Optional)
81
STEP 5 Wizard
82
STEP 6 Wizard: Dock Position Calibration
82
STEP 7 Wizard: Loosen Pin
83
STEP 8 Wizard: Loosen Screws
83
STEP 9 Wizard: Lock the Tool
84
Step 11 - Wizard: Tighten the Lower Screw
85
STEP 12 Wizard: Install Pins
85
STEP 13 Wizard: Dock Successfully Calibrated
86
STEP 14 Wizard: Test Loadcell
86
Step 15 - Wizard: Recalibrate Filament Sensors
87
Step 16 - Wizard: Recalibrate Filament Sensors
87
STEP 17 Wizard: Recalibrate Filament Sensors
88
STEP 18 Calibration Pin: Parts Preparing
88
STEP 19 Calibration Pin: Parts Assembly
89
STEP 20 Wizard: Tool Offset Calibration
89
STEP 21 Wizard: Sheet Install
90
STEP 22 Wizard: Calibration Pin Installation
90
STEP 23 Wizard: Offset Calibration Done
91
STEP 24 Calibration Pin
91
STEP 25 It's Done
92
STEP 26 Reward Yourself
92
STEP 27 Quick Guide for Your First Prints
93
STEP 28 Printable 3D Models
93
STEP 29 Prusa Knowledge Base
94
Manual Changelog XL (Single-Head to Five-Head Upgrade)
95
STEP 1 Manual Changelog XL (Single-Head to Five-Head Upgrade)
96
Advertisement
Prusa Research Original Prusa XL Handbook (58 pages)
Brand:
Prusa Research
| Category:
3D Printers
| Size: 4 MB
Table of Contents
Table of Contents
4
Introduction
12
Original Prusa XL Overview and Glossary
13
Contents of the Package and Accessories
14
How to Move the Printer
15
Disconnecting the Power Source
15
Error Screens
16
Your First Print
17
Basic Controls
17
Selftest Calibration (Wizard)
18
Preparing Flexible Print Sheets
18
Running the Selftest
20
Inserting Filament
21
Removing Filament
22
Starting the First Print
23
Removing a Printed Object from the Print Sheet
24
First Print Troubleshooting
25
First Layer Peeling off from the Bed
25
Nozzle Moves too High/Low, or Extrudes Plastic Outside the Print Area
25
The Nozzle Does Not Start Extruding, Even after Multiple Attempts
25
After a few Hours of Printing, the Nozzle Stops Extruding Filament
25
Updating the Firmware
26
Sample Models
27
Factory Reset
27
Advanced User Guide
28
Prusa Academy Courses
28
Network Connection
29
Obtaining Printable Models
30
Create Your Own Model
31
What Is a G-Code File
31
Prusaslicer
32
Prusaslicer Interface Explained
33
Initial Setup and General Workflow
34
Using Supports
35
Speed Vs Print Quality
36
Infill
37
Brim
37
Printing Objects Larger than the Print Volume
38
Printing Multicolored Objects (Single-Tool XL)
39
Slicing and Exporting
40
Using Nozzles with Various Diameters
40
Material Guide
41
Pla
41
Petg
42
Asa (Abs)
43
PC (Polycarbonate) and PC Blend
44
Pvb
45
Flexible Materials
46
PA (Polyamide) / PA11CF
47
Regular Maintenance
48
Flexible Print Sheets
48
Double-Sided TEXTURED Print Sheet
50
Double-Sided SMOOTH Print Sheet
50
Double-Sided SATIN Print Sheet
51
Improving the Adhesion
51
Keeping the Printer Clean
51
Linear Rails
51
Fans
51
Extruder Feeding Gear
52
Extruder Is Clogged or Jammed
52
Cleaning the Nozzle
53
Troubleshooting Faulty Sensor Readings and Removing Errors
53
Filament Sensors
53
Flashing an Unofficial (Unsigned) Firmware
54
FAQ - Frequently Asked Questions and Basic Troubleshooting
55
Mesh Bed Leveling Fails
55
Printer Does Not Recognize the Inserted USB Drive
55
Loose Belts
56
Homing Failed
56
Heating Error
56
Fan Error
56
Reverting to an Older Firmware
56
Nozzle Hitting the Sheet / Other Z-Axis Issues
56
Advanced Hardware Troubleshooting
57
Troubleshooting Print Quality Issues
57
Advertisement
Related Products
Prusa Research Original Prusa MINI
Prusa Research ORIGINAL i3 MK3S+
Prusa Research Original Prusa i3 MK3S
Prusa Research Original Prusa XL Enclosure
Prusa Research CORE ONE
Prusa Research CORE One Conversion kit
Prusa Research CORE One kit
Prusa Research ESP32-CAM
Prusa Research i3
PRUSA Research i3 MK2
Prusa Research Categories
3D Printers
Enclosure
Digital Camera
Safety Equipment
More Prusa Research Manuals
Login
Sign In
OR
Sign in with Facebook
Sign in with Google
Upload manual
Upload from disk
Upload from URL