Sign In
Upload
Manuals
Brands
Pfaff Manuals
Sewing Machine
creative icon
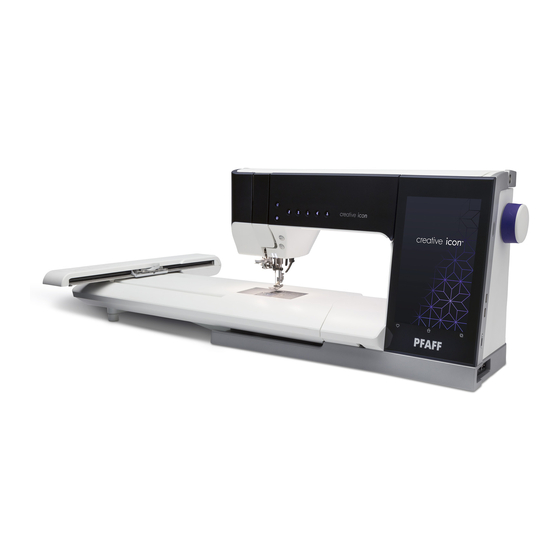
Pfaff creative icon Sewing Machine Manuals
Manuals and User Guides for Pfaff creative icon Sewing Machine. We have
1
Pfaff creative icon Sewing Machine manual available for free PDF download: User Manual
Pfaff creative icon User Manual (211 pages)
Brand:
Pfaff
| Category:
Sewing Machine
| Size: 20 MB
Table of Contents
Declaration of Conformity
4
Table of Contents
5
1 Built-In User's Guide
10
Welcome to the Built-In User's Guide
10
Finding a Topic
10
Navigating the User's Guide
10
2 Introduction
11
Machine Overview
11
Front
11
Needle Area
12
Right Side
12
Rear
12
Top
13
Accessory Tray
13
Storing a Needle Plate
14
Embroidery Unit
14
Function Buttons
15
Presser Foot up and Extra Lift
15
Presser Foot down and Pivot
15
Automatic Needle Threader
15
Cut Function
15
Immediate Tie-Off
16
Stitch Re-Start
16
Needle Stop Up/Down
16
Start/Stop
16
Reverse
16
Basic Gestures for the Multi-Touch Screen
17
Accessories
18
Included Accessories
18
Included Hoops
18
Presser Feet
19
Stitch Overview
21
Utility Stitches
21
Stitch Menu Overview
25
Alphabets
25
3 Preparations
26
Unpacking Machine and Embroidery Unit
26
Connect the Power Cord and Foot Control
26
Pack Away after Sewing
27
USB Ports
27
Using a USB Device
27
Getting Started with Wifi and Mysewnet™ Cloud
28
LED Lights
28
Free Arm
28
Manual Thread Cutter
28
Knee-Lift
29
Speed Control Lever
29
Thread Sensor
29
Telescopic Thread Guide
30
Spool Pins
31
Spool Caps
31
Threads
32
Needles
33
Important Needle Information
33
Changing the Needle
34
Threading
35
Threading the Upper Thread
35
Automatic Needle Threader
37
Threading Tips and Hints
39
Threading for Twin Needle
40
Bobbin Winding
42
Winding through the Needle
43
Inserting the Bobbin
44
Changing the Bobbin Case
45
IDT™ System (Integrated Dual Feed)
46
Engaging the IDT™ System
46
Disengaging the IDT™ System
46
Changing the Presser Foot
47
Remove Presser Foot
47
Attach Presser Foot
47
Attaching the Sensormatic Buttonhole Foot
47
Attaching the Dynamic Spring Foot 6D
48
Changing to Straight Stitch Needle Plate
49
4 Embroidery Preparations
50
Embroidery Unit
50
Embroidery Hoop Overview
50
Dynamic Spring Foot 6D
50
Straight Stitch Needle Plate
51
Designs
51
Creative Icon™ Sampler Book
51
Connect the Embroidery Unit
52
Remove the Embroidery Unit
52
To Hoop the Fabric
53
Slide On/Off the Hoop
53
5 The Multi-Touch Screen
54
Multi-Touch Screen
54
Gestures
54
Start Page
55
Start Sewing
55
Start Embroidering
55
Load from Mysewnet
55
Open Help Center
55
Main Functions
56
Save
56
Home
56
Mode Switch
56
Common Functions
56
Cancel
56
Touch & Hold
56
Settings with Toggle Function
57
Help Center
58
User's Guide
58
Getting Started
58
Techniques and Tutorials
58
Stabilizer Guide
58
Settings
59
Sewing Settings
59
Embroidery Settings
62
Machine Settings
64
Wifi Settings
65
Mysewnet™ Settings
65
Machine Information
65
Smart Toolbox
66
Top Bar
66
Help Center
66
Quick Help
66
Main Menu
67
Information Area
67
Wifi
68
Mysewnet
68
Recommendations
68
Information
69
Active Features
69
Menu Panel
69
Options Selected from the Menu Panel
70
Toolbar
71
Customize Your Work Area
71
Full Screen View
71
Base Bar
71
6 Wifi & Mysewnet™ Services
73
Wifi Introduction
73
Getting Started with Wifi
73
Hidden Network
73
Firmware Update Using Wifi
73
Firmware Update Using a USB Device
73
Complimentary Software
73
Mysewnet™ Services
75
Mysewnet™ Account
75
Mysewnet™ Cloud
75
Used Space in Mysewnet™ Cloud
76
Installation of Mysewnet™ Cloud Sync Tool for Computer
76
Mysewnet™ Portal
77
Sewnotice App
78
Troubleshooting Connectivity
78
7 Sewing
79
Sewing Mode - Introduction
79
Sewing Mode - Overview
79
Getting Started with Sewing
82
Load a Stitch from the Menu Panel
82
Select a Stitch from the Selection Menu
83
Load a Stitch from File Manager
83
Sewing Recommendations
84
Settings in Sewing Mode
85
Activstitch™ Technology
85
Automatic Presser Foot Lift
86
Automatic Thread Cutter
86
Free-Motion Options
86
Stitch Limiting Options
87
Needle Stop Position
88
Presser Foot Pressure
88
Options for Feed Dogs
88
Tie-Off Options
88
Stitch Edit
89
Stitch Width
89
Stitch Positioning
89
Stitch Length
89
Stitch Density
90
Mirroring
90
Buttonhole Slit Length
90
Button Stitch Repetition
90
Activstitch™ Technology
91
Free-Motion Options
92
Dynamic Spring Foot 6D Free-Motion
92
Spring Foot Free-Motion
92
Sensormatic Free-Motion
92
Tie-Off Options
93
Stitch Repeat
93
Save Stitch
94
Balance
94
Sewing Programs
95
Tapering Stitches
95
Taper Satin Stitch Exercise
95
Stitch Repeat
96
Patchwork Program
96
Single Stitch Program
96
Combining Programs
96
Sewing Techniques
97
Buttonholes
97
Sew on a Button
98
Four Direction Sewing
98
Special Stitch Techniques
99
Ribbon Stitches
99
Stacking Stitches
99
Floating Stitches
100
Radiant Stitches
101
Lace Edge Stitches
101
Optional Feet Stitches
101
Pop-Up Messages in Sewing
102
8 Embroidery Edit
104
Embroidery Edit - Introduction
104
Embroidery Edit - Overview
105
Getting Started with Embroidering
107
Load a Design
107
Load a Font
107
Load a Stitch
108
Load from Another Location
108
Color Edit
109
Change more than One Color Block
109
Layers
110
Select Design(S)/Change Stitch-Out Order
110
Select One Design
110
Select All
110
Multi-Select
111
Group/Ungroup
111
Edit Functions
112
Control Wheel
112
Move
113
Rotate
114
Scale
114
Zoom Options
116
Duplicate/Multi Duplicate
116
Delete/Delete All
116
Mirroring
116
Move into Hoop
116
Undo/Redo
117
Pan
117
Resize
117
Hoop Options
119
Hoop Selection
119
Grid
119
Background
119
Stitch Edit
120
Full Screen View
120
Embroidery Text
121
Create a Text
121
Add a Letter
121
Delete a Letter
121
Text Shaping
122
Smart Toolbox on a Design
123
Duplicate
123
Multi Duplicate
123
Mirroring
123
Move into Hoop
123
Grid On/Off
123
Delete/Delete All
123
Read about Embroidery Edit
123
Reset Toolbar
123
Smart Toolbox on Embroidery Area
124
Move into Hoop
124
Grid On/Off
124
Delete All
124
Read about Embroidery Edit
124
Reset Toolbar
124
Settings in Embroidery Edit
125
Activstitch™ Technology
125
Embroidery Foot Type
126
Twin Needle Options
126
Thread Cut Options
127
Presser Foot Height
128
Select Default Hoop Size
128
Save Design
128
Save Current State/Restore Current State
129
Pop-Up Messages in Embroidery Edit
130
9 Embroidery Stitch-Out
131
Embroidery Stitch-Out - Introduction
131
Embroidery Stitch-Out - Overview
132
Embroidery Stitch-Out Settings
133
Attach Selected Hoop
133
Attached Needle Plate
133
Selected Foot Type
133
Activstitch™ Technology
135
Thread Cut Options
135
Basting Options
135
Color Options
135
Turnable Hoop Options - Side Sort
135
Color Block List
136
Basting Options
136
Ghost Mode
137
Color Block Sort
137
Color Block Merge
137
Monochrome
137
Stitch-Out Progress
139
Number of Stitches in Current Color Block
139
Number of Stitches in Embroidery Combination
139
Progress Circle
139
Remaining Embroidery Time by Color Block
139
Hoop Position
140
Current Stitch Position
140
Park Position
140
Trim Position
140
Center Position
140
Step Stitch-By-Stitch
141
Go to Stitch
141
Activstitch™ Technology
141
Zoom Options
141
Precise Positioning
142
Getting Started with Precise Positioning
142
Precise Positioning Exercise
143
Zoom to Cursor
144
Set Cursor Point
144
Save Current State/Restore Current State
145
Auto Save
145
Pop-Up Messages in Embroidery Stitch-Out
146
10 Shape Creator
150
Shape Creator - Introduction
150
Shape Creator - Overview
151
Getting Started with Shape Creator
153
Load a Shape
153
Load a Letter Shape
153
Load a Design
153
Load a Stitch
154
Edit Shape
154
Rotate
154
Scale
156
Combination Repeat/Duplicate Last
156
Set Number of Designs/Stitches
157
Zoom Options
157
Positioning
158
Control Points
158
Edit Existing Shape
160
Shape Creator Exercise
160
11 Appliqué Creator
161
Appliqué Creator - Introduction
161
Appliqué Creator - Overview
162
Getting Started with Appliqué Creator
164
Load a Shape
164
Load a Letter Shape
164
Load Autofill Stitch
164
Load a Design
165
Load a Stitch
165
Edit Appliqué
166
Rotate
166
Scale
167
Combination Repeat/Duplicate Last
168
Set Number of Designs/Stitches
168
Zoom Options
168
Positioning
169
Control Points
169
Edit Existing Appliqué
172
Create Appliqué Exercise
172
Appliqué Stitch-Out
173
12 Sequence Creator
174
Sequence Creator - Introduction
174
Sequence Creator - Overview
175
Getting Started with Sequence Creator
177
Load a Stitch
177
Load a Font
177
Adjust Text and Stitches
178
Delete a Stitch or Letter
178
Duplicate a Stitch or Letter
178
Replace a Stitch or Letter
178
Directional Stitches
179
Sequence Commands
180
True Size
180
Saving a Sequence
180
Sew or Embroider Your Sequence
181
Adjust the Entire Sequence
182
Using Sequence Creator in Sewing Mode and Embroidery Edit
182
Pop-Up Messages in Sequence Creator
183
13 Stitch Creator™ Feature
184
Stitch Creator™ Feature - Introduction
184
Stitch Creator™ Feature - Overview
185
Getting Started with Stitch Creator
186
Definition of a Stitch Point
186
Select Stitches/Stitch Points
186
Preview
187
Stitch Creator™ Edit Tools
187
Zoom
187
Move
187
Add a Stitch or Stitch Point
188
Duplicate Selected Stitch Point
188
Triple Stitch
188
Mirroring
188
Delete Selected Stitch Point
188
Edit a Stitch Made in Stitch Creator
189
Load and Sew a Stitch
189
Sewing Mode
189
Embroidery Edit
189
Saving a Stitch
189
Using Created Stitches in Sewing and Embroidery Mode
189
Using Created Stitches in Sequence Creator
189
Pop-Up Messages in Stitch Creator™ Feature
190
14 Help Center
191
Help Center - Introduction
191
Help Center - Overview
191
User's Guide
192
Getting Started
193
Techniques and Tutorials
194
Garment Techniques
194
Sewing Techniques
194
Quilting Techniques
195
Embroidery Techniques
195
Stabilizer Guide
195
Projects
196
Video Player
197
15 File Manager
198
File Formats
199
Browse File Manager
199
Open a File or Folder
199
Multi-Select
199
Mysewnet™ Cloud Folder
199
USB Device
200
List/Thumbnail View
200
Move up One Folder Level
200
Organize
200
Create New Folder
200
Rename a File or Folder
200
Move a File or Folder
201
Copy a File or Folder
202
Delete a File or Folder
202
Pop-Up Messages in File Manager
202
16 Maintenance
204
Cleaning the Machine Exterior
204
Removing the Needle Plate and Cleaning the Bobbin Area
204
Cleaning under the Bobbin Area
204
Replacing the Needle Plate
205
Troubleshooting
205
Bobbin Thread Breaks
207
Service
208
Non-Original Parts and Accessories
209
Technical Specification
209
17 Important
210
Important Safety Instructions
210
Danger -To Reduce the Risk of Electric Shock
210
Warning -To Reduce the Risk of Burns, Fire, Electric Shock, or Injury to Person
210
Save These Instructions
210
Intellectual Property
210
Servicing of Double Insulated Products
211
Licenses
211
Advertisement
Advertisement
Related Products
Pfaff CREATIVE 2.0 -
PFAFF creative sensation
Pfaff Creative Vision
PFAFF creative sensation pro
PFAFF CREATIVE 2170 SEWING
Pfaff Creative Performance
Pfaff creative 3.0
Pfaff Creative Coverlock 4874
Pfaff creative sensation pro II
Pfaff creative EMBELLISHMENT ATTACHMENT
Pfaff Categories
Sewing Machine
Sewing Machine Accessories
Jacks
Trucks
Winches
More Pfaff Manuals
Login
Sign In
OR
Sign in with Facebook
Sign in with Google
Upload manual
Upload from disk
Upload from URL