Sign In
Upload
Manuals
Brands
Pantech Manuals
Cell Phone
Duo
Pantech Duo Manuals
Manuals and User Guides for Pantech Duo. We have
1
Pantech Duo manual available for free PDF download: User Manual
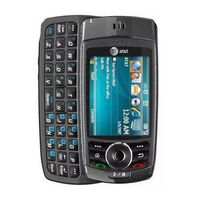
Pantech Duo User Manual (344 pages)
Pantech Duo: User Guide
Brand:
Pantech
| Category:
Cell Phone
| Size: 5.24 MB
Table of Contents
Important Information
1
Menu Outline
2
Using Shortcuts
2
Table of Contents
4
Chapter 1 Before Using Your Phone
15
Inside the Package
16
Handset Description
17
Activating Your Phone
19
Home Screen
20
Home Screen Customization
20
Home Screen Icons
20
Battery Usage
24
Battery Installation
24
Battery Removal
24
Battery Charging
25
Battery Status Check Led
25
Power Connection
26
Battery Usage Times
27
Battery Standby Times
27
Battery Handling Information
28
Chapter 2 Basic Operation
29
Turning the Phone On/Off
30
Turning the Phone on
30
Turning the Phone off
30
Using the Quick List
31
Call Functions
32
Make a Call by Entering a Contact Name
32
Make a Call by Entering a Phone Number
32
Make a Call from an Open Contact
33
Make a Call from the Call History List
33
Make a Call Using a Recently Dialed Phone Number
34
Make a Call from a Hyperlink Phone Number
34
Answer a Call by Pressing any Key
34
Answer or Ignore a Call
35
Answer a Second Call
35
Insert a Manual Pause in a Dialing Sequence
35
Insert a Three-Second Pause in a Dialing Sequence
36
Basic Functions
37
Setting up Your Voicemail
37
Lock the Keypad
38
Unlock the Keypad
38
Auto-Lock the Keypad
39
Set the Date and Time
39
Set the Idle Timer
40
Change the Home Screen Appearance
40
View Operating System Information
41
Enter Owner Information
41
Explore Files and Folders
42
Silence the Ring Tone of an Incoming Call
42
Making an Emergency Call
43
Entering Text and Numbers
44
Change between Uppercase, Lowercase, and Caps Lock
44
Change the Multipress Timeout
44
Delete Characters
45
Enter a Space
45
Enter a Symbol
45
Enter Numbers in Text Boxes
46
Enter Punctuation in Multipress Mode
46
Enter Punctuation in Xt9 Mode
46
Enter Text in Xt9 Mode
47
Start a New Line
48
Turn on Caps Lock
48
Enter the Plus Sign for International Calls
48
Change the Input Mode
49
Using Qwerty Keyboard
50
Chapter 3 Calendar, Contacts, Call History & My Stuff
53
Calendar
54
Schedule an Appointment
54
Delete an Appointment
55
Update an Appointment
56
View an Appointment
56
View Appointments for the Week
57
View Today's Agenda
57
View Your Agenda for a Specific Date
58
View Your Schedule for the Month
58
Make an Appointment Recurring
59
Show Week Numbers
60
Change the Workweek Display
61
Change the Reminder Time
62
Contacts
63
Create a New Contact
63
Beam a Contact
64
Call a Contact from Contact Information
65
Call a Contact from the Contact List
66
Change the Default Number for a Contact
66
Duplicate a Contact
67
Copy to Device / Sim
67
Copy All to Device / Sim
68
Delete a Contact
69
Delete All Device / Sim
69
Create a Contact for a Caller
70
Filter the Contact List
70
Find a Contact
71
Send an E-Mail to a Contact
71
Send a Text Message to a Contact
72
View and Edit Contact Information
72
Add a Picture to a Contact
73
Remove a Picture from a Contact
74
Assign a Category to a Contact
75
Assign a Ring Tone to a Contact
76
Create a Speed Dial
76
Using Speed Dials
77
View and Edit a Speed Dial
78
Delete a Speed Dial
78
Call History
79
View Call Timers
79
Reset Call Timers
80
View Details about a Call
80
Create a Contact from Call History
81
Delete an Item from Call History
81
Dial the Last Number Called
82
Find a Contact from Call History
82
Insert an International Country Code
82
Send an E-Mail Message from Call History
83
My Stuff
84
Chapter 4 Voicemail & Messaging
85
Voicemail
86
Call Your Voicemailbox
86
Text Messaging
87
Create a Text Message
87
Delete All Messages
88
Multimedia Message
89
Create a Multimedia Message
89
Text Box
90
Multimedia Message Menu Options
90
View Multimedia Message
93
Select Multimedia Message in the List of Message Type
93
Change Messaging Account Options
94
Change How the Message List Displays
95
Create a Message from a Contact Card
95
E-Mail
96
Synchronizing E-Mail Messages
96
During Synchronization
96
Connecting Directly to an E-Mail Server
96
Folder Behavior with a Direct Connection to an E-Mail Server
97
Creating an E-Mail Account
97
Create an E-Mail Message
99
Overview of E-Mail Security
100
Download a Complete E-Mail Message
101
Download an Attachment
101
Mark a Folder for Synchronization
102
Add a Picture to an E-Mail Message
103
Verify the Digital Signature on a Signed Messageyou Receive
103
Send and Receive Internet E-Mail Messages
104
Add a Voice Recording to an E-Mail Message
104
Set up an Internet E-Mail Account Manually
105
Delete a Message
107
Delete an Account
107
Edit Predefined Text
108
Empty the Deleted Items Folder
109
Forward a Message
109
Insert Predefined Text into a Message
110
Mark a Message as Read or Unread
110
Move a Message to a Different Folder
111
Open a Message
112
Quickly Move between Accounts
112
Send a Message Draft
113
Reply to a Message
113
Save a Draft of a Message
114
Specify the Language for Reading a Message
114
Stop Adding a Signature to Messages
115
View an Attachment
115
View Message Folder Contents
116
View the Inbox Message List
116
View the List of Accounts
117
What Is Ssl
117
Chapter 5 Organizer
119
Alarm
120
Using the Alarm
120
Voice Note
121
Create a Voice Note
121
Listen to a Voice Note
122
Delete a Voice Note
122
Rename a Voice Note
123
Notepad
124
To Access Notepad
124
Creating a Memo
124
Viewing a Memo
124
Sending a Memo
124
Deleting a Memo
125
Calculator
126
Using the Calculator
126
World Time
127
Using the World Time
127
Tasks
128
Create a Task
128
Change a Completed Task to Incomplete
128
Assign a Category to a Task
129
Delete a Task
130
Mark a Task as Complete
130
Locate a Task
131
At&T Music
133
Windows Media Player
134
Copying Media Files
134
Start Synchronization
135
Playing Media Files
136
Select a Category
137
Setting up a Playlist
138
Shop Music
141
Using ID Song
142
Music ID
142
Using Manage ID's
143
Getting Help with Music ID
144
Exiting from the Music ID Application
144
XM Radio Mobile
145
Music Videos
146
The Buzz
147
On the Home Screen, Press the Left Soft Key < [Start] Select AT&T Music and Press OK
147
Community
149
Chapter 7 At&T Mall
151
Shop Tones
152
Shop Games
153
Shop Graphics
154
Shop Multimedia
155
Shop Applications
156
Media Net Home
157
Chapter 8 Cellular Video
159
Cellular Video
160
Homepage. this Homepage Provides You with
160
Several Sections of Accessible Content
160
Categories from Which to Begin Searching for Media
160
Launches the Media Net Homepage
160
Help: Provides Basic On-Line Assistance Which Answers
160
Most of the Common Issues Users Come Across While this
160
Highlight the Desired Media Clip or Select from
161
One of the Available Categories and Press the OK
161
Media Clip Options
162
Library
162
Play/Pause
162
Stop
162
Shuffle/Repeat
162
Full Screen
162
Options
163
Properties
163
Settings
164
Cellular Video Settings
164
Using the Video Categories
165
Viewing a Video Clip
165
Customizing Cellular Video
166
Updating the Favorites List
166
Adding a Video Alert
167
My Purchases
168
Parental Controls
169
Setting up Parental Control
169
Configuring the Filters
170
IM&Email, Mobitv, Media Net, Office Mobile
171
IM&Email, Mobitv, Media Net, Office Mobile
172
IM&Email
172
Mobitv
172
Media Net
173
Office Mobile
173
Camera
175
Camera / Camcorder Mode
176
Select Video Quality
176
Copy an Image to Your Phone
177
Take Pictures Using a Timer
178
Adjust Pictures and Video for Lighting Conditions
178
Select Where Pictures Are Saved
179
Create a Pictures Folder
179
Edit a Picture
180
View Pictures as a Slide Show
181
Set a Picture as the Home Screen
182
Send a Picture Via Multimedia Mesage
183
Save a Copy of a Picture
184
View Pictures on Your Phone
184
Camera / Camcorder Operations
185
Camera
185
Video
185
Record a Video
185
Play Recorded File
186
Take a Picture
186
Take a Picture (Multishot)
186
Snapshot
187
Viewing Saved File
187
Camera / Camcorder Controls
188
Camera Menu
188
Camcorder Menu
190
General Settings
192
Camera Settings
194
Camcorder Settings
195
Overview of the Default Hardware Button Assignments
196
Chapter 11 Mobile Internet Explorer
197
Using Internet Explorer
198
Add a Web Page to the Favorites List
198
Change Connection Options
199
Change Web Page Display Options
200
Clear History, Cookies, or Temporary Files
201
Create a New Folder in Favorites
201
Delete a Favorite
202
Disconnect from the Internet
202
Edit a Favorite
203
Go to a Link
203
Go to a Web Page
204
Go to a Web Page in the History List
204
Open Internet Explorer
205
Refresh a Web Page
205
Return to a Web Page You Visited in the same Session
205
View a Favorite
206
View a List of Recently Visited Web Pages
206
Move a Favorite to a Folder
207
Change the Size of Text on Web Pages
207
Show or Hide Pictures on Web Pages
208
View a Page in Full Screen Mode
208
Send a Link Via E-Mail
209
Adjust the Scrolling Speed
210
Chapter 12 Connectivity, Bluetooth and Activesync
211
Activesync
212
Install and Set up Activesync
212
Set up an Exchange Server Connection
213
Change Activesync Settings
214
Schedule Synchronization as Items Arrive
215
Change the Synchronization Schedule
216
Start and Stop Synchronization
217
View Information about Sync Status
217
Change Settings for an Information Type
218
Connect the Phone
219
Deactivate the Usb Modem
219
Connect to a Pc Using Chargeable Usb Cable
220
Connect to a Pc Using Bluetooth
220
Change E-Mail Security Options
221
Exclude an E-Mail Address from Reply All
222
Bluetooth
223
Accept a Bluetooth Partnership
223
Create a Bluetooth Partnership
224
End a Bluetooth Partnership
225
Make Your Device Discoverable
226
Rename a Bluetooth Partnership
227
Turn Bluetooth on and off
228
Receive Beamed Information
229
Beam an Item
230
Set up a Bluetooth-Enabled Headset
231
Set up a Stereo Headset
232
Turn Wireless Power on or off
233
Connect to Intranet Urls
234
Use a Specific Connection to Connect to the Internet
235
Edit a Vpn Connection
236
Overview of Bluetooth Virtual Com Ports
237
Outgoing Com Port
237
Set up an Outgoing Bluetooth Com Port
237
Connect to Internet on Pc through Bluetooth Internet Sharing
238
Connect to Internet on Pc through Usb Internet Sharing
239
Create a Dial-Up Connection
240
Create a Proxy Connection
241
Create a Vpn Connection
242
Delete a Dial-Up Connection
243
Delete a Proxy Connection
243
Delete an Intranet Url
244
Delete a Vpn Connection
245
Edit a Dial-Up Connection
245
Edit a Proxy Connection
246
Edit an Intranet Url
247
Connecting the Gps Intermediate Driver to Gps Hardware
248
Chapter 13 Applications
249
Download Agent
250
File Explorer
251
Java
252
Speed Dial
253
Voice Command
254
Adjust the Microphone
254
Set the Voice Command Button
254
Try out Voice Command
254
Try out more Commands
255
To Learn more
255
Using the Voice Command Button
256
Making Phone Calls
257
Showing Contacts
259
Reading Appointments
260
Playing Music
261
Starting Programs
262
Getting Phone Status
263
Getting Voice Command Help
263
Personalization
264
General Options
264
Phone Options
265
Calendar Options
265
Media Options
265
General Tips
266
Phone and Contact Tips
267
Reading Appointments Tips
268
Playing Music Tips
268
Starting Programs Tips
269
Troubleshooting
270
Reading Appointments Troubleshooter
272
Task Manager
273
Internet Sharing
274
Chapter 14 Get Telenav
274
My-Cast Weather - Demo
274
Myspace Mobile
274
Clearvue Pdf
274
Settings
275
Phone
276
Auto Answer
276
Auto Lock
276
Call Forwarding
276
Call Options
277
Turn Call Waiting Notifications on and off
278
Caller ID
278
Channels
278
Fixed Dialing
279
Select Networks
279
Add a Network
280
Display Your Phone Number
280
Service Dialing Numbers (Sdn)
281
Select Tty Mode
281
Sounds
282
Change or Turn Sounds on or off
282
Delete a Sound
283
Copy a Sound from Your Pc to Your Phone
284
Profiles
285
View the List of Profiles
285
Edit a Profile
285
Change the Current Profile
286
Home Screen
287
Change the Home Screen Appearance
287
Clock
288
Set the Date and Time
288
Auto Update
288
Connections
289
Wireless Manager
289
Create a Bluetooth Partnership
290
Create a Dial-Up Connection
291
Create a Gprs Connection
292
Create a Proxy Connection
293
Create a Vpn Connection
294
End a Bluetooth Partnership
295
Delete a Dial-Up Connection
295
Delete a Gprs Connection
296
Delete a Proxy Connection
296
Change an Intranet Url
297
Make Your Device Visible
297
Turn on and off Bluetooth
298
Receive Beamed Information
298
Beam an Item
299
Set up an Outgoing Bluetooth Com Port
300
Set up a Bluetooth-Enabled Headset
301
Security
302
Enable the Device Lock
302
Disable the Device Lock
303
View a Certificate
304
Delete a Certificate
304
Activating the Sim Pin
305
Locking the Sim Card
306
Changing Pin2
306
Encryption
307
Master Clear
307
Remove a Program
308
Power Management
309
Ipm Power Mode
310
Accessibility
311
Regional Settings
312
Error Reporting
313
Turn Error Reporting on / off
313
Chapter 15 Games
315
Solitaire
316
Start a Game of Solitaire
316
How to Move Cards
316
Play Solitaire
317
Bubble Breaker
318
Overview of Bubble Breaker
318
Breaker Bonus
318
Start Bubble Breaker
318
View Bubble Breaker Statistics
319
Midnight Pool - Demo
320
Brain Challenge - Demo
321
Scrabble Blast - Demo
322
Tiger Woods Pga Tour 07 - Demo
323
Jewel Quest 2 - Demo
324
Chapter 16 Safety and Warranty
325
Safety Information for Wireless Handheld Phones
326
Exposure to Radio Frequency Signals
326
Antenna Care
326
Driving Safety
327
Electronic Devices
328
Blasting Areas
329
Potentially Explosive Atmospheres
329
Precautions
330
Safety Information for Fcc Rf Exposure
331
Body-Worn Operation
331
Sar Information
332
Safety Information for Battery Usage
333
Fcc & Industry Canada Regulatory Compliance
334
Fcc Hearing-Aid Compatibility Regulations for Wireless Devices
336
Fda Consumer Update
338
Protect Your Warranty
342
Manufacturer's Warranty
343
12 Month Limited Warranty
343
Advertisement
Advertisement
Related Products
Pantech DM P100
Pantech DM-P205
Pantech Discover
Pantech 5U000242C0A
Pantech A100
Pantech A1406PT
Pantech ADR8995
Pantech ADR910L
Pantech Angela
Pantech AT&T C820
Pantech Categories
Cell Phone
Modem
Telephone
Tablet
Wireless Router
More Pantech Manuals
Login
Sign In
OR
Sign in with Facebook
Sign in with Google
Upload manual
Upload from disk
Upload from URL