Sign In
Upload
Manuals
Brands
Olympus Manuals
Camera Accessories
PT-033
Olympus PT-033 Manuals
Manuals and User Guides for Olympus PT-033. We have
2
Olympus PT-033 manuals available for free PDF download: Instruction Manual
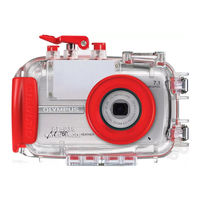
Olympus PT-033 Instruction Manual (291 pages)
Brand:
Olympus
| Category:
Camera Accessories
| Size: 10 MB
Table of Contents
English
46
Introduction
40
Please Read the Following Items before Use
40
For Safe Use
40
Batteries
42
Setting the Underwater Shooting Scene Mode
42
For Prevention of Water Leakage Accidents
43
Handling the Product
44
Table of Contents
46
Contents
48
Names of the Parts
49
Install the Strap
50
Master the Basic Operation
50
Holding the Case
50
How to Press the Shutter
51
How to Switch between the , and SCN Modes
51
How to Use the Zoom Buttons
51
1 Preparations
48
Check the Contents of the Package
48
2 Advance Check of the Case
52
Advance Test before Use
52
Advance Test
52
3 Install the Digital Camera
53
Check the Digital Camera
53
Battery Confirmation
53
Confirmation of the Remaining Number of Pictures to be Taken
53
Remove the Hand Strap from the Digital Camera
53
Prepare the Camera
54
Applicable Digital Cameras
54
Turn the Digital Camera on
54
Check the Camera's Operation
54
Open the Case
54
Load the Digital Camera
55
Insertion of Silica Gel
56
Make Sure the Camera Is Loaded Properly
57
Seal the Case
57
Check the Operation of the Loaded Camera
58
Confirm the Shooting Scene and Shooting Mode
59
Installation and Removal of the LCD Hood
60
Installation
60
Removal
60
Mounting and Removing the Lens Cap
61
Perform the Final Checks
61
Visual Inspection
61
Final Test
62
4 Taking Pictures under Water
63
How to Use the Hand Strap
63
Take Pictures Carefully
63
Confirm the Picture on the LCD Monitor
63
Quietly Press the Shutter Lever
63
Cautions When Using the Flash
63
5 Underwater Shooting According to the Scene Type
64
Underwater Shooting Modes
64
How to Select the Shooting Scene
65
AF Lock During Underwater Shooting
65
6 Handling after Shooting
66
Wipe off any Waterdrop
66
Take out the Digital Camera
67
Wash the Case with Pure Water
68
Dry the Case
68
7 Maintaining the Waterproof Function
69
Remove the O-Ring
69
Remove any Sand, Dirt, Etc
69
Install the O-Ring
71
How to Apply Grease to the O-Ring
71
Replace Consumable Products
72
8 Appendix
73
Q & a on the Use of the
73
Specifications
78
Limitation de Garantie
84
Manipulation du Produit
88
Français
90
1 Préparatifs
92
Contrôle du Contenu de L'emballage
92
Nomenclature des Pièces
93
Mise en Place de la Courroie
94
Maîtriser Le Fonctionnement de Base
94
Tenue du Caisson
94
Comment Appuyer Sur Le Déclencheur
95
Comment Commuter Le Mode entre , Et SCN
95
Comment Utiliser Les Touches de Zoom
95
2 Contrôle Préliminaire du Caisson
96
Test Préliminaire Avant Utilisation
96
Test Préliminaire
96
3 Mise en Place de L'appareil Photo Numérique
97
Contrôle de L'appareil Photo Numérique
97
Contrôle de Batterie
97
Confirmation du Nombre de Vues Restant À Prendre
97
Retirer la Courroie de I'appareil Photo Numérique
97
Préparer L'appareil Photo
98
Appareils Photo Numériques Applicables
98
Mettre L'appareil Photo en Numérique Marche
98
Vérifier Le Fonctionnement de L'appareil Photo
98
Ouvrir Le Caisson
98
Insérer L'appareil Photo Numérique
99
Introduction du Gel de Silice
100
Vérifier Après Insertion
101
Sceller Le Caisson
101
Vérifier Le Fonctionnement de L'appareil Photo Installé
102
Vérifier Le Mode de Prise de Vue Et de Scène de Prise de Vue
103
Mise en Place Et Retrait de la Coiffe de L'écran ACL
104
Mise en Place
104
Retrait
104
Montage Et Retrait du Bouchon D'objectif
105
Effectuer Les Contrôles Finaux
105
Inspection Visuelle
105
Test Final
106
4 Prise de Vues Sous L'eau
107
Utilisation de la Courroie
107
Prendre des Vues Soigneusement
107
Confirmer la Vue Sur L'écran ACL
107
Appuyer Doucement Sur Le Levier de Déclencheur
107
Précaution en Utilisant Le Flash
107
5 Prise de Vue Sous-Marine Selon Le Type de Scène
108
Types de Scènes Sous-Marines
108
Comment Sélectionner Le Mode de Scène de Prise de Vue
109
Mémorisation AF Pendant la Prise de Vue Sous-Marine
109
6 Manipulation Après la Prise de Vue
110
Essuyer Toute Goutte D'eau
110
Sortir L'appareil Photo Numérique
111
Laver Le Caisson Avec de L'eau Pure
112
Sécher Le Caisson
112
7 Maintien de la Fonction D'étanchéité
113
Retirer Le Joint
113
Retirer Tout Grain de Sable, Poussière, Etc
113
Installer Le Joint
115
Comment Appliquer la Graisse Sur Le Joint
115
Changer Les Pièces Consommables
116
8 Annexe
117
Q & R Sur L'utilisation du
117
Fiche Technique
122
Deutsch
134
1 Vorbereitende Schritte
136
Packungsinhalt auf Vollständigkeit Prüfen
136
Bezeichnung der Teile
137
Anbringen der Handgelenkschlaufe
138
Grundsätzliche Bedienungsschritte
138
Richtiges Halten des Gehäuses
138
Richtiges Drücken des Auslösers
139
So Schalten Sie zwischen dem -, - und SCN-Modus um
139
So Verwenden Sie die Zoomtasten
139
2 Check vor Benutzung des Gehäuses
140
Erster Systemcheck vor dem Gebrauch
140
Erster Dichtigkeitstest
140
3 Einsetzen der Digitalkamera
141
Überprüfen der Digitalkamera
141
Batterieleistung
141
Überprüfen der noch Verfügbaren Restaufnahmen
141
Entfernen Sie den Trageriemen von der Digitalkamera
141
Bereiten Sie die Kamera vor
142
Geeignete Digitalkameras
142
Schalten Sie die Digitalkamera ein ( on
142
Überprüfen Sie die Kamera auf Einwandfreie Funktionsweise
142
Öffnen des Gehäuses
142
Setzen Sie die Digitalkamera ein
143
Einlegen des Silicagel-Beutels
144
Überprüfen Sie die Kamera auf Einwandfreie Installation
145
Schließen Sie das Unterwassergehäuse Vollständig
145
Überprüfen Sie die Eingesetzte Digitalkamera auf Einwandfreie Funktionsweise
146
Überprüfen Sie das Motivprogramm/Aufnahmeprogramm
147
Anbringen und Entfernen der LCD-Monitor-Blendschutzhaube
148
Anbringen
148
Entfernen
148
Anbringen und Abnehmen des Objektivschutzes
149
Abschließende Überprüfung des Gehäuses
149
Visuelle Inspektion
149
Abschließender Systemcheck
150
4 Unterwasseraufnahmen
151
Verwendung der Handgelenkschlaufe
151
Beim Fotografieren Bitte Beachten
151
Bildüberwachung auf dem LCD-Monitor
151
Ruckfreies Drücken des Auslösers
151
Bitte Beim Fotografieren mit Blitz Beachten
151
5 Unterwasseraufnahme bei Verwendung eines Aufnahmeprogramms
152
Die Verfügbaren Unterwasser-Aufnahmeprogramme
152
So Wählen Sie ein Motivprogramm
153
Verwendung des Schärfespeichers bei Unterwasseraufnahmen
153
6 Behandlung nach dem Gebrauch
154
Entfernen von Wassertropfen
154
Entnehmen Sie die Digitalkamera
155
Reinigen des Gehäuses mit Klarem Wasser
156
Abtrocknen des Gehäuses
156
7 Wartung der Wasserdichtigkeit
157
Entfernen des O-Rings
157
Reinigen des O-Rings
157
Anbringen des O-Rings
159
Einfetten des O-Rings
159
Austausch von Verschleißteilen
160
8 Anhang
161
Fragen und Antworten
161
Technische Daten
166
Lea Atentamente las Siguientes Indicaciones Antes de Utilizar el Producto
172
Para un Uso Seguro
172
Español
178
1 Preparaciones
180
Verifique Los Contenidos del Paquete
180
Nombre de las Partes
181
Coloque la Correa
182
Aprenda la Operación Básica
182
Sosteniendo la Caja
182
Cómo Presionar el Disparador
183
Cómo Cambiar entre Los Modos , y SCN
183
Cómo Usar Los Botones del Zoom
183
2 Verificación Anticipada de la Caja
184
Prueba Anticipada Antes del Uso
184
Prueba Anticipada
184
3 Instale la Cámara Digital
185
Verifique la Cámara Digital
185
Confirmación de Pila
185
Confirmación del Número de Fotos Restantes a Ser Tomadas
185
Retire la Correa de Mano desde la Cámara Digital
185
Prepare la Camera
186
Cámaras Digitales Aplicables
186
Active la Cámara Digital (on
186
Compruebe la Operación de la Cámara
186
Abra la Caja
186
Coloque la Cámara Digital
187
Inserción de Silicagel
188
Compruebe la Condición de Colocación de la Cámara
189
Selle la Carcasa
189
Compruebe la Operación de la Cámara Colocada
190
Confirme el Modo de Escena de Toma Fotográfica y Toma Fotográfica
191
Instalación y Retiro del Visera de LCD
192
Instalación
192
Extracción
192
Colocando y Retirando la Tapa del Objetivo
193
Realice las Verificaciones Finales
193
Inspección Visual
193
Prueba Final
194
4 Tomando Fotos Debajo del Agua
195
Cómo Usar la Correa de Mano
195
Tome las Fotos Cuidadosamente
195
Confirme la Foto sobre el Monitor LCD
195
Presione Suavemente la Palanca del Disparador
195
Precaución al Usar el Flash
195
Acuerdo al Tipo de Escena
196
Tipos de Escenas de Toma Fotográficas Submarinas
196
Cómo Seleccionar la Escena de Toma Fotográfica
197
Bloqueo de Enfoque Automático (AF) Durante la Toma Fotográfica Submarina
197
5 Toma Fotográfica Debajo del Agua de
196
6 Manipulación Después de la Toma Fotográfica
198
Limpie Secando todo Vestigio de Agua
198
Retire la Cámara Digital
199
Lave la Caja con Agua Pura
200
Seque la Caja
200
7 Manteniendo la Función de Hermeticidad al Agua
201
Retire la Junta Tórica
201
Quite toda Arena, Suciedad, Etc
201
Coloque la Junta Tórica
203
Cómo Aplicar Grasa a la Junta Tórica
203
Reemplace las Partes Consumibles
204
8 Apéndice
205
Preguntas y Repuestas sobre el Uso de la
205
Especificaciones
210
漢語
222
使用前請閱讀以下條款
216
前言
216
安全注意事項
216
關于照相機的模式設定
218
如何防止滲水事故
219
使用注意事項
220
1 準備
224
檢查包裝盒中的內容
224
部件名稱
225
安裝手帶
226
掌握基本操作
226
把持防水機殼的姿勢
226
怎樣按快門杆
227
怎樣使用調焦按鈕
227
Scn 模式的切換方法
227
2 防水機殼的預先檢查
228
使用前的預先檢查
228
預先檢查
228
3 裝入數碼照相機
229
檢查數碼照相機
229
確認電池
229
確認可拍攝圖像數量
229
取下數碼照相機上的手帶
229
照相機的準備工作
229
可裝入哪些型號的數碼照相機
229
打開照相機的電源
229
檢查照相機的操作情況
230
打開防水機殼
230
裝入數碼照相機
230
插入矽膠
231
檢查裝入狀況
231
密閉防水機殼
232
裝入後的操作檢測
232
拍攝場景 / 拍攝模式的確認
233
液晶顯示屏遮光罩的安裝和拆卸方法
234
鏡頭蓋的安裝和取下方法
234
肉眼檢查
234
最終檢查
235
4 水中的拍攝方法
236
怎樣使用手帶
236
拍攝時﹐請注意
236
用液晶顯示屏確認拍攝畫面
236
平穩地按下快門杆
236
使用閃光燈拍攝時的注意事項
236
5 與水中拍攝場景相吻合的拍攝
237
水中拍攝場景的種類
237
水中廣角 1
237
水中廣角 2
237
水中近拍
237
場景拍攝的選擇方法
238
關於水中拍攝場景時的 Af(自動)鎖定
238
6 拍攝後的處理方法
239
擦乾水滴
239
取出數碼照相機
240
用清水清洗防水機殼
241
晾乾防水機殼
241
7 防水功能的維護
242
取下 O- 環
242
清除沙粒﹑灰塵等
242
安裝 O- 環
244
如何使用 O- 環軟膏
244
更換消耗品
244
附錄
245
使用問答
245
規格
249
사용하시기 전에
254
사용에 앞서 다음 사항을 꼭 숙지하시기 바랍니다
254
안전한 사용을 위해
254
배터리
256
카메라의 모드 설정
256
누수 방지
257
취급에 대해
258
조선말/한국어
260
구성품 확인
262
시작하기
262
부품 명칭
263
기본 조작 익히기
264
스트랩 연결하기
264
케이스 잡기
264
Scn 모드의 전환 방법
265
셔터 누르는 법
265
줌 버튼 사용법
265
사용 전 사전 검사
266
사전 검사
266
케이스 사전 점검
266
남은 촬영 가능회수 확인
267
디지털 카메라 장착
267
디지털 카메라 확인
267
디지털 카메라에서 핸드 스트랩 제거
267
배터리 확인
267
카메라를 준비합니다
267
디지털 카메라 장착
268
케이스 열기
268
장착 상태 점검
269
방수 케이스 밀폐
270
장착후의 조작 점검
270
촬영 신 / 촬영 모드의 확인
271
Lcd 후드의 장착과 분리
272
렌즈 뚜껑의 장착, 분리
272
최종 점검 수행
272
최종 점검
273
Lcd 모니터에서 사진을 확인합니다
274
사진 촬영
274
셔터 레버를 부드럽게 누릅니다
274
수중 촬영
274
플래시 사용시 주의 사항
274
핸드 스트랩 사용법
274
수중 촬영 신에 맞추어 촬영
275
수중 촬영 신의 종류
275
수중 촬영 신 시의 Af Lock 에 대해서
276
촬영 신의 선택방법
276
물기 제거
277
디지털 카메라를 꺼냅니다
278
케이스 건조
279
케이스 세척
279
O - 링 제거
280
방수기능 유지관리
280
이물질 제거
280
O - 링 설치하기
282
O - 링에 윤활제 바르기
282
소모품 교체
282
부록
283
사용 관련 질의 및 답변
283
제품 규격
287
Advertisement
Olympus PT-033 Instruction Manual (44 pages)
Brand:
Olympus
| Category:
Camera Accessories
| Size: 2 MB
Table of Contents
Please Read the Following Items before Use
2
For Safe Use
2
Batteries
4
Setting the Underwater Shooting Scene Mode
4
For Prevention of Water Leakage Accidents
5
Table of Contents
8
Preparations
10
Check the Contents of the Package
10
Names of the Parts
11
Install the Strap
12
Master the Basic Operation
12
Holding the Case
12
How to Press the Shutter
13
How to Switch between the , and SCN Modes
13
How to Use the Zoom Buttons
13
Advance Check of the Case
14
Advance Test before Use
14
Advance Test
14
Install the Digital Camera
15
Check the Digital Camera
15
Battery Confirmation
15
Confirmation of the Remaining Number of Pictures to be Taken
15
Remove the Hand Strap from the Digital Camera
15
Prepare the Camera
16
Applicable Digital Cameras
16
Turn the Digital Camera on
16
Check the Camera's Operation
16
Open the Case
16
Load the Digital Camera
17
Insertion of Silica Gel
18
Make Sure the Camera Is Loaded Properly
19
Seal the Case
19
Check the Operation of the Loaded Camera
20
Confirm the Shooting Scene and Shooting Mode
21
Installation and Removal of the LCD Hood
22
Installation
22
Removal
22
Mounting and Removing the Lens Cap
23
Perform the Final Checks
23
Visual Inspection
23
Final Test
24
Taking Pictures under Water
25
How to Use the Hand Strap
25
Take Pictures Carefully
25
Confirm the Picture on the LCD Monitor
25
Quietly Press the Shutter Lever
25
Cautions When Using the Flash
25
Underwater Shooting According to the Scene Type
26
Underwater Shooting Modes
26
How to Select the Shooting Scene
27
AF Lock During Underwater Shooting
27
Handling after Shooting
28
Wipe off any Waterdrop
28
Take out the Digital Camera
29
Wash the Case with Pure Water
30
Dry the Case
30
Maintaining the Waterproof Function
31
Remove the O-Ring
31
Remove any Sand, Dirt, Etc
31
Install the O-Ring
33
How to Apply Grease to the O-Ring
33
Replace Consumable Products
34
Appendix
35
Q & a on the Use of the PT-033
35
Specifications
40
Advertisement
Related Products
Olympus PT-037
Olympus PT-038 - Underwater Housing For FE-230
Olympus PT-035
Olympus PT-031
Olympus PT-032
Olympus PT-034
Olympus PT-030
Olympus PT-036
Olympus PT-026 - Underwater Housing For Stylus 500 Digital Camera
Olympus PT-042
Olympus Categories
Digital Camera
Voice Recorder
Microscope
Camera Accessories
Camera Lens
More Olympus Manuals
Login
Sign In
OR
Sign in with Facebook
Sign in with Google
Upload manual
Upload from disk
Upload from URL