Sign In
Upload
Manuals
Brands
Mold-Masters Manuals
Controller
E-Multi ER4-350
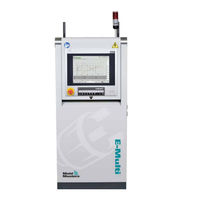
Mold-Masters E-Multi ER4-350 Controller Manuals
Manuals and User Guides for Mold-Masters E-Multi ER4-350 Controller. We have
2
Mold-Masters E-Multi ER4-350 Controller manuals available for free PDF download: User Manual
Mold-Masters E-Multi ER4-350 User Manual (170 pages)
Auxiliary Injection Unit
Brand:
Mold-Masters
| Category:
Laboratory Equipment
| Size: 12 MB
Table of Contents
Table of Contents
3
Section 1 - Introduction
11
Intended Use
11
Documentation
11
Release Details
11
Warranty
11
Returned Goods Policy
11
Table 1-1 Release Details
11
Movement or Resale of Mold-Masters Products or Systems
12
Copyright
12
Units of Measure and Conversion Factors
13
Table 1-2 Units of Measure and Conversion Factors
13
Trademarks and Patents
14
Section 2 - Global Support
15
Manufacturing Facilities
15
Regional Offices
15
International Representatives
16
Section 3 - Safety
17
Introduction
17
Safety Hazards
18
Figure 3-1 Injection Molding Machine Hazard Areas
18
Table 3-1 Safety Hazards
19
Operational Hazards
21
General Safety Symbols
23
Table 3-2 Typical Safety Symbols
23
Wiring Check
24
Lockout Safety
25
Electrical Lockout
26
Energy Forms and Lockout Guidelines
27
Table 3-3 Energy Forms, Energy Sources and General
27
Disposal
28
E-Multi Injection Unit Safety Hazards
29
Figure 3-2 E-Multi Safety Hazards
29
Table 3-4 E-Multi Injection Unit Safety Hazard Details
30
E-Multi Servo Carriage Safety Hazard
31
Table 3-5 E-Multi Servo Carriage Safety Hazard Details
31
E-Multi Radial Unit Hazards
32
Figure 3-3 E-Multi Radial Safety Hazard Locations
32
Table 3-6 E-Multi Radial Safety Hazards Details
33
Safety Symbols on the E-Multi Injection Unit
34
Table 3-7 Safety Symbols Used on the E-Multi
34
Safety Guards
35
Figure 3-4 Guards Layout
35
E-Multi Weight Specifications
36
Table 3-8 Safety Symbols on the E-Multi Transport Stand
36
Table 3-9 E-Multi Injection Unit Shipping Dimensions and Weight
36
Lift the E-Multi Injection Unit
37
Figure 3-5 Do Not Use the Motor as a Lifting Point
37
Table 3-10 E-Multi Injection Unit Lifting Kits
37
EM1 / EM2 / EM3 Lift Connections
38
EM1 / EM2 / EM3 Vertical Lift Connections
38
Figure 3-6 EM1 / EM2 Vertical Lifting Connections (EM3 Similar)
38
Table 3-11 EM1 / EM2 / EM3 Vertical Lift Connections
38
EM1 / EM2 / EM3 Horizontal Lift Connections
39
Figure 3-7 EM3 Horizontal Lift Connections. EM1 / EM2 Similar
39
Table 3-12 EM1 / EM2 / EM3 Horizontal Lift Connections
39
EM4 Vertical Lift Procedures
40
Horizontal Placement from the Shipping Crate
40
Horizontal Placement from a Horizontal Stand
41
Attach the Lifting Bar
41
Vertical Orientation with Two Lifting Machines
43
Vertical Orientation with One Lifting Machine
45
E-Multi Injection Unit Installation Onto the Molding Machine
46
EM4 Horizontal Lift Connections
47
Figure 3-8 EM4 Horizontal Lift Connections
47
Table 3-13 EM4 Horizontal Lift Connections
47
Section 4 - Overview
48
E-Multi Injection Unit Models
48
Figure 4-1 E-Multi Injection Unit Models
48
E-Multi Injection Unit Components
49
Figure 4-2 E-Multi Injection Unit Components
49
Section 5 - Preparation
50
Shipping Contents
50
Figure 5-1 Oil Fill Kit (Optional)
50
Unpacking
51
Inspection
51
Section 6 - Installation
52
Attach E-Multi Injection Unit to the Mold / Machine
53
Controller Installation
54
Operational Environment
55
Section 7 - System Setup
56
Connection of the Controller to the E-Multi Injection Unit
56
Route and Connect Servo Cables
56
Figure 7-1 EM3 Servo Cable Routing
56
Route and Connect Heater, I/O, Injection Molding Machine Cables
57
Figure 7-2 Cables Held with Wire Ties
57
Figure 7-3 Correct Connector Alignment
57
Figure 7-4 E-Multi Connection Locations
58
Connection to a Robot
59
Connection of the Controller to the Molding Machine
59
Connection a Handheld HMI (Optional)
59
Figure 7-5 Hand-Held HMI and Connection
59
Figure 7-6 Robot Jumper Plug
59
Air Connections
60
Water Connections
61
Figure 7-7 EM3 / EM4 Water Supply and Return Manifolds
61
Figure 7-8 EM3 / EM4 Servo Motor Cooling Connections
61
Table 7-1 Cooling System Water Limits
61
Cooling Water Quality
62
Cooling Water Schematic
62
Corrosion Caused by Condensation
62
Figure 7-9 Water Cooling Schematic Diagram
62
Table 7-2 Basic Water Quality Specification
62
Coolant and Additives
63
Figure 7-10 Water Quality Specification Tag on E-Multi
63
Connection to a Diagnostic Computer (Optional)
64
Figure 7-11 Wireless Network Icon
65
Section 8 - Operation
66
Introduction
66
Controller Startup and Shutdown
66
Figure 8-1 E-Multi Main Power Switch
66
Switch on
67
Switch off (Shutdown)
67
Shutdown the Heating
67
Shutdown the Controller
67
Figure 8-2 Button Strip below Controller Display (HMI)
67
Section 9 - Maintenance
68
Preventive Maintenance Schedule
68
Screw Torque Specifications
68
Table 9-1 Preventive Maintenance Schedule
68
Table 9-2 Screw Torque Specifications
68
Other Torque Specifications
69
Belt Tension Specifications
69
Table 9-3 Nozzle Tip and Locking Plate Torque Specifications
69
Table 9-4 Feed Block Torque Specifications
69
Table 9-5 Belt Tension Specifications
69
Lubrication Guidelines
70
Table 9-6 E-Multi Injection Unit Lubrication
70
Preload Oil Pressure Verification
71
Check the Preload Oil Pressure
71
Assemble the Injection Pressure Oil Fill Kit
71
Charge the High Pressure Oil Circuit with the Oil Kit
72
E-Multi Preload Pressures
73
Table 9-7 E-Multi Preload Pressures (1.34 Software)
73
Table 9-8 Grease Lubrication Mass - Injection Ball Screws
73
Check the Oil Bath Level
74
Check Lubrication of Linear Guides and Injection Ball Screws
74
Purge Plastic from System
75
Purge Cooling Water from System
75
Move the E-Multi Injection Unit for Maintenance
76
Clean Servo Motor Cooling Lines
76
Indications of Cooling Line Contamination
76
Figure 9-1 Comparison of Clean and Contaminated Cooling
76
Adapter Plate Removal and Installation
77
Cleaning Recommendations
77
Injection Nozzle Replacement
80
Nozzle Protrusion Adjustment - Toggle Link Models
80
Introduction
80
Adjust the Nozzle Protrusion Manually
81
Figure 9-2 Protrusion Adjustment Parts. EM1 Shown
81
Figure 9-3 Nozzle Touching Mold
83
Nozzle Protrusion Adjustment - Automatic Adjustment
84
Calibrate the Carriage Home Position
84
Calibrate Manually
84
Automatic Calibration
85
Figure 9-4 Automatic Calibration
85
Injection Axis Referencing
86
Bolt Type Shut off Nozzle Maintenance
87
Barrel Head Removal and Replacement
89
Heater Replacement
90
Feed Assembly Removal and Replacement
94
Remove Feed Assembly
94
Install the Feed Block
96
Feed Screw Cleaning and Replacement
97
Prepare for Feed Screw Removal
97
Remove the Feed Screw
98
Cleaning
99
Install the Feed Screw
100
Barrel Removal and Installation
103
Remove the Barrel Assembly
103
Transfer Heaters and Thermocouples to a New Barrel
105
Install the Barrel Assembly
106
Belt Tension Adjustment
108
Belt Removal and Installation
109
Figure 9-5 Linear Guide Position
110
Servicing and Repairing Your Controller
111
Section 10 - Component Tests and System Alarms
112
Thermocouple Electrical Test
112
Heater Continuity Test
112
Transducer Output Alarm
112
Vibrator Valve Test
113
Control System Alarms
113
Servo Motor Temperature Alarms
114
Figure 10-1 Motor Temperature Alarm - Alarms Screen on
114
Section 11 - E-Multi Radial Option
116
Introduction
116
E-Multi Radial Specifications
116
Table 11-1 E-Multi Radial Specifications
116
E-Multi Radial Components
117
Figure 11-1 Main Components of the E-Multi Radial
117
Unpacking
118
Figure 11-2 Sling Positions of the E-Multi Radial Vertical Beam
118
Inspection
119
Figure 11-3 Forward Sling Attachment
119
Figure 11-4 Rear Sling Attachment
119
Figure 11-5 Oil Fill Kit (Optional)
119
E-Multi Radial Installation (EM1 and EM2 Models)
121
Figure 11-6 Tilting the E-Multi Radial from the Horizontal to
122
Figure 11-7 Install the Barrel Heats Connector
124
Figure 11-8 Attach the Servo Motor Cables
124
Install Onto an Injection Molding Machine
124
Manual Position Adjustment
125
Figure 11-9 Install the I/O Connector
125
Figure 11-10 Gap between the Rotating Plate and Lockring
126
Home Position Calibration
128
Auto Purge
128
E-Multi Radial Maintenance
129
Lubricate the E-Multi Radial Carriage Ball Screw and Linear Guides
129
Table 11-2 Grease Lubrication Volume - Ball Screw Nut
129
Service of the E-Multi Radial Carriage Assembly and Servo Motor
132
ER3 / ER4 Installation
133
Spare Parts for the E-Multi Radial
141
Section 12 - Servo Carriage Option
142
Introduction
142
E-Multi Servo Carriage Specifications
142
Table 12-1 E-Multi Servo Carriage Specifications
142
Material Handling
143
Preparation
143
Unpacking
143
Inspection
143
Installation
143
Calibrate Home Position
143
Auto Purge
144
Maintenance
144
Check the Lubrication of the Ball Screw
144
Spare Parts
144
Section 13 - Servo Cooling Option
146
Operation and Specifications
146
Closed Loop Specification
146
External Loop Specification
146
Materials in Contact with Coolant
146
Table 13-1 Materials in Contact with Coolant
146
Maintenance
147
Drain the Coolant
147
Figure 13-1 Bottom Side of the Cooling Unit Showing the
147
Clean / Replace the Heat Exchanger
148
Troubleshooting
148
Table 13-2 Troubleshooting
148
Section 14 - E-Multi Stands
150
Introduction
150
Stand Options
150
Figure 14-1 Compact Stand
150
Figure 14-2 Heavy Duty Stand
150
Table 14-1 E-Multi Stand Options
150
Compact Stand
151
Main Components
151
Figure 14-3 Compact Stand Main Components
151
Horizontal Position Adjustment
152
Assembly
152
Figure 14-4 Compact Stand Horizontal Position Adjustment
152
Figure 14-5 Compact Stand Assembly
152
Heavy Duty Stand
153
Main Components
153
Figure 14-6 Heavy Duty Stand Main Components
153
Horizontal Position Adjustment
154
Front or Back Leg Position
154
Figure 14-8 Heavy Duty Stand - Front or Back Leg Position
154
Figure 14-7 Heavy Duty Stand Horizontal Position Adjustment
154
Counter Weight Kit (Optional)
155
Figure 14-9 Heavy Duty Stand Counter Weight Kit
155
Assembly
156
Leveling Castors
157
Mold Installation
157
Figure 14-10 E-Multi Stand Leveling Castors
157
Figure 14-11 E-Multi Injection Unit Stand-To-Mold Installation
158
Mold Removal
160
Disassembly
160
Figure 14-12 with the Crane, Lift the E-Multi Injection Unit up and Away from the Stand
160
Section 15 - Euromap 67
162
Scope and Application
162
Description
162
Plug and Socket Outlet
162
Table 15-1 Plug on the Injection Molding Machine
162
Section 16 - Water Quality
167
Table 16-1 Detailed Water Quality Specification
167
Index
169
Advertisement
Mold-Masters E-Multi ER4-350 User Manual (161 pages)
Brand:
Mold-Masters
| Category:
Controller
| Size: 9 MB
Table of Contents
Table of Contents
2
Section 1 - Introduction
10
Intended Use
10
Release Details
10
Warranty
10
Returned Goods Policy
10
Movement or Resale of Mold-Masters Products or Systems
10
Table 1-1 Release Details
10
Copyright
11
Units of Measure and Conversion Factors
11
Table 1-2 Units of Measure and Conversion Factors
11
Trademarks and Patents
12
Section 2 - Global Support
13
Manufacturing Facilities
13
Regional Offices
13
International Representatives
14
Section 3 - Safety
15
Introduction
15
Safety Hazards
16
Figure 3-1 Injection Molding Machine Hazard Areas
16
Table 3-1 Safety Hazards
18
Operational Hazards
19
General Safety Symbols
21
Table 3-2 Typical Safety Symbols
21
Wiring Check
22
Lockout Safety
23
Electrical Lockout
24
Energy Forms and Lockout Guidelines
25
Table 3-3 Energy Forms, Energy Sources and General
25
Grounded Earth Connections
26
Disposal
26
E-Multi Controller Safety Hazards
27
Operational Environment
27
Cabinet Push / Tip Forces
27
Table 3-4 Cabinet Push / Tip Forces
27
Figure 3-2 E-Multi Controller Safety Hazards
28
E-Multi Injection Unit Safety Labels
29
Figure 3-3 E-Multi Injection Unit Safety Labels
29
E-Multi Injection Unit Safety Hazards
30
Table 3-5 E-Multi Injection Unit Safety Hazard Details
30
E-Multi Injection Unit Safety Symbols
32
Table 3-6 Safety Symbols Used on the E-Multi Injection Unit
32
E-Multi Injection Unit Safety Guards
33
Figure 3-4 Guards Layout
33
E-Multi Weight Specifications
34
Table 3-7 E-Multi Injection Unit Shipping Dimensions and Weight
34
Unpack the E-Multi Controller
35
Figure 3-5 Correct Side of Crate to Open
35
Figure 3-6 Remove Top Row of Screws
35
Figure 3-7 Remove Cross Brace Screws
36
Figure 3-8 Remove Screws from Side and Bottom
36
Lift the E-Multi Controller
37
Preparation
37
Figure 3-9 Eyebolts and Washers
37
Figure 3-10 Install Eyebolts and Washers
38
Figure 3-11 Attach Slings to All Four Eyebolts
38
Lift the E-Multi Injection Unit
39
Prior to Lifting the E-Multi Injection Unit
39
Table 3-8 E-Multi Injection Unit Lifting Kits
39
Figure 3-12 Do Not Use the Motor as a Lifting Point
39
EM1 / EM2 / EM3 Lift Connections
40
EM1 / EM2 / EM3 Vertical Lift Connections
40
Table 3-9 EM1 / EM2 / EM3 Vertical Lift Connections
40
EM1 / EM2 / EM3 Horizontal Lift Connections
41
Table 3-10 EM1 / EM2 / EM3 Horizontal Lift Connections
41
E-Multi Injection Unit Stand Safety
42
Section 4 - Overview
43
Controller Front
43
Figure 4-1 Controller Front
43
Controller Back - Connections Side
44
Figure 4-2 Controller Back Connections
44
Figure 4-3 Diagnostic Kit (Option)
44
Cable Holders
45
Figure 4-4 Cable Holders
45
Figure 4-5 Attach Cable Holders
45
Section 5 - Installation
47
Introduction
47
Connect the Controller to the E-Multi
48
Connect a Robot to the Controller
48
Figure 5-1 EM3 Servo Cable Routing
48
Figure 5-2 Robot Jumper Plug
48
Connect the Controller to the Molding Machine
49
Figure 5-3 E-Multi Connection Locations
49
Connect a Handheld HMI (Optional)
50
Connect Diagnostic Computer (Optional)
50
Figure 5-4 Handheld HMI and Connection
50
Figure 5-5 Wireless Network Icon
51
Section 6 - Operation
52
Introduction
52
Isolate the Controller
52
Figure 6-1 E-Multi Main Power Switch
52
Switch on
53
Switch off (Shutdown)
53
Shutdown the Heating
53
Shutdown the Controller
53
Figure 6-2 Button Strip below Controller Display (HMI)
53
Section 7 - E-Multi Controller HMI Interface
54
Introduction
54
Cabinet Mounted Control Buttons
55
Figure 7-1 Cabinet Mounted Control Buttons
55
Table 7-1 Control Buttons
55
E-Multi Touchscreen Interface
56
Top Bar - Status Display
57
Table 7-2 Top Bar - Status Display
57
Active Movement Icons
58
Status Icons
58
Table 7-3 Active Movement Icons
58
Table 7-4 Status Icons
58
Bottom Bar - Screen Navigation Buttons
59
Table 7-5 Screen Navigation Buttons
59
Print Functionality
60
Table 7-6 Printer Settings
60
Figure 7-2 Print Functionality Screen
60
Screen Descriptions
61
Overview Screen
62
Table 7-7 Overview Screen Components
63
Table 7-8 Overview Screen Context Menu Buttons
65
Injection Settings Screen
66
Table 7-9 Injection Settings Screen Components
66
Table 7-10 Injection Settings Screen Context Menu Buttons
68
Hold Settings Screen
69
Table 7-11 Hold Setting Screen Components
69
Table 7-12 Hold Settings Screen Context Menu Buttons
70
Recovery Settings Screen
71
Table 7-13 Recovery Settings Screen Components
71
Table 7-14 Recovery Settings Screen Context Menu Buttons
73
Barrel Temperature Settings - Legacy Controllers
74
Figure 7-7 Legacy Style Barrel Temperature Settings Screen
74
Table 7-15 Legacy Style Barrel Temperature Setting Screen
74
Table 7-16 Legacy Style Barrel Temperature Setting Screen Context Menu Buttons
75
Barrel Temperature Settings - Mold-Masters Screen
76
Figure 7-8 Mold-Masters Barrel Temperature Settings Screen
76
Table 7-17 Mold-Masters Barrel Temperature Screen Components
77
Table 7-18 Mold-Masters Temperature Settings Screen Context Menu Buttons
78
Integrated Hot Runner Temperature Control (Option)
79
Figure 7-9 Integrated Hot Runner Controller Overview
79
Figure 7-10 Hot Runner Controller Monitor Screen
80
Monitor Screen
80
Table 7-19 Monitor Screen Control Buttons
80
Figure 7-11 Setup Screen (Supervisor Level)
84
Setup Screen (Supervisor Level)
84
Utilities Screen (Supervisor Level)
88
Table 7-21 Utility Screen Elements
89
Integrated E-Drive Control (Option)
90
Figure 7-13 E-Drive Control Screen Components
90
E-Drive Control Buttons
91
Table 7-22 E-Drive Control Buttons
91
Overview Screen
92
Figure 7-14 E-Drive Controller Overview Screen
92
Table 7-23 E-Drive Overview Screen Elements
92
Homing
93
Table 7-24 E-Drive Screen Context Menu Buttons
93
Figure 7-15 E-Drive Setting Screen
94
Settings Screen (Supervisor Level)
94
Table 7-25 E-Drive Settings Screen Elements
95
Valve Gate Settings Screen
96
Table 7-26 Valve Gate Settings Screen Elements
97
Shutoff-Nozzle Settings Screen
98
Shutoff-Nozzle Settings Screen-Kortec
101
Production Graph Screen
104
Lower Menu Buttons
106
Software Oscilloscope
107
Measure Parameter
107
Trigger
108
Parameter
108
Line Color
109
Process Data (PD) Protocol Screen
110
Lower Menu Buttons
111
Main Settings Screen
112
System Settings Screen
114
Lower Menu Buttons
116
E-Multi Radial / Servo Carriage Screen
117
Auto Purge Screen
119
Info-Log Screen
121
Programmable I/O
123
I/O Monitor Screen
125
Production Settings Screen
126
Drive Monitor Screen
127
Task Monitor Screen
129
Drive Parameter Monitor Screen
130
PID Settings
131
Reference Settings Screen
132
Reference Settings Screen - Continued
133
Machine Data Screen
134
Variable Monitor Screen
135
Delay Settings Screen
137
Calibration Settings Screens
138
Alarms Screen
139
Mold Data Screen
141
Lower Menu Buttons
142
Euromap E67 Screen
143
Legacy E67 Screen
144
Section 8 - Maintenance
145
Clean the HMI Screen
145
Preventative Maintenance
145
Verify Injection Pressure Oil Circuit (Preload Pressure)
146
Check the Preload Oil Pressure
146
Nozzle Protrusion Adjustment - Automatic Adjustment
147
Carriage Home Position Calibration
147
Manual Calibration
147
Automatic Calibration
148
Injection Axis Referencing
149
Service and Repair the Controller
150
Replacement Parts
150
Cleaning and Inspection
150
Update Software
151
Save Mold Data
151
Save Machine Data
152
Install New Software
153
Section 9 - Troubleshooting
156
Thermocouple Electrical Check
156
Heater Continuity Check
156
Transducer Output Check
156
Vibrator Valve Check
156
Servo Motor Temperature Check
157
Troubleshoot the Control System
157
Fault and Warning Messages
158
Index
160
Advertisement
Related Products
Mold-Masters E-Multi ER4-550
Mold-Masters E-Multi ER1-15
Mold-Masters E-Multi ER1-30
Mold-Masters E-Multi ER2-50
Mold-Masters E-Multi ER2-80
Mold-Masters E-Multi ER3-100
Mold-Masters E-Multi ER3-200
Mold-Masters E-Multi EM1
Mold-Masters E-Multi EM2
Mold-Masters E-Multi EM3
Mold-Masters Categories
Controller
Industrial Equipment
Laboratory Equipment
Temperature Controller
More Mold-Masters Manuals
Login
Sign In
OR
Sign in with Facebook
Sign in with Google
Upload manual
Upload from disk
Upload from URL