Sign In
Upload
Manuals
Brands
Mita Manuals
Copier
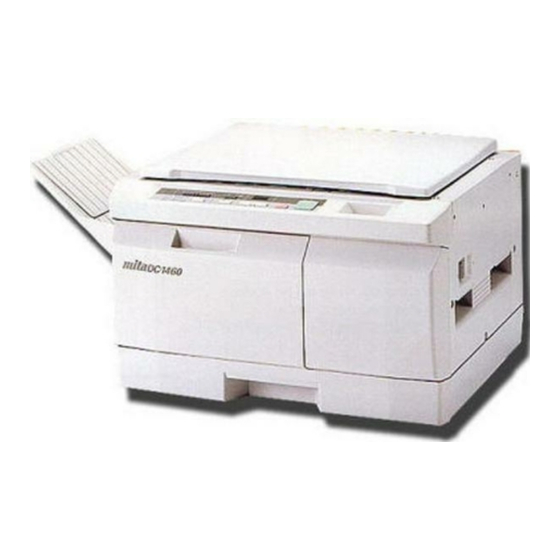
DC-1460
Mita DC-1460 Manuals
Manuals and User Guides for Mita DC-1460. We have
1
Mita DC-1460 manual available for free PDF download: Service Manual
Mita DC-1460 Service Manual (249 pages)
Brand:
Mita
| Category:
Copier
| Size: 1 MB
Table of Contents
Table of Contents
10
Itheory and Construction Section
12
Specifications
13
Handling Precautions
16
Drum
17
Developer and Toner
17
-3 Mechanical Construction
18
Mechanical Construction
18
Part Names and Their Functions
19
Machine Cross Section
21
Drive System
22
1 ) Paper Feed Section
23
Mechanical Construction
23
Paper Feed from the Paper Drawer
25
Paper Feed from the Bypass Slot
26
2 ) Main Charging Section
27
3 ) Exposure Section
30
4 ) Developing Section
36
5 ) Transfer and Separation Section
44
6 ) Cleaning Section
47
7 ) Charge Erasing Section
48
8 ) Fixing and Eject Section
50
Electrical Section
55
Electrical Parts Layout
56
Detection of Paper Misfeeds
61
Paper Misfeed Detection
62
Paper Misfeed Detection Conditions
63
-3 Operation of the Pcb
65
Operation of the PCB
65
Power Source PCB
66
Main PCB
67
Avr Pcb
68
Operation Unit PCB
69
Set up and Adjustment Section
71
-1 Installation
72
Installation
72
1 ) Installation Environment
73
Unpacking and Installation
73
2 ) Installation Procedure
74
Setting Initial Copy Modes
86
Installing the Dehumidifier Heater
87
Specifications Only)
87
Installing the Flicker Resistor (Optional, 240 V/50 Hz Specifications Only)
89
-2 Simulation
91
Simulation
91
1 ) Running a Simulation
92
Simulations
92
2 ) Simulation List
95
3 ) Contents of Simulations
98
-3 Assembly and Disassembly
118
Assembly and Disassembly
118
1 ) Precautions
120
Precautions for Assembly and Disassembly
120
1 ) Detaching and Refitting Paper Feed Pulleys a and B
121
Paper Feed Section
121
2 ) Replacing the Feedshift Films
123
Adjusting the Leading Edge Margin
126
Adjusting the Trailing Edge Blank Cut Timing
128
Adjusting the Trailing Edge Margin
130
1 ) Replacing the Charger Wire
132
Main Charging Section
132
1 ) Detaching and Refitting the Halogen Lamp
135
Exposure Section
135
2 ) Detaching and Refitting the Optical Section Thermostat
136
3 ) Adjusting the Positions of the Light Adjusters
137
4 ) Detaching and Refitting the Scanner Wires
138
Detaching the Scanner Wires
138
Installing the Scanner Wires
140
( 5 ) Adjusting Longitudinal Image Squareness (Inclination of Light Source 2)
149
( 6 ) Adjusting Lateral Image Squareness (Height of Light Source 2)
150
7 ) Making Fine Adjustment to Image Focus
151
Adjusting the Mirror Home Position for 100% Copying
152
Adjusting the Mirror Home Position for Enlargement Mode
154
Adjusting the Mirror Home Position for Reduction Mode
155
8 ) Setting the Exposure Amount
156
9 ) Adjusting the Auto Exposure
160
Adjusting Exposure Amount for Enlargement/Reduction Mode
161
Adjusting Exposure Amount for Enlargement Mode
162
Adjusting Exposure Amount for Reduction Mode
163
Adjusting Lateral Magnification (Correcting the Lens Travel Distance)
164
Adjusting Longitudinal Magnification (Scanning Speed)
168
1 ) Detaching and Refitting the Drum
169
Drum Section (Metric Specification Only)
169
2 ) Cleaning the Drum
171
1 ) Replacing Developer
172
Developing Section (Metric Specification Only)
172
( 2 ) Adjusting the Formation Position of the Magnetic Brush (Reference)
174
( 3 ) Adjusting Developing Bias Voltage (Reference)
175
1 ) Replacing the Charger Wires
176
Transfer Section
176
1 ) Replacing the Cleaning Blade
180
Cleaning Section (Metric Specification Only)
180
2 ) Detaching and Refitting the Lower Cleaning Blade
182
1 ) Detaching and Refitting the Fixing Heater
183
Fixing Section
183
2 ) Detaching and Refitting the Fixing Unit Thermistor
186
3 ) Detaching and Refitting Fixing Thermostats 1 and 2
187
4 ) Detaching and Refitting the Press Roller
188
5 ) Detaching and Refitting the Heat Roller
190
6 ) Detaching and Refitting the Heat Roller Separation Claws
192
7 ) Detaching and Refitting the Fixing Blade
193
PCB Initial Setting
194
Replacing the Main PCB
195
Adjustment-Free Variable Resistors (VR)
197
Self-Diagnostics
198
Self Diagnostic Function
199
-6 Troubleshooting
205
Troubleshooting
205
Image Formation Problems
207
( 1 ) no Image (Entirely White)
209
( 2 ) no Image (Entirely Black)
210
3 ) Image Is too Light
211
4 ) Background Is Visible
211
6 ) a Black Line Appears Longitudinally
212
7 ) a Black Line Appears Laterally
213
9 ) Black Dots Appear on the Image
214
Image Is Blurred
215
Paper Creases
216
The Leading Edge of the Image Is Sporadically Misaligned with the Original
216
Offset Occurs
217
Image Is Partly Missing
218
Fixing Is Poor
219
Image Is out of Focus
219
Image Is Not Square Laterally
220
Image Is Partially Missing Laterally
220
As Soon as the Main Switch Is Turned on (J03 Appears)
221
Copying (PF Appears)
221
Paper Misfeed
221
Paper Misfeeds
221
The Main Switch Is Turned on (J02 Appears)
221
Copying (J01 Appears)
222
Copying (J02 Appears)
222
Copying (J03 Appears)
222
1 ) Power Source PCB
223
PCB Terminal Voltages
223
2 ) Main PCB
225
3 ) Avr Pcb
228
4 ) Operation Unit PCB
230
Electrical Problems
231
Is Turned on
231
The Registration Clutch Does Not Operate
233
The Fixing Heater Does Not Turn on (C61, C63)
234
The Halogen Lamp Does Not Turn off
234
No Developing Bias Is Output
235
Others
236
1 ) no Primary Paper Feed
237
4 ) the Scanner Does Not Travel
237
6 ) Paper Jams
237
Mechanical Problems
237
Appendixes
239
Timing Chart No. 1
240
Timing Chart No. 2
241
Timing Chart No. 3
242
Power Source PCB
243
Avr Pcb
244
Operation Unit PCB
245
Main PCB
246
Connection Diagram
247
Wiring Diagram
248
Advertisement
Advertisement
Related Products
Mita DP-1400
Mita DP-1800
Mita DP-2800
Mita DP-3600
Mita MIP-2400
Mita PointSource Ai 3010
Mita Categories
Fax Machine
Printer
All in One Printer
Copier
Accessories
More Mita Manuals
Login
Sign In
OR
Sign in with Facebook
Sign in with Google
Upload manual
Upload from disk
Upload from URL