Sign In
Upload
Manuals
Brands
Metrohm Manuals
Measuring Instruments
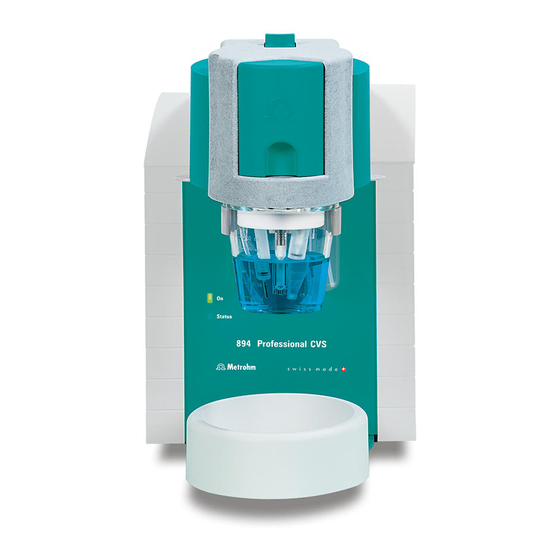
894 Professional CVS
Metrohm 894 Professional CVS Manuals
Manuals and User Guides for Metrohm 894 Professional CVS. We have
1
Metrohm 894 Professional CVS manual available for free PDF download: Manual
Metrohm 894 Professional CVS Manual (97 pages)
Brand:
Metrohm
| Category:
Measuring Instruments
| Size: 5 MB
Table of Contents
Table of Contents
5
1 Introduction
11
Instrument Description
11
Intended Use
12
About the Documentation
12
Further Information and Literature
12
Symbols and Conventions
13
Safety Instructions
14
General Notes on Safety
14
Flammable Solvents and Chemicals
14
Electrical Safety
14
Personnel Safety
15
Tubing and Capillary Connections
16
Recycling and Disposal
16
2 Overview of the Instrument
17
Front
17
Figure 1 894 Professional CVS Front
17
Rear
18
Figure 2 894 Professional CVS Rear
18
RDE Measuring Head
20
Figure 3 RDE Measuring Head - Overview
20
Measuring Head Connector Plate and Measuring Head Insert
21
Figure 4 Measuring Head Connector Plate
21
Figure 5 Measuring Head Insert
23
Tubing Connector (Measuring Head Arm)
24
Figure 6 Tubing Connector (Measuring Head Arm)
24
Setting up the Instrument
26
Packaging
26
Checks
26
Location
26
Equipping the RDE Measuring Head
26
Figure 7 Do Not Touch the Drive Disk
27
Figure 8 Inserting the Measuring Head
27
Figure 9 Removing the Stopper from the Pipetting Opening
28
Figure 10 Removing the Measuring Head Cover
28
Connecting the Gas Inlet
29
Figure 11 Inserting the Gas Inlet
30
Preparing Electrodes and Inserting Them in the RDE Measuring Head
31
Figure 12 Connecting the Gas Inlet
31
Figure 13 Removing the Protective Cap from the Electrode Tip
32
Figure 14 Tightening the Electrode Tip to the Driving Axle
32
Figure 15 Working Electrode, Installed
33
Figure 16 Fastening the Drive Belt
33
Figure 17 Connecting the Working Electrode
34
Figure 18 Assembling the Reference Electrode with the Electrolyte Vessel
35
Figure 19 Connecting a Reference Electrode
36
Figure 20 Connecting the Auxiliary Electrode
37
Establishing the Tubing Connections
38
Installing the Four-Way Micro Dosing Tip
38
Figure 21 Inserting the Four-Way Micro Dosing Tip
39
Figure 22 Screwing a PTFE Capillary to a Dosing Unit
39
Installing Capillaries
40
Figure 23 Sealing the PTFE Capillary of a Four-Way Micro Dosing Tip
40
Figure 24 Inserting a PEEK Capillary into the Measuring Head
41
Installing FEP Tubing
43
Figure 25 Screwing a Capillary to a Dosing Unit
43
Figure 26 Inserting a Piece of FEP Tubing into the Measuring Head
45
Figure 27 Installing the Measuring Head Cover
46
Figure 28 Inserting the Stopper in the Pipetting Opening
47
Figure 29 Installing a Bottle Cap with Pieces of Tubing on a Rinsing Canister
48
Figure 30 Connecting the Five-Way Tubing Connector to a Waste Canister
49
Connecting Instruments Electrically
50
Connecting the Instrument to the Power Grid
50
Figure 31 Connecting FEP Tubing to the Dosing Unit (Auxiliary Solution)
50
Connecting the 894 Professional CVS
51
Connecting an 800 Dosino
53
Figure 32 Connecting a Dosing Device to an MSB Socket
53
4 Start-Up
57
5 System Configuration
61
Manual Operation
61
Figure 33 Manual Operation - Electrical Connection
61
Semiautomated Operation
62
Connecting Devices Electrically
62
Establishing the Tubing Connections
62
Figure 34 Semiautomated Operation - Electrical Connections
62
Figure 35 Semiautomated Operation - Tubing Setup with Two Dosing Units
63
Figure 36 Semiautomated Operation - Tubing Setup with Four Dosing Units
64
Figure 37 Semiautomated Operation - Tubing Setup - Details 894 Professional
65
Automated Operation
66
Connecting Devices Electrically
66
Figure 38 Automated Operation - Electrical Connections
67
Establishing the Tubing Connections
68
Figure 39 Automated Operation - Tubing Setup - Overview
68
Figure 40 Automated Operation - Tubing Setup - Details 894 Professional
68
Figure 41 Automated Operation - Tubing Setup - 800 Dosino Details
68
Figure 42 Automated Operation - Tubing Setup - 858 Professional Sample Pro- Cessor Details - Guide Chain
68
Figure 44 Automated Operation - Tubing Configuration - Rinsing and Waste Solu- Tions - Details 894 Professional CVS
68
Figure 43 Automated Operation - Tubing Setup - Adding Rinsing Solution and Pumping out the Waste Solution
73
6 Operation and Maintenance
75
Care
75
Maintenance by Metrohm Service
76
Replacing the Measuring Head
76
Figure 45 Removing the Measuring Head
77
Performing a Dummy Cell Test
78
Figure 46 Do Not Touch the Drive Disk
78
Figure 47 Dummy Cell Test - Ideal Curve Progression
79
Replacing Electrode Cables
80
Figure 48 Replacing Electrode Cables
80
Adjusting the Sample Needle in the Sample Processor
81
Figure 49 Adjusting the Sample Needle in the Sample Processor
81
Calibrator
82
Relocating the 894 Professional CVS
82
Quality Management and Qualification with Metrohm
84
7 Troubleshooting
85
Peripheral Devices
87
8 Appendix
89
Tubing Lengths in the Measuring Head Arm
89
Status" LED - Various Instrument Statuses
89
9 Technical Specifications
90
Operating Modes
90
Potentiostat
90
Galvanostat
91
Temperature Measurement
91
Measuring Input
91
Accuracy
91
Resolution
92
Calibrator
92
Stirrer
92
Hardware
93
Power Connection
93
Ambient Temperature
93
Reference Conditions
93
Housing Data
94
10 Accessories
95
Index
96
Advertisement
Advertisement
Related Products
Metrohm 862
Metrohm 884 Professional VA
Metrohm Autolab 8 Series
Metrohm Titrando 890
Metrohm 899 Coulometer
Metrohm 831 KF
Metrohm 892 Professional Rancimat
Metrohm 893
Metrohm 895
Metrohm 896
Metrohm Categories
Laboratory Equipment
Measuring Instruments
Security Sensors
Control Unit
Medical Equipment
More Metrohm Manuals
Login
Sign In
OR
Sign in with Facebook
Sign in with Google
Upload manual
Upload from disk
Upload from URL