Sign In
Upload
Manuals
Brands
LAR Process Analysers Manuals
Analytical Instruments
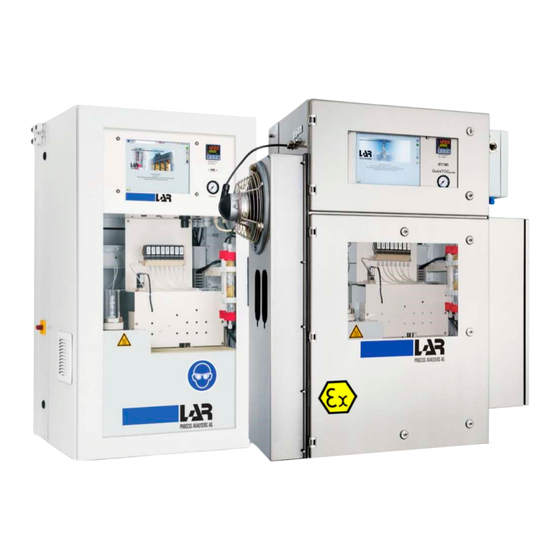
QuickTOC purity
LAR Process Analysers QuickTOC purity Manuals
Manuals and User Guides for LAR Process Analysers QuickTOC purity. We have
1
LAR Process Analysers QuickTOC purity manual available for free PDF download: User Manual
LAR Process Analysers QuickTOC purity User Manual (196 pages)
Brand:
LAR Process Analysers
| Category:
Analytical Instruments
| Size: 27 MB
Table of Contents
Table of Contents
3
Certificates
9
General Information
17
Safety Notes
17
Safety Symbols
18
Warning Sign on Casings with Explosion Protection
19
Operating Principle of the Analyser
21
Measurement of TOC
21
The Sum Parameter TOC
21
High Temperature Method at 1,200°C
21
High Temperature Method Vs. Wet Chemical Method
21
The Measurement Principle of the TOC-Difference Method
22
Proceeding
22
Advantages
23
The Measurement Principle of the TOC-Direct Method (NPOC-Method)
23
Proceeding
23
Advantages
24
The Measurement Principle of the Tconly Method
24
Proceeding
24
Advantages
25
Measurement Ranges
25
Explosion Protection
26
Product
27
Scope of Delivery
27
Identification Plate
28
Construction of the Analyser
29
Front View
29
Bottom of the Analyser
31
Right Side
32
Left Side
33
Components of the Analyser
33
Pump System
33
Tube Cassette Pump
34
Tubes (for the Tube Cassette Pump)
34
Sample Pump
35
Glass Components
36
Calibration Vessel
36
Sample Vessels
37
Ceramic Furnace
38
Trackball
40
Components of the Explosion Protection
40
Overpressure System
40
Cooling and Emergency Cooling
42
Connections
45
Mounting Plate
46
Power Supply
48
Electronic Connections (Digital and Analog Connections)
49
Connections on the TRC-Board
49
RS232 Serial Interface
51
Digital Inputs
51
Relays
52
Analog Outputs
52
Carrier Gas
56
Installation
57
Installation Procedure
57
Installation of the Analyser
57
Site Selection - Ambient Conditions
58
Mounting the Analyser On-Site
60
Maximum Swing-Open of the Analyser
61
Wall Mounting
62
Carrier Gas
63
Sample Inlet and Drain
64
Power Supply
64
Signal Connections
65
Rinsing Water
65
Provide Acid Solution (TOC-Direct and TOC-Difference Method)
66
Provide Calibration Standards
67
Start-Up
69
Procedure
69
Start-Up of the Analyser
69
Checking the Pre-Fusing
70
Checking the Installation Plate
70
Removing Transport Locks
71
Furnace Transport Screw
72
Aligning the Voltage
73
Switching on the Pre-Fusing
73
Filling and Installing the Reactor Pipereactor Pipe
73
Completing the Furnace
76
Installation of the Pump Tubes
78
Installation of the Tubes into the Tube Cassette Pump
78
Installation of the Tubes into the Sample Pump
78
Analyser Tubing
80
Connecting the Control Unit
81
Connecting the Furnace Emergency Cooling
82
Switch on the Analyser
82
Setting the Bypass for the Control Unit
83
Rinse the Injection System und Sample Tubes
84
Costumisation of Application-Specific Settings
84
Checking Status Parameters
84
Perform a Calibration
84
Operation with Trackball
85
Start Measuring Mode
85
Reagents and Calibration Standards
87
Reagents
87
Deionised Water for Calibration Standards
87
Rinsing Water
87
Phosphoric Acid (H3PO4) for TOC-Difference Method
88
Hydrochloric Acid (Hcl) for TOC-Direct Method (NPOC-Method)
88
Other Chemicals
89
Calibration Standards - TOC-Difference Method
89
Stock Solution - TOC-Difference Method
90
Dilution of the Stock Solution - TOC-Difference Method
91
Calibration Standards - TOC-Direct Method / Tconly Method
92
Stock Solution - TOC-Direct Method / Tconly Method
92
Dilution of the Stock Solution - TOC-Direct Method / Tconly Method
93
How to Work with the Analyser
95
General
97
User Levels
97
Configuration
98
Setting the Working Parameters
98
Setting the Measuremement Parameters
99
Measuring Intervals of the Sample Streams 1 to 6
100
Filling Time of the Sample
100
Filling Time of the Acid
100
Emptying Time Sample
100
Outgassing Time (NPOC)
100
TC Delay
100
TIC Delay
100
Preparation Time of the Injection Loop
100
Filling Time of the Injection Loop
101
Waiting Time of the Injection Loop
101
Injection Time
101
Outliers in a Measurement
101
Maximum CV for a Measurement
101
Averaging Values
101
Setting Parameters for Gas Measuremement
102
Purge Time Test Gas
102
Cleaning Time
102
Repeat the Cleaning Cycle
102
Filling
102
Injection Time Test Gas
102
Filling Time Carrier Gas
102
Injection Time Carrier Gas
103
Calibration
103
Perform Calibration
103
Perform a 1-Point Calibration for a Sample Stream
104
Perform a Multipoint Calibration (Three Solutions) for a Sample Stream
105
Calibration Results
106
Injection Volume
107
Volume of the Injection Loop
108
TC for each Sample Stream
108
Relay Settings
108
Programming Tools
108
Testing the Relays
109
PC Settings
109
Channel Display
111
Measured Values Screen
112
Signal Curve
113
Status Screen
113
Service Actions
114
Select Sample Flow for Flushing the Sample Tubes
115
Maintenance
116
Rinse Sample Tubes
116
Switching the Furnace on and off
116
Switching the Condensate Pump on and off
117
Single Measurement
117
Auto Check
118
Auto Calibration: Automatic Calibration through Calibration Standards
120
Autocheck - Automitic Checking with Calibration Standards
120
Setting Limits
120
Rinse Sample Tubes
121
Rinse before Measurement
122
Purge Time
122
Rinse after Measurement
122
Rinse
122
Automatic High-Salt Rinse from the Reactor
122
Database
122
Data in Table Form
124
Daily Results as a Curve
124
Log
125
Saving Data
127
Calibrate Analog Output
127
Good to Know
128
Password
128
Software Version
128
Abort Measurement
128
Furnace on - off
129
Automatic Temperature Control
129
Condensate Pump on - off
129
Date and Time
129
Language
129
Save
129
User Level 3
130
PC Settings
130
Calibration Results
131
CAN Selftest
131
Hardware Info
132
DIGITAL in 1, 2 and 3
132
DIGITAL out 1, 2 and 3
133
Calibrations
135
Service Calibration
135
Service Parameter
137
Update Manager
138
Names and Units
139
Control State
139
Care and Maintenance
143
Overview of Regular Care and Maintenance Actions
144
Tightness Test
144
Protocol for Visual Inspection (Analyser)
145
Care and Maintenance Tasks
146
Overview
146
Actions
147
Clean Vessel for Calibration Fluid and Replace Calibration Standard
149
Check Pump Hoses and Clean if Necessary
149
Check the Inlet and Outlet of the Control Unit for Contamination
149
Check Ventilator for Contamination
149
Check Reactor Foot and Clean if Necessary
149
Check the Gas Cooler
150
Cleantube Cassette Pump and Pump Cassettes
151
Clean Sample Pump
151
Adjust Sample Pump
151
Clean and Grease Bearing Pin
152
Checking Measurement Values of the Standard Solution
152
Perform a Calibration
153
Perform a Gas Calibration
153
Check and Document the Status of the Analyser
154
Check and Document a Measurement
154
Replace Pump Tubes and Condensate Tubes
154
Replace Reactor Pipe or Reactor Pipe Filling
155
Replace Reactor Seal
157
Loop System Tube
159
Check Sample Drain Tubes and Replace
160
Check Quartz Wool Filter and Replace if Necessary
160
Replace Gas Filter
161
Check Viton Tubes and Replace if Necessary
161
Accessories and Options
163
Overview
163
Mounting Rack
164
Multi Parameter Option
166
Multi Stream Option
167
Minor Disruptions - Quickly Solved
171
Preconditions for Fault-Free Measurement Mode
171
Breakdowns
172
Check the Fuses - Automatic Circuit Breaker
173
Breakdowns of the Temperature Regulator
174
Technical Data
175
Specifications
175
Ambient Conditions
176
Specifications for Accessories and Options
176
Flow Diagrams
177
Component Labelling
177
TC-Only Method (1 Sample Stream)
178
TC-Only Method (6 Sample Streams)
179
NPOC Method (1 Sample Stream)
180
NPOC Method (6 Sample Streams)
181
Logs and Protocols
183
Operating Log
184
Protocol for Visual Inspection (Analyser)
185
Care Protocol (Analyser)
186
Maintenance Protocol (Analyser)
187
Functional Test Protocol (Analyser)
188
Safety Data Sheets
189
Contact
191
Contact to LAR
191
Distributors / Authorized Service Partners
191
Optimization
191
Advertisement
Advertisement
Related Products
LAR Process Analysers QuickTOC ultra
LAR Process Analysers Categories
Measuring Instruments
Analytical Instruments
More LAR Process Analysers Manuals
Login
Sign In
OR
Sign in with Facebook
Sign in with Google
Upload manual
Upload from disk
Upload from URL