Sign In
Upload
Manuals
Brands
KNK Manuals
Cutter
Zing Air
KNK Zing Air Manuals
Manuals and User Guides for KNK Zing Air. We have
2
KNK Zing Air manuals available for free PDF download: Owner's Manual, User Manual
KNK Zing Air Owner's Manual (302 pages)
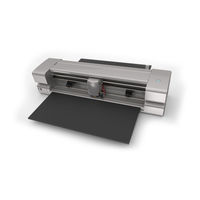
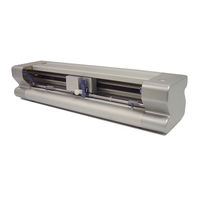
Klic-N-Kut digital die cutter
Brand:
KNK
| Category:
Cutter
| Size: 21 MB
Table of Contents
Knk Zing and Zing Air with Sure Cuts a Lot
1
Where to Start
1
Table of Contents
3
Introduction
9
Unpacking
9
Contents
9
Items to Note (Please Read!)
9
Parts of the Knk Zing Air
10
Front
10
Back
10
Accessories
11
Test Pen Holder
11
Blades Included with KNK Zing Air Purchase
11
Blade Installation
11
Preparing and Caring for the Cutting Mat
12
Tips on Using the Cutting Mat
12
Cleaning and Replenishing the Cutting Mat
13
Pinch Wheel Levers
13
Mat/Material Guides
14
Registering and Installing Drivers and Scal
14
Connecting the Zing Air to Your Computer
14
Connecting to a PC
14
Connecting to a Mac
16
Verify Communication and Test Draw Shapes
17
Setup for Drawing
17
Drawing Your First Shape
18
Maintenance
22
Zing Air: Cutting
24
What You Need to Understand about Cutting
24
You Have to Make Mistakes
24
The most Common Mistakes Made by New Owners
24
Begin with Easy Materials and Easy Shapes
24
Record Your Successes
24
Use the Correct Blade for the Material You Are Cutting
25
Set the Blade Length/Exposure to Match the Material Thickness
25
Set the Blade Height above the Material
25
Adjust the Speed, Force, and Number of Passes Based on the Material and Shapes
26
Perform Test Cuts
26
Know Where Your Images will Cut
27
Keep the Cutting Mat Clean and Sticky
27
Don't Get Frustrated, Get Help
27
Choices before Cutting
27
Controlling What Shapes will Cut
27
Controlling Where Shapes will Cut
28
Selecting the Tool to be Used for Cutting
29
Determining the Cut Settings
30
Cut Settings
30
Pressure
30
Speed
30
Blade Offset
30
Multi-Cut
31
Overcut
31
Presets
32
Set Origin
33
Other Output Functions
33
Important Checklist before You Cut
33
Resolution Calibration
34
Settings Form for Cutting Materials
37
Suggested Cut Settings for Various Materials on Knk Zing / Zing Air
38
Scal: Installation, Preferences, and Workspace
43
Installing Scal
43
Selecting and Downloading the Software
43
Activating the Software
43
Installing the USB Driver
45
Installing Your Cutter
45
Main Scal Screen
46
Language Preference
47
Units Preference
47
Customizing the Cutting Mat
47
Mat Size
47
Mat Orientation
48
Mat Grid
49
Workspace Alpha
50
Rulers
51
Customizing the Workspace
51
Snap to
53
Other Preferences
54
Zooming and Panning
55
Undo/Redo
56
Undo
56
Redo
56
Pages
56
Help Resources
57
Scal: Handling Files and Organizing Layers
59
Opening Files
59
Opening a New File/Project
59
Opening an Existing .SCUT File
59
Saving Scal Files
60
Using the Library
60
Shapes Tab
60
Fonts Tab
64
Projects Tab
65
Layers Panel
66
Introduction to the Layers Panel
66
Layer Panel
66
Parts of the Layers Panel
67
Creating Folders and Moving Layers
70
The Eshape Store
73
Importing from the Eshape Store
73
Exporting to the Eshape Store
75
Importing Other File Formats
77
Importing Vector Files
77
Importing Raster Files
78
Importing Fonts
79
Exporting in Other File Formats
79
Exporting in SVG Format
79
Exporting in JPG, PNG, BMP and TIFF Formats
80
Exporting in FCM Format
81
Exporting in PLT Format
81
Exporting to SCAL2
82
Scal: Manipulating and Coloring Shapes
83
Selecting
83
Deleting
85
Moving
85
Resizing, Scaling, Autofit
87
Resizing
87
Scaling
88
Autofit
88
Rotating
89
Skewing and Distorting
91
Skewing
91
Distorting
91
Mirroring and Flipping
92
Locking and Unlocking
92
Hiding and Showing
93
Grouping and Ungrouping
94
Group
94
Ungroup
94
Breaking and Merging
95
Break Apart
95
Merge
96
Arranging (Ordering) Shapes
97
Fill & Stroke: Fill
99
No Fill
100
Color Fill
100
Pattern Fill
100
Gradient Fill
102
Opacity
104
Fill & Stroke: Stroke
105
Dropper Tool
109
Cutting, Copying, Pasting, Duplicating
110
Cutting to the Clipboard
110
Copying to the Clipboard
110
Pasting from the Clipboard
110
Duplicating - Duplicate
111
Quick Duplicate
111
Alignment
111
Align to Page
112
Align to Selection
113
Distribute
114
Distribute to Page
115
Distribute to Selection
116
Distribute to Selection below
118
Scal: Working with Text
121
Text Options
121
Selecting a Font
121
Adding Text Options
121
Four Modes of Text
122
Type Tool
122
Vertical Type Tool
122
Four Mode of Text
122
Type on Path Tool
123
Type on Arch Tool
123
Text Settings
124
Other Text Editing
125
Creating a Connected Letter Title
126
Incorporating Shapes into a Title
127
Welding Titles in Imaginative Ways
127
Stenciling Letters
128
Open Path Fonts (Opf)
129
Knockout
130
Title Crawl
131
Other Text Effects
132
Scal: Tracing and Drawing
133
Raster Versus Vector
133
Finding Easy Images to Trace
134
Trace Function
135
Trace Settings
135
Monochrome Trace of a Colored Image: Effects of Contrast
138
Monochrome Trace of a Silhouette Image: Effects of Smooth
140
Monochrome Trace of a Detailed Image: Effects of Detail
141
Monochrome Trace of a Coloring Book Image: Single Line Threshold and Blackout
141
Monochrome Trace of a PNG File with a Transparent Background
142
Color Layers Trace
143
Single Color Trace
145
Draw Functions
149
The Draw Tool
149
Freehand Drawing
151
Brush Drawing
152
Manual Tracing of an Imported Image
152
Importing an Image for Manual Tracing
152
Manual Tracing Using the Draw Tool
153
Editing the Trace
154
Copy, Mirror and Weld to Complete Symmetrical Shapes
156
Scal: Editing
157
Simplify
157
Split Path
158
Close Path
160
Join Paths
160
Path Offset
161
Eraser
163
Knife and Crop
164
Using Knife
164
Using Crop
165
Which Cutting Tool to Use
166
Ruler
167
The Shape Tool - Path and Node Editing
169
Moving a Path
169
Reshaping a Path
170
Examples of Smoothing Curves
174
Applications for the Shape Tool
175
Scal: Designing
176
Where Do I Start with Learning to Design
176
Project Info
176
Basic Shapes
177
Rectangle
177
Rounded Rectangle
177
Circle and Oval
178
Triangle
178
Polygon
178
Star
178
Spiral
179
Shadow Layer
180
Shadow Layer Settings
180
Boolean Operations
183
Union
183
Intersection
184
Exclude
185
Front Minus Back
186
Back Minus Front
186
Duplicate Rotated
187
Duplicate Rotated Settings
187
Using Duplicate Rotated to Design a Wreath
188
Using Duplicate Rotated to Design a Frame
189
Object on Path
190
Designing a Scalloped Oval
191
Warp a Shape to a Path
193
Remaining Settings
194
Wrapper
194
Lattice
196
Rhinestones
200
Guidelines for Rhinestone Pattern Design
200
Rhinestone Outline
200
Rhinestone Fill
201
Editing Rhinestone Designs
202
Additional Tips on Rhinestone Designing
203
Jigsaw Puzzle
205
Rotate
208
Extrude (SCAL PRO Only)
209
Barrel Distortion
210
Bulge
211
Canned
213
Wave
214
Scal: Output
216
The Style Panel
216
Preview
217
Printing
218
Weeding (SCAL PRO Only)
220
Tiling (SCAL PRO Only)
222
Cut Settings
224
Cut Window Settings
224
Cut by Color (SCAL PRO Only)
229
Tiles (SCAL PRO Only)
234
Extras (SCAL PRO Only)
235
Controlling Where Shapes will Cut
237
Overview
237
Origin Point
238
Wysiwyg
240
Path Details and Reverse Path
243
Line Fill
243
Pierce
245
Zing Air: Print and Cut
246
What Is a Print and Cut (PNC)
246
What Is Apnc Calibration
246
Laser Calibration Procedure
247
What You Need for Calibrating
247
Preparing the Calibration File
247
Entering Settings and Printing
249
Setting the Registration Marks and Cutting
252
Adjusting the X and y Laser Offsets
252
Preparing an Actual Print and Cut Application
253
Print and Cut Tips
254
Scan2Cut
254
Scan2Cut: Introductory Tutorial
254
Scan2Cut: Additional Methods and Details
261
Zing Air: Applications
264
Cardstock and Paper
264
Selecting Cardstock
264
Settings
264
Troubleshooting
264
Chipboard
265
Selecting Chipboard
265
Settings
265
Troubleshooting
266
Vinyl
266
Types of Vinyl
266
Settings
266
Applying Vinyl
267
Fabric and Felt
267
Iron-On or Heat Transfer Vinyl (HTV)
268
Types of HTV
268
Cutting HTV
268
Adhering Iron-On
269
Rhinestone Templates
269
Cutting Rhinestone Template Material
269
Weeding and Brushing in Rhinestones
270
Heat Pressing Rhinestones
270
Extra Tips on Rhinestone Applications
271
Drawing with a Pen or Glue Pen
271
Draw and Cut: Using the Zing Pen Tool
272
Draw and Cut: When the Pen and Blade Holder Are Not Aligned
274
Embossing and Scoring
277
General Info on Embossing
277
Embossing Paper or Cardstock
277
Embossing Leather
278
Engraving
278
Project: Engraving a Dog Tag
279
Using the Punch Tool
280
Cake Decorating
280
Additional Applications
281
Wood
281
Craft Plastic
281
Suggested Settings for Various Accessories 1
283
Settings Form for Accessory Tools
285
Appendix A Shortcuts and Icons in Sure Cuts a Lot
286
Appendix B Troubleshooting Faq's
292
Communication Issues
292
Operating Issues
293
Cutting/Drawing Issues
294
Appendix C Scal Details
297
C1 Screenshot of Scal Screen
297
C2 Bars
297
C2.1 Menu Bar
297
C2.2 Toolbar
298
C2.3 Pages Bar
298
C2.4 Status Bar
298
C3 Panels
298
C3.1 Tools Panel
298
C3.2 Properties Panel
299
C4 Preferences
299
C4.1 Preferences: General Tab
299
C4.2 Preferences: Edit Tab
300
Acknowledgements
302
Advertisement
KNK Zing Air User Manual (193 pages)
with Make-The-Cut
Brand:
KNK
| Category:
Cutter
| Size: 13 MB
Table of Contents
Table of Contents
2
Unpacking, Installing, and Assembling
7
Unpacking
7
Contents
7
Items to Note (Please Read!)
7
Parts of the Zing
8
Front
8
Back
8
Part of the Zing
8
Accessories
9
Test Pen Holder
9
Blades Included with KNK Zing Purchase
9
Blade Installation
9
Mat (Carrier Sheet)
10
Installation of Make the Cut (MTC) Software, Zing Driver, and the Zing Plug-In
11
Pinch Wheel Levers
11
Mat/Material Guides
12
Test Drawing Shapes
12
Landscape Versus Portrait: Which Do You Prefer
12
Drawing Your First Shape
14
Cutting
18
What You Need to Understand about Cutting
18
You Have to Make Mistakes
18
The most Common Mistakes Made by New Owners
18
Begin with Easy Materials and Easy Shapes
18
Record Your Successes
18
Use the Correct Blade for the Material You Are Cutting
19
Set the Blade Length to Match the Material Thickness
19
Set the Blade Height above the Material
19
Adjust the Speed, Force, and Number of Passes Based on the Material and Shapes
20
Perform Test Cuts
20
Know Where Your Images will Cut
20
Adjust Blade Offset if Needed
20
Keep the Cutting Mat Clean and Sticky
21
Don't Get Frustrated, Get Help
21
Cut with Klic-N-Kut Zing
21
Speed
22
Force
23
Multicut
24
Blade Offset
24
Cut Type
25
Knife Point
25
Wysiwyg
26
WYSIWYG - Virtual Mat Matches Ruled Grid on Actual Mat
27
WYSIWYG - Virtual Mat Matches Material Dimensions
28
Print and Cut
29
Set Blade Origin
29
Connection Status and Test Cut Menu
30
Updates, Presets, and Help
30
Important Checklist before You Cut
31
Resolution Calibration
32
Suggested Settings for Various Materials 1
34
Settings Form for Cutting Materials
36
Mtc Basics
37
Main Mtc Screen
37
Toolbars
38
File Toolbar
38
Import Toolbar
38
Magic Toolbar
39
Node Mode Toolbar
39
Bars
39
Menu Bar
39
Sel. Properties Bar
39
Main Bar
40
Layer Bar
40
Tab Bar
40
Page Bar
40
Status Bar
41
Virtual Mat
41
Zooming and Panning
42
Opening Mtc Files
43
Opening a New File/Project
43
Opening an Existing MTC File
43
Saving Mtc Files
44
Opening Basic Shapes
44
Selecting, Moving, and Deleting Shapes
45
Selecting
45
Moving
46
Deleting
46
Cutting, Copying, Pasting, Duplicating
47
Cutting to the Clipboard
47
Copying to the Clipboard
47
Pasting from the Clipboard
47
Duplicating
48
Undo/Redo
48
Undo
48
Redo
49
Layer Bar
49
Resizing, Rotating, Slanting, and Warping
51
Resizing
51
Rotating and Slanting
52
Warping
52
Changing Color, Texture, and Line Style
53
Changing Color
53
Changing Texture
53
Changing Line Style
55
Other Shape Manipulations
56
Aligning
56
Spacing
56
Mirroring and Flipping
56
Importing and Exporting
58
Accessing the Import Options
58
Importing from the Online Mtc Gallery
58
Importing Svg, Svgz from Your Computer
59
Importing Ai, Eps, Ps, Pdf
60
Importing Scut, Scut2
61
Importing Ttf, Otf Font Files
61
Importing from Lettering Delights
61
Importing Raster Files (JPG, BMP, PNG, Etc)
62
Accessing the Export Options
62
Exporting to Basic Shapes
63
Exporting to Mtc Gallery
63
Exporting as Eps/Ai, Svg, or Pdf
64
Exporting as a Raster File
64
Using Windows Copy/Paste
65
Adobe Illustrator
65
Inkscape
65
KNK Studio/ ACS Studio
65
Working with Text
67
The Text and Fonts Tab
67
Opening Font Files
67
Add Text Group
68
Rotating Text
69
Splitting Text
69
Creating a Connected Letter Title
70
Incorporating Dingbat Shapes into a Title
71
Welding Titles in Imaginative Ways
72
Fitting Text to the Outside of a Shape
73
Wrapping Text Around a Circle
73
Wrapping Text Half-Way Around the Top and the Bottom of a Circle
74
Fitting Text to Paths
76
Closed Path in Bézier Warp
76
Open Path in Bézier Warp
77
Creating an Overlay Title and Welding Text to Frames
77
Stenciling Letters
79
Open Path Fonts (Opf)
80
Tracing
81
Raster Versus Vector
81
Finding Easy Images to Trace
82
Pixel Trace
82
Pixel Trace Method
83
Alpha Trace Method
86
Palette Trace
88
Color Trace
93
Manual Tracing
99
Importing an Image for Manual Tracing
99
Manual Tracing Using the Bézier Curves and Straight Line (Pen Tool)
101
Flip/Mirror and Weld to Complete Symmetrical Shapes
103
Editing
104
Separating and Combining Shapes
104
Split
104
Break
105
Join
105
Layer
106
Blackout
107
Shape Magic Advance Part 1: the Simplify Functions
108
Auto Simplify Welds
108
Auto Simplify Path
108
Smooth & Simplify
108
Shape Magic Advance Part 2: Details
109
View Path Detail
109
Nodes on Mat
110
Shape Magic Advance Part 3: the Path Functions
110
Flatten Paths
110
Thin Paths
111
Fuse N' Weld
112
Reverse Paths
112
Shape Magic Advance Part 4: Tiler
113
Node Mode Toolbar
115
Add Basic Shapes (Basic Shapes Tool)
115
Measure Shape Lengths and Angles (Measure Tool)
116
Slice Shapes and Lines (Knife Tool)
117
Draw Freehand Lines
118
Drawing Thin Lines
118
Drawing Thick Lines
119
Drawing with Other Line Styles
119
Erase Sections of Paths (Eraser Tool)
120
Erasing
120
Inverse Erasing (Adding to an Image)
121
Eraser or Knife
123
Draw Bézier Curves and Straight Lines (Pen Tool)
123
Drawing Straight Lines
123
Drawing Curves
124
Combining Straight Lines and Curves
125
Edit Paths at Node Level (Node Edit Tool)
125
Segment Editing
125
Node Editing
128
Applications for Node Edit
129
Designing
130
Where Do I Start with Learning to Design
130
Shadow Layer
130
Outset Shadow
130
Blackout Option
131
Corner Join Option
131
Inset Shadow
131
Weld Tool
132
Designing a Balloon
132
Designing a Border
132
Boolean Join
133
Cutting One Shape from Another
133
Wrap Object to Path
134
Creating a Wreath
134
Conical Warp
135
Tumbler Wrap
136
Lattice
137
Latticed Circle
137
Rhinestone Design
138
Rhinestone Outline
138
Rhinestone Fill
139
Additional Tips on Rhinestone Designing
140
Jigsaw Puzzle
141
Notes Window
142
Note Window
142
Design Contest Tutorials
143
Designing a Whale by Brigit Mann
143
Designing a Flower by Laury Vaden
145
Print and Cut
151
What Is a Print and Cut (PNC)
151
What Is Apnc Calibration
151
PNC Procedure Part 1: Setting up and Printing
152
Landscape Mode Option
152
Portrait Mode Option
155
Pnc Procedure Part 2: Aligning and Calibrating
158
Aligning the Laser with the Registration Marks
158
Adjusting the Laser Offset
159
Print and Cut Tips
160
Print and Cut Scenarios
160
Cutting Multiple PNC Images on the same Page
160
PNC with a Contour Shape Larger than the Printed Image
161
PNC with a Contour Shape Smaller than the Printed Image
162
PNC with a Contour Shape Overlapping the Printed Image
164
PNC with an Inset Cut Line
165
Applications
168
Cardstock and Paper
168
Chipboard
168
Vinyl
169
Fabric and Felt
169
Iron-On Transfer
170
Cutting Iron-On
170
Adhering Iron-On
170
Rhinestone Templates
171
Designing Rhinestone Patterns
171
Cutting Rhinestone Template Material
171
Weeding and Brushing in Rhinestones
171
Heat Pressing Rhinestones
172
Extra Tips on Rhinestone Applications
172
Drawing with a Pen or Glue Pen
172
Adjusting for the Difference in Diameters of Tools and Blade Holders
173
Embossing and Scoring
175
Engraving Metal
176
Project: Engraving a Dog Tag
177
Using the Punch Tool
178
Additional Applications
179
Suggested Settings for Various Accessories 1
180
Settings Form for Accessory Tools
181
Tool
181
Appendix A Key Board Shortcuts
182
Appendix B Troubleshooting Faq's
188
Communication Issues
188
Operating Issues
188
Cutting Issues
189
Y Cardstock Is Not Cutting All the Way through Have the Blade All the Way out and Using the Maximum Force
191
Software Issues
191
Acknowledgements
193
Advertisement
Related Products
KNK Categories
Cutter
More KNK Manuals
Login
Sign In
OR
Sign in with Facebook
Sign in with Google
Upload manual
Upload from disk
Upload from URL