Sign In
Upload
Manuals
Brands
Instrumentarium Manuals
Dental equipment
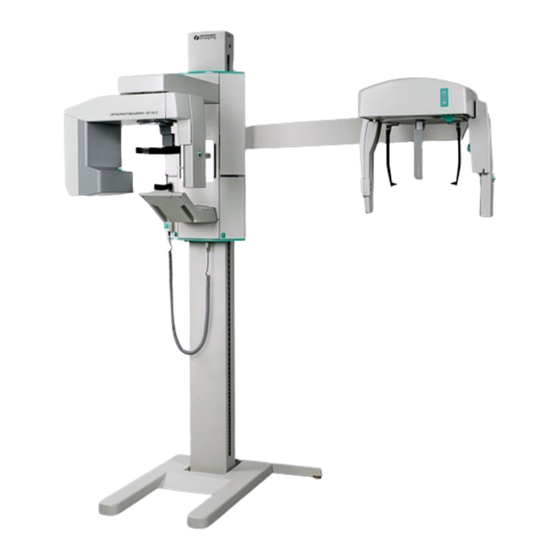
Orthopantomograph OP100 D
Instrumentarium Orthopantomograph OP100 D Manuals
Manuals and User Guides for Instrumentarium Orthopantomograph OP100 D. We have
2
Instrumentarium Orthopantomograph OP100 D manuals available for free PDF download: Installation & Adjustment Manual, Upgrade Manual
Instrumentarium Orthopantomograph OP100 D Installation & Adjustment Manual (108 pages)
Brand:
Instrumentarium
| Category:
Dental equipment
| Size: 18 MB
Table of Contents
Table of Contents
5
Introduction
7
General
7
Markings and Abbreviations
8
63547-IMG Rev 2
8
Radiation Protection Guidelines
9
Manufacturers Liability
10
Pre Installation
11
OP100 D / OC100 D Layout Models
11
Differences between Right and Left Handed Units
12
Checking the Site
13
Tools and Hardware
16
OP100 D Shipment
17
Unpacking the Column
17
Unpacking the Carriage
18
Installation Options
22
Panoramic Unit Assembly
23
Wall Mount Bracket
23
Column Unit
24
Vertical Carriage
27
Transportation Bolts & Supports
29
Vertical Carriage Cables
33
Control Panel
34
Remote Exposure Button
35
Installing the Cephalostat Kit
37
Unpacking the Crate
37
Installing the Arm Angle
37
Assembling the Cephalostat Kit
38
Installing the Cephalostat Kit
40
Removing the Cephalostat Head Cover
41
Removing the Transport Supports
41
Fastening the Camera Holder
42
Adjusting the Cephalostat Arm
42
Connections
45
Connecting to the Mains Voltage
45
Permanent Installation to Mains Voltage
47
Installation of Pc System
49
Site Selection
49
Parts Needed to Connect PC Hardware to OP100 D Unit
49
PCI Board and Optical Fibres Installation
49
Software Installation
51
Connecting and Disconnecting the CCD Camera
53
Alignment of the Unit
55
Panoramic Beam Check and Alignment
55
OP100 D Units
55
OC100 D Units
57
Reviewed: Salmenkivi Mika 18.06.07 15:30:12
57
Instrumentarium Dental
58
Image Layer Check
59
Light Projectors
62
Midsagittal Light
62
Frankfort FH Light
63
Layer Light
63
Adjusting the Cephalostat Collimator
64
Cephalostat Beam Check and Alignment
65
Adjusting the Secondary Collimator
68
Test Images
69
Calibrating the Detection Sensitivity
70
Calibrating the AEC
72
Ear Rod Alignment
73
Adjusting the Laser Light
75
Calibrating the Nasion Frequency
75
Installing Cephalostat Covers
76
Checking the Operation
79
Dose Settings
79
Quality Assurance Test
79
AEC Principles
80
Panel Functions
81
User Training & Review of Radiation Safety Rules
83
Changing the Layout of the Ceph Head
85
Changing the Ceph Head from Right to Left Sided
85
Changing the Ceph Head from Left to Right Sided
86
Appendix A, Changing the Layout of the Panoramic Unit
89
Changing the Panoramic Unit from Right to Left Handed
89
Positioning Panel
89
Control Panel
89
FH Light Projector
90
Layer Light Projector
92
Changing the Panoramic Unit from Left to Right Handed
93
Positioning Panel
94
Control Panel
94
FH Light Projector
94
Layer Light Projector
97
Appendix B, Installing the Base Plate
99
Appendix C, Repacking Instructions
101
Introduction
101
Repacking OP100 D / OC100 D
101
Repacking the Vertical Carriage
101
Repacking the Column & Base Plate
103
Repacking the Cephalostat
104
Appendix D, OP100 D Installation Check List
105
Advertisement
Instrumentarium Orthopantomograph OP100 D Upgrade Manual (62 pages)
Brand:
Instrumentarium
| Category:
Dental equipment
| Size: 6 MB
Table of Contents
Table of Contents
5
Introduction
7
General
7
Contents of Upgrade Kits
8
Preparing for OC100 D Upgrade Kit Installation
9
Before Starting
9
Removing the Tube Head Covers
9
Removing the Head Support Assembly
11
Removing the Collimator
12
Opening the Inverter Board
12
Removing the Cassette Head
13
Removing the Covers of the Carriage Assembly
15
Removing the Patient Positioning Panel
15
Removing the CPU
16
Removing the Interface Board
16
Unplugging the Connector X6
16
Disconnecting the Main Cable
17
Removing the Head Support Bracket
17
Changing the Side Box Chassis L
17
Removing the Film Cephalostat
18
Installing the Cephalostat Kit
19
Unpacking the Crate
19
Installing the Arm Angle
19
Assembling the Cephalostat Kit
20
Installing the Cephalostat Kit
22
Changing the Transformer
22
Removing the Cephalostat Head Cover
22
Removing the Transport Supports
23
Fastening the Camera Holder
23
Connecting and Disconnectiong the CCD Camera
24
Modification of the Panoramic Unit
27
Installing the Terminal Board
27
Installing the Camera Power Supply Board
27
Fastening the Collimator
28
Installing the Head Support Bracket
29
Connecting the Main Cable
30
Installing the Head Support
31
Installing the Panoramic Camera Holder
32
Adjusting the Camera Connectors
33
The Main Cable Connections
35
Connecting the Plug X6
35
Connecting the Interface Board Cables
35
Connecting the Power Board Cables
35
Connecting the Cables in the Left Side Box Chassis
36
Connecting the Cables to CPU
36
Connecting the Panels
37
Permanent Installation to Mains Voltage
39
Adjusting the Unit
41
Preparation
41
Adjusting the Cephalostat Arm
42
Adjusting the Panoramic Collimator
43
OP100 D Unit
43
OC100 D Units
44
Adjusting the Cephalostat Collimator
46
Cephalostat Beam Check and Alignment
48
Adjusting the Secondary Collimator
49
Test Images
51
Calibrating the Detection Sensitivity
51
Calibrating the AEC
53
Ear Rod Alignment
53
Adjusting the Laser Light
54
Calibrating the Nasion Frequency
55
Finishing the Kit Installation
57
Cephalostat Covers
57
Tube Head Assembly Covers
57
Head Support Covers
58
Main Support Cover
58
Covers of the Cabin
58
Replaced Parts
59
Advertisement
Related Products
Instrumentarium Orthoceph OC100 D
Instrumentarium Orthopantomograph OP200
Instrumentarium Orthoceph OC200
Instrumentarium Orthopantomograph OP200 D
Instrumentarium Orthoceph OC200 D
Instrumentarium Express
Instrumentarium Categories
Dental equipment
Medical Equipment
More Instrumentarium Manuals
Login
Sign In
OR
Sign in with Facebook
Sign in with Google
Upload manual
Upload from disk
Upload from URL