Sign In
Upload
Manuals
Brands
Hioki Manuals
Data Loggers
LR8432-20
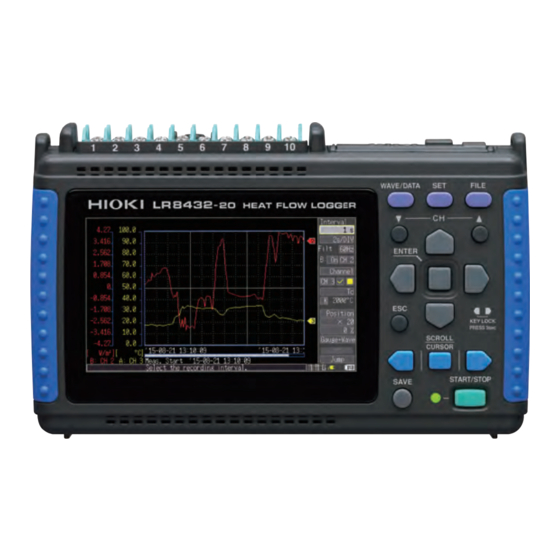
Hioki LR8432-20 Heat Flow Logger Manuals
Manuals and User Guides for Hioki LR8432-20 Heat Flow Logger. We have
2
Hioki LR8432-20 Heat Flow Logger manuals available for free PDF download: Instruction Manual, Measurement Manual
Hioki LR8432-20 Instruction Manual (238 pages)
Heat Flow Logger
Brand:
Hioki
| Category:
Data Loggers
| Size: 5 MB
Table of Contents
Table of Contents
3
Contents
9
Introduction
9
Confirming Package Contents
10
Safety Information
12
Operating Precautions
16
Chapter 1 Overview
23
Product Overview and Features
23
Measurement Flow
24
Names and Functions of Parts
26
Screen Configurations
28
Basic Operation
31
Screen Operations
31
Starting and Stopping Recording
32
Disabling Key Operations (Key-Lock Function)
33
Saving Data
33
Verifying the Input Level (Level Monitor)
34
Chapter 2 Measurement Preparations
35
Using the Battery Pack (Option)
36
Install the Battery Pack
40
Charge the Battery Pack
40
Connecting the AC Adapter
41
Connecting Measurement Cables to the Instrument
42
2.3 Connecting Measurement Cables to the Instrument
43
Connecting Measurement Leads or Thermocouples (for Voltage or Temperature, Respectively)
44
Connect the Heat Flow Sensor (Heat Flow Measurement)
45
Connecting the Optional Model 9641 Connection Cable (for Pulse Signal Input)
47
Turning the Power on and off
48
Zero Adjustment
49
Chapter 3 Setting before Measurement
51
Pre-Operation Inspection
51
Operating Flow Overview
52
Setting Configuration 1 - Recording Settings
56
Specify the Recording Interval
56
Setting the Display Time Base (Horizontal Axis Magnification, Set as Needed)
57
Selecting the Recording Start/Stop Method
59
Set the Recording Length for Repeated or One-Time Recording
60
Enable Digital Filtering (Noise Suppression) (as Needed)
60
Automatic Saving
61
Replacing Removable Storage During Real-Time Saving
63
Setting Configuration 2 - Input Channel Settings
64
Voltage Measurement Settings
66
Temperature Measurement Settings
67
Heat Flow Measurement Settings
69
Integration (Count) Measurement Settings
71
Revolution Measurement Settings
72
Display Settings
74
Selecting Waveform Display Color
74
Specifying Vertical Display Range by Magnification and Zero Position (Vertical Axis Expansion/Compression)
74
Specifying the Vertical Display Range by Upper and Lower Limits (Expansion/Compression)
75
Converting Units (Scaling Function)
77
Entering Comments
80
Viewing All Channel Settings in a List
82
Switching Channel Display Settings
83
Batch Copying Channel Settings
84
Batch Setting Waveform Display/Hide and Waveform Color Settings for All Channels
85
Initializing Settings (to Factory Defaults)
85
Aligning Zero Positions on the Grid
86
Display Celsius (°C) Temperature Values as Fahrenheit (°F)
87
Chapter 4 Specifying Criteria for Measurements (Triggering, Alarm and Timer)
89
Setting Criteria to Start and Stop Recording
90
Setting the Input Signal Trigger Threshold (Level Trigger)
91
Setting Lower and Upper Trigger Thresholds (Window Trigger)
93
Selecting Trigger Sources and Combinations
94
Setting Criteria for Pre-Trigger Recording (Pre-Trig)
95
Alarm Output
96
Confirming Trigger and Alarm Criteria Settings (List)
99
Starting and Stopping Recording by Timer
100
About Recording Operation
102
Chapter 5 Waveform Analysis
105
Viewing Waveforms
106
Scrolling Waveforms
106
Verifying Waveform Display Position
106
Magnifying and Compressing Horizontally
107
Viewing any Waveform Location (Jump Function)
107
Selecting Display Options
108
Displaying Gauges
108
Displaying Cursor Values
109
Specifying a Waveform Time Span
111
Viewing Input Signals as Numerical Values
112
Inserting Event Marks (Search Function)
114
Inserting Event Marks While Viewing Waveforms
114
Inserting Event Marks Using External Input Signals
115
Searching Event Marks
116
Chapter 6 Saving & Loading Data
117
About Saving and Loading Data
117
Using a CF Card/Usb Flash Drive
119
CF Card Insertion & Removal
120
USB Flash Drive Insertion & Removal
120
Formatting a CF Card/Usb Flash Drive
121
Saving Data
122
Automatic Saving
123
Selecting the Manual Saving Method [Quick Save]/[Select & Save]
124
Saving Waveform Data (with the SAVE Key)
125
Capturing a Screen Image (with the SAVE Key)
126
Saving Numerical Calculation Results (with the SAVE Key)
127
Saving Setting Configurations
128
Loading Data on the Instrument
129
Loading a Setting Configuration
129
Loading Waveform Data and Screen Images
130
Data Management
131
Switching Removable Storage
131
Viewing Folder Contents and the Parent Folder
132
Deleting Data
132
Renaming Files and Folders
133
Copying Data
134
Sorting Files
135
Transferring Data to a Computer (USB Drive Mode)
136
Select the USB Drive Mode
136
Connecting the USB Cable
137
Chapter 7 Numerical/Waveform Calculations
139
Performing Numerical Calculation
139
Key Operation During Setting
141
Calculating Values in Real Time During Measurement (Automatic Calculation)
142
Manual Calculation
145
Apply Calculations to a Specific Time Span (Manual Calculation Only)
146
Numerical Value Calculation Expressions
147
Performing Waveform Calculation
149
Key Operation During Setting
149
Setting the Waveform Display Color
152
Setting the Display Format
152
Setting the Display Range in the Vertical Axis Direction Using Upper/Lower Limit Values
152
Waveform Calculation Formula
153
Chapter 8 System Environment Settings
155
Screen and Key Operation Settings
156
Using the Auto-Resume Function (Resume after Power Restoration)
156
Adjust Backlight Brightness
156
Enabling and Disabling the Backlight Saver
157
Setting the Screen Color Scheme
157
Enabling or Disabling the Beeper
157
Selecting the Horizontal (Time) Axis Display
158
Selecting the Display Language
158
CSV File Saving Settings
159
CSV File Data Decimal and Separator Characters
159
Making System Settings
160
Setting the Date and Time
160
Initializing the Instrument (System Reset)
161
Switching the USB Mode
162
Self-Test
163
Chapter 9 External Control
165
Connecting to the External Control Terminals
165
External Trigger Input
167
External Signal Output (Trigger Output)
168
Alarm Signal Output (Alarm Output)
170
Synchronous Measurements with Multiple Instruments
171
Chapter 10 Specifications
173
Chapter 11 Maintenance and Service
183
Troubleshooting
183
Cleaning
186
Disposing of the Instrument
187
Appendix
189
Appendix 1 Error Messages and Remedial Actions
189
Appendix 2 File Naming
195
Appendix 3 Text File (CSV) Internal Format
197
Appendix 4 Binary File Size Calculation
198
Appendix 5 List of Default Settings
199
Appendix 6 Maximum Recordable Time
200
Appendix 7 Reference
201
Appendix 8 Concerning Noise Countermeasures
202
Appendix 9 Using the Application Program
208
Installing Logger Utility
210
Installing the USB Driver
213
Connecting the Instrument to the Computer with a USB Cable
216
Starting and Ending Logger Utility
219
Uninstalling the Logger Utility
219
Appendix 10Frequently Asked Questions
220
Installation and Settings
220
Triggering
222
Measuring
223
Data Saving
224
Logger Utility
228
Appendix 11Pulse Input Circuit Diagram
229
Appendix 12Heat Flow
230
Index
233
Advertisement
Hioki LR8432-20 Measurement Manual (44 pages)
Portable Handheld Memory HiLogger, Heat Flow Logger
Brand:
Hioki
| Category:
Data Loggers
| Size: 1 MB
Table of Contents
Confirming Package Contents
4
Safety Information
6
Safety Symbols
6
Other Symbols
7
Operating Precautions
10
Before Use
10
Instrument Installation
10
Handling the Instrument
12
Before Turning Power on
13
Settings Screens
19
File Screen
20
Measurement Procedure
21
Turn the Power on
22
View Measurement Values
36
Specifying a Range
37
Advertisement
Related Products
Hioki LR8431-20
Hioki LR8401-20
Hioki LR8400-20
Hioki LR8402-20
Hioki LR8410-20
Hioki LR8450
Hioki LR8450-01
Hioki LR8410
Hioki LR8431
Hioki LR8514
Hioki Categories
Measuring Instruments
Test Equipment
Data Loggers
Multimeter
Accessories
More Hioki Manuals
Login
Sign In
OR
Sign in with Facebook
Sign in with Google
Upload manual
Upload from disk
Upload from URL