Sign In
Upload
Manuals
Brands
GCC Technologies Manuals
Plotter
EXPERT 24 LX
User Manuals: GCC Technologies EXPERT 24 LX Plotter
Manuals and User Guides for GCC Technologies EXPERT 24 LX Plotter. We have
2
GCC Technologies EXPERT 24 LX Plotter manuals available for free PDF download: User Manual, Firmware Model Changing
GCC Technologies EXPERT 24 LX User Manual (141 pages)
CUTTING PLOTTER
Brand:
GCC Technologies
| Category:
Plotter
| Size: 8 MB
Table of Contents
Important Information
3
Table of Contents
4
1 General Information
6
Package Items
6
Product Features
6
The Appearance
7
The Front View
7
The Back View
7
The Side Views
8
Choosing a Proper Place before Setting up the Cutting Plotter
9
Connecting the Power Supply
9
Installation 2.1 Precaution
9
Stand Installation
10
Blade Installation
13
Media Loading
15
Loading the Sheet Media
15
Loading the Roll Media
17
How to Change the Poll Size Without Turning off the Machine?
17
Cable Connection
18
USB Interface
18
Connecting Your GCC Cutter
18
USB Driver Installation
18
Installing the Software
19
Driver Un-Installation
21
RS-232 Interface
24
Printer Sever Shared Setting
24
Connecting to the RS-232 (Serial) Port
24
The Outline of Control Panel
27
Reset Origin
27
Operation 3.1 the Control Panel
27
Cut Test
28
Repeat
28
Repeat AAS Job
28
Vlcd
29
Functions of VLCD
30
Restore Factory Default Settings
32
File Uploader
33
Functions of File Uploader
33
Data Transmission
34
Expert 24 LX Print Driver Setting
35
Option Page
35
Die Cut
35
Reference Parameter Setting for Different Materials
37
4 Basic Maintenance
38
Cleaning the Cutting Plotter
38
Cleaning the Grid Drum
38
Precaution in Cleaning
38
Cleaning the Pinch Rollers
39
5 Automatic-Aligning System
40
Introduction
40
AAS Calibrating the System
41
AAS Calibration
41
Media Calibration
41
4-Point Positioning
42
AAS II on Expert 24 LX
42
Segmental Positioning
42
Printer Test
43
Multiple Copies
43
Registration Mark Offset Range
45
Contour Cutting
45
Creating Graphics
45
Placing the Registration Marks
46
Print the Graphics
47
Load the Printout Onto Cutter
47
Cut the Contour
47
Tips for AAS
48
6 Trouble Shooting
49
Light Indicators
49
What if Expert 24 LX Cannot Operate?
49
Warning Indicators
50
Error Indicators
51
Cutting Quality Problems
52
Appendix
53
Expert 24 LX Specification
53
Blade Specification
54
About the Tool
55
Protrusion Length of the Blade
55
Coreldraw Plug-In Instruction
56
User Instructions
57
Add Registration Mark by Page Size
59
Workable Area
60
Add Registration Mark by Object
61
Contour Cutting through Coreldraw
67
Greatcut Instruction
70
GCC AASII System
70
Output
76
Edit Your Image in Adobe Illustrator
84
Advanced Settings
92
Illustrator Plug-In Instruction
97
Printer Setting
98
Three Types of Registration Marks
109
Signpal 10.5 Instruction
113
Installing the Signpal 10.5 Software
113
Set up Your GCC Cutter on Production Manager
122
Signpal AASII Quick Start
125
Signpal 10.5 Feature Lists
131
Directcut Instruction
135
Run Directcut
135
Create/ Import Your Image/ File
136
Advertisement
GCC Technologies EXPERT 24 LX Firmware Model Changing (2 pages)
2 in 1 main board
Brand:
GCC Technologies
| Category:
Plotter
| Size: 0 MB
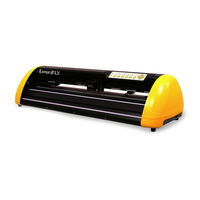
Table of Contents
Firmware Model Changing on GCC Cutting Plotter
1
Step 1: Connector PC with Jaguar IV
1
Step 2: Use Uploader Browse the File
2
Step 3: after File Translation Finished
2
Step 4: Turn on Machine
2
Step 5: Disassemble Main Board from JIV
2
Step 6: Connector PC with PII
2
Step 7: Use Uploader Browse the PII Latest Firmware
2
Step 8: after Firmware Translation Finished
2
Step 9: Turn on Machine if Work to Normaly Status
2
Advertisement
Related Products
GCC Technologies EXPERT 24
GCC Technologies Expert 52
GCC Technologies EXPERT 52 LX
GCC Technologies Expert II Series
GCC Technologies 21 Series
GCC Technologies Elite 21DN
GCC Technologies Elite 21N
GCC Technologies Elite 21SE
GCC Technologies Elite 21DN+
GCC Technologies IFIIS 20JFL
GCC Technologies Categories
Printer
Engraver
Plotter
Cutter
Measuring Instruments
More GCC Technologies Manuals
Login
Sign In
OR
Sign in with Facebook
Sign in with Google
Upload manual
Upload from disk
Upload from URL